
Sponsored

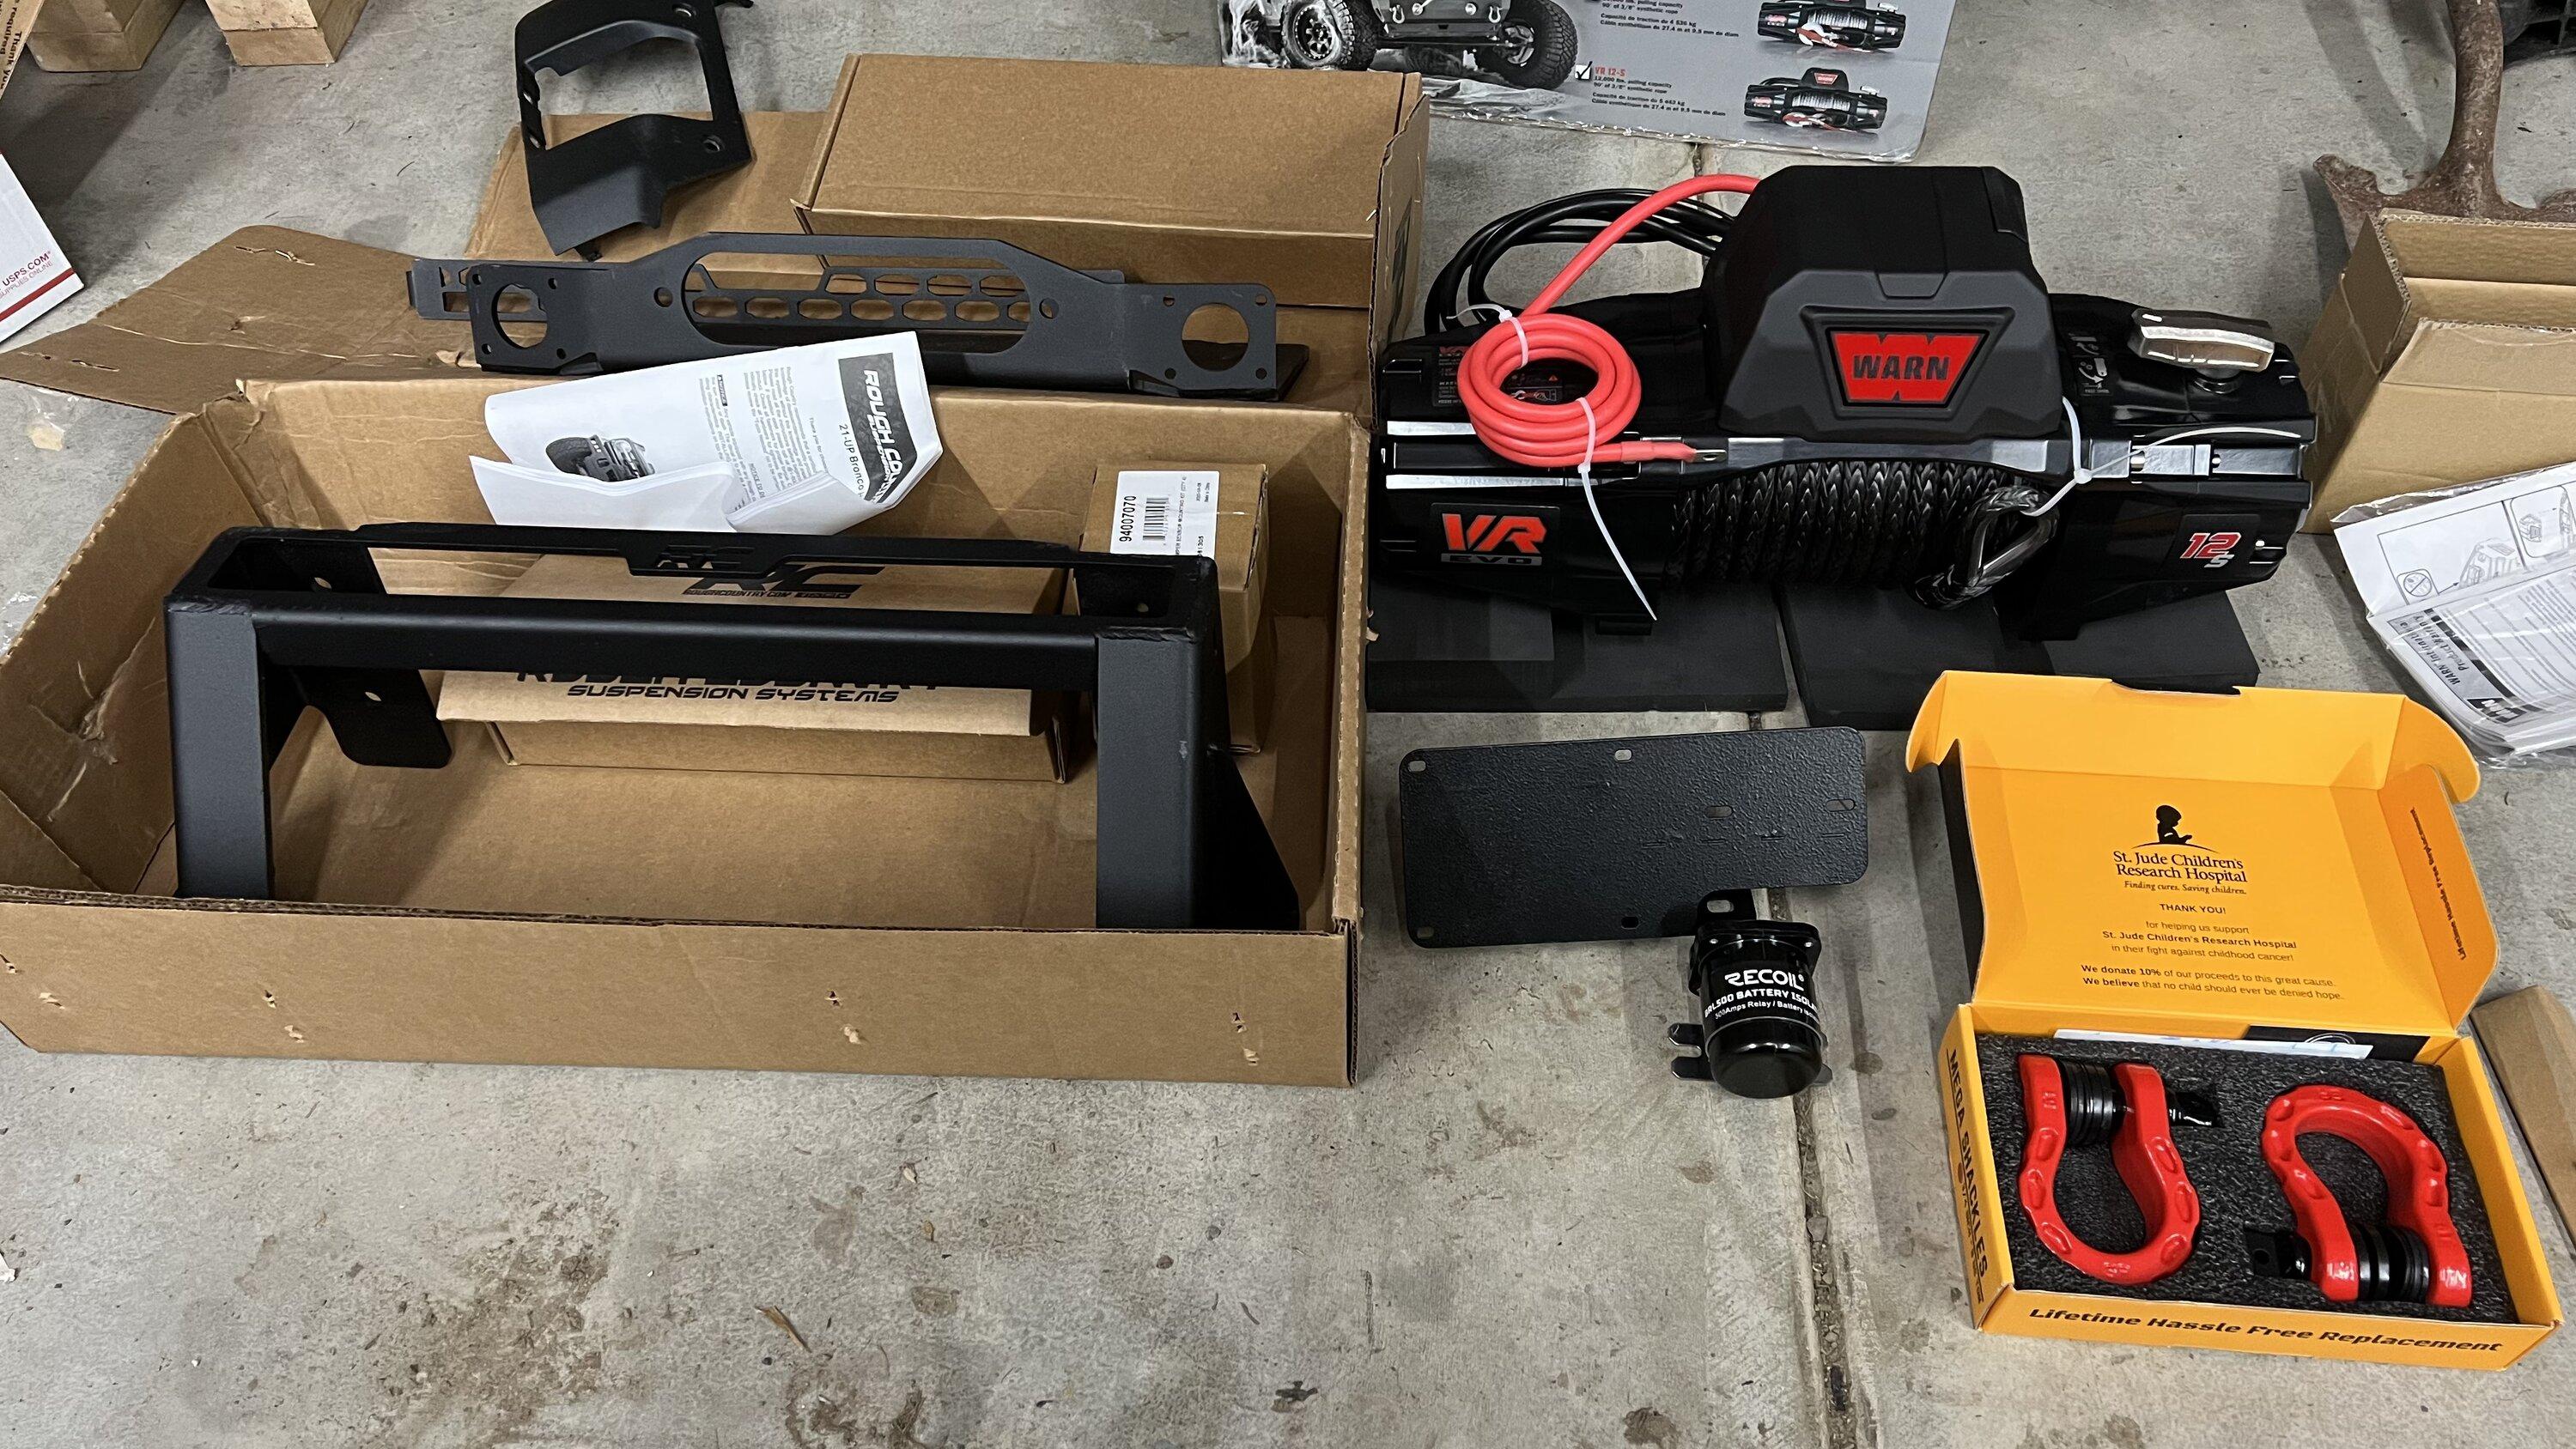
Rough country winch mount unbox/ INSTALL tips.

Blaylock1988

Badlands
Well-Known Member
Joined
Aug 13, 2021
Threads
1
Messages
361
Reaction score
508
Location
Colorado Springs
Vehicle(s)
2021 Ford Bronco, 2004 Volkswagen R32
Your Bronco Model
Badlands
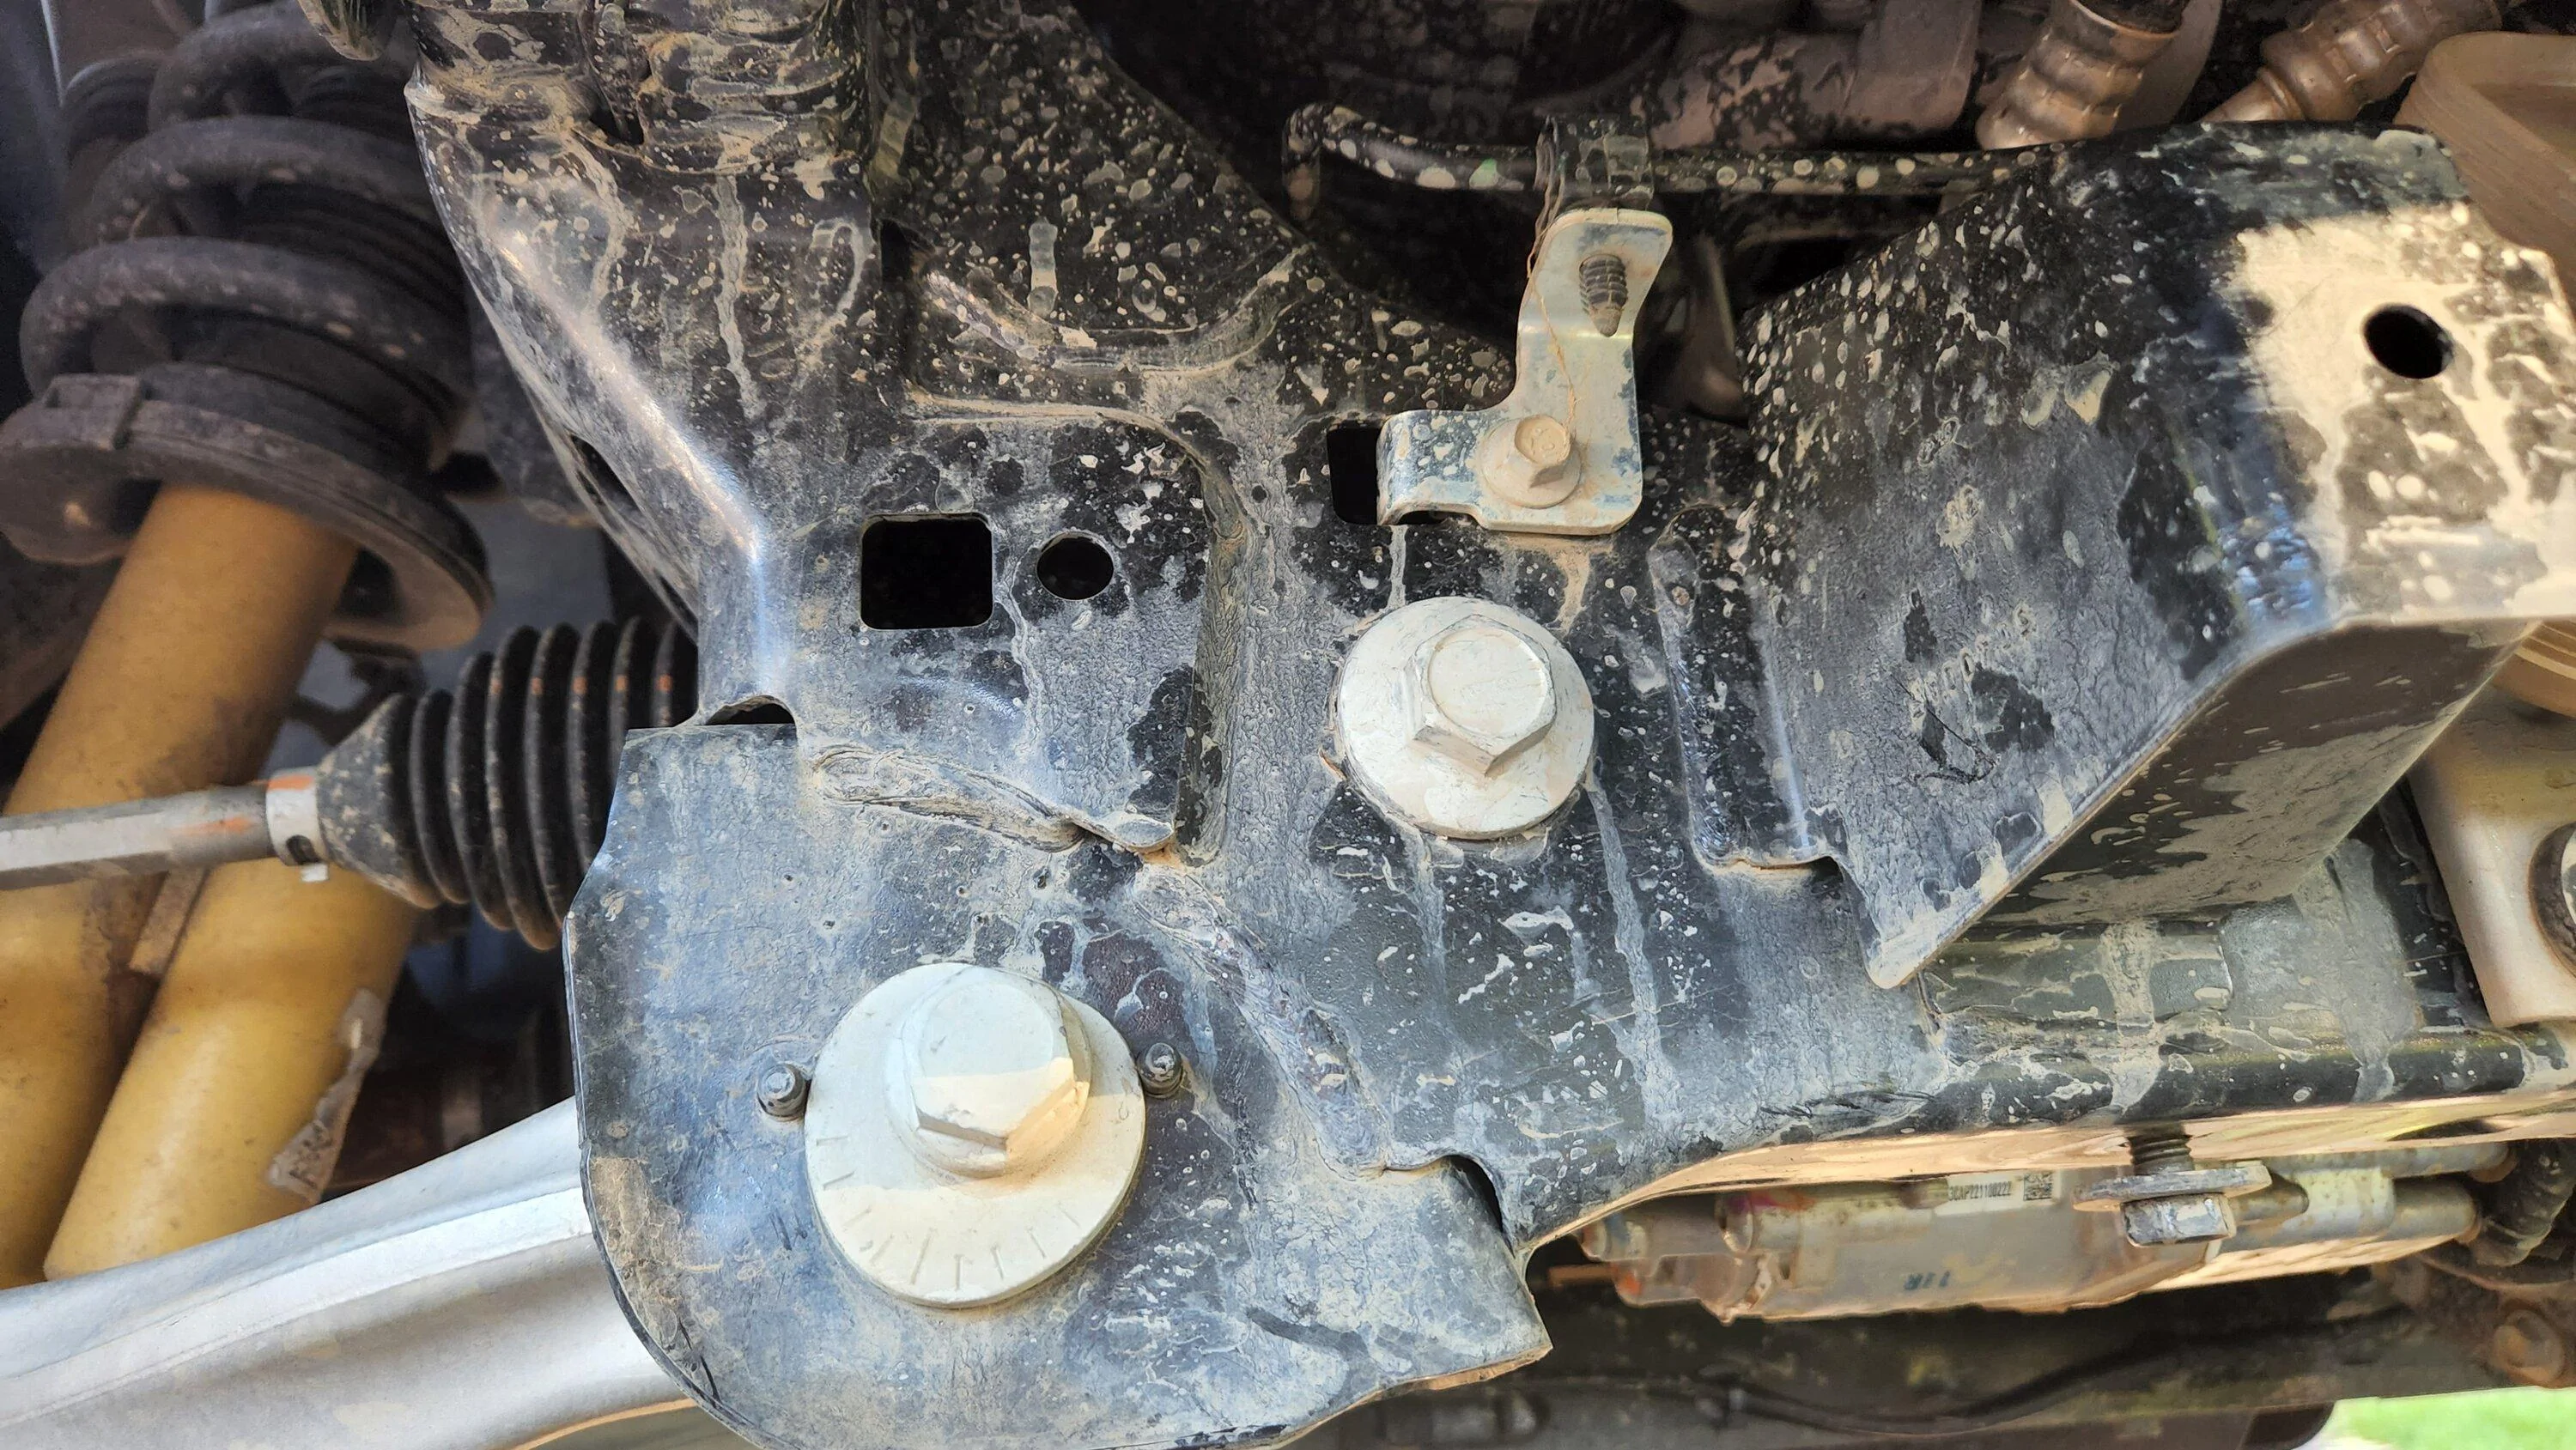
For anyone trying to use the LOD frame tie in kit. Well it sucks. It does not fit with the modular bumper and hits the steel bash plate as well. Of course you don’t know this until your trying to out the bumper on😡. This on top of the cheapest bolts and nuts, washers available. So tomorrows project since I’m frustrated about it, is to take the bumper off and cut the bottoms off of the frame tie ins and prime paint them so I can continue
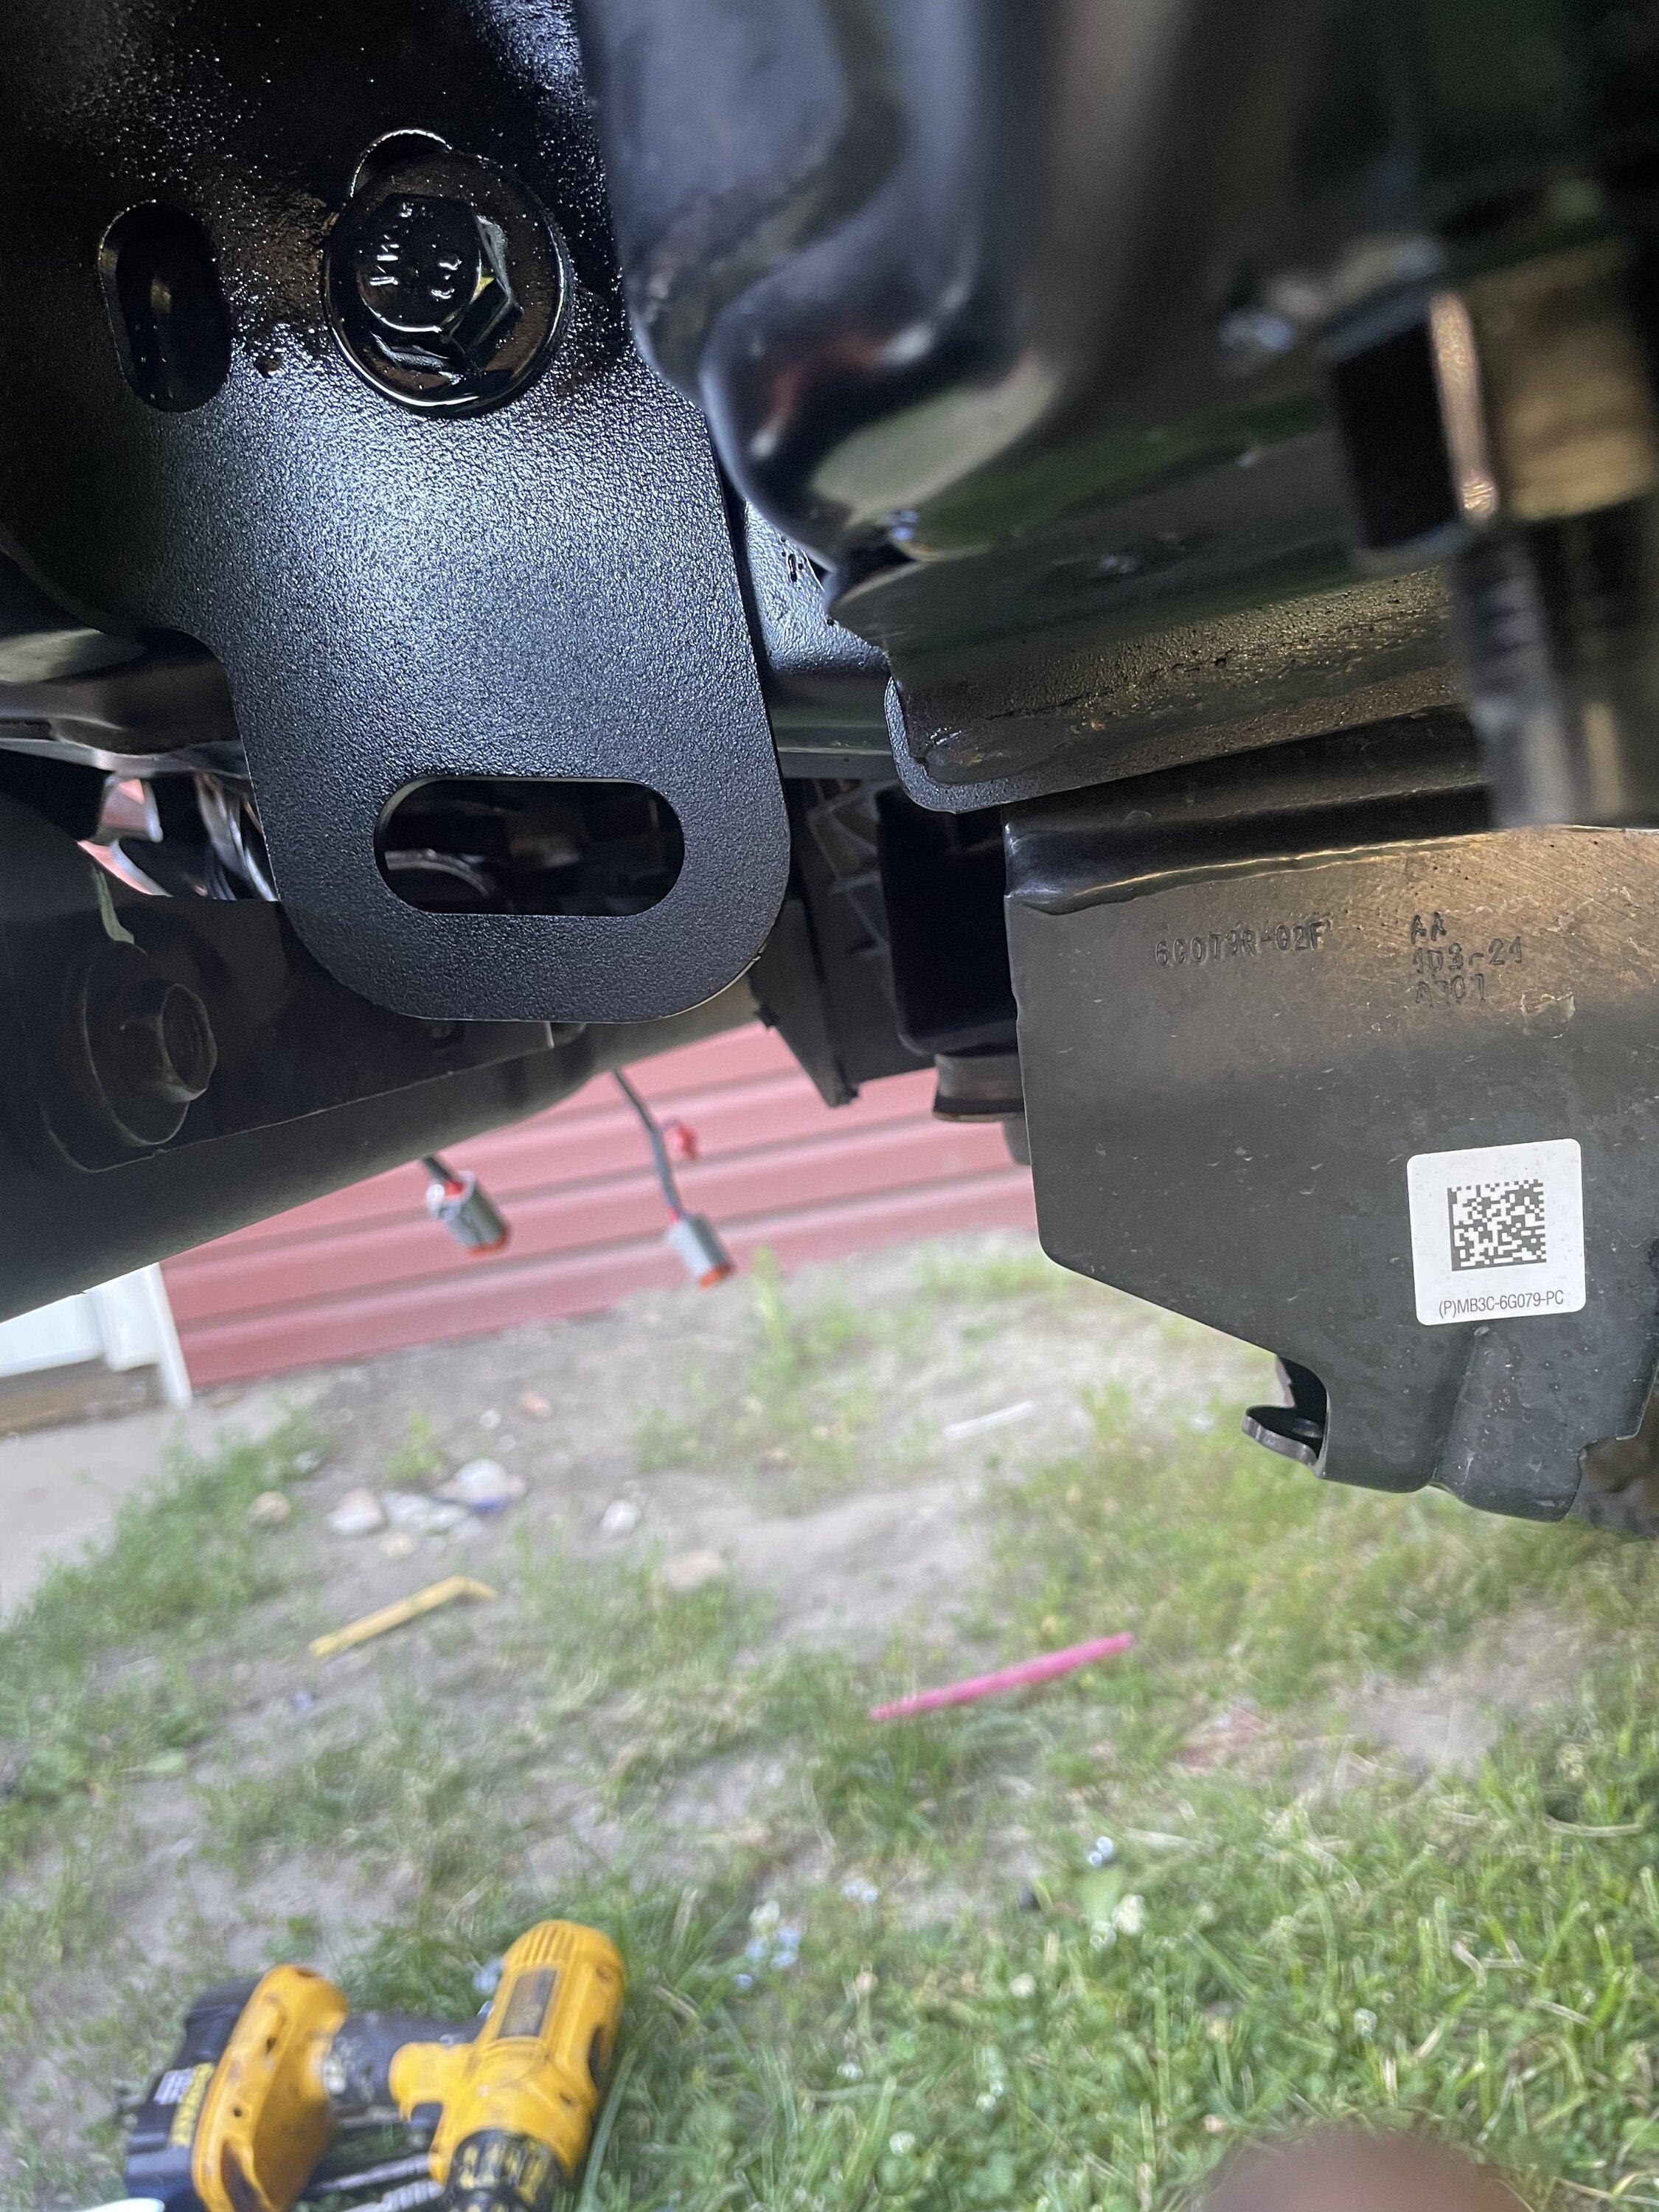
E02064CF-B04C-4F49-A550-3C01C1A8B86F.jpeg
That is disappointing. Let me know where you cut them. Seems ridiculous they didn't say anything about which bumpers it's compatible with, and those lower parts are supposed to be for flat towing too.
 

akturbo

Badlands
Well-Known Member
Joined
Oct 15, 2020
Threads
41
Messages
820
Reaction score
1,297
Location
Seattle Eastside
Vehicle(s)
'21 Bronco, '24 2D HLE (wife's), 3500HD Chevy, Rav4Prime, Turbo Skidoo
Your Bronco Model
Badlands
Clubs
 
Almost ready to install, waiting on the matching light bar that arrives today, I'll pull the camera so I can install when the JCR bracket arrives tomorrow. I'm thinking this RC mount will be temporary, the bumpers (ARB and BAMF) I wanted had too long of lead times.

Ford Bronco Rough country winch mount unbox/ INSTALL tips. IMG_3817 (2)
Ford Bronco Rough country winch mount unbox/ INSTALL tips. IMG_3807
 

ATLBronco75

Badlands
Well-Known Member
First Name
Tom
Joined
Feb 7, 2020
Threads
50
Messages
1,346
Reaction score
3,851
Location
Atlanta GA
Vehicle(s)
2.7 Badlands
Your Bronco Model
Badlands
Clubs
 
Ok. Problems.

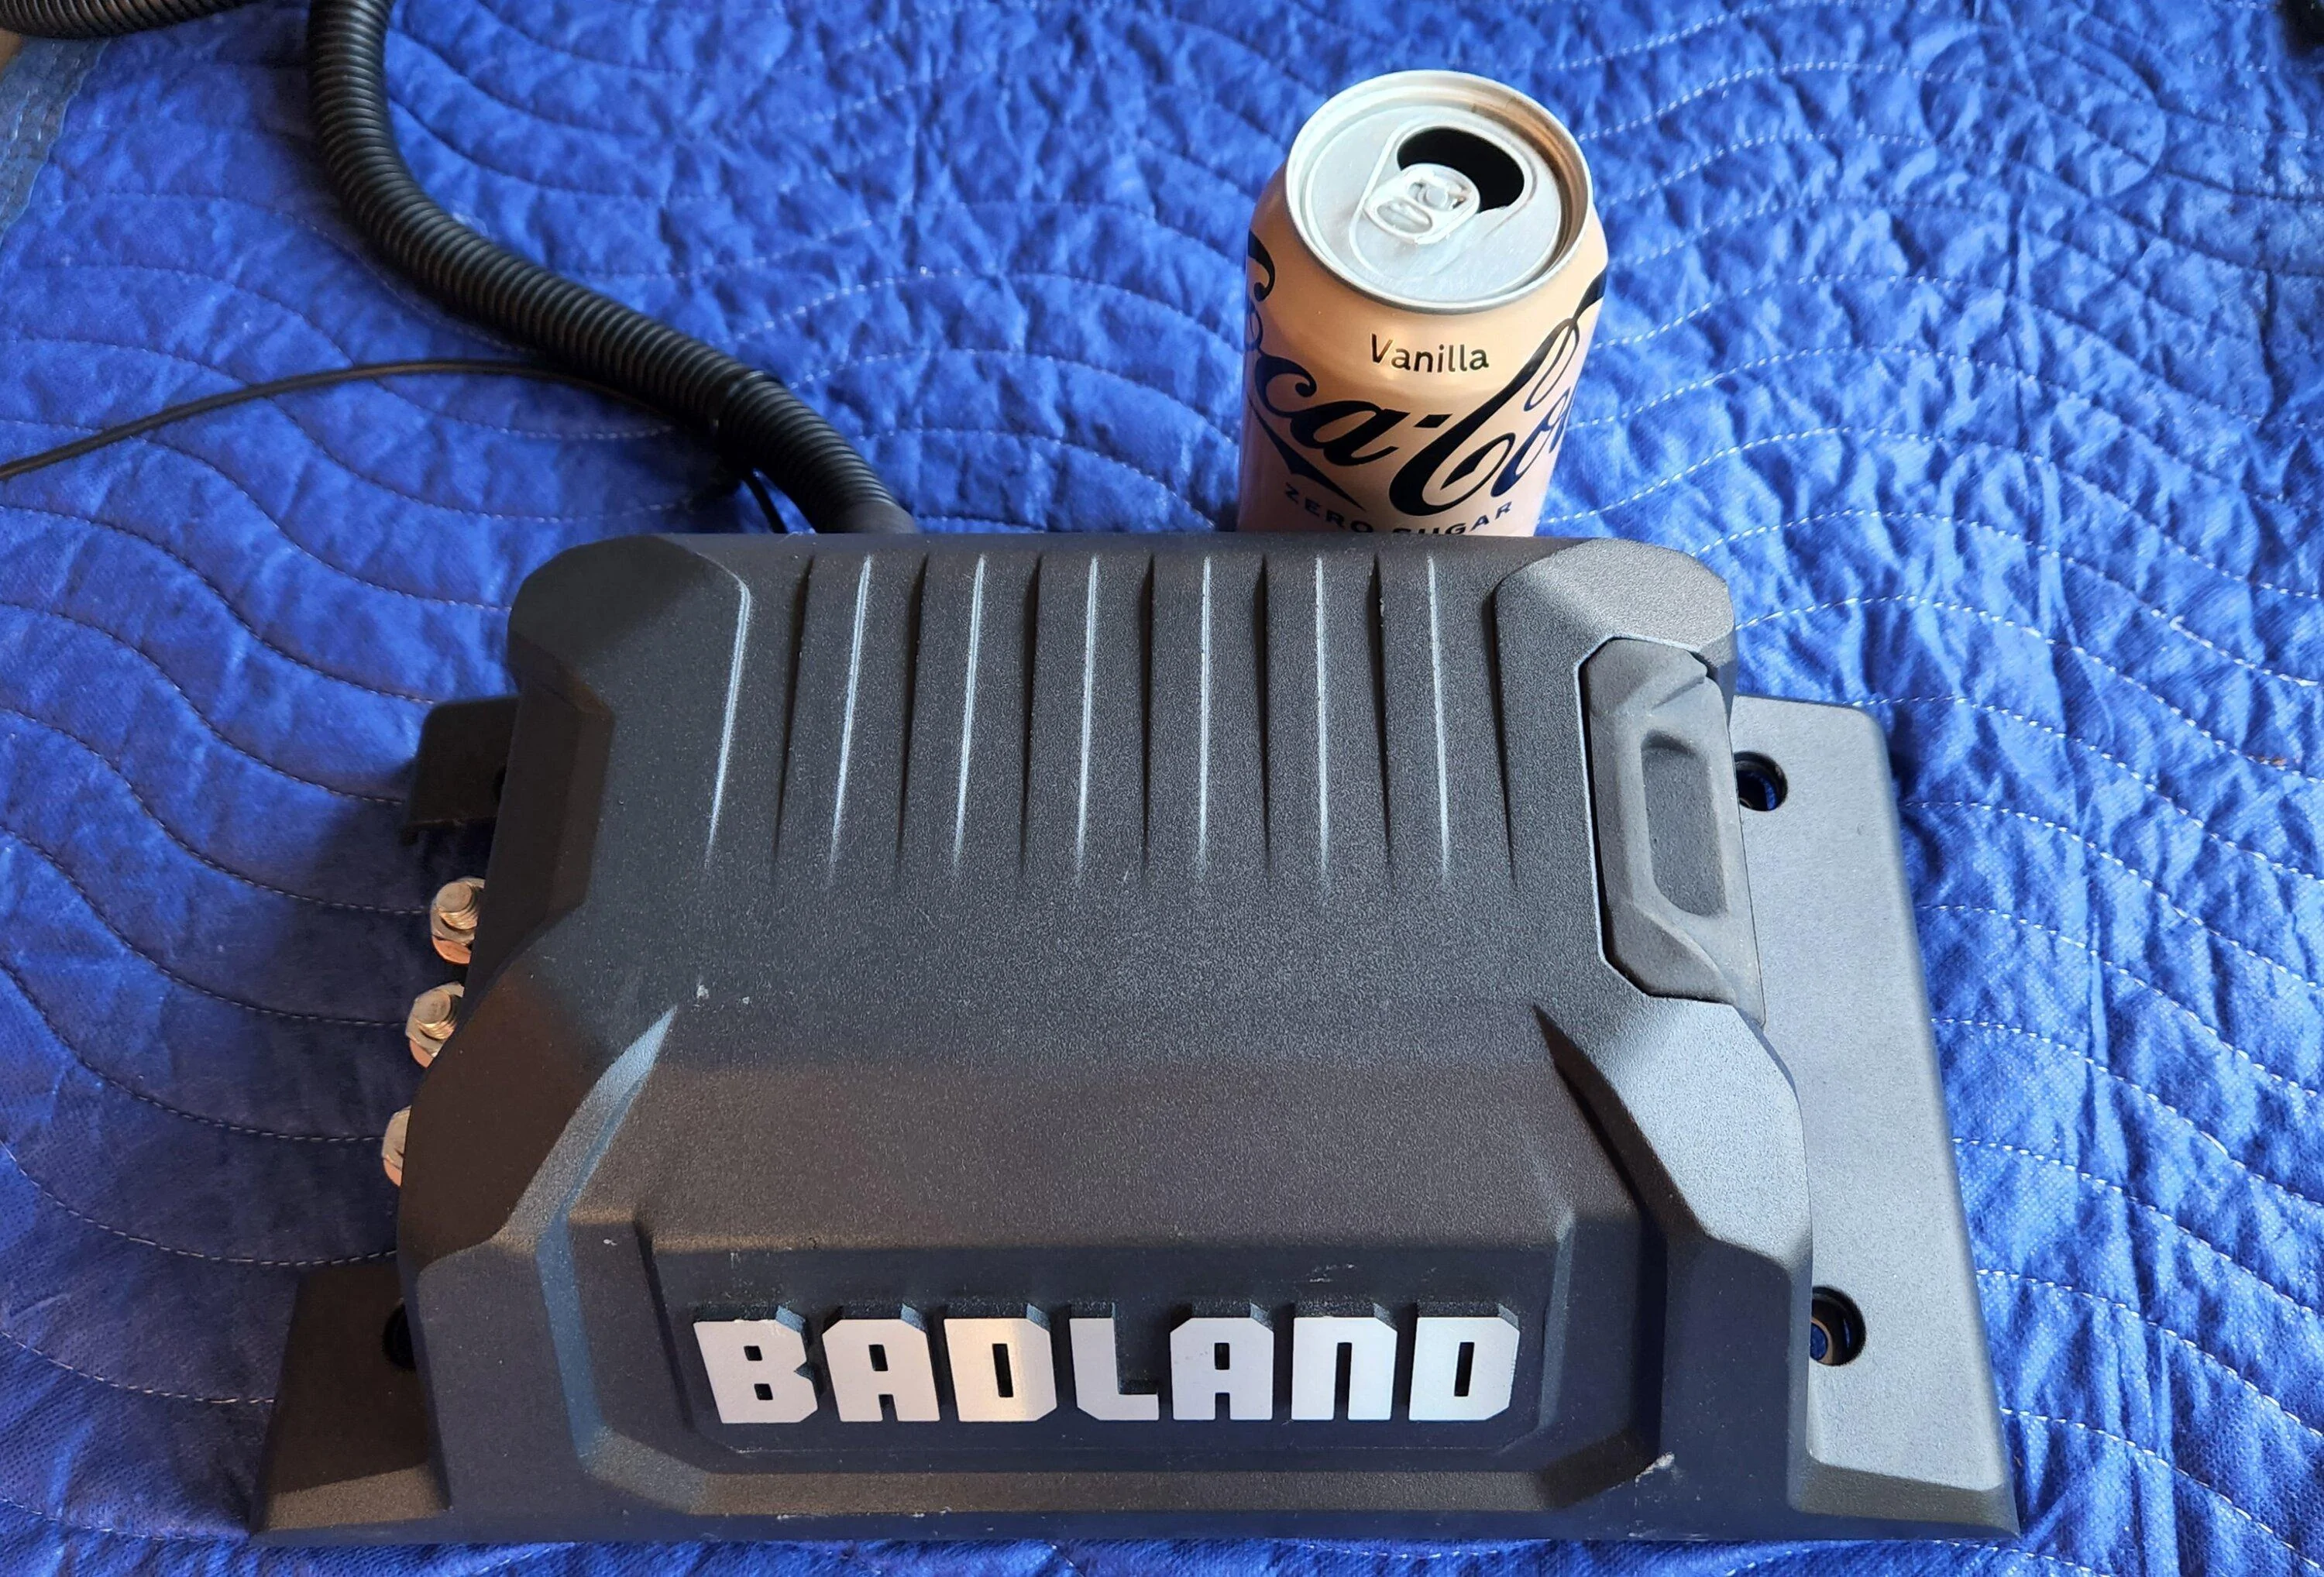
1. The box is just HUGE.

20220622_201712.jpg


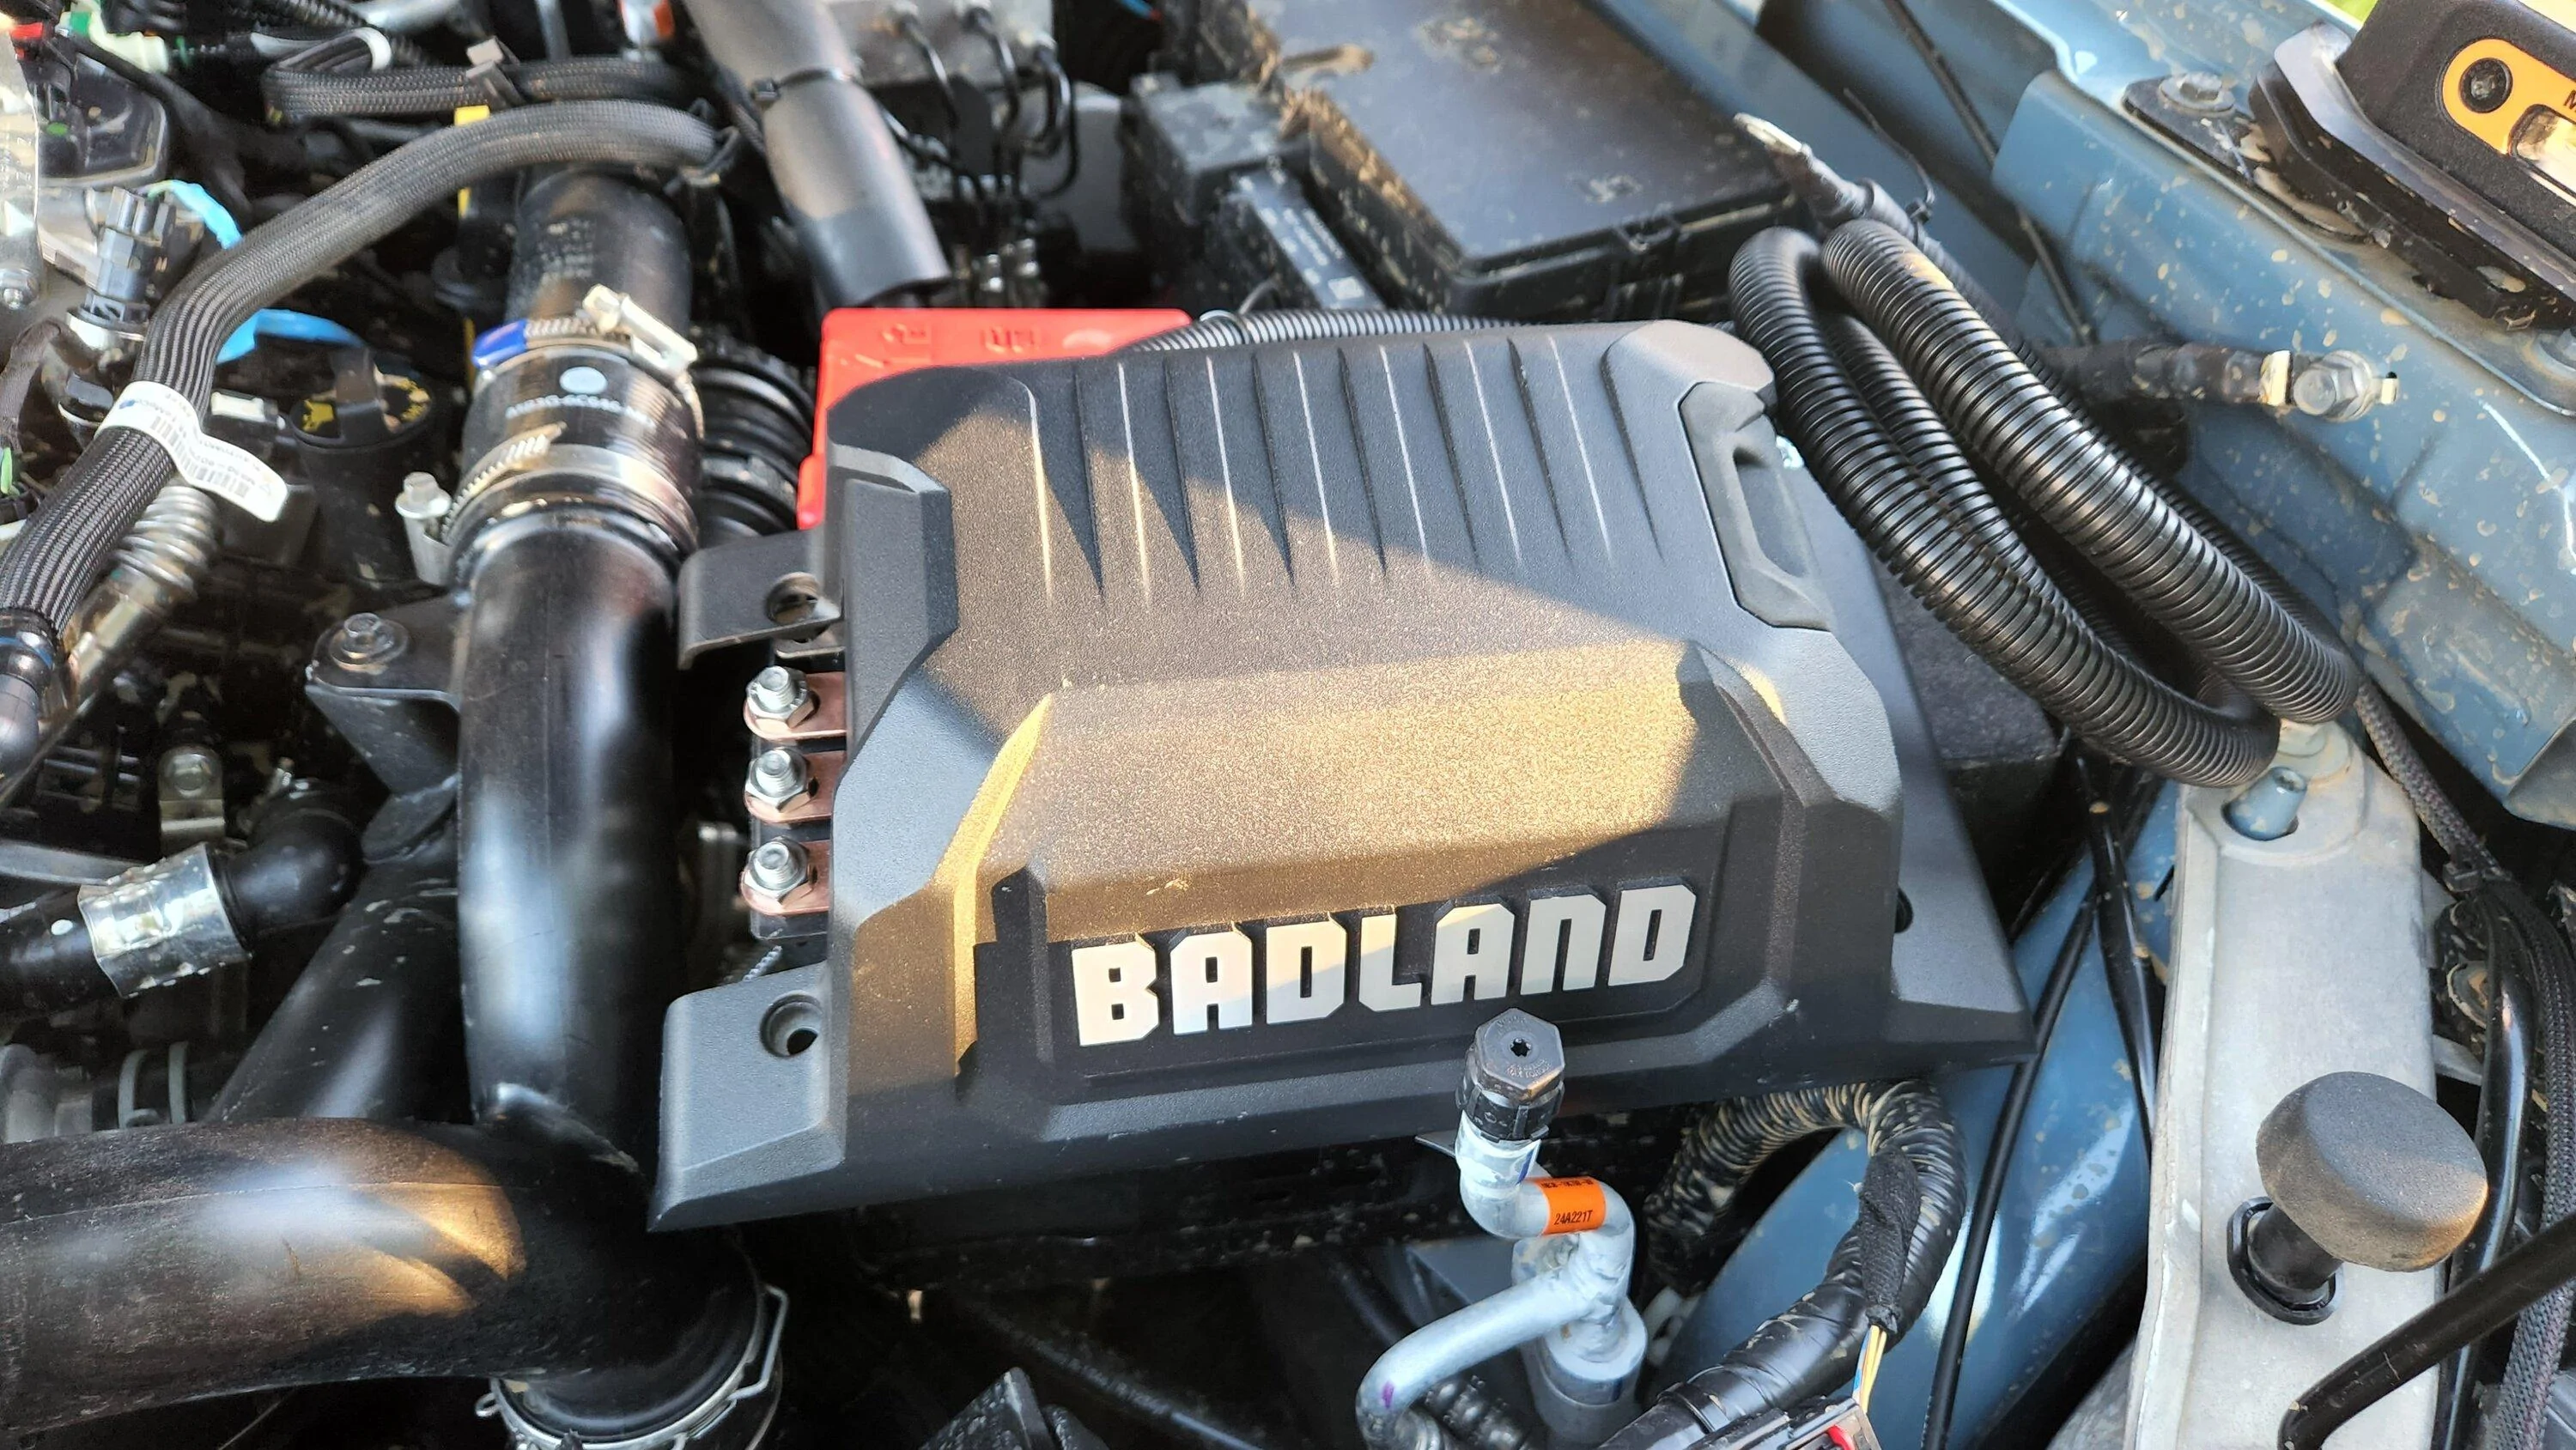
2. It's way to big to fit in BAMF location in front of the battery.

20220622_202330.jpg


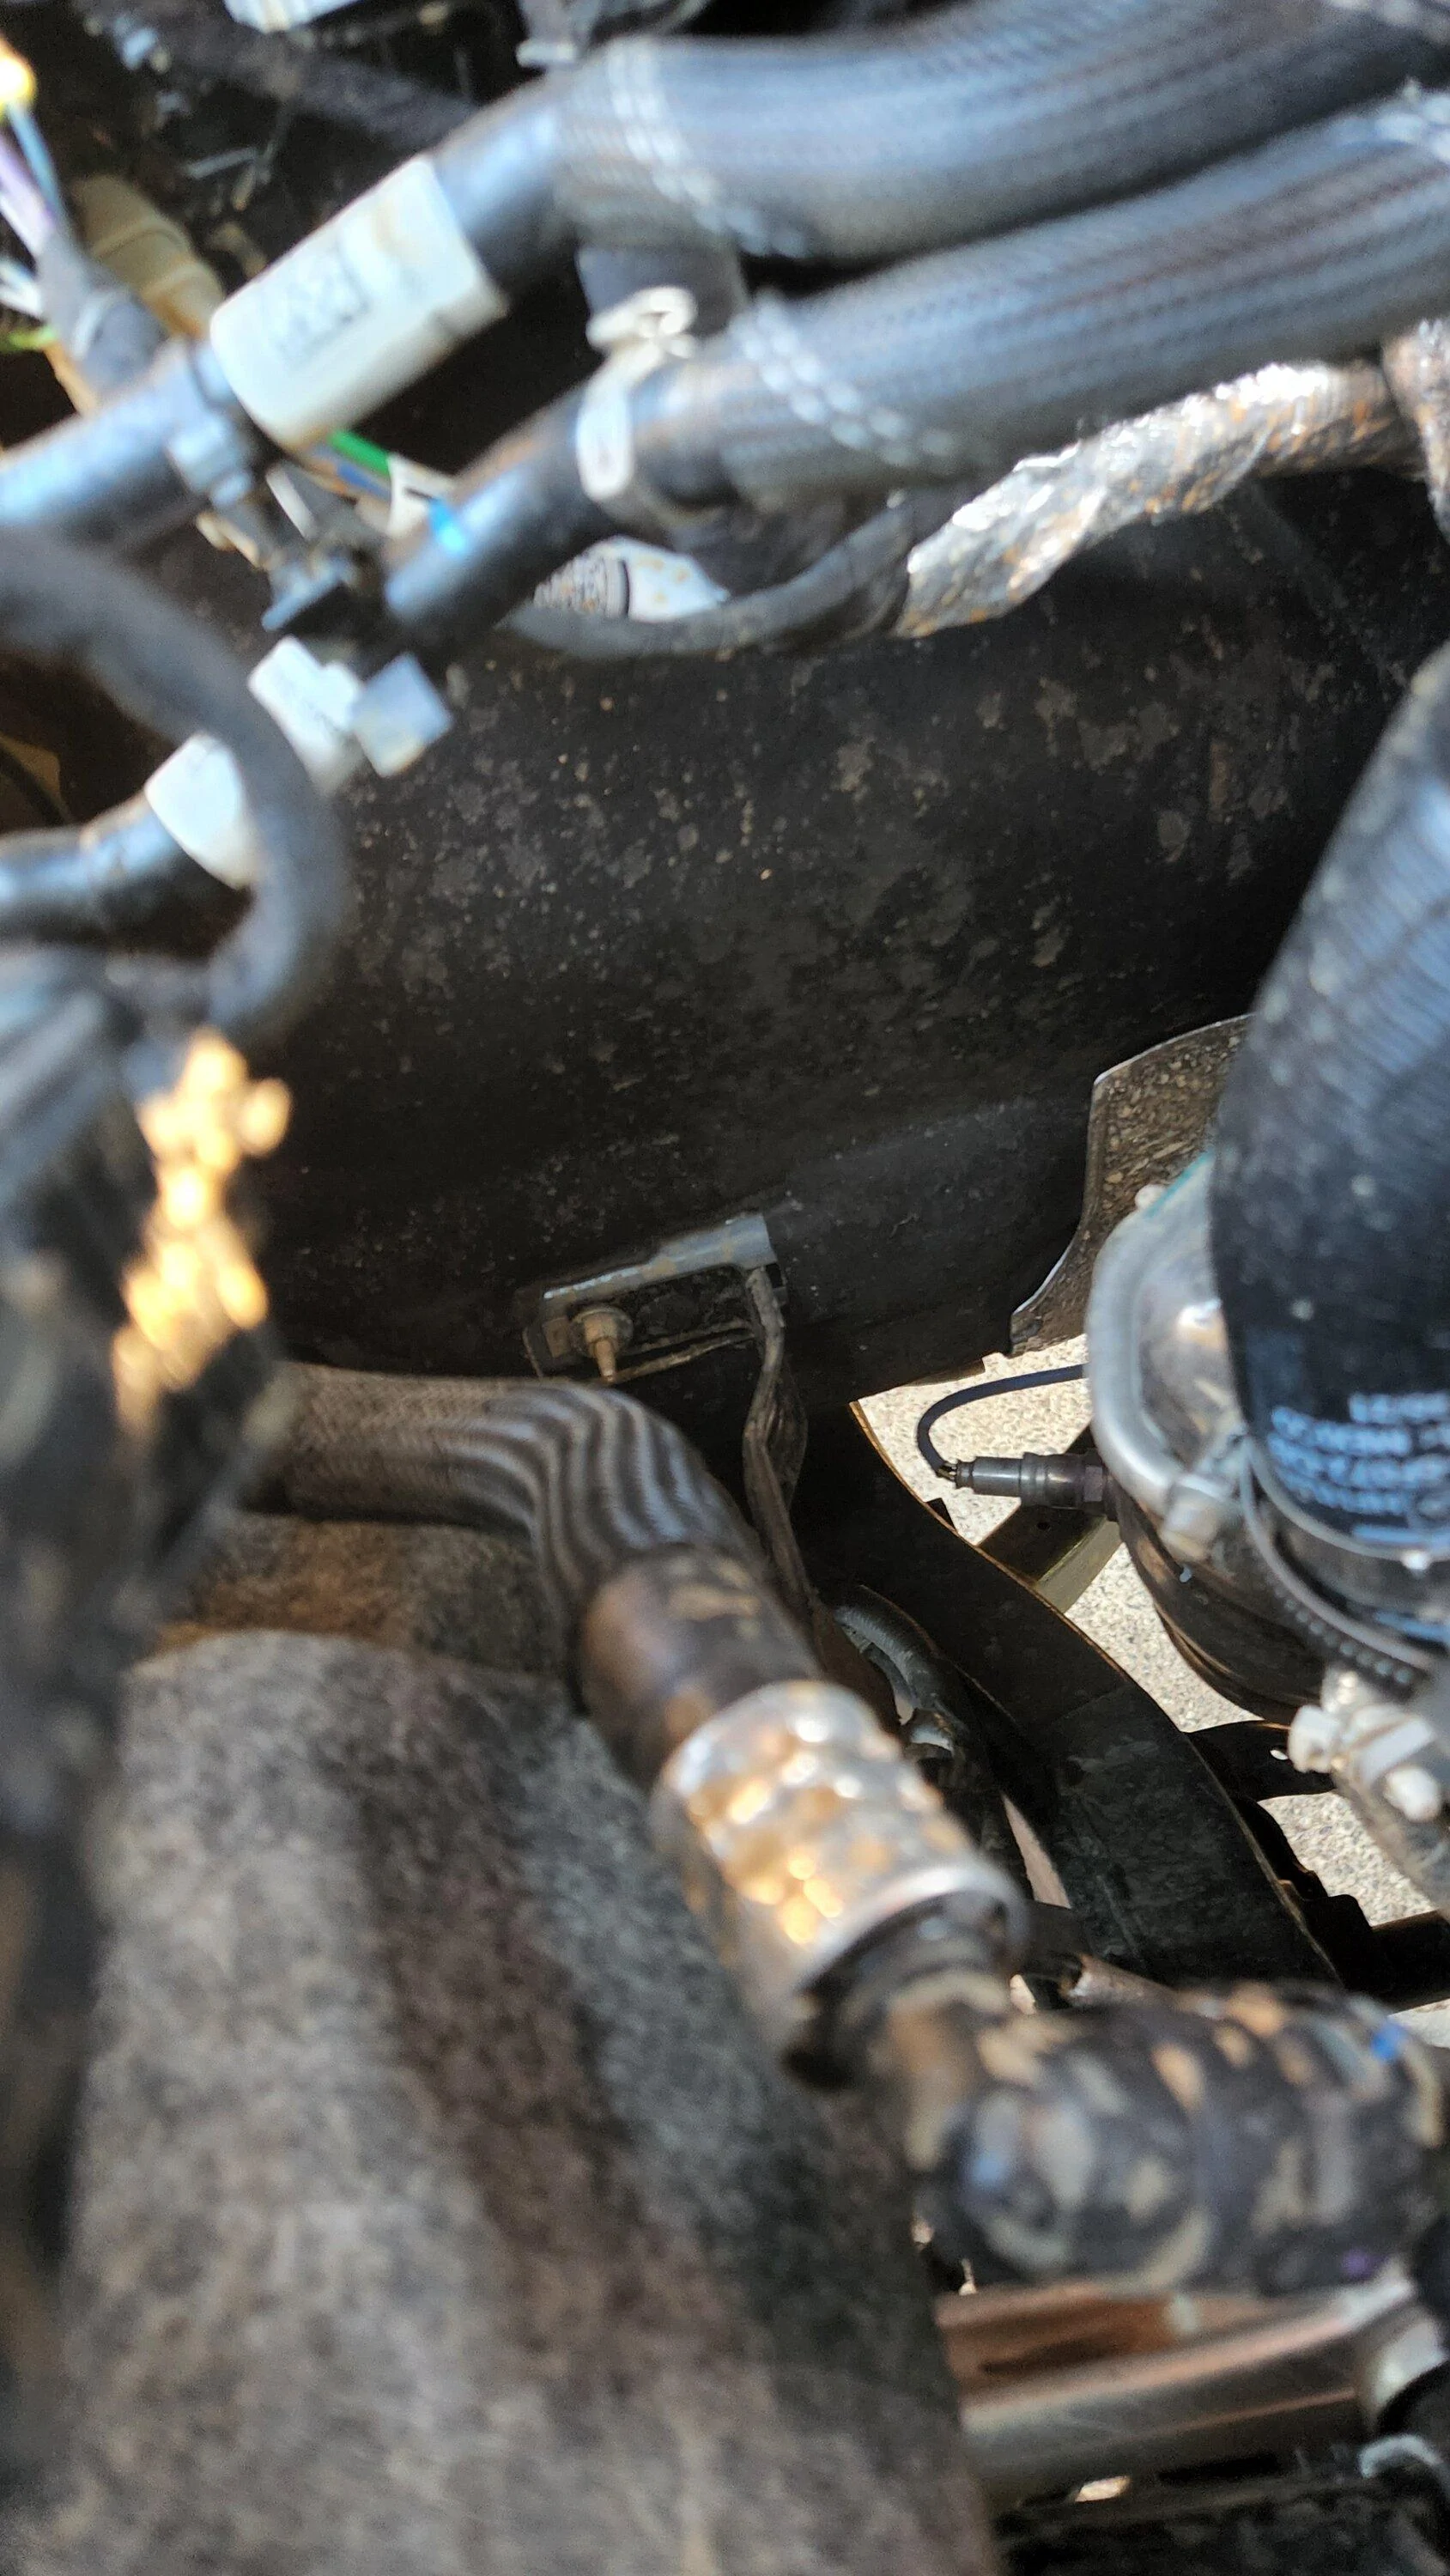
3. The only viable space is near passenger firewall... right next to the turbo. 🔥 Nope.

20220622_202343.jpg


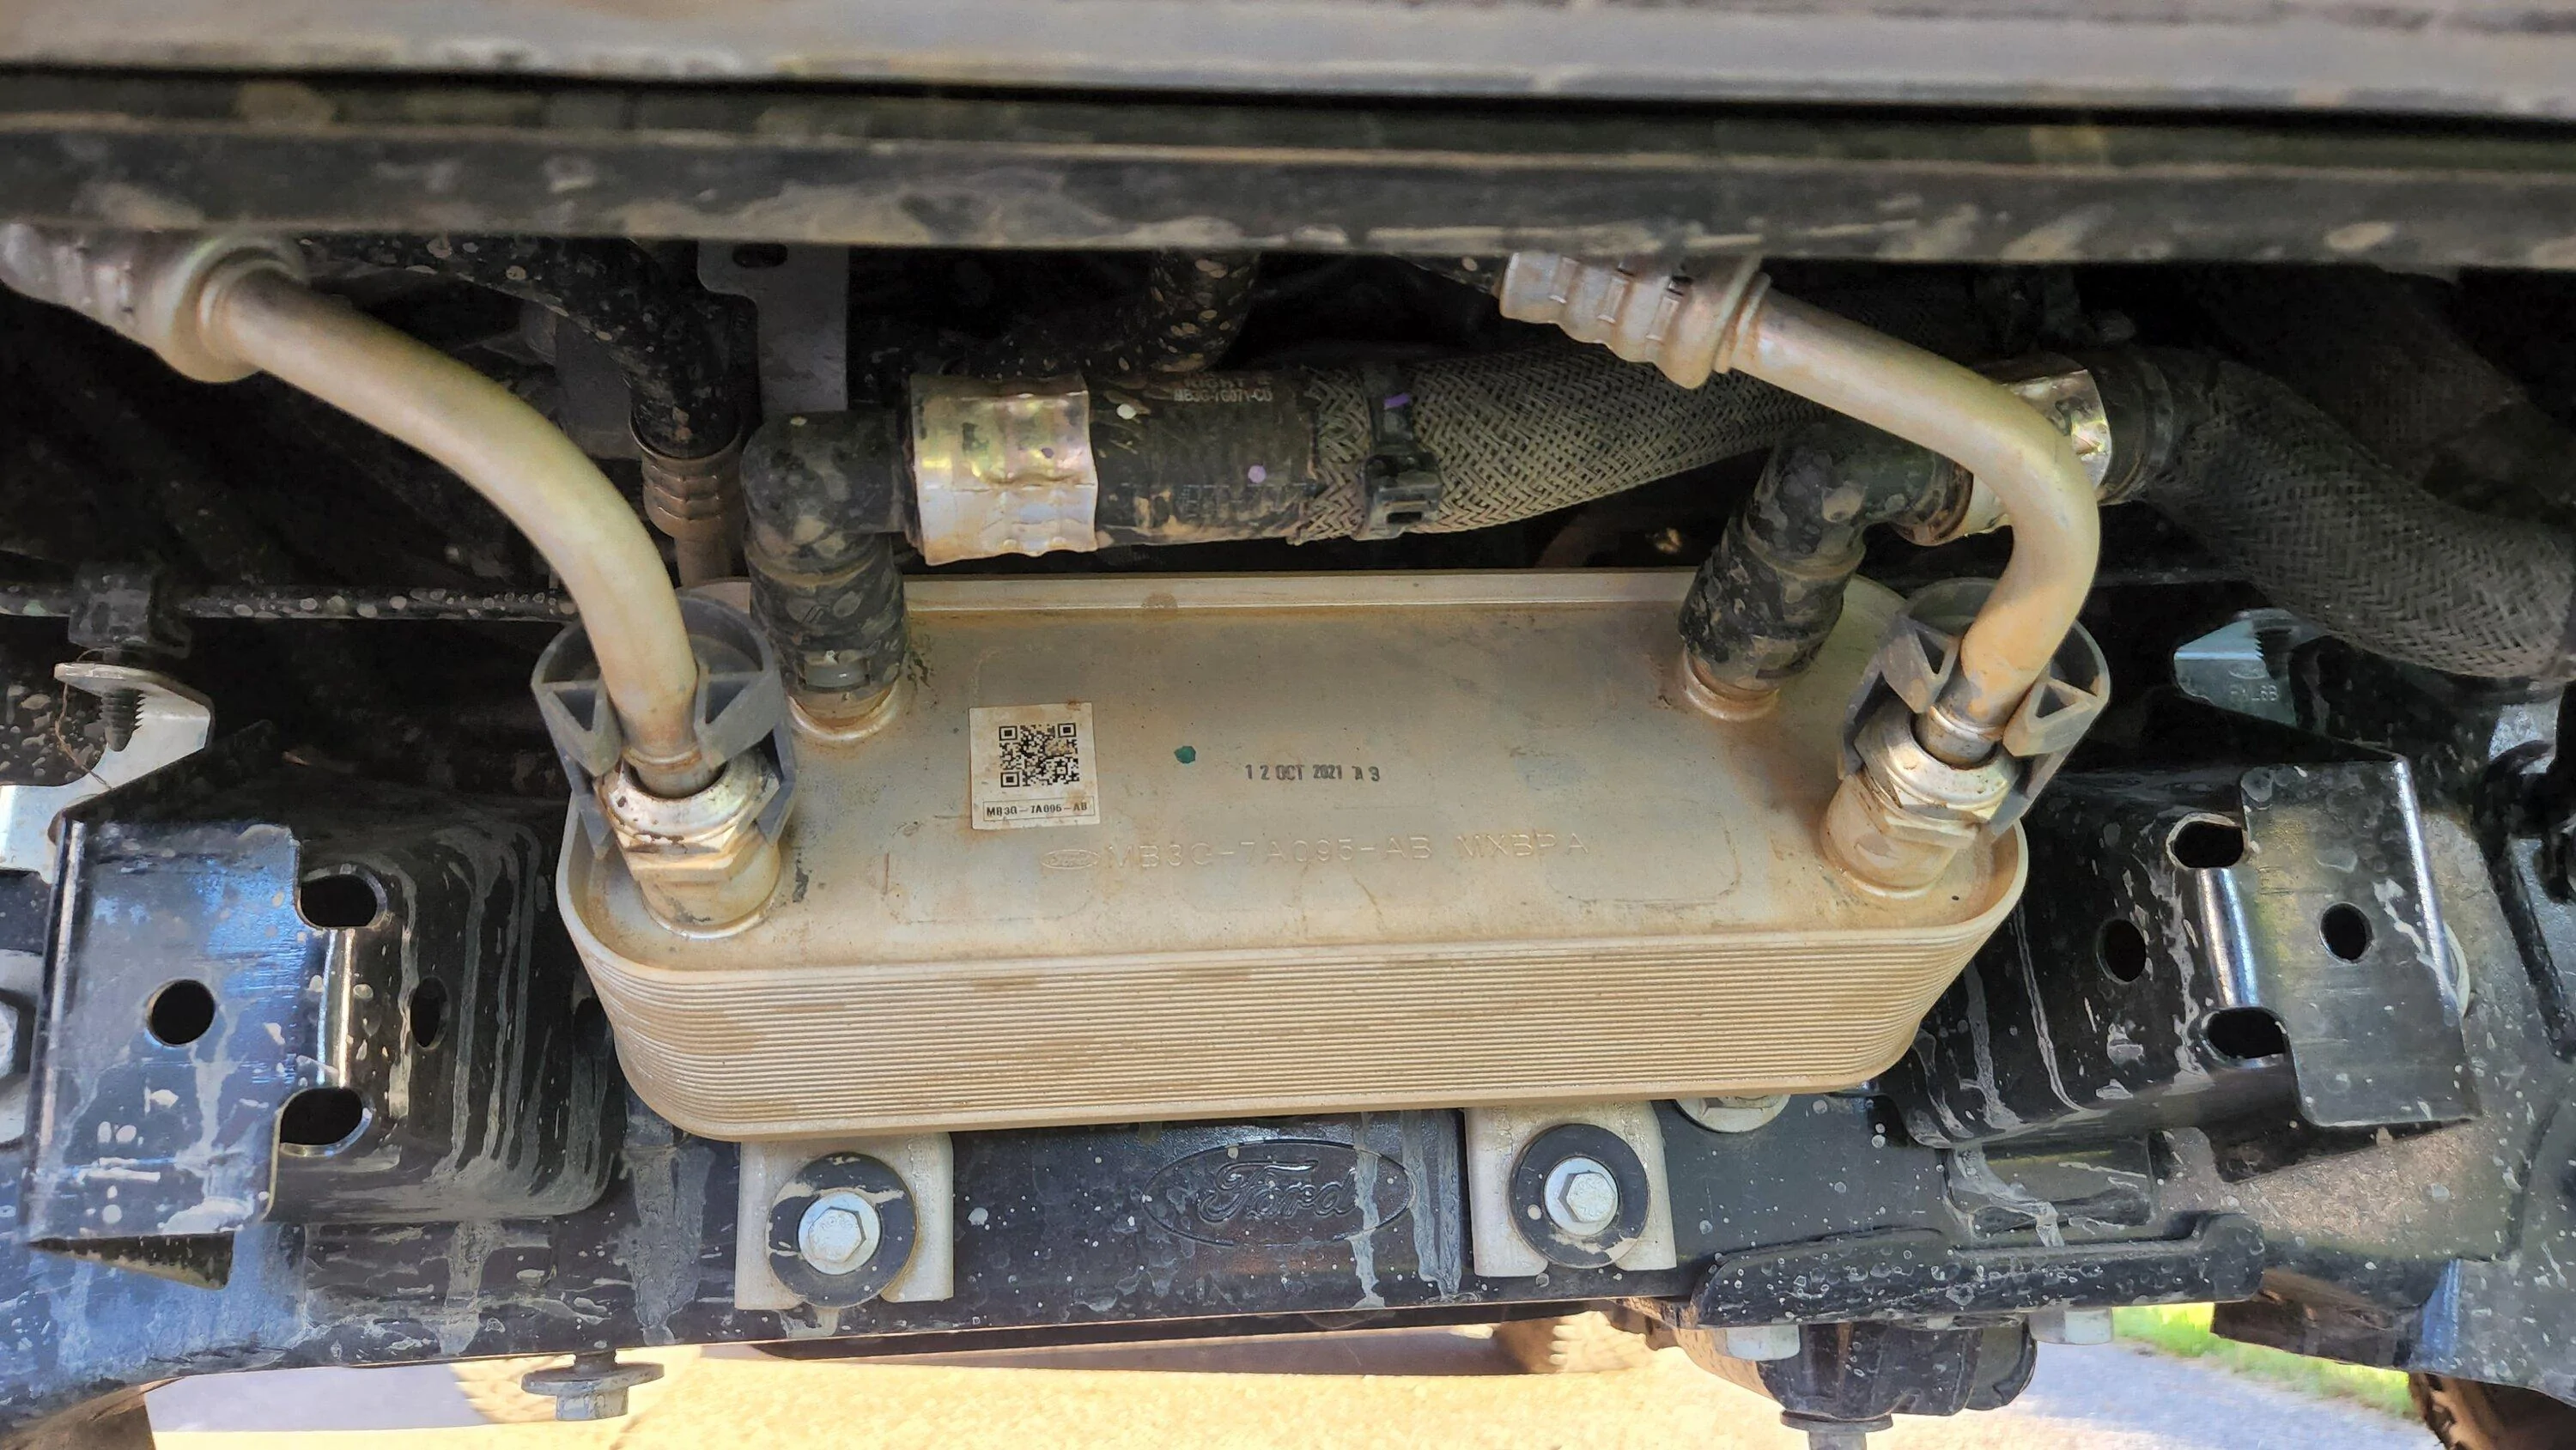
4. The heat exchanger leaves no room under the bash plate without relocation.

20220622_201845.jpg


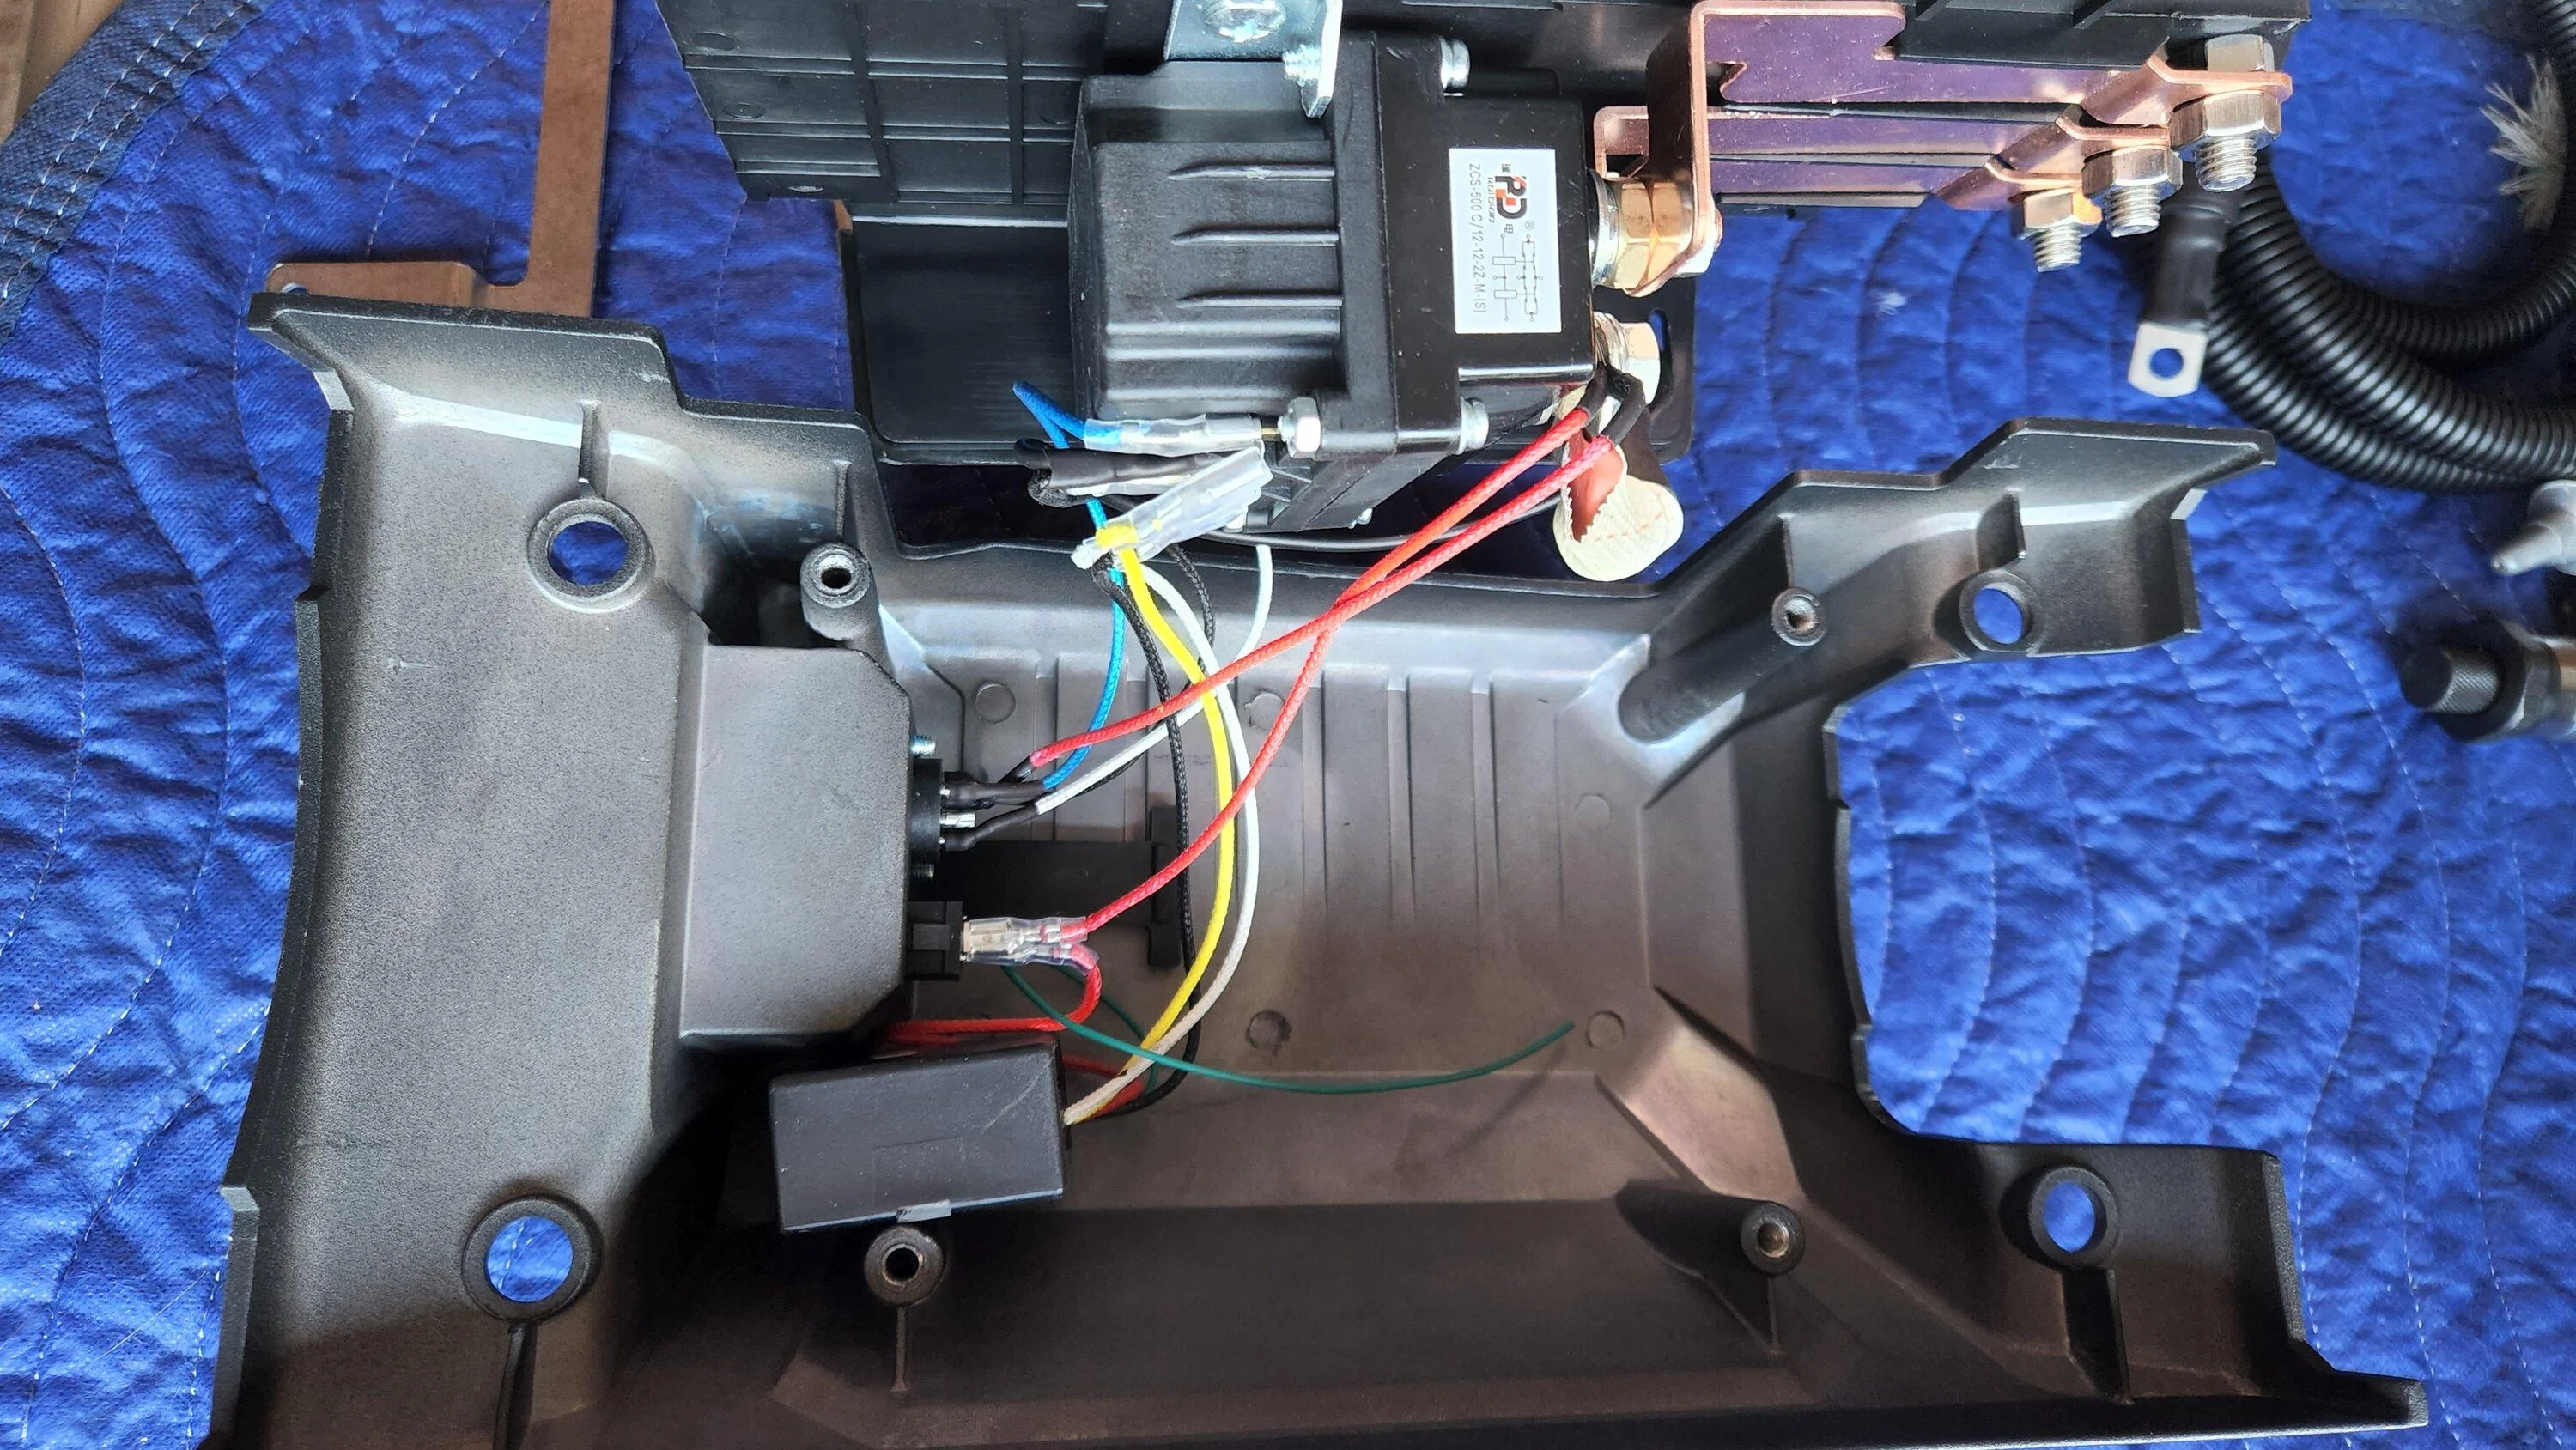
5. I want to cut off the casing parts that make it so big... but I opened the case there's a better solution.

20220622_201816.jpg


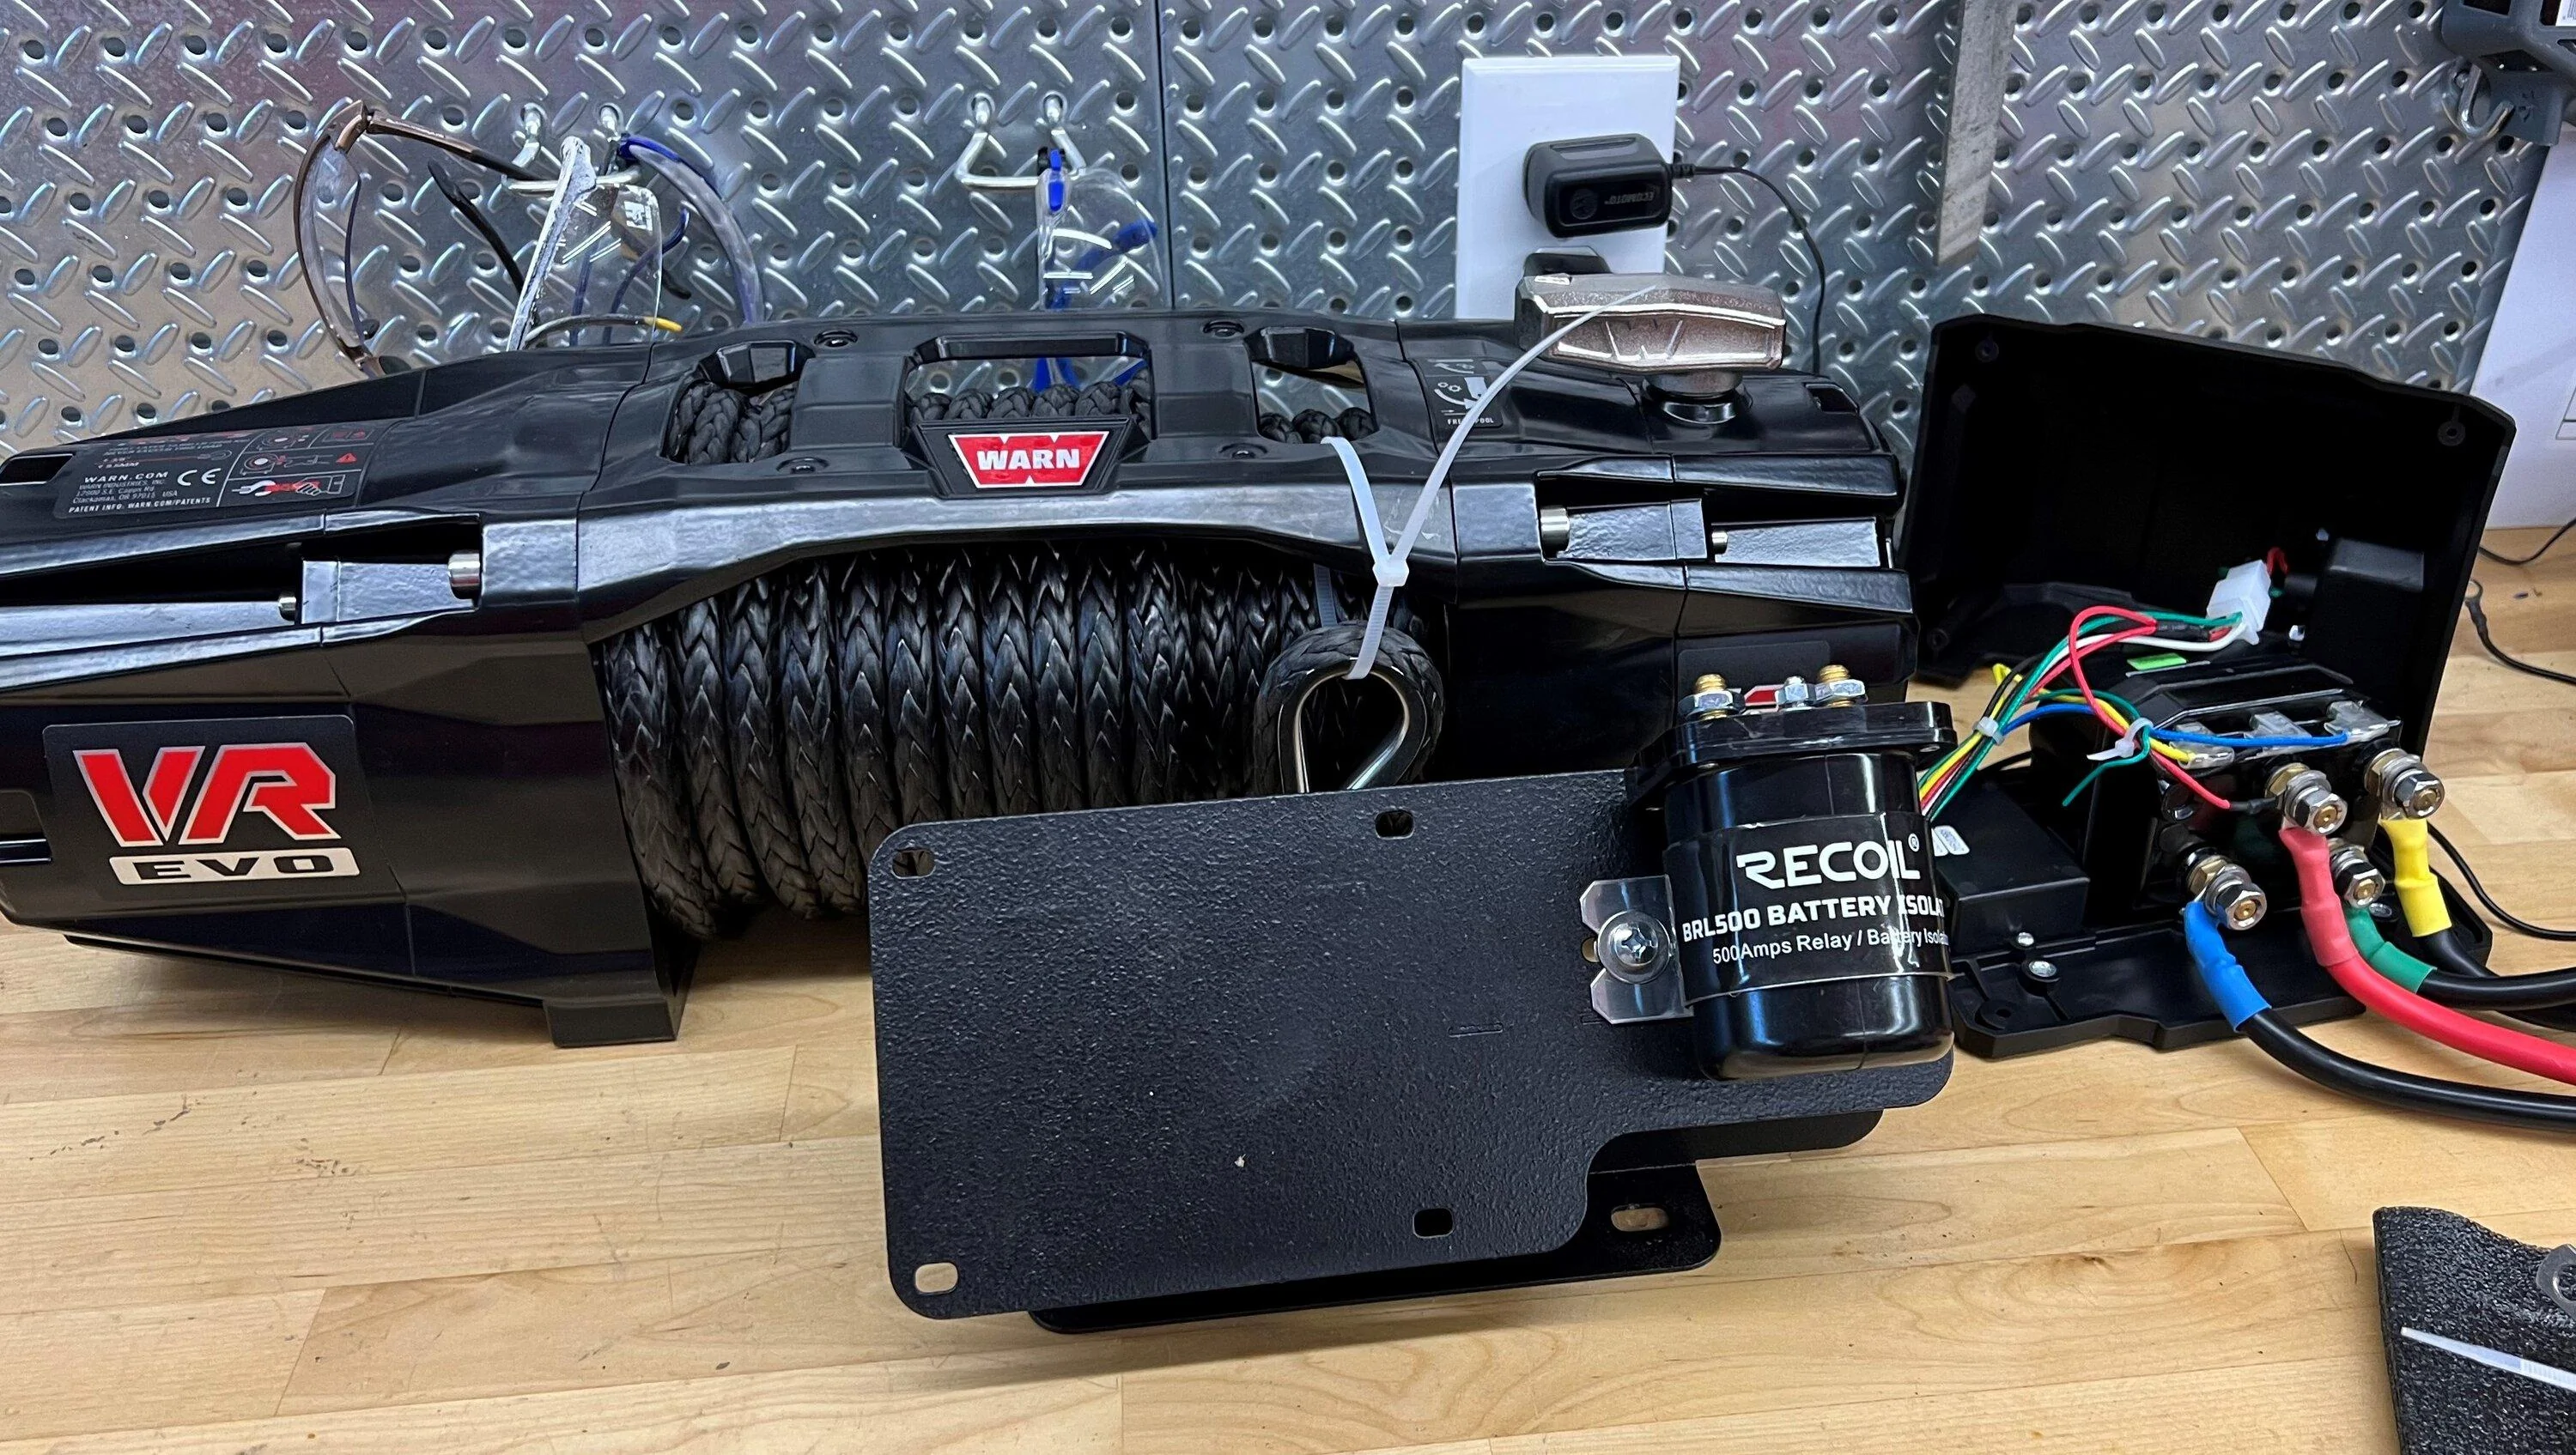
6. None of this stuff is waterproofed. They put a nice rubber cover over the power switch and remote cable... which gives you a false impression of watertightness... because from the underside (surprise), the edges have up to a 1/4" gap between the two halves of the casing. Some of the components (like the bluetooth relay) don't look like anything I'd expose to any weather at all. WTF?

20220622_201821.jpg


So since the "guts" of it look small and removeable, I'm inclined to get a waterproof electronics project box and reassemble all that kit in a MUCH more manageable (and protective) casing.

Loving the winch. Hating the control box. Part of me is considering just putting it back on top of the winch... but I risk wanting to throat-punch myself every time I looked at it.

So this is no longer a 'tonight' project. For now, a couple of frosty Guinness adult beverages will help me decide the plan of attack. 🍻

20220622_202346.jpg


20220622_201900.jpg

Did you ever get a project box for this? I've very curious about the relocation.
 

66GT

Badlands
Well-Known Member
First Name
Thomas
Joined
Dec 15, 2021
Threads
20
Messages
893
Reaction score
3,107
Location
Tacoma, WA
Vehicle(s)
03 Marauder, 66 Mustang GT, 65 Ranchero, 64 Comet
Your Bronco Model
Badlands
Clubs
 

Sponsored
OP
OP
‘21OBX

‘21OBX

Outer Banks
Well-Known Member
First Name
Ken
Joined
Jan 24, 2022
Threads
101
Messages
2,611
Reaction score
3,366
Location
90Bronco19
Vehicle(s)
2022 bronco outer banks
Your Bronco Model
Outer Banks
Clubs
 
That is disappointing. Let me know where you cut them. Seems ridiculous they didn't say anything about which bumpers it's compatible with, and those lower parts are supposed to be for flat towing too.
I followed the frame left about 1/4” as to not Knick the frame. I’m at the point that I’m out of shade until evening. Did a test run and parking sensor fault right away. Won’t even let my rear sensors work. Everything off plugged in and tight. Soooo. I’m going to take a nap and figure that crap out this evening. I hope.
 

66GT

Badlands
Well-Known Member
First Name
Thomas
Joined
Dec 15, 2021
Threads
20
Messages
893
Reaction score
3,107
Location
Tacoma, WA
Vehicle(s)
03 Marauder, 66 Mustang GT, 65 Ranchero, 64 Comet
Your Bronco Model
Badlands
Clubs
 
I followed the frame left about 1/4” as to not Knick the frame. I’m at the point that I’m out of shade until evening. Did a test run and parking sensor fault right away. Won’t even let my rear sensors work. Everything off plugged in and tight. Soooo. I’m going to take a nap and figure that crap out this evening. I hope.
I had a sensor fault as well... after checking that all the connections on the sensor extensions are tight (including the main connection to the harness if you removed the bumper)... make sure they are pointed directly forward (and not up or down from horizontal). You might want to turn vehicle all the way off and back on again between adjustments.
 

66GT

Badlands
Well-Known Member
First Name
Thomas
Joined
Dec 15, 2021
Threads
20
Messages
893
Reaction score
3,107
Location
Tacoma, WA
Vehicle(s)
03 Marauder, 66 Mustang GT, 65 Ranchero, 64 Comet
Your Bronco Model
Badlands
Clubs
 
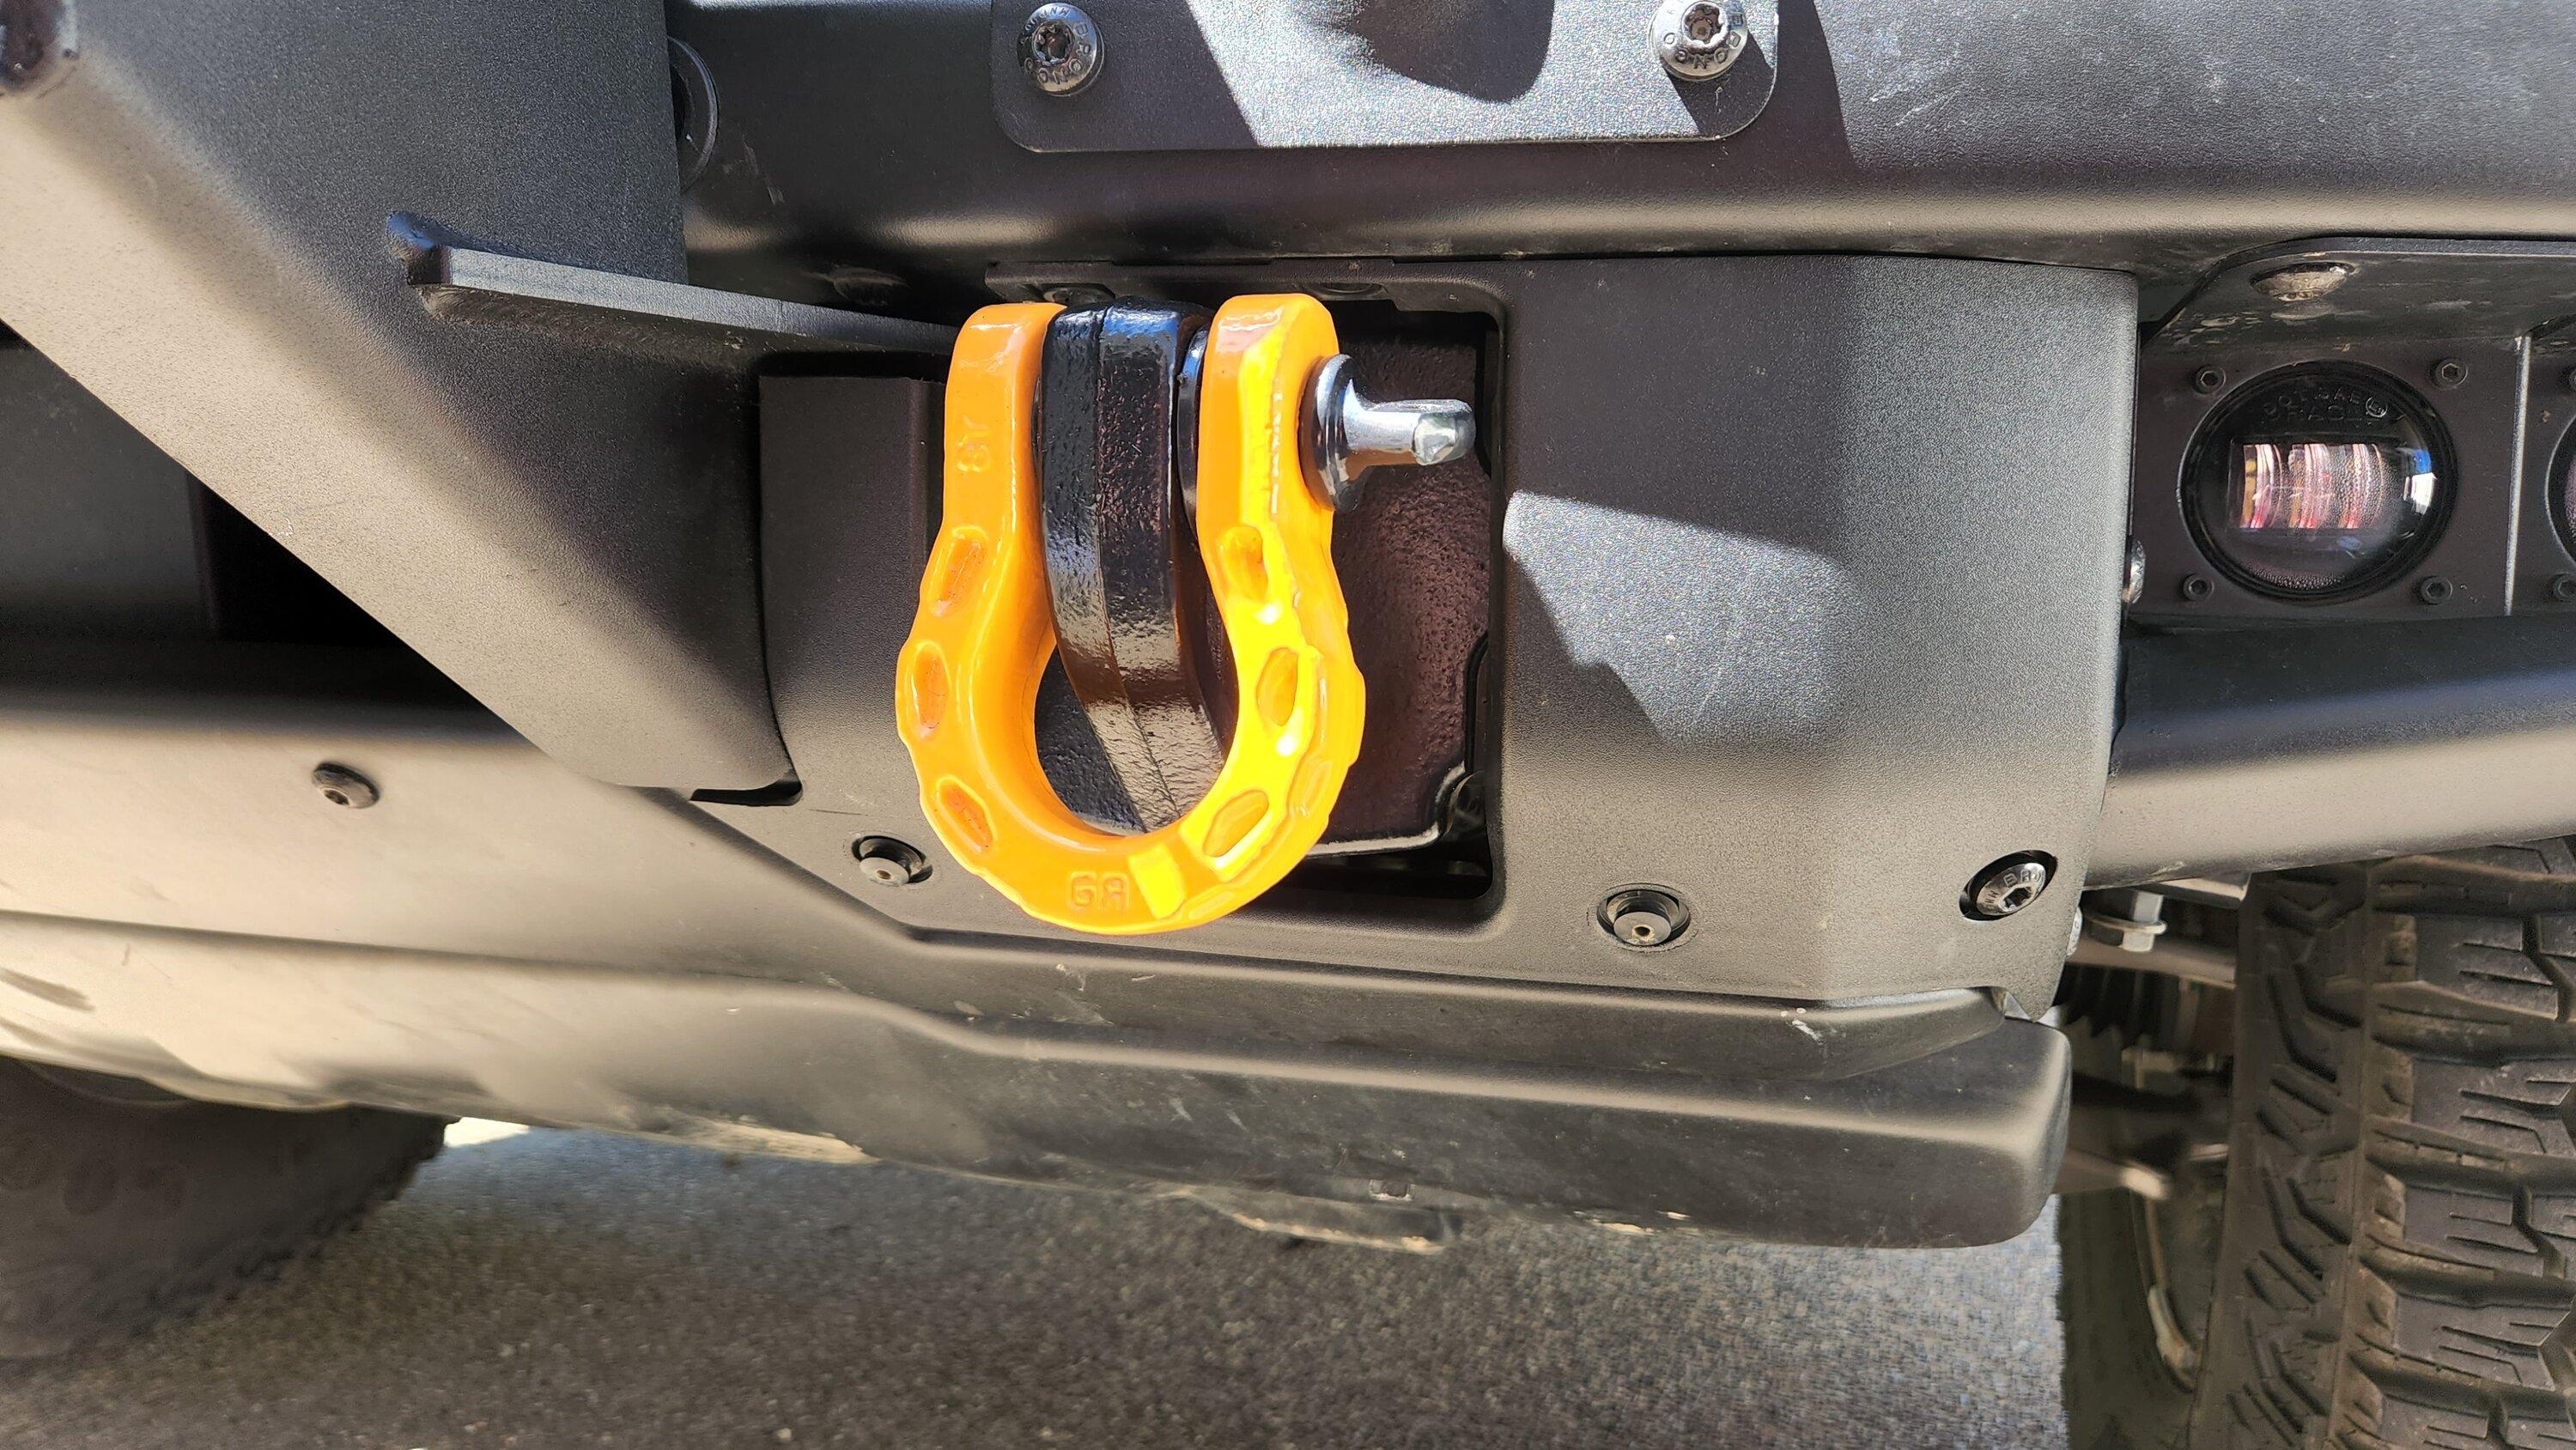
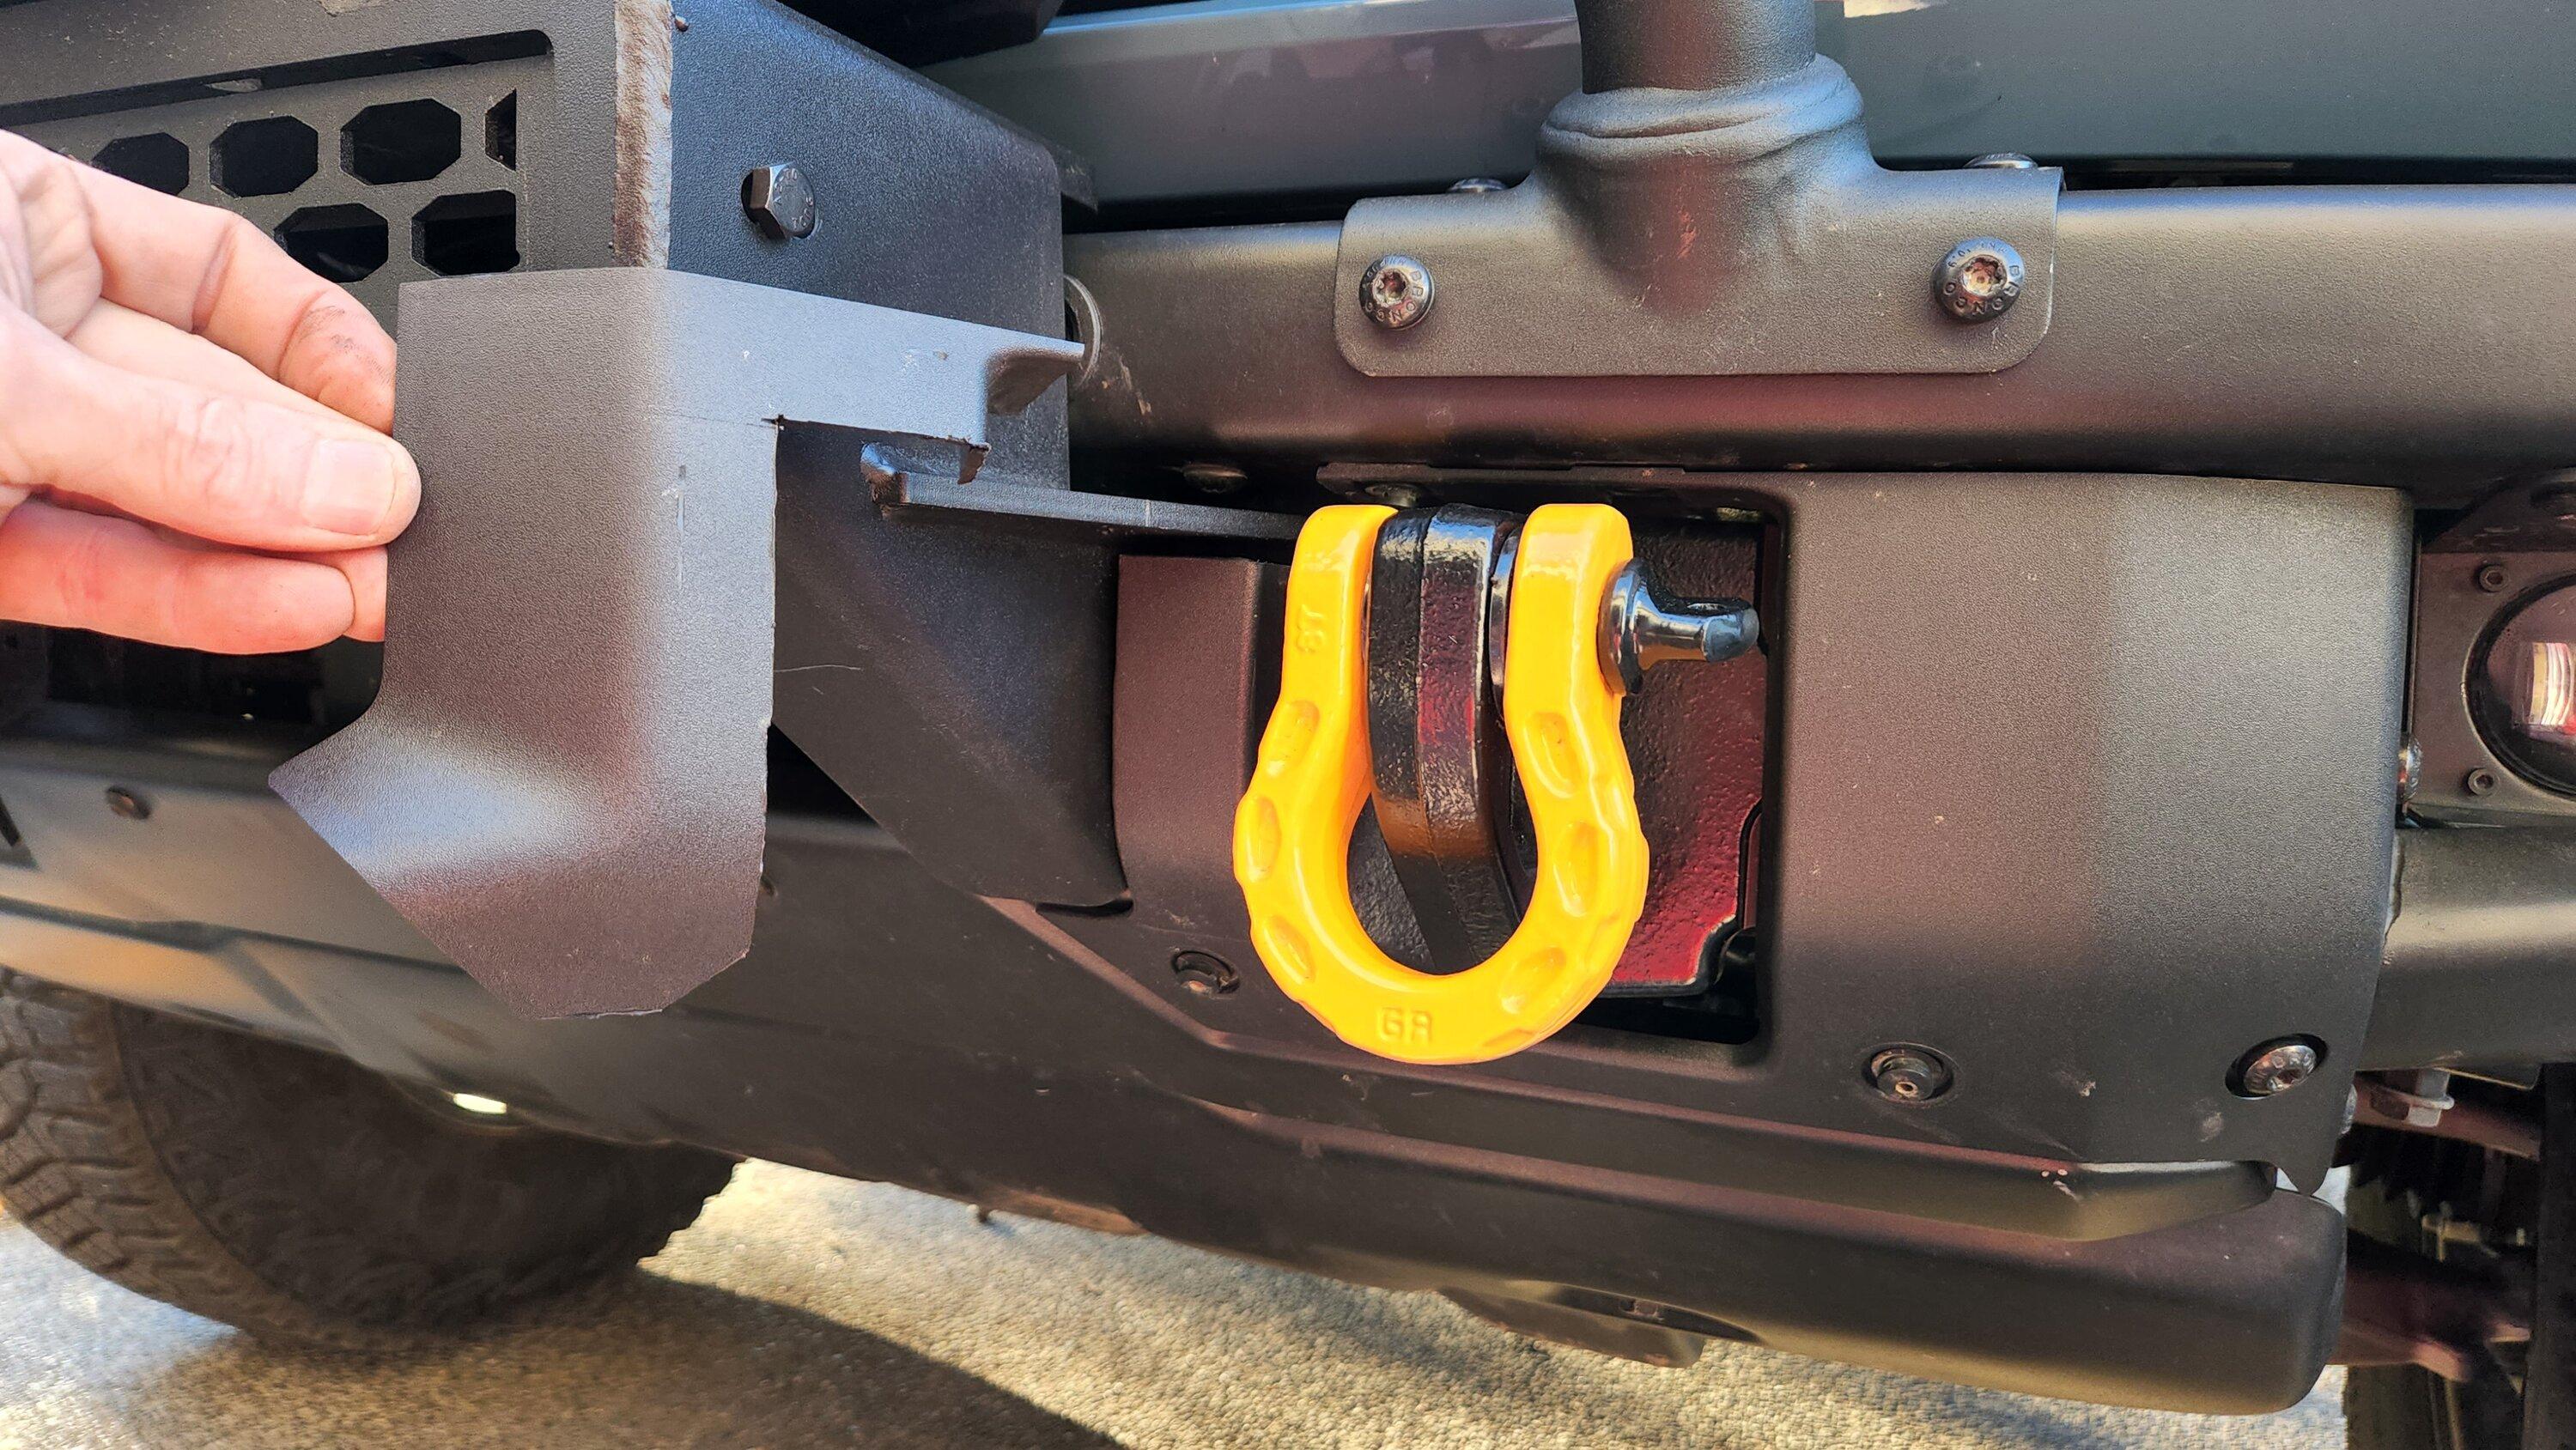
Finally got around to trimming and reinstalling the plastic covers for the frame mounts. It was a PITA because the angles the pics are shot from in the instructions don't give you a good orientation to how the panel is being viewed.

Also, they walk you through doing the passenger side with pics... but the last pic (of the installed cover) is of the DRIVER'S side. They tell you the driver's side is the mirror image of the passenger... but they never show the completed pass side (and don't acknowledge the last pic is actually of the driver's side). It's just confusing.

I used painter's tape to mask off the areas I wanted to keep and mark the inside cut line. I used a Dremel with a narrow cutoff wheel for the straight cuts. To clean it up and make the lower inside radius, I used a cone-shaped grinding stone.

Ford Bronco Rough country winch mount unbox/ INSTALL tips. 20220624_152019
 
OP
OP
‘21OBX

‘21OBX

Outer Banks
Well-Known Member
First Name
Ken
Joined
Jan 24, 2022
Threads
101
Messages
2,611
Reaction score
3,366
Location
90Bronco19
Vehicle(s)
2022 bronco outer banks
Your Bronco Model
Outer Banks
Clubs
 
Finally got around to trimming and reinstalling the plastic covers for the frame mounts. It was a PITA because the angles the pics are shot from in the instructions don't give you a good orientation to how the panel is being viewed.

Also, they walk you through doing the passenger side with pics... but the last pic (of the installed cover) is of the DRIVER'S side. They tell you the driver's side is the mirror image of the passenger... but they never show the completed pass side (and don't acknowledge the last pic is actually of the driver's side). It's just confusing.

I used painter's tape to mask off the areas I wanted to keep and mark the inside cut line. I used a Dremel with a narrow cutoff wheel for the straight cuts. To clean it up and make the lower inside radius, I used a cone-shaped grinding stone.

20220624_152019.jpg
This single picture is the most useful picture I’ve seen in this whole ordeal. Thank you! This gives me a way better reference than the directions. 👍
 

66GT

Badlands
Well-Known Member
First Name
Thomas
Joined
Dec 15, 2021
Threads
20
Messages
893
Reaction score
3,107
Location
Tacoma, WA
Vehicle(s)
03 Marauder, 66 Mustang GT, 65 Ranchero, 64 Comet
Your Bronco Model
Badlands
Clubs
 
This single picture is the most useful picture I’ve seen in this whole ordeal. Thank you! This gives me a way better reference than the directions. 👍
If that helps... maybe this will, too. Here it is next to the chunk you cut out.

Ford Bronco Rough country winch mount unbox/ INSTALL tips. 20220624_200114
 

Sponsored
OP
OP
‘21OBX

‘21OBX

Outer Banks
Well-Known Member
First Name
Ken
Joined
Jan 24, 2022
Threads
101
Messages
2,611
Reaction score
3,366
Location
90Bronco19
Vehicle(s)
2022 bronco outer banks
Your Bronco Model
Outer Banks
Clubs
 
I had a sensor fault as well... after checking that all the connections on the sensor extensions are tight (including the main connection to the harness if you removed the bumper)... make sure they are pointed directly forward (and not up or down from horizontal). You might want to turn vehicle all the way off and back on again between adjustments.
Forscan says left inner sensor. I’ve swapped sensors left to right and still the same. So tomorrow I get to take everything back off 🤦. As I can’t see or get to the plug where the extension is at with the mount installed. Then on to wiring the control for the winch. I can’t deal with it in top and will relocate it.
 

66GT

Badlands
Well-Known Member
First Name
Thomas
Joined
Dec 15, 2021
Threads
20
Messages
893
Reaction score
3,107
Location
Tacoma, WA
Vehicle(s)
03 Marauder, 66 Mustang GT, 65 Ranchero, 64 Comet
Your Bronco Model
Badlands
Clubs
 
Forscan says left inner sensor. I’ve swapped sensors left to right and still the same. So tomorrow I get to take everything back off 🤦. As I can’t see or get to the plug where the extension is at with the mount installed. Then on to wiring the control for the winch. I can’t deal with it in top and will relocate it.
Can you post a pic of both sides of your sensor install before you rip it back off? ... maybe it's something simple.
 
OP
OP
‘21OBX

‘21OBX

Outer Banks
Well-Known Member
First Name
Ken
Joined
Jan 24, 2022
Threads
101
Messages
2,611
Reaction score
3,366
Location
90Bronco19
Vehicle(s)
2022 bronco outer banks
Your Bronco Model
Outer Banks
Clubs
 
Can you post a pic of both sides of your sensor install before you rip it back off? ... maybe it's something simple.
I’ve already removed the sensor holders swapped things inspected everything. It’s not a blockage or something it’s a wiring issue. My next step is to swap extensions from right to left. To see if the problem switches sides.
 
OP
OP
‘21OBX

‘21OBX

Outer Banks
Well-Known Member
First Name
Ken
Joined
Jan 24, 2022
Threads
101
Messages
2,611
Reaction score
3,366
Location
90Bronco19
Vehicle(s)
2022 bronco outer banks
Your Bronco Model
Outer Banks
Clubs
 
I’ve already removed the sensor holders swapped things inspected everything. It’s not a blockage or something it’s a wiring issue. My next step is to swap extensions from right to left. To see if the problem switches sides.
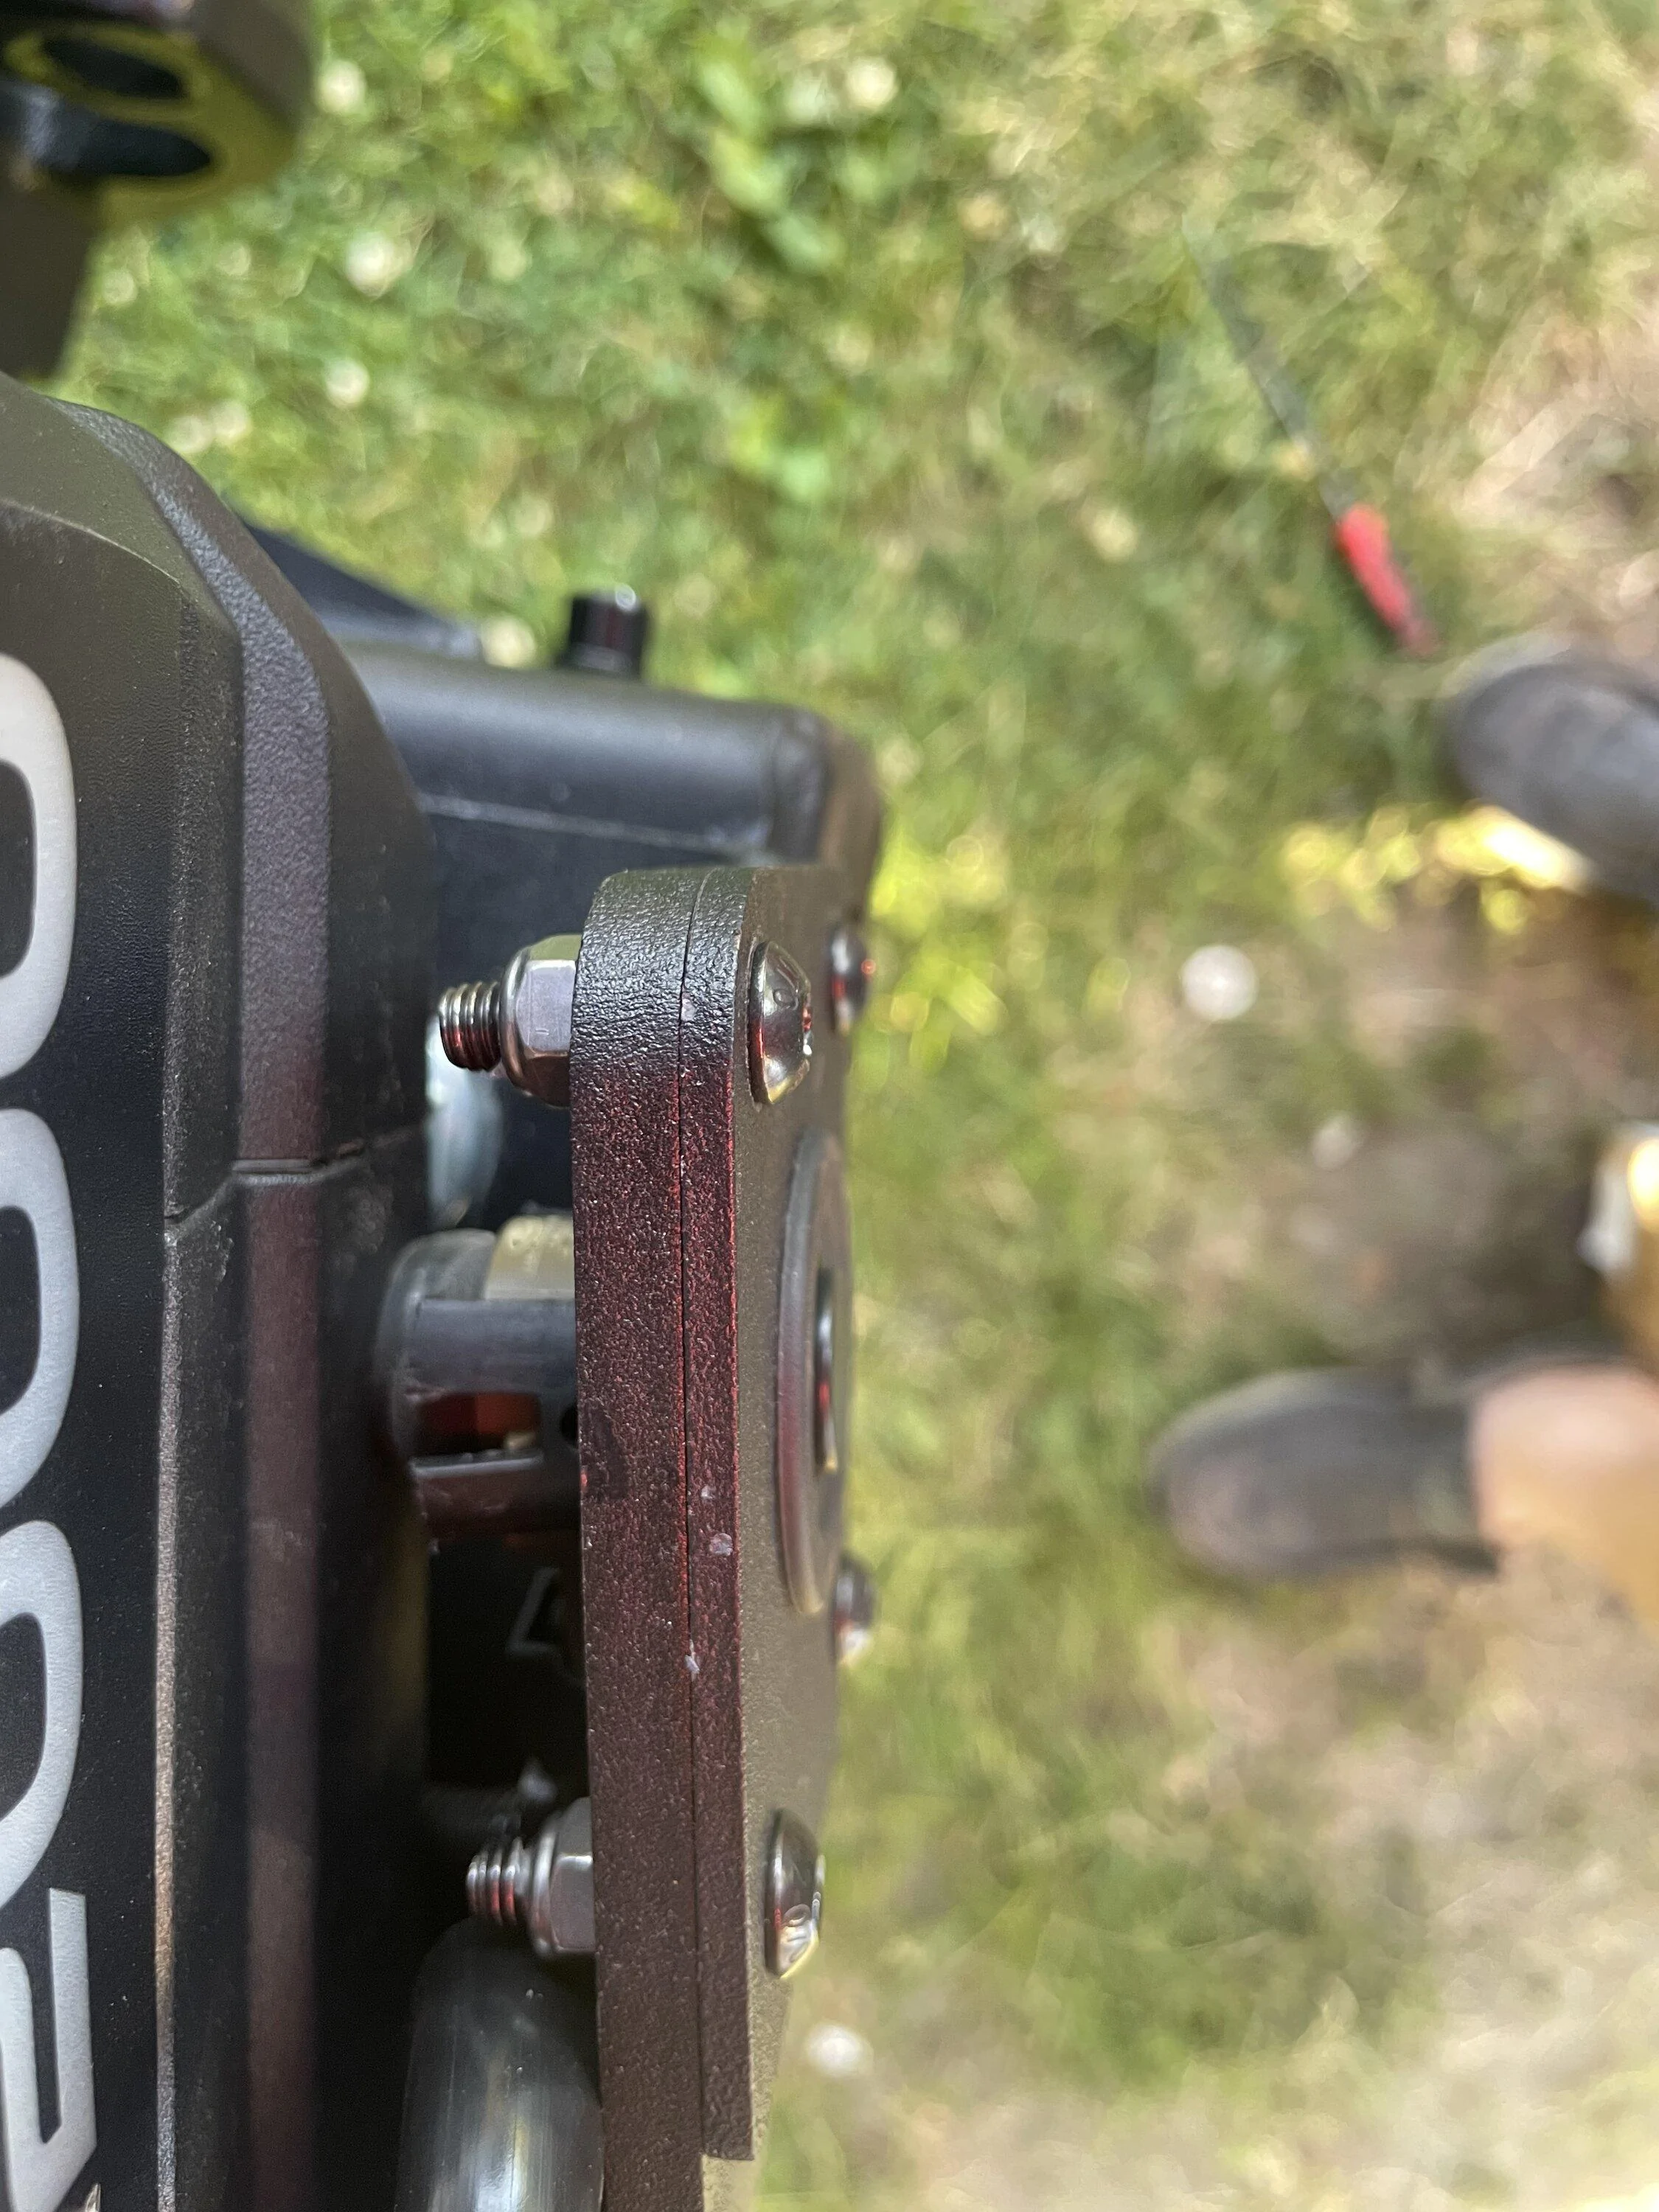
Found it. On the extension harness one of the pins was not seated. So double check Yours just a gentle tug will let you know if they are seated. Here’s a pic of what I did to hold the sensors in. I cut the tabs shorter and used the foam and rubber they give you for a snug fit
Ford Bronco Rough country winch mount unbox/ INSTALL tips. BFFCDCC5-8D1B-43EE-AAAB-2E12CEEF78A8
 
OP
OP
‘21OBX

‘21OBX

Outer Banks
Well-Known Member
First Name
Ken
Joined
Jan 24, 2022
Threads
101
Messages
2,611
Reaction score
3,366
Location
90Bronco19
Vehicle(s)
2022 bronco outer banks
Your Bronco Model
Outer Banks
Clubs
 
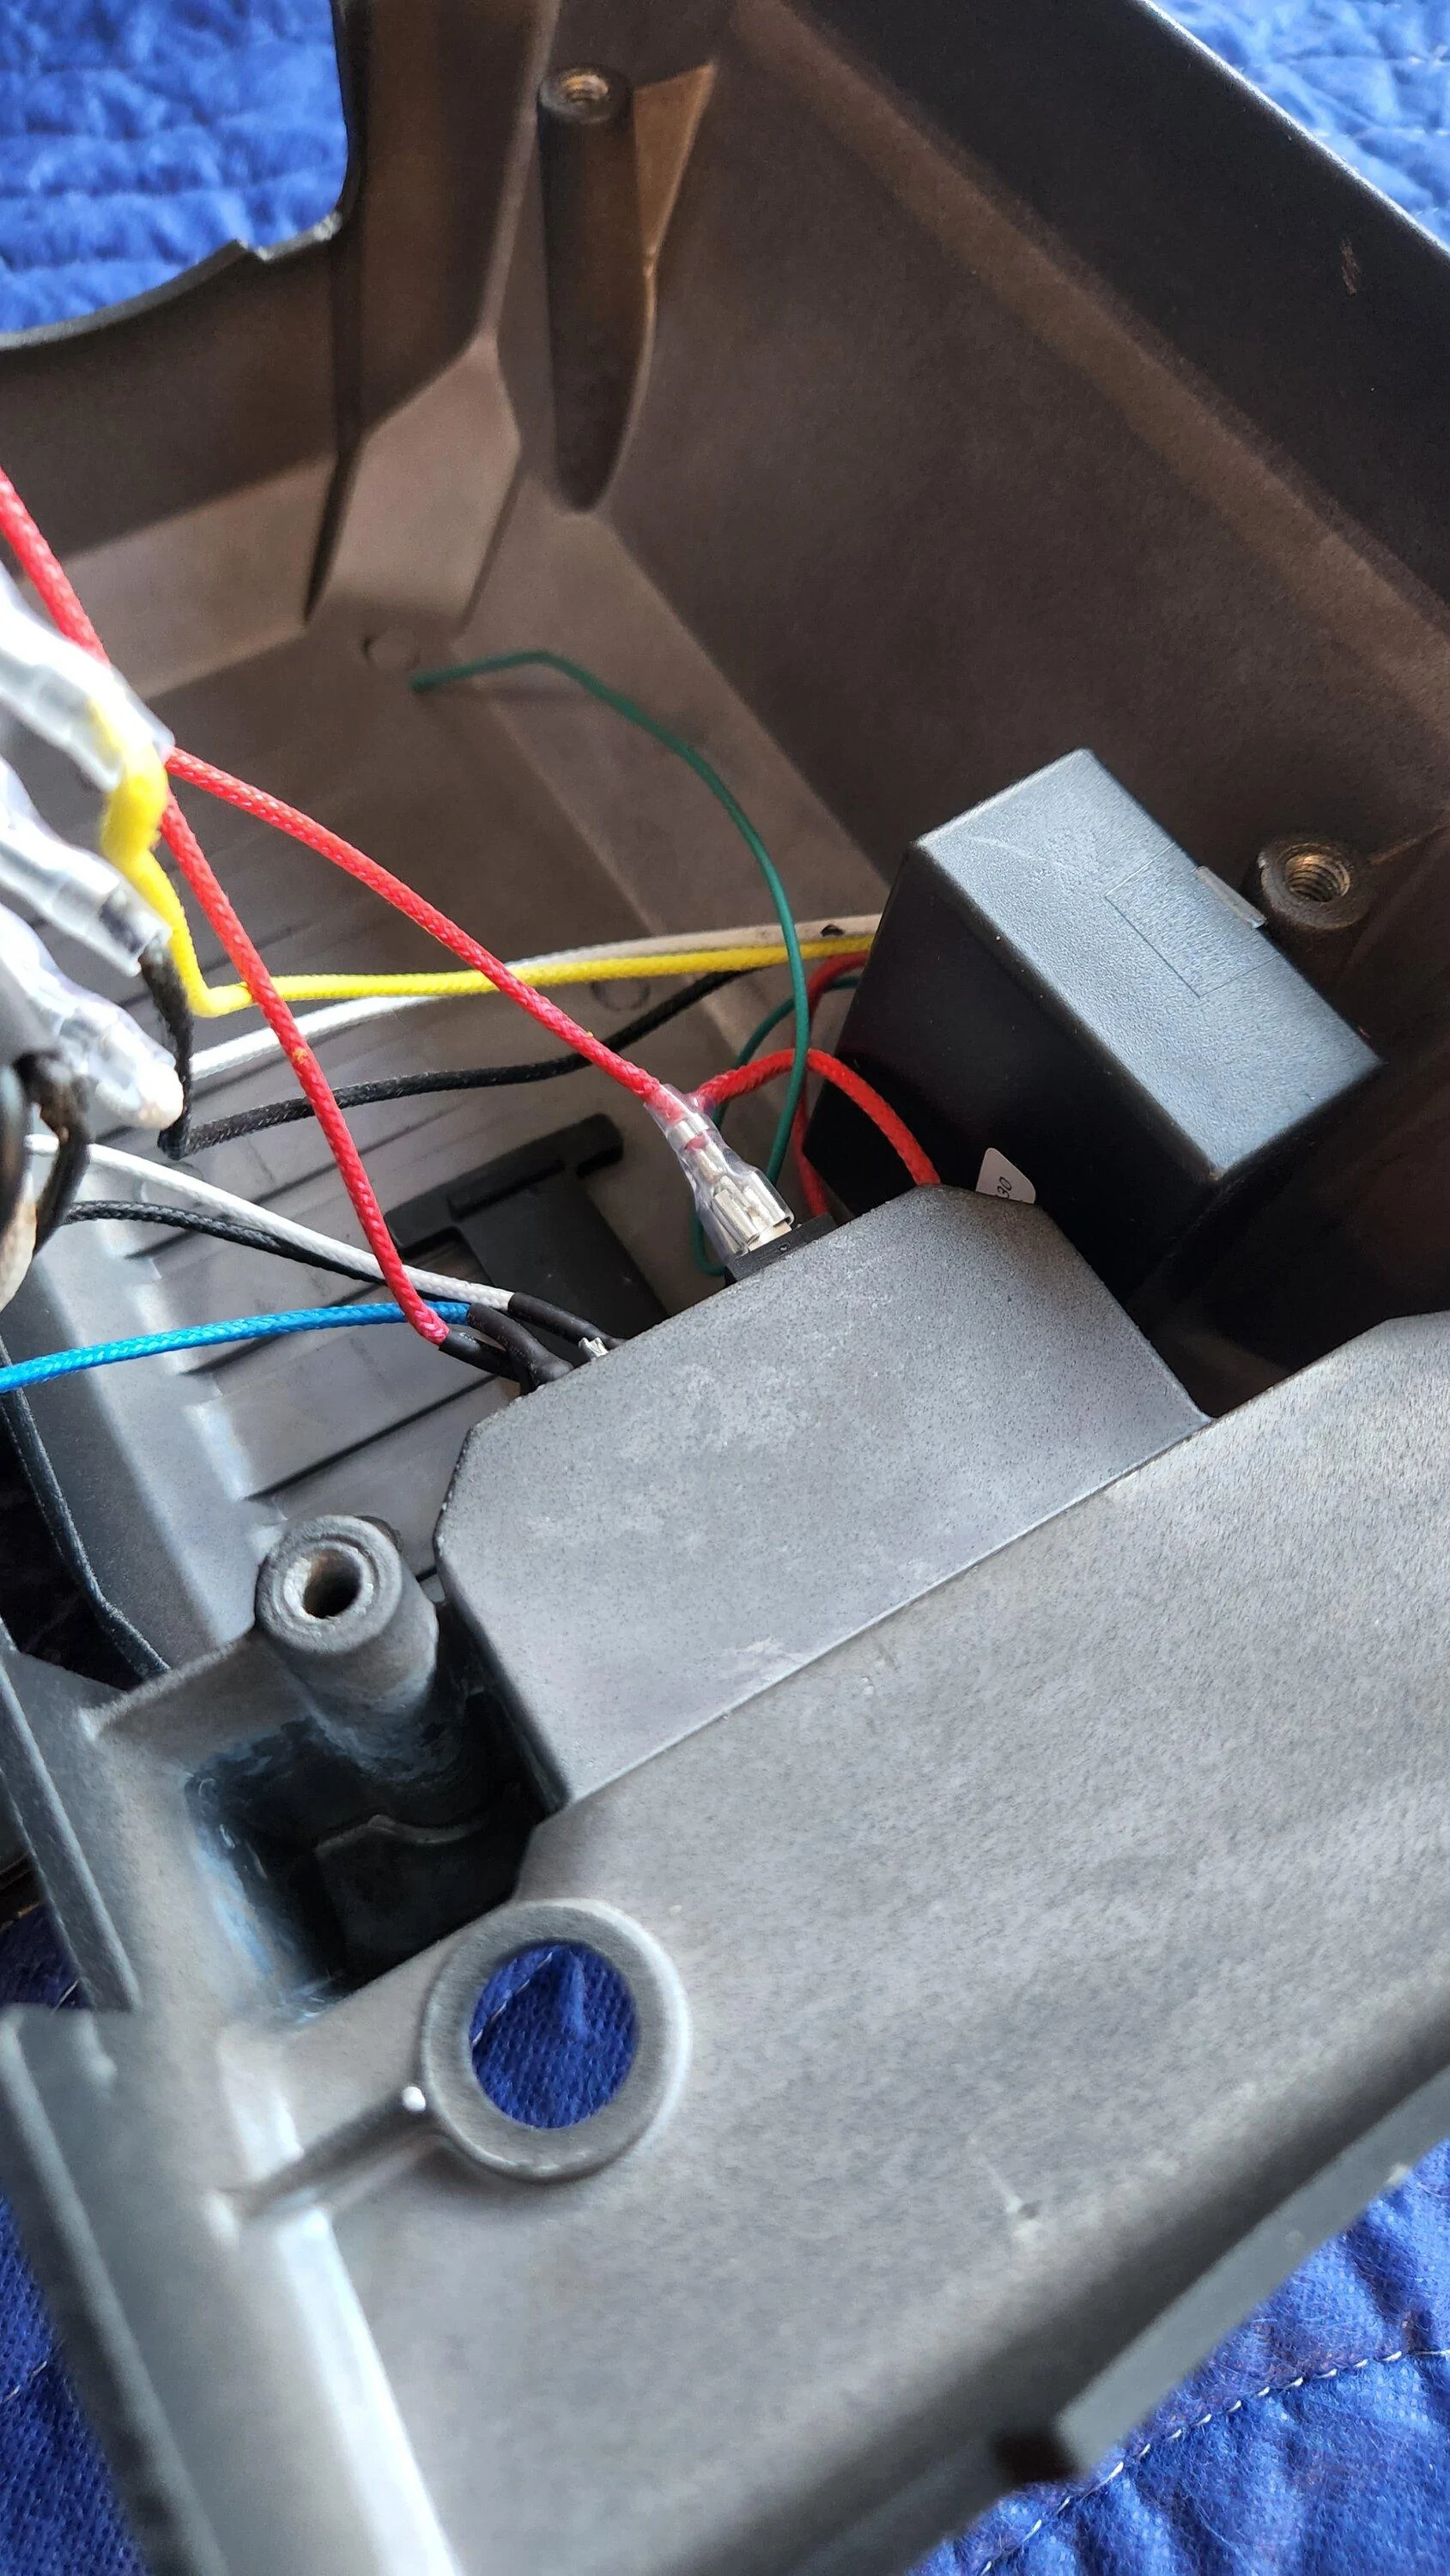
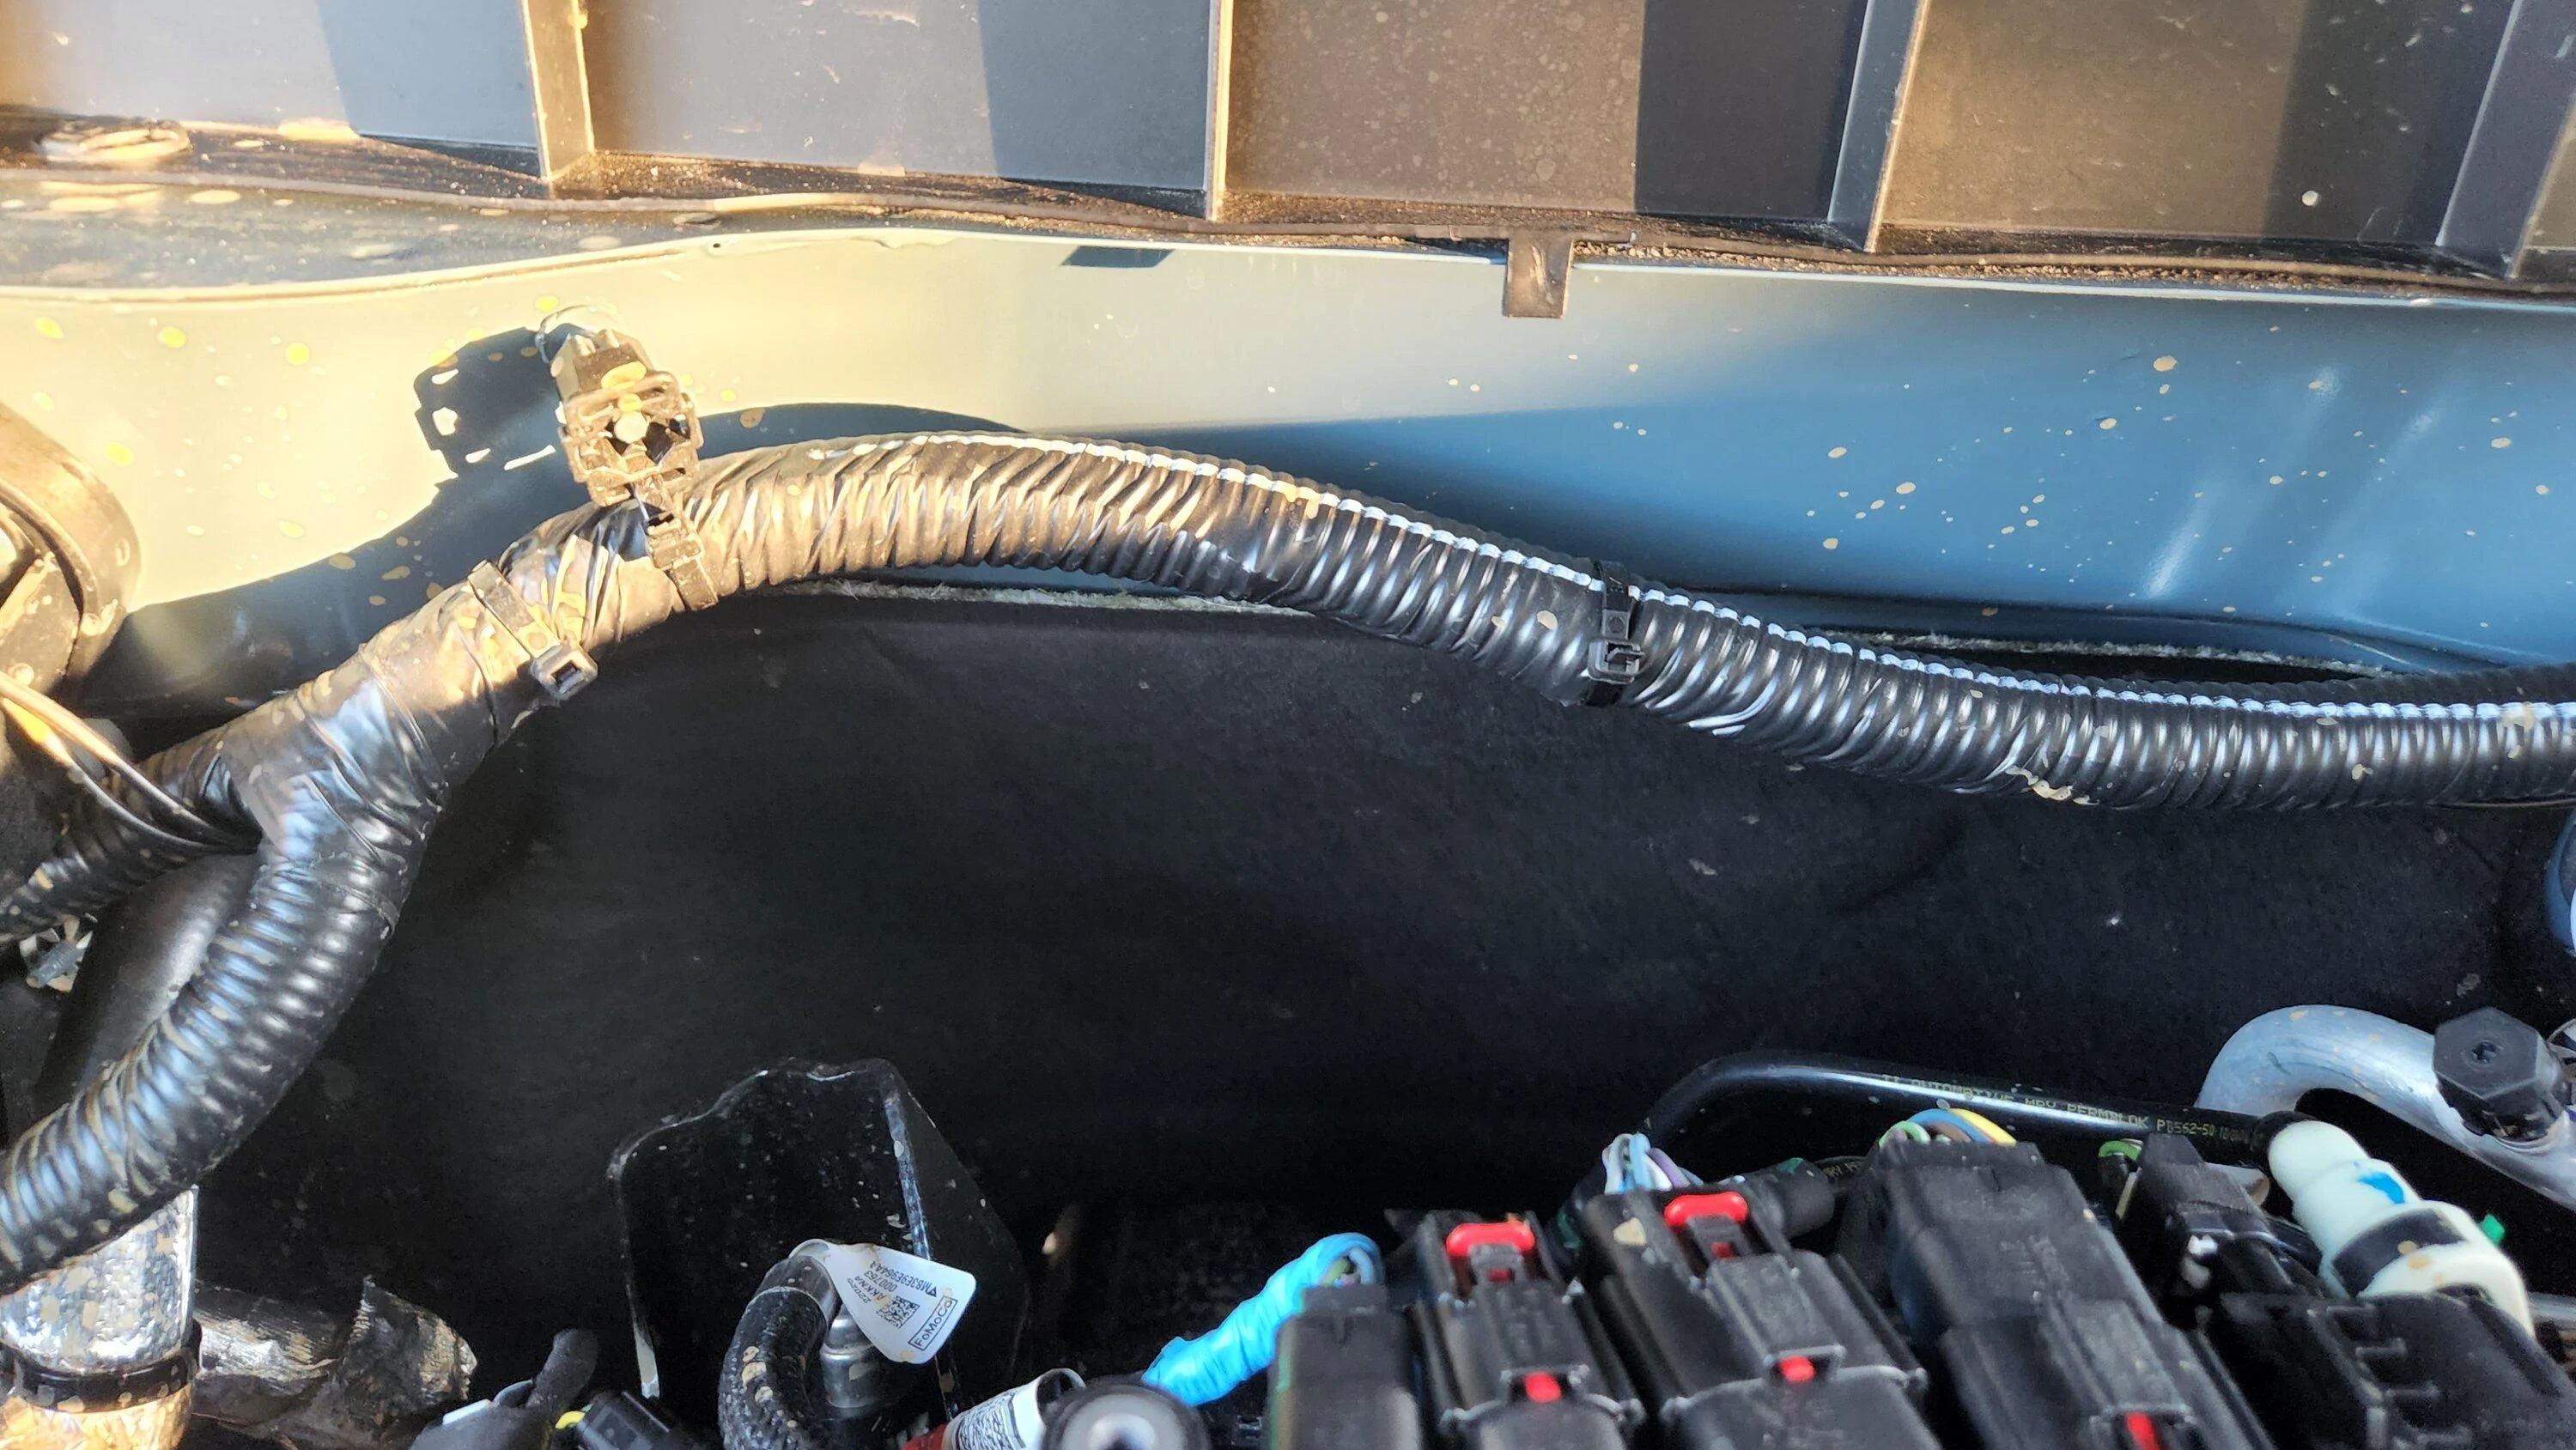
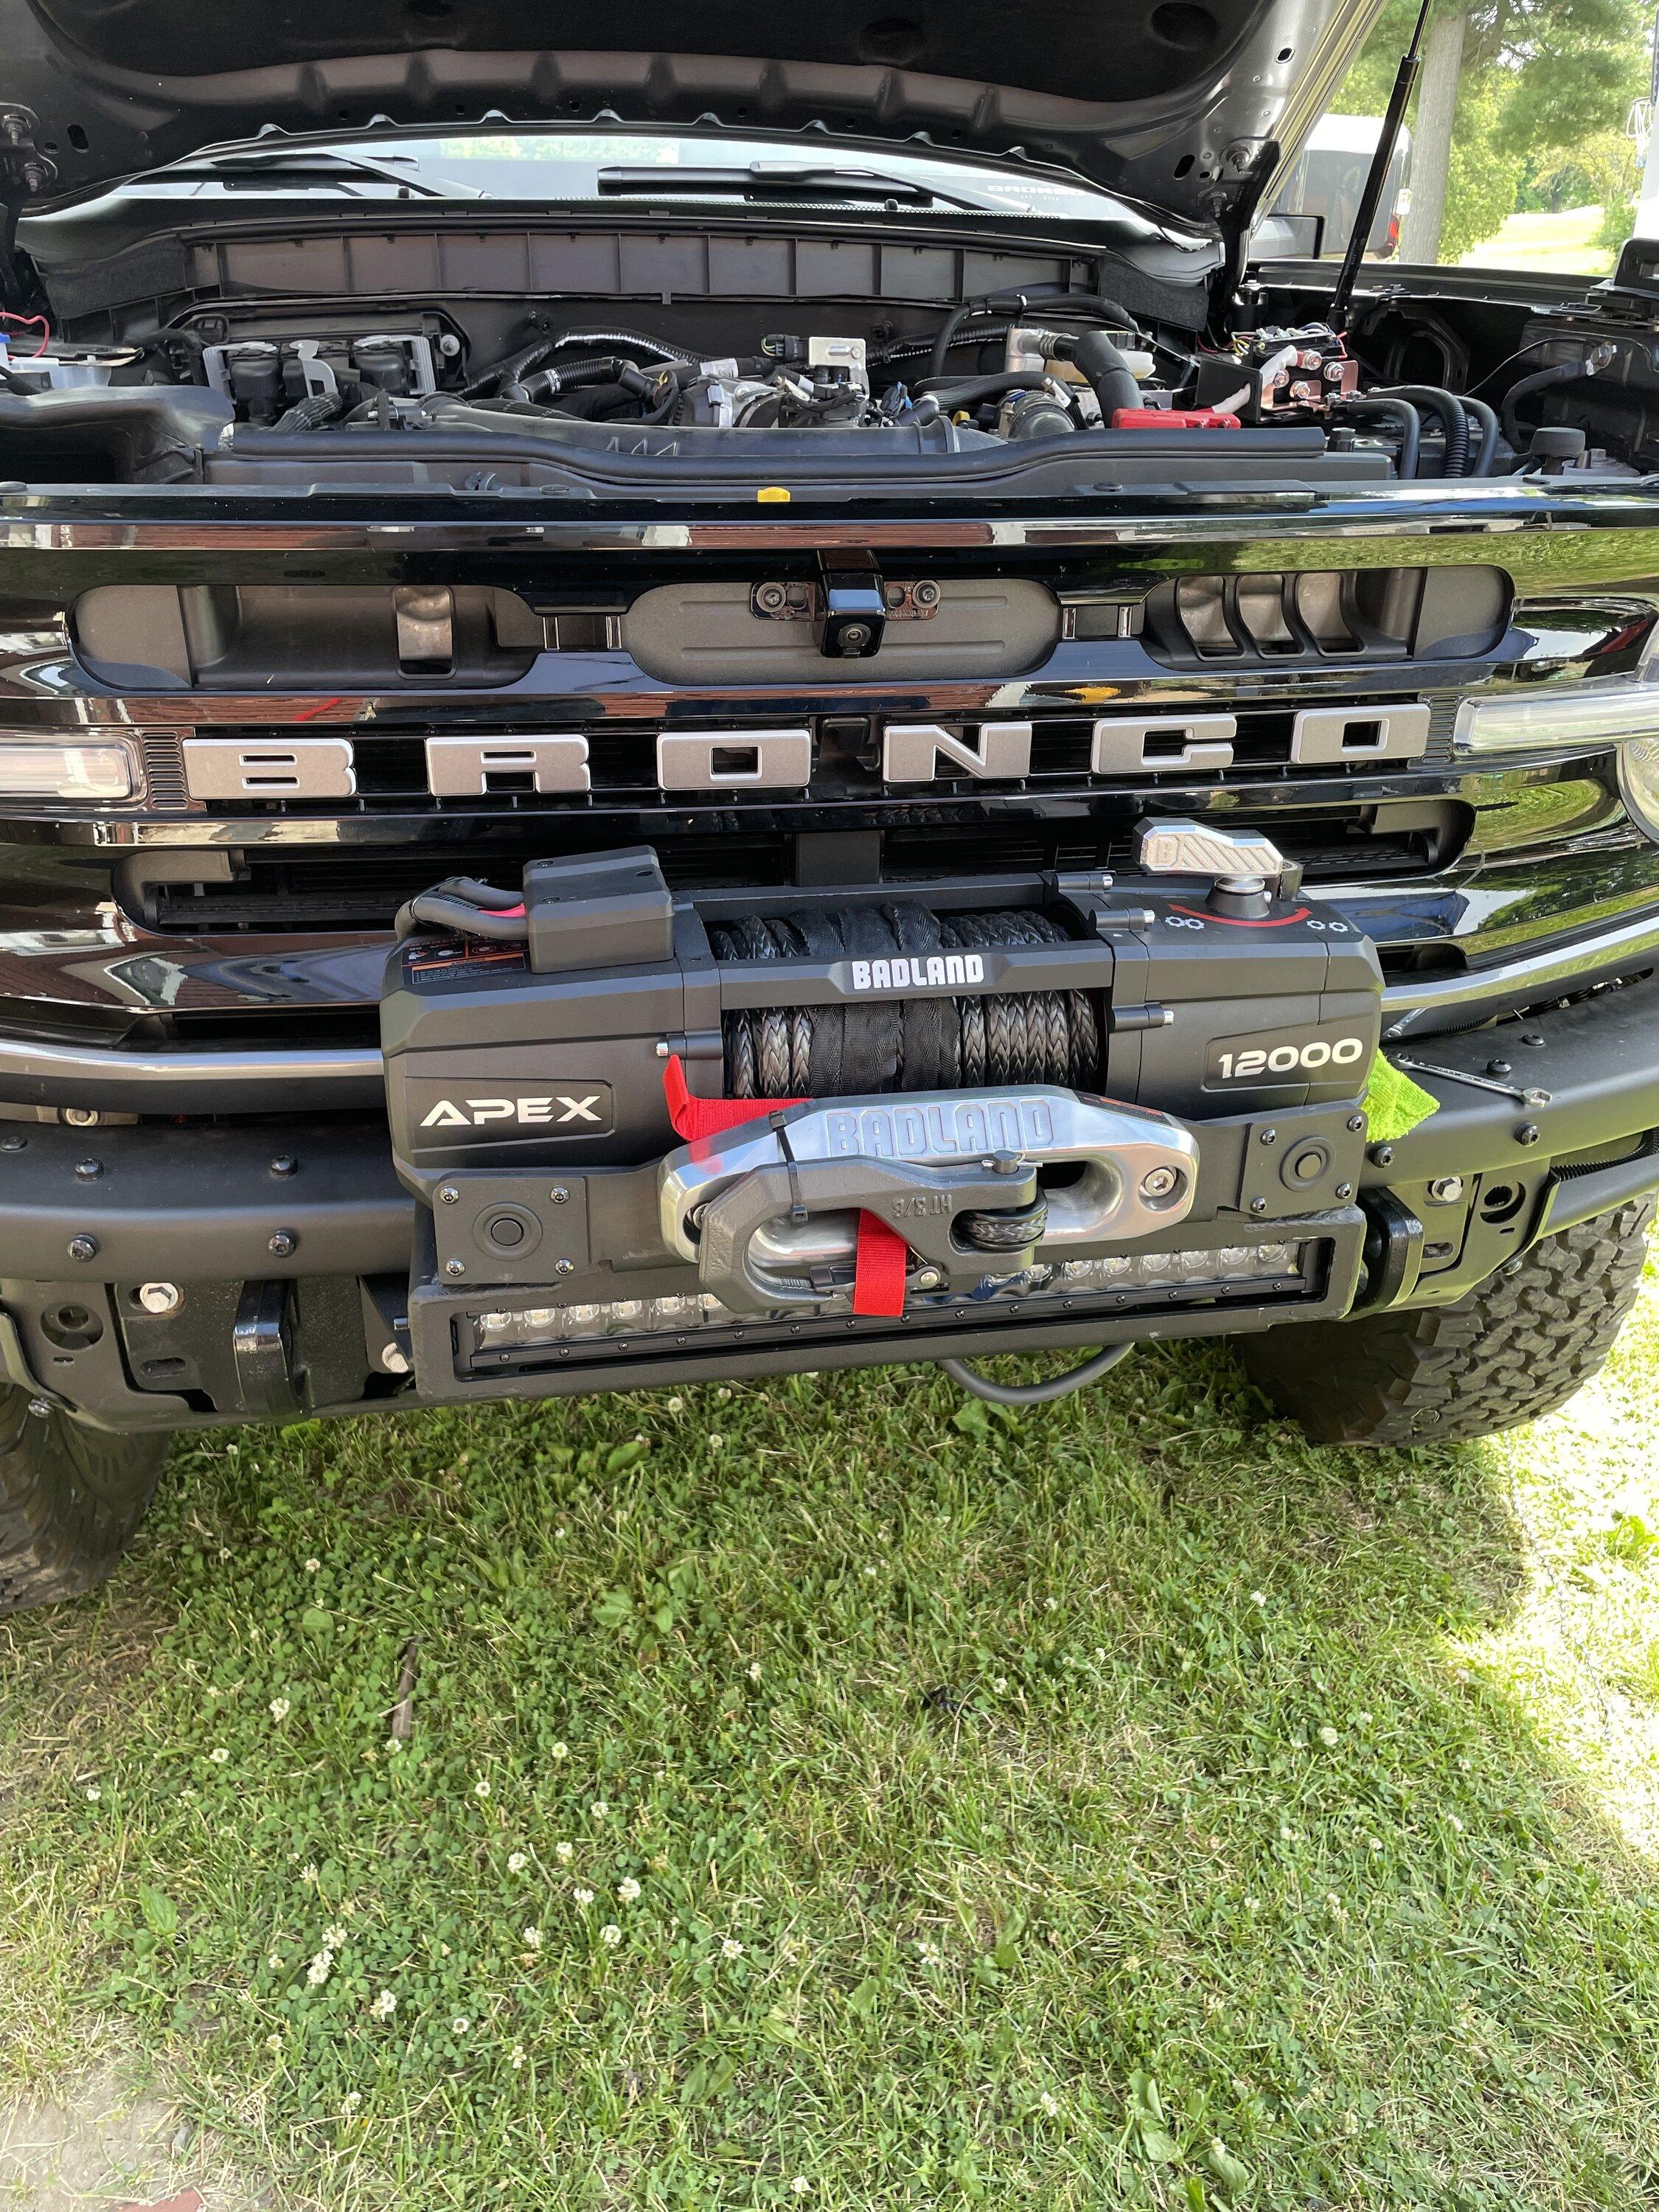
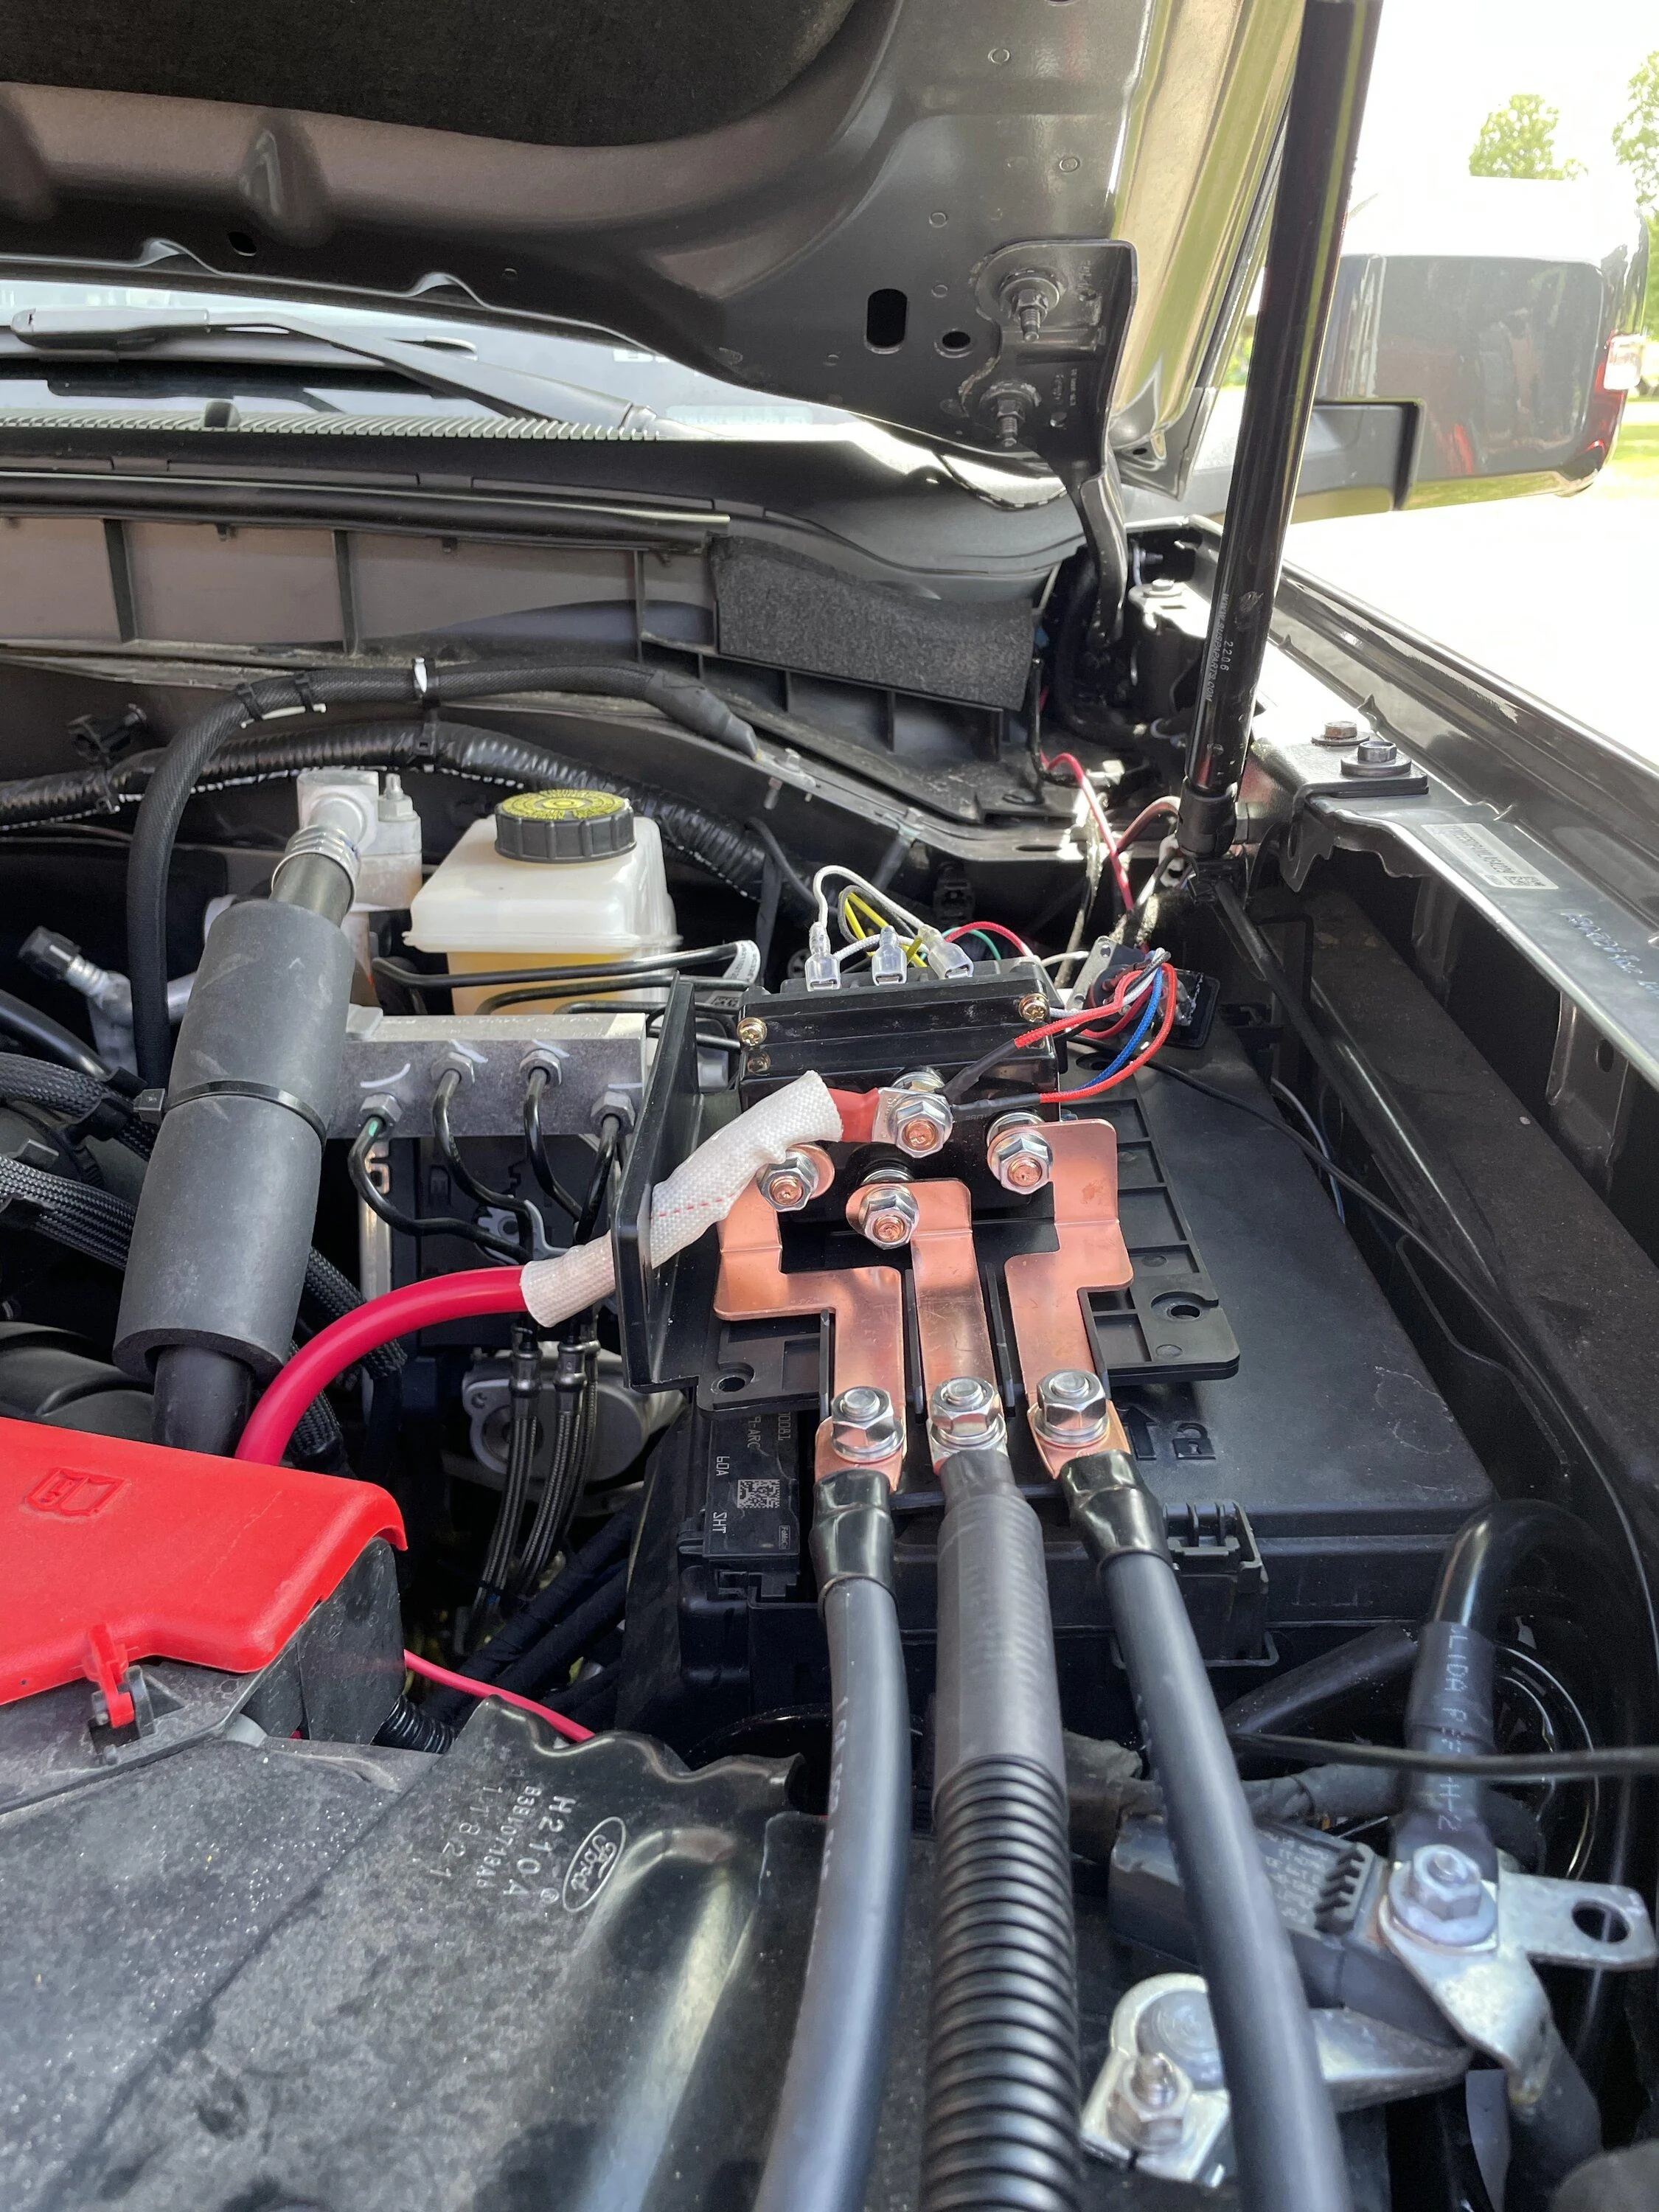
After seeing previous posts and after relocating the camera my free way. I decided I’m going with the control relocate. I went to my local auto value and had them make me some 8’ cables. Ordered a water right project box. Here’s the mock up and wires ran. I’ll unhook the positive lead until the box comes in. I still have to trim the plastic trim parts, and get some more chafe protection on the wires.
Ford Bronco Rough country winch mount unbox/ INSTALL tips. 299EAF85-2CB8-4DAA-B04F-6C320D1E1E36
Ford Bronco Rough country winch mount unbox/ INSTALL tips. 88936BB2-851A-409C-8D64-F09FD86512BD
Sponsored


Top