OK. Now that I have had the top on, adjusted everything, and added my extras let's talk about a few things.
1. Installation
First things first, I did mine in the dark. I had work lights up, and the house outdoor lights on, so we could see. Getting the top off the scaffold was not hard. I will say to unbolt the bottom two bolts with the nuts attached, then have some hold the top, and unbolt the left top. My top did not fall off, but it did move a little. So that's just a precaution.
We positioned the top when it came off to orientate the direction for the Bronco. Had my smallest guy get in, and I and the other guy supported the back, and one more person to help walk it up. The guy inside took the front and we lifted it up over and were ready to set it down. A few things:
A. Get the red tape off before you get all the way forward. (did this)
B. When placing the top, try to get the front in and down, then lower the back onto the studs. It is hard to see the studs from the outside holding so have a spotter.
C. Do not freak out if the front rubber has some exposure. I will line up once the bolts are in.
Once we got the top in the correct position, I did a few things a bit differently. The top sits on but was not fully down due to the seals. The rear forward bolt was in position, but the top seemed to sit up higher on this side. adjust, adjust,, did not seem to change it. May have been the way my frame was? So I used a thinner washer, got the nut on the bolt, cranked it down, let it set while I adjusted other things, came back took the nut off, and everything was fitted. Now I was able to use the black washers they wanted from the kit. The front bolts went in without a hitch, I did the driver outside, then the passenger, and worked my way to the middle. They supply you with Loctite, (nice) though I purchased a bottle for this.
For the rear section, I used the Rockworx I had purchased and bolted down. The panels that go on top, place the rear, then the front. Note, for me, the panels did not just drop into place. Not sure why, but had to move them, and get them in there correctly. Even in the morning, I found the front one was not on correctly. Perhaps it was the light or something, but I was easily able to unlatch and drop it on correctly. My latches were not too bad but I had to adjust most of them once it was all on.
2. Post installation
A few things of note for those who may have some of these accessories.
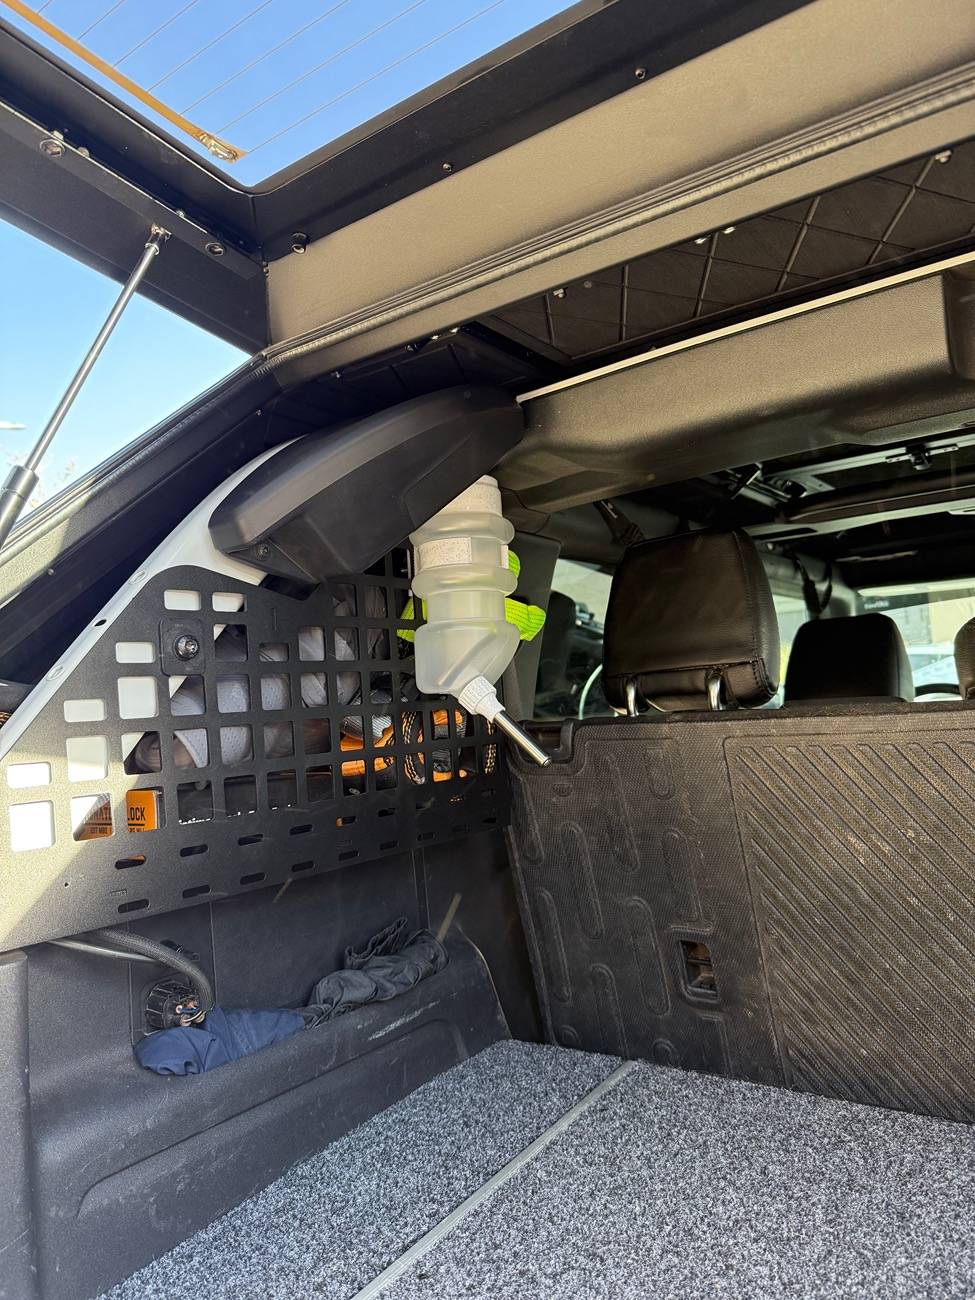
1. Overhead DV8 molle panel/Cross Bar: You will need to remove the overhead section to get this top on. The two inner front screws for the top will not be accessible with this one. The crossbar...well Fabion had told me I needed to cut a part off the bar, that overlapped into the plastic. (It's like a piece that slots into the frame) I did not need to do this. The top sat down just outside of this, and it did not interfere. So no cutting. The overhead section will be a pain to put back on if you have big hands. I was able to hold the nut in place with a finger whie I got the screw in. (Yes it was a pain, but it got done) So just a heads up on that.
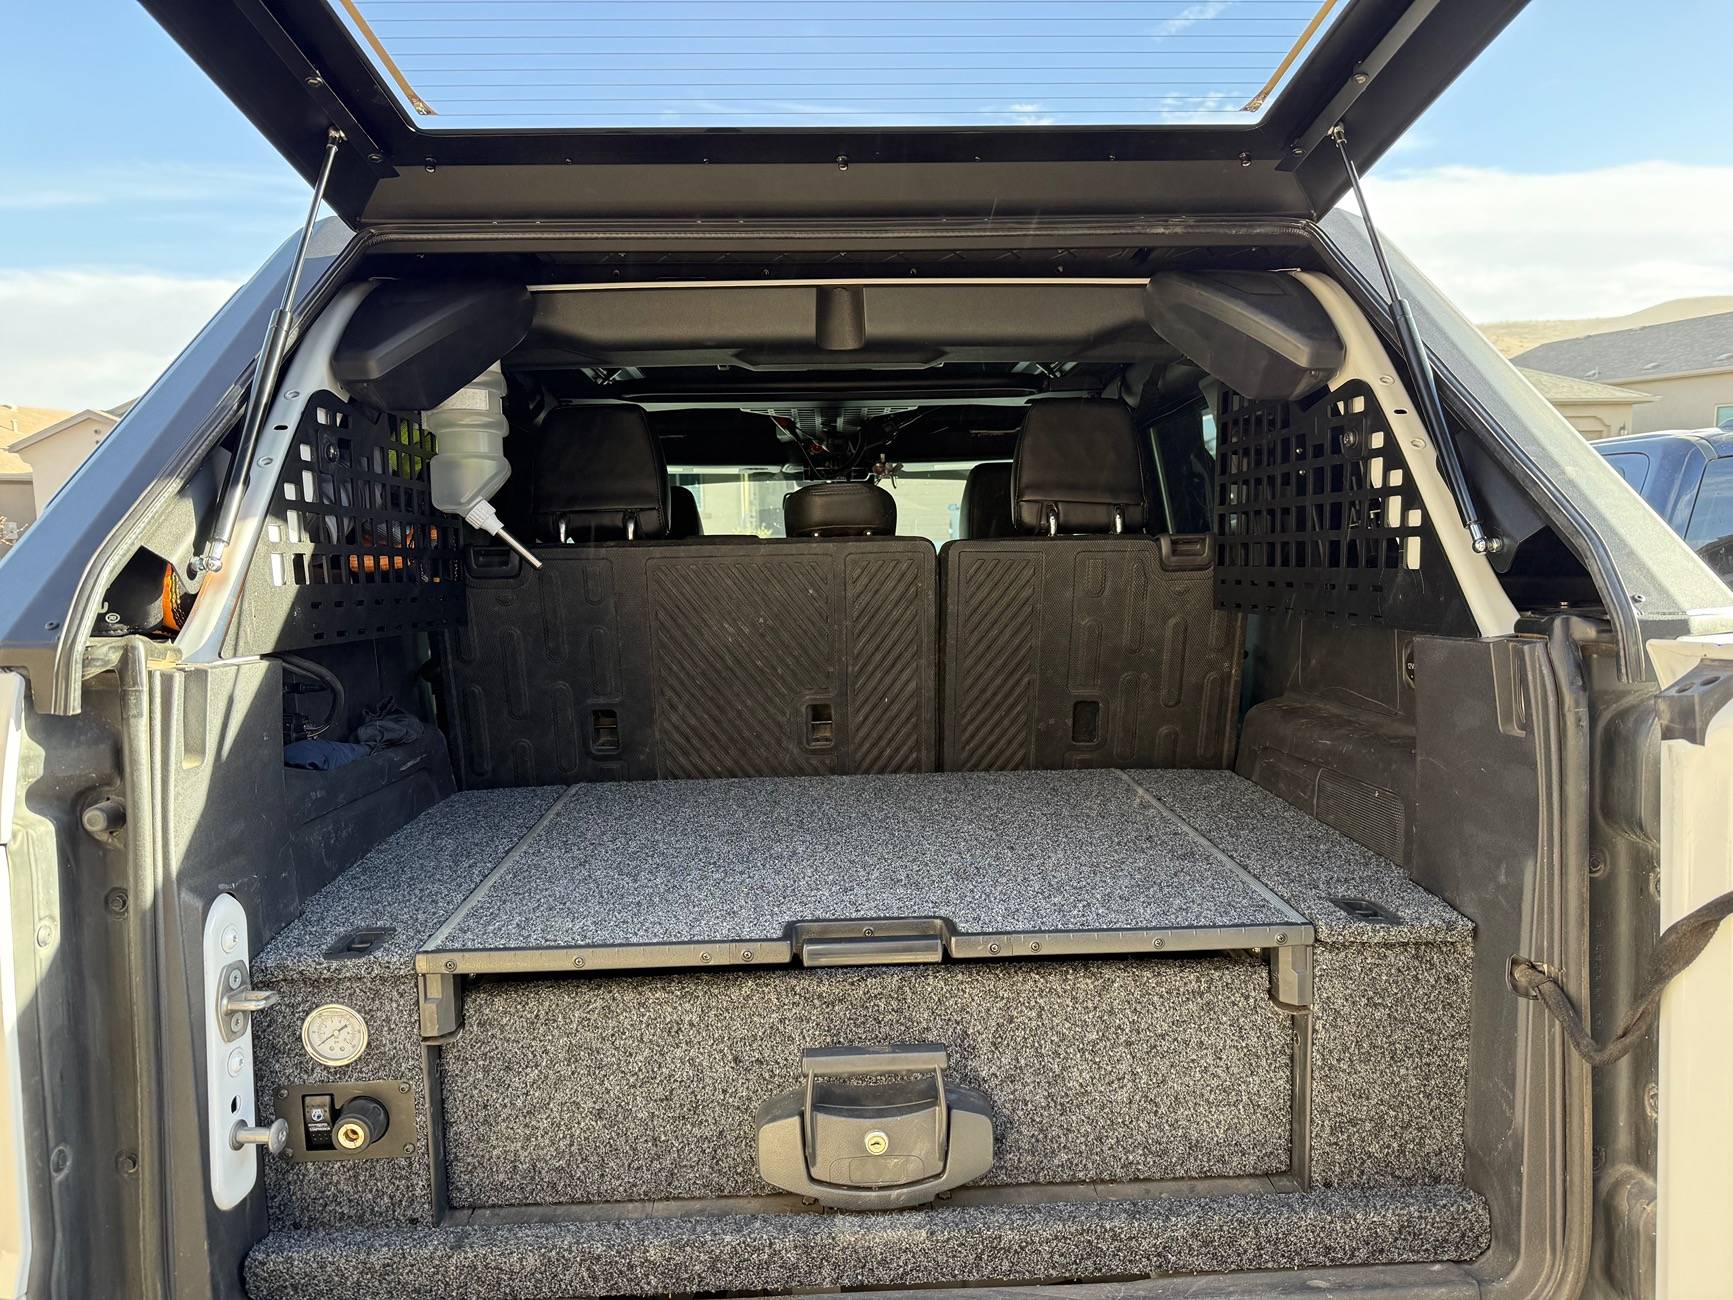
2. DV8 Rear Pocket Molle. No problems, worked fine. Just note that they call for a T50, and it's not. It's a T45 for the seatbelt bolt. The RockWorx works just fine with their molle, and you can still use the strap mounts. (Honestly, I bought these a WHILE ago, and I was going to use them dammit! Plus they look cool.)
3. My impressions.
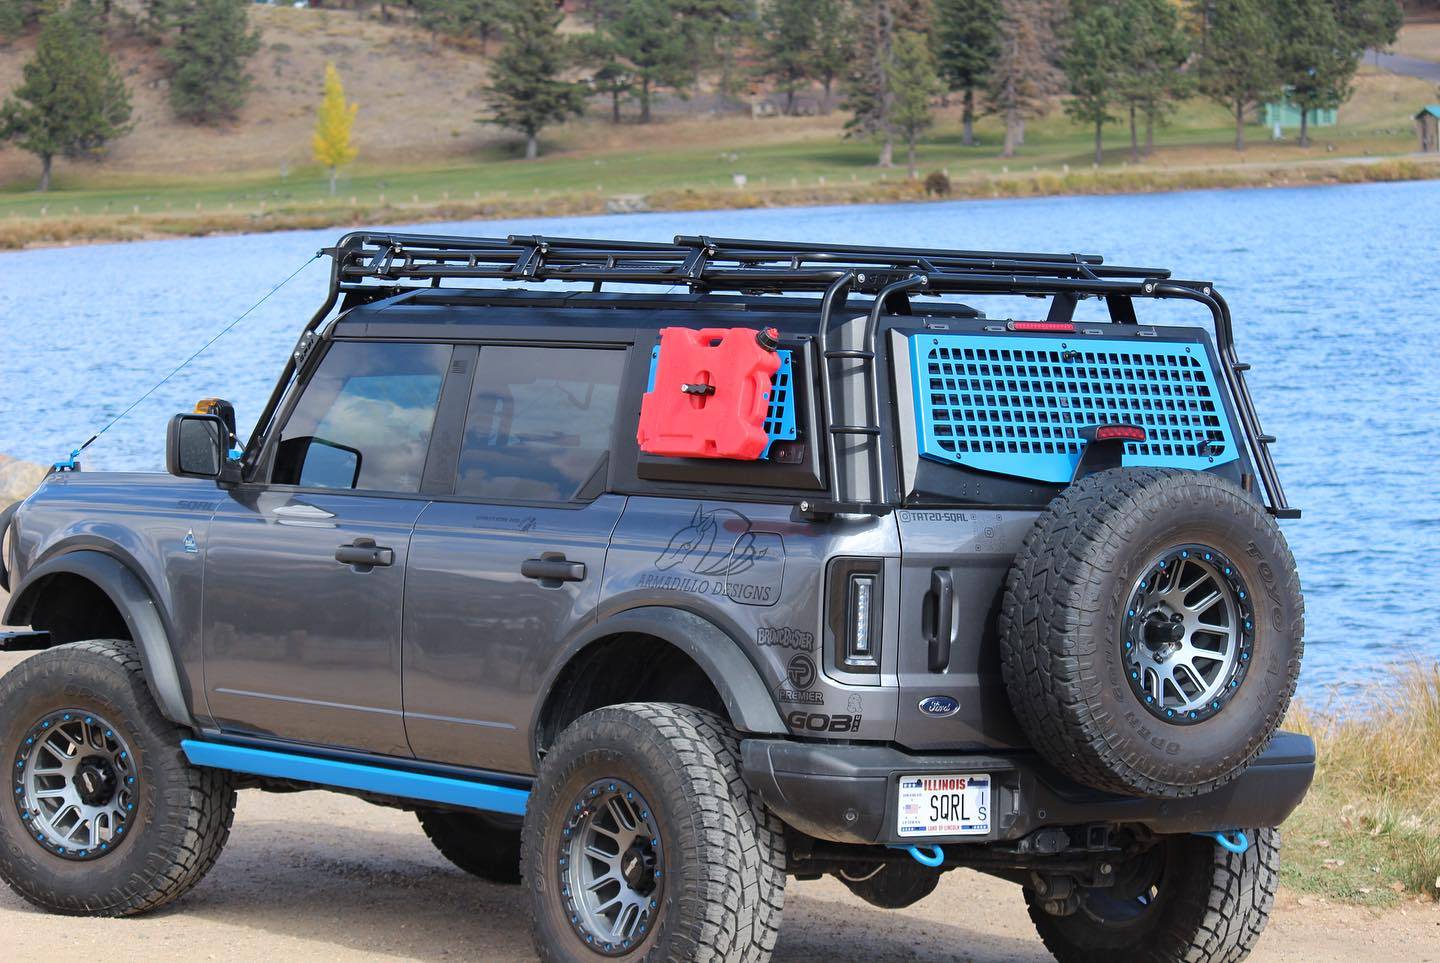
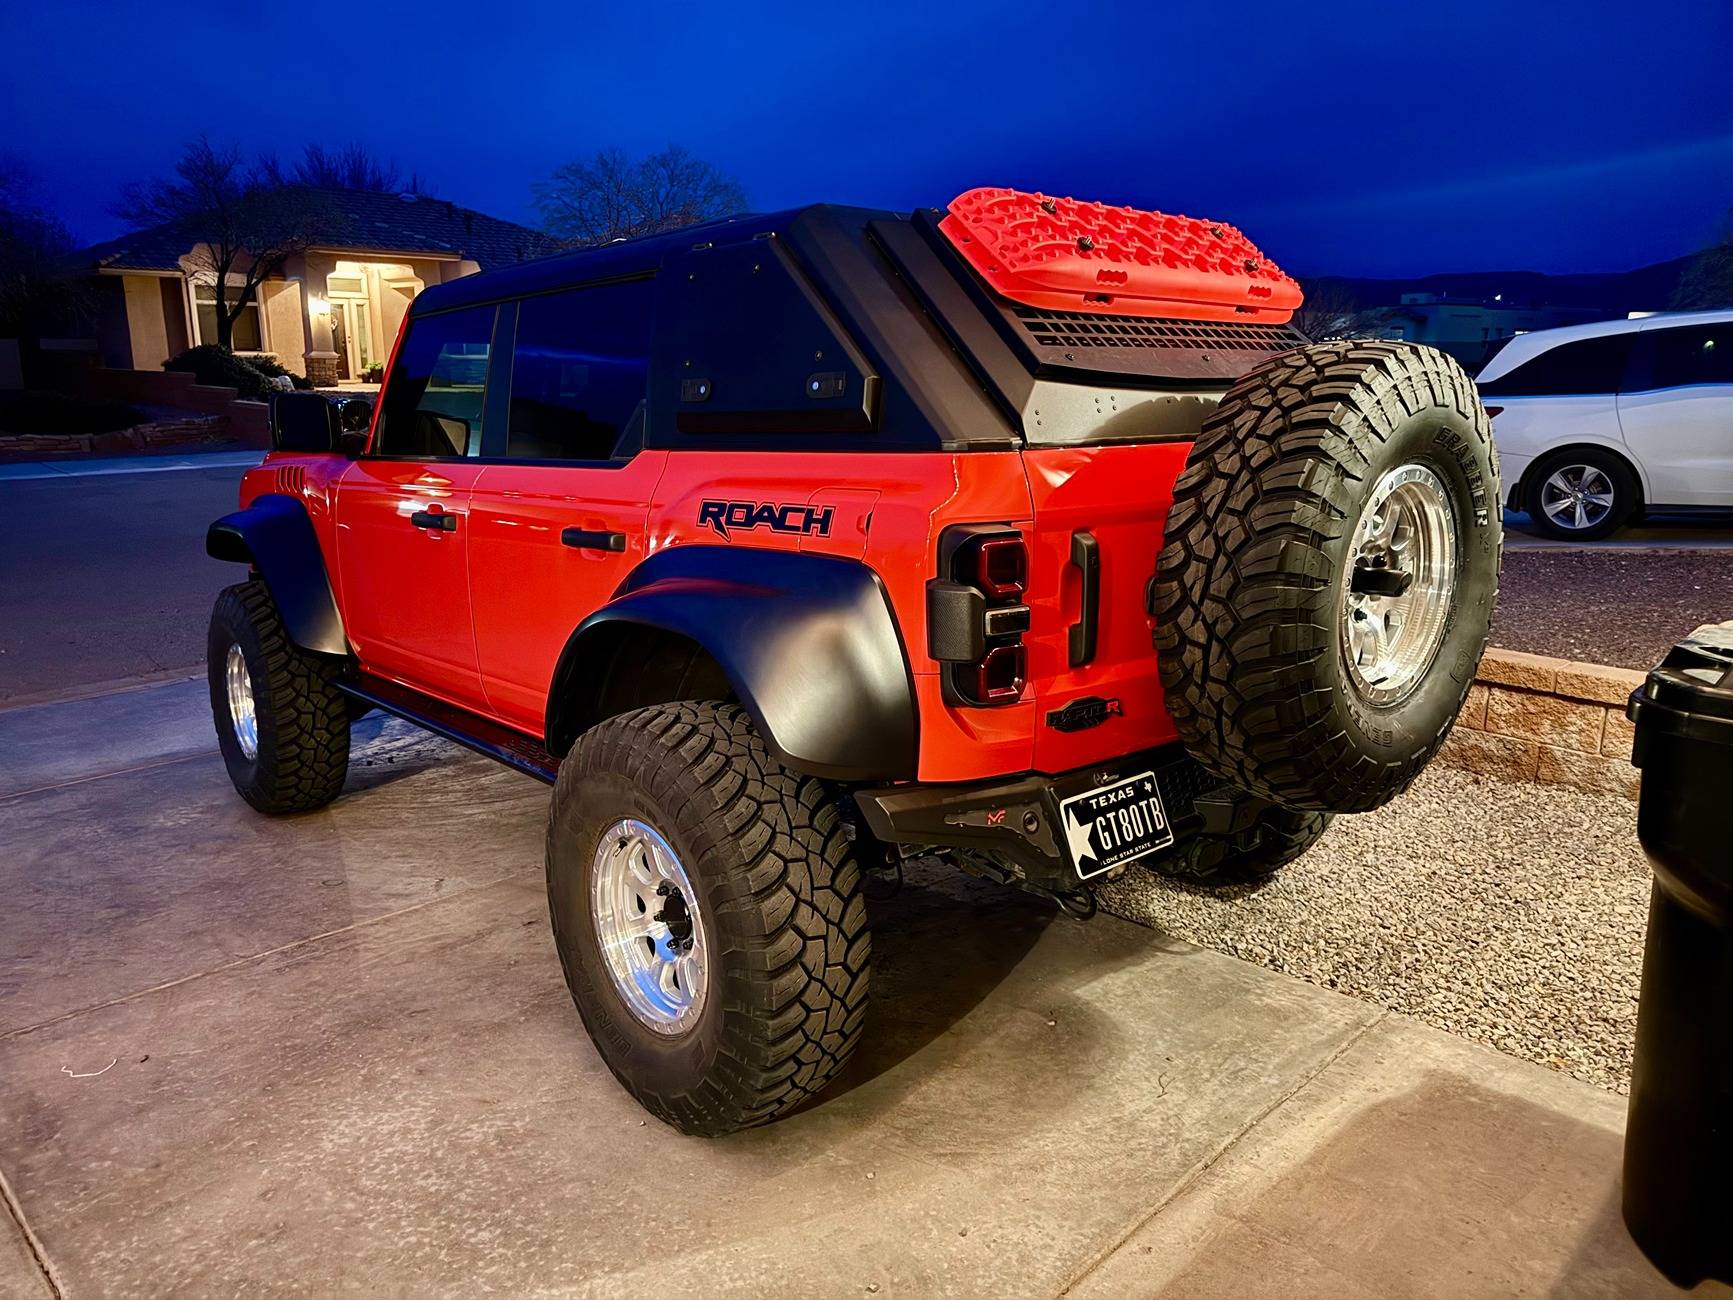
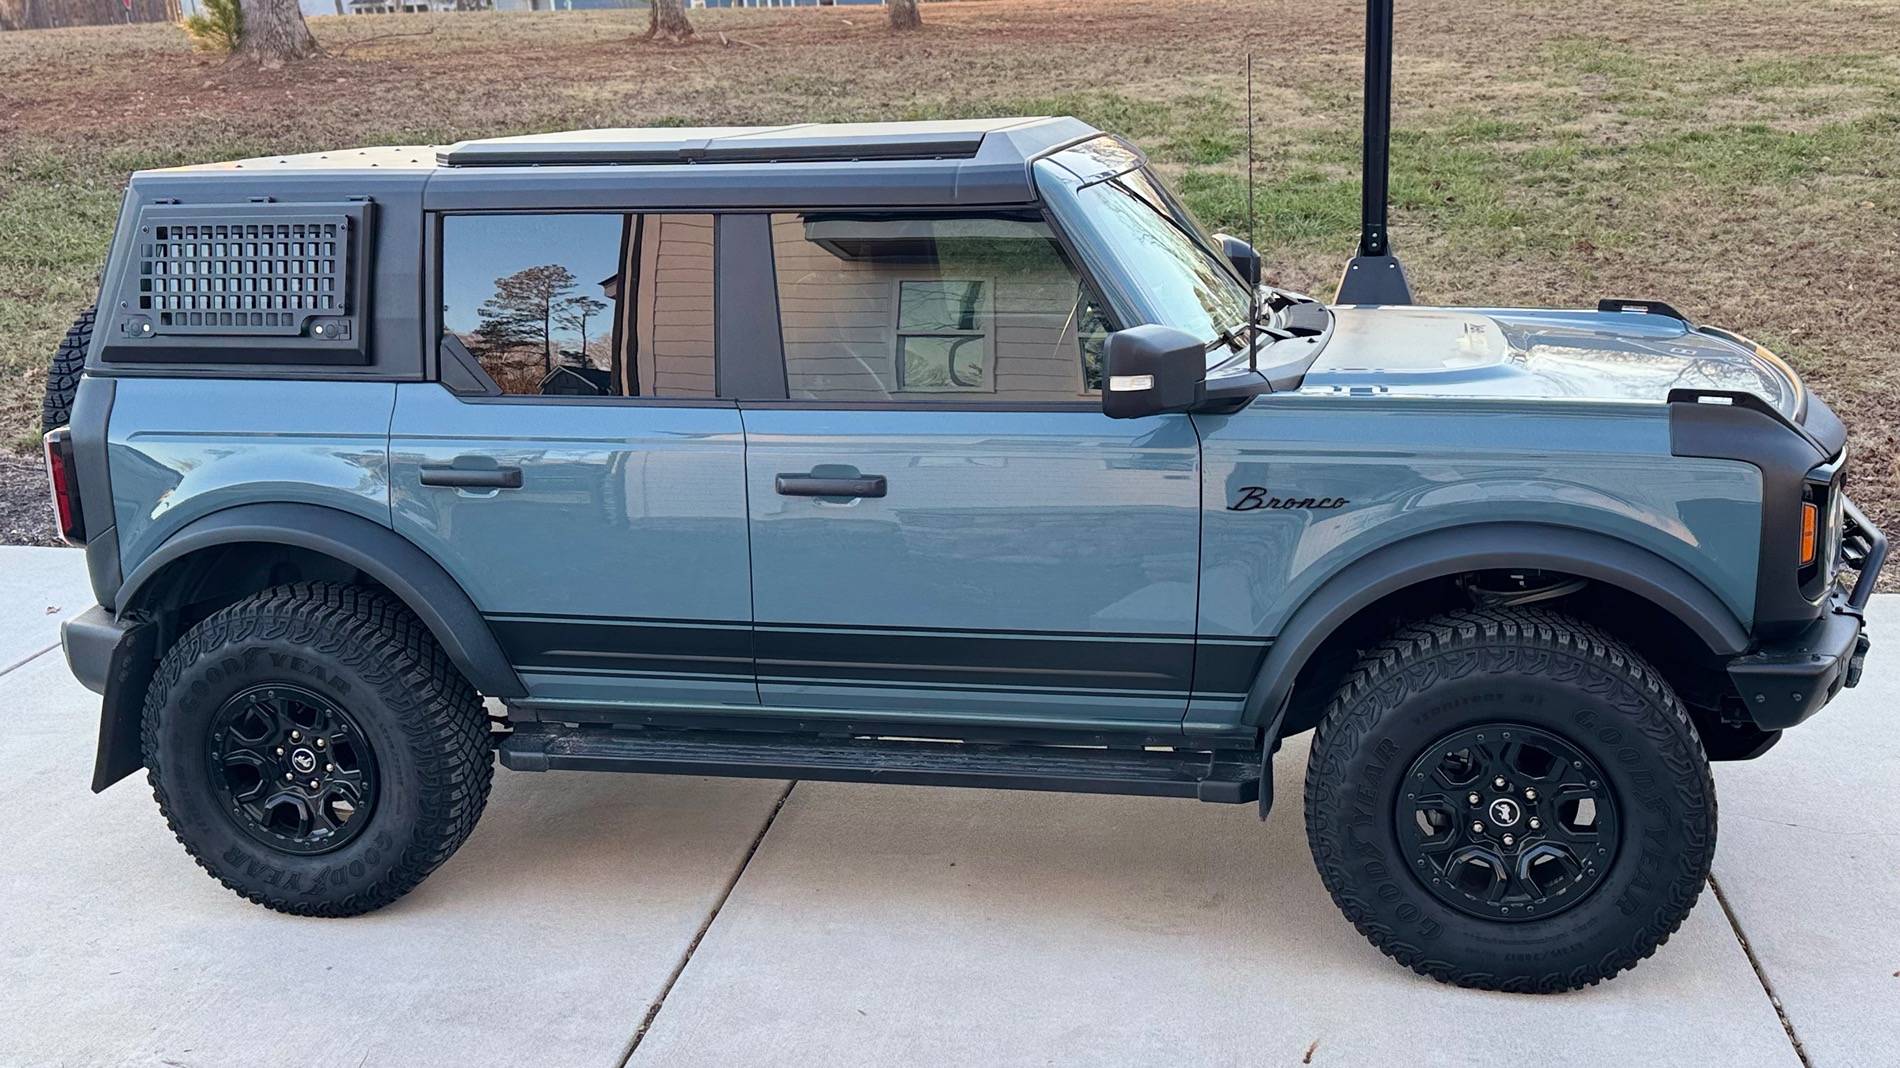
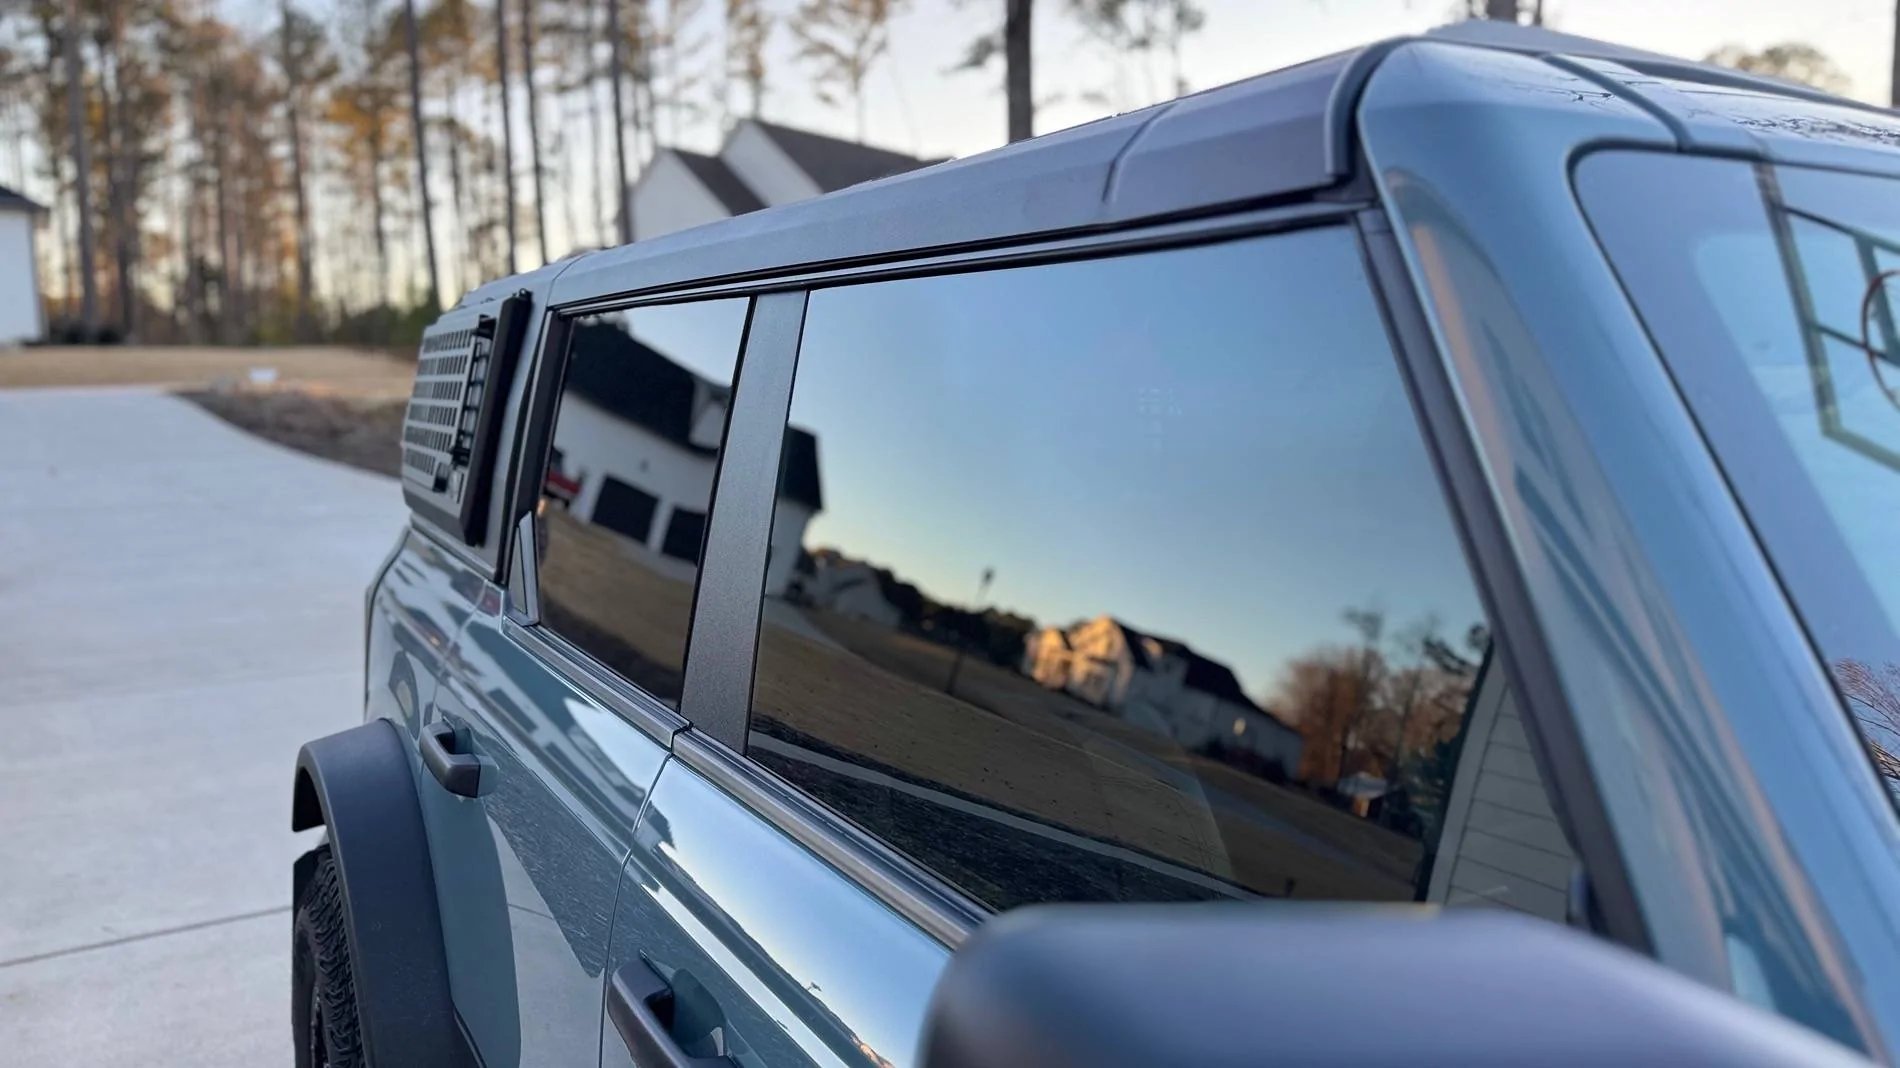
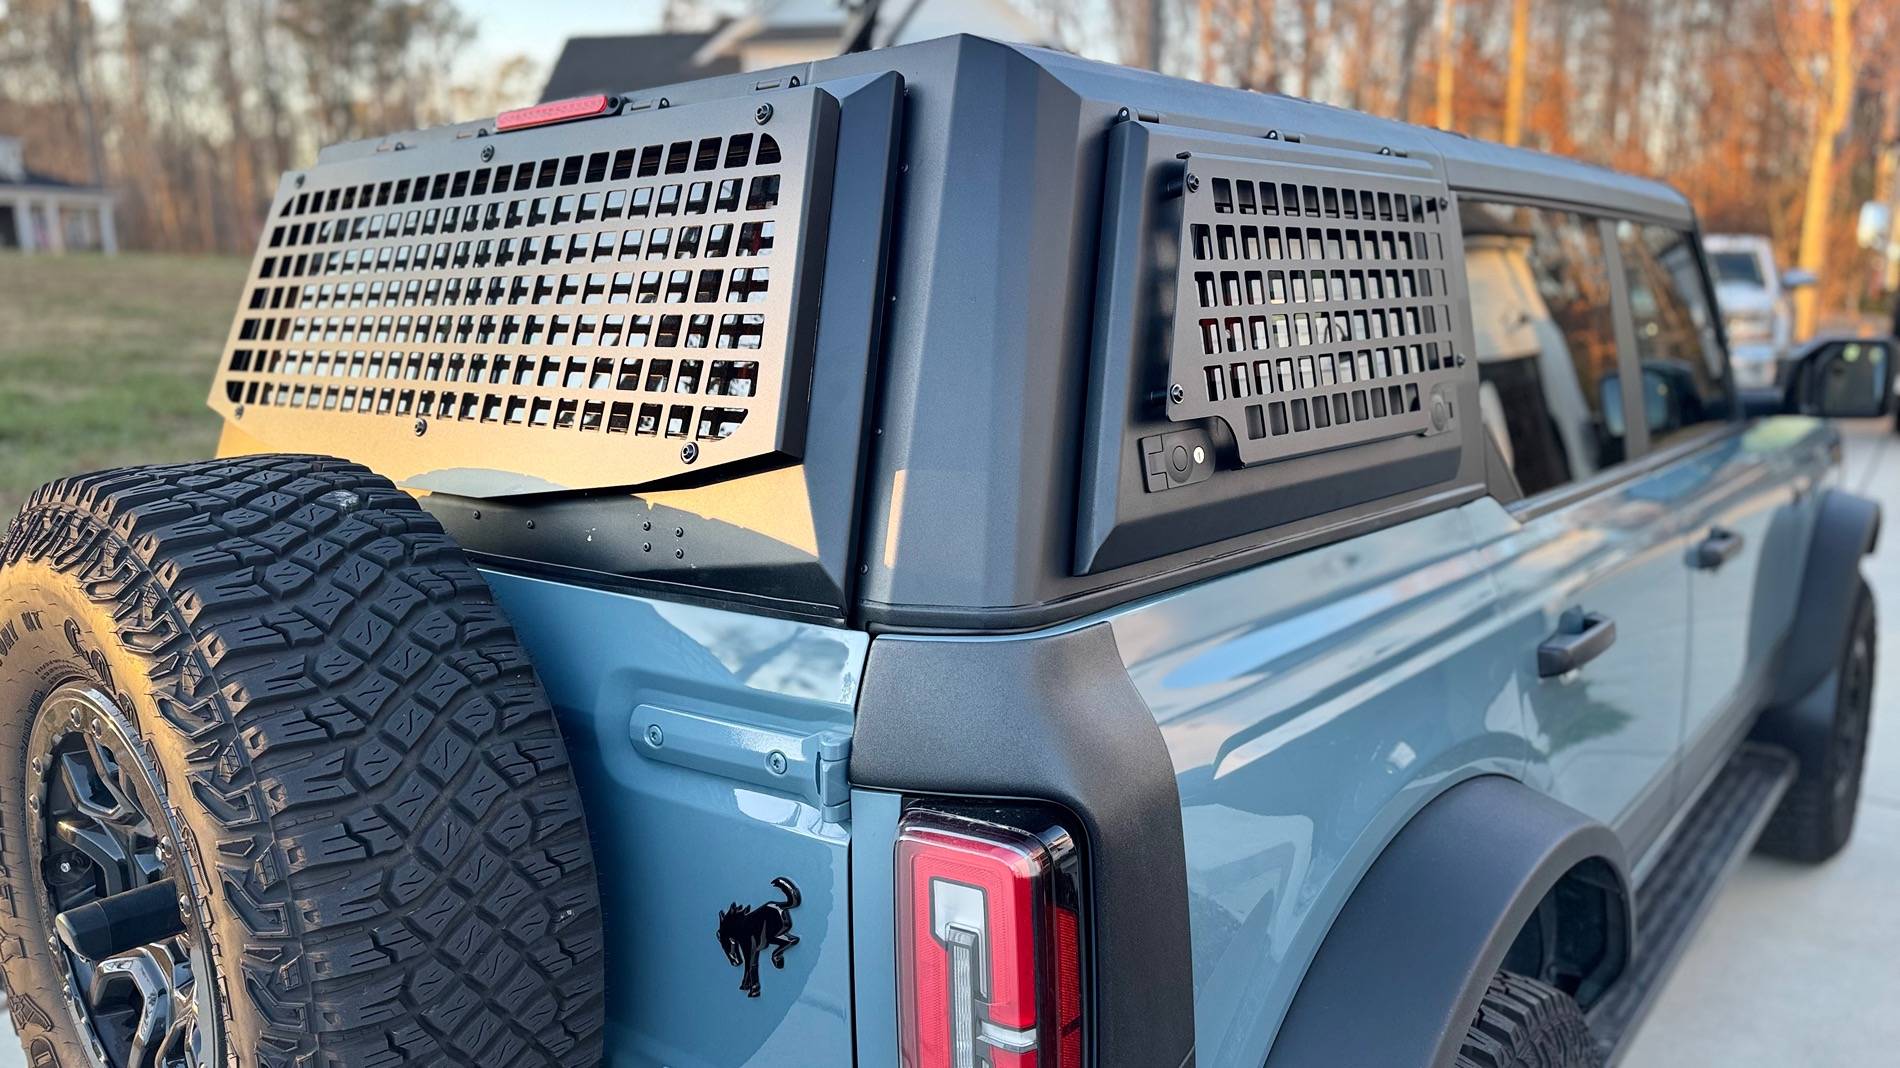
I am impressed. The ride is much more quieter. The noise I hear now is from my tires. I have a little wind noise from the lightbar, but it is not as loud as it was before. With the top, and my cross-brace, I have zero squeaks or rattles. Before I had them, now there is none. It's solid. I will be going to the trails in Ocala on the 18th~19th of this month so I will see how it does there. The material that was used for the sound deadening is nice. Also, it was put in all over and laid out nicely. The colour options make it stand out. The people who have seen it like the way the orange is just not in the diamond pattern but is in the other parts of the molding all inside the top. The exterior molle panels are also very nice. A lot more rugged than I thought, the rear panel is just not sitting on the glass, it encloses the glass. The gaps are all sealed. So it's like a cover.
4. Last thoughts.
With everything about how this top was conceived and everything that changed, I think it was for the better. Now did it take a long time to come? Yes. Was it delayed? Yes. Did they keep me in the loop? Yes. Was I informed? Yes. Full disclosure, I have Fabions personal number. No I am not his best bud, or hang out buddy, I received it early on in the process so I could be informed of things.
I bought this top when it was still in the very early stages, and I knew things would well, be delayed and not go as plan. I myself am an Engineer, I understand how what's on paper, and mocks ups always do not commit to the physical model. I had faith though that they would come through, I added my opinion when asked of it, and let the process happen.
Will the tops come faster now? I think so. As with all things, they too are starting to refine the process. Now that have had success with installs both inside the shop and shipped to people, I believe the order to finish will become more manageable, and people will get their tops quicker.
This top I would dare say, is the best on the market. The construction, build, material, well it's going to last. Easily will last the life of the vehicle. It will be interesting to see what other things Armadillo Designs comes up with. It is always nice to have a new innovator in the market. It keeps things fresh and new and only helps excel that market for the vehicle.
I wish them all the success in their endeavors, and I hope they continue to have fun doing it. Because why do something you dislike?
1. Installation
First things first, I did mine in the dark. I had work lights up, and the house outdoor lights on, so we could see. Getting the top off the scaffold was not hard. I will say to unbolt the bottom two bolts with the nuts attached, then have some hold the top, and unbolt the left top. My top did not fall off, but it did move a little. So that's just a precaution.
We positioned the top when it came off to orientate the direction for the Bronco. Had my smallest guy get in, and I and the other guy supported the back, and one more person to help walk it up. The guy inside took the front and we lifted it up over and were ready to set it down. A few things:
A. Get the red tape off before you get all the way forward. (did this)
B. When placing the top, try to get the front in and down, then lower the back onto the studs. It is hard to see the studs from the outside holding so have a spotter.
C. Do not freak out if the front rubber has some exposure. I will line up once the bolts are in.
Once we got the top in the correct position, I did a few things a bit differently. The top sits on but was not fully down due to the seals. The rear forward bolt was in position, but the top seemed to sit up higher on this side. adjust, adjust,, did not seem to change it. May have been the way my frame was? So I used a thinner washer, got the nut on the bolt, cranked it down, let it set while I adjusted other things, came back took the nut off, and everything was fitted. Now I was able to use the black washers they wanted from the kit. The front bolts went in without a hitch, I did the driver outside, then the passenger, and worked my way to the middle. They supply you with Loctite, (nice) though I purchased a bottle for this.
For the rear section, I used the Rockworx I had purchased and bolted down. The panels that go on top, place the rear, then the front. Note, for me, the panels did not just drop into place. Not sure why, but had to move them, and get them in there correctly. Even in the morning, I found the front one was not on correctly. Perhaps it was the light or something, but I was easily able to unlatch and drop it on correctly. My latches were not too bad but I had to adjust most of them once it was all on.
2. Post installation
A few things of note for those who may have some of these accessories.
1. Overhead DV8 molle panel/Cross Bar: You will need to remove the overhead section to get this top on. The two inner front screws for the top will not be accessible with this one. The crossbar...well Fabion had told me I needed to cut a part off the bar, that overlapped into the plastic. (It's like a piece that slots into the frame) I did not need to do this. The top sat down just outside of this, and it did not interfere. So no cutting. The overhead section will be a pain to put back on if you have big hands. I was able to hold the nut in place with a finger whie I got the screw in. (Yes it was a pain, but it got done) So just a heads up on that.
2. DV8 Rear Pocket Molle. No problems, worked fine. Just note that they call for a T50, and it's not. It's a T45 for the seatbelt bolt. The RockWorx works just fine with their molle, and you can still use the strap mounts. (Honestly, I bought these a WHILE ago, and I was going to use them dammit! Plus they look cool.)
3. My impressions.
I am impressed. The ride is much more quieter. The noise I hear now is from my tires. I have a little wind noise from the lightbar, but it is not as loud as it was before. With the top, and my cross-brace, I have zero squeaks or rattles. Before I had them, now there is none. It's solid. I will be going to the trails in Ocala on the 18th~19th of this month so I will see how it does there. The material that was used for the sound deadening is nice. Also, it was put in all over and laid out nicely. The colour options make it stand out. The people who have seen it like the way the orange is just not in the diamond pattern but is in the other parts of the molding all inside the top. The exterior molle panels are also very nice. A lot more rugged than I thought, the rear panel is just not sitting on the glass, it encloses the glass. The gaps are all sealed. So it's like a cover.
4. Last thoughts.
With everything about how this top was conceived and everything that changed, I think it was for the better. Now did it take a long time to come? Yes. Was it delayed? Yes. Did they keep me in the loop? Yes. Was I informed? Yes. Full disclosure, I have Fabions personal number. No I am not his best bud, or hang out buddy, I received it early on in the process so I could be informed of things.
I bought this top when it was still in the very early stages, and I knew things would well, be delayed and not go as plan. I myself am an Engineer, I understand how what's on paper, and mocks ups always do not commit to the physical model. I had faith though that they would come through, I added my opinion when asked of it, and let the process happen.
Will the tops come faster now? I think so. As with all things, they too are starting to refine the process. Now that have had success with installs both inside the shop and shipped to people, I believe the order to finish will become more manageable, and people will get their tops quicker.
This top I would dare say, is the best on the market. The construction, build, material, well it's going to last. Easily will last the life of the vehicle. It will be interesting to see what other things Armadillo Designs comes up with. It is always nice to have a new innovator in the market. It keeps things fresh and new and only helps excel that market for the vehicle.
I wish them all the success in their endeavors, and I hope they continue to have fun doing it. Because why do something you dislike?
Sponsored


")