- First Name
- Randy
- Joined
- Nov 1, 2023
- Threads
- 2
- Messages
- 553
- Reaction score
- 976
- Location
- Massachusetts
- Vehicle(s)
- Bronco
- Your Bronco Model
- Badlands
Here's a very long thread with lots of people's experiences and suggestions. Take your time and read it.
https://www.bronco6g.com/forum/threads/trailrax-modular-roof-rack-for-your-bronco.40436/page-49
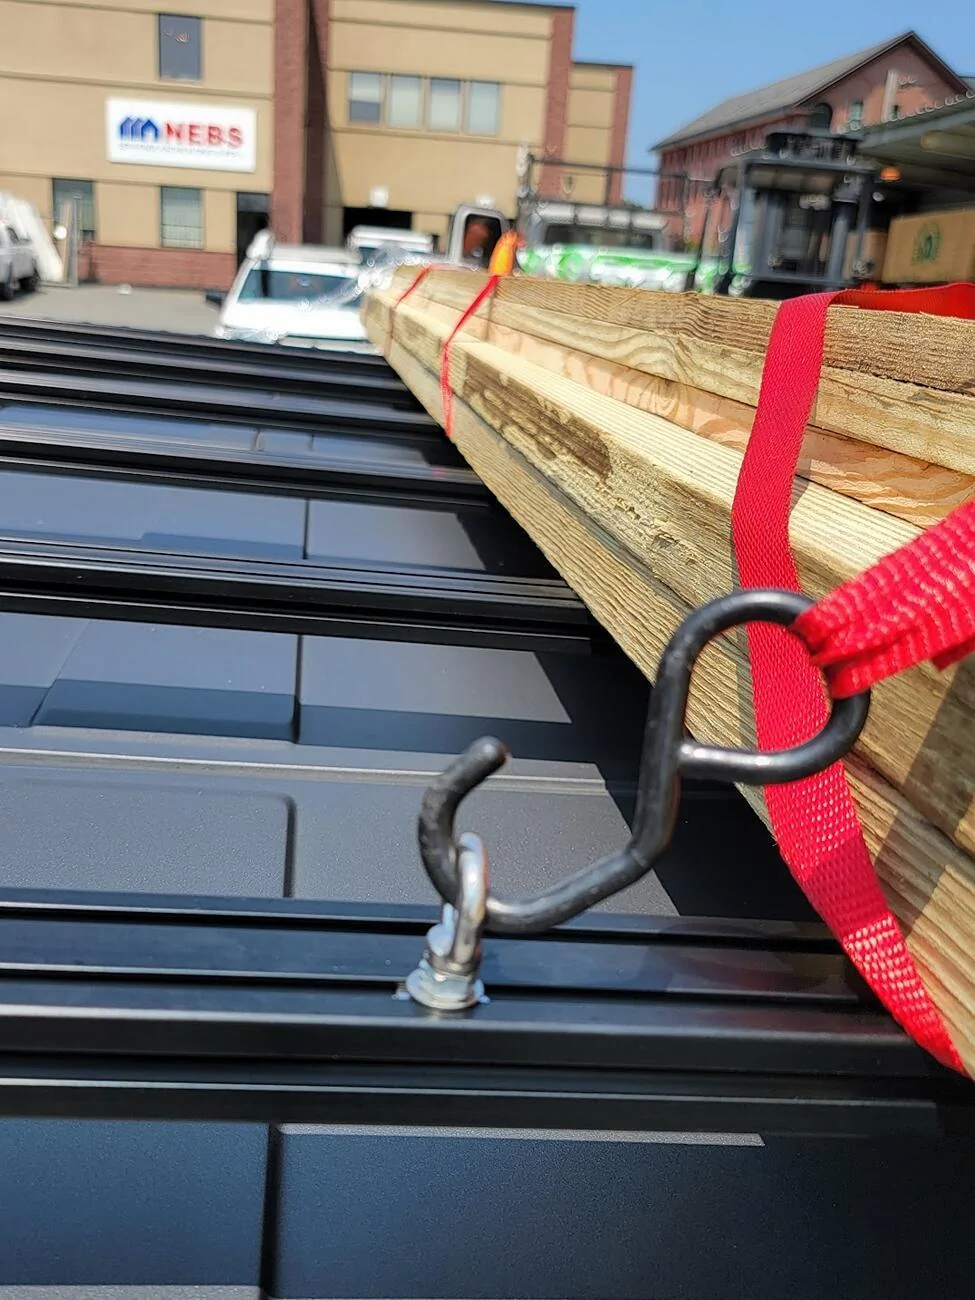
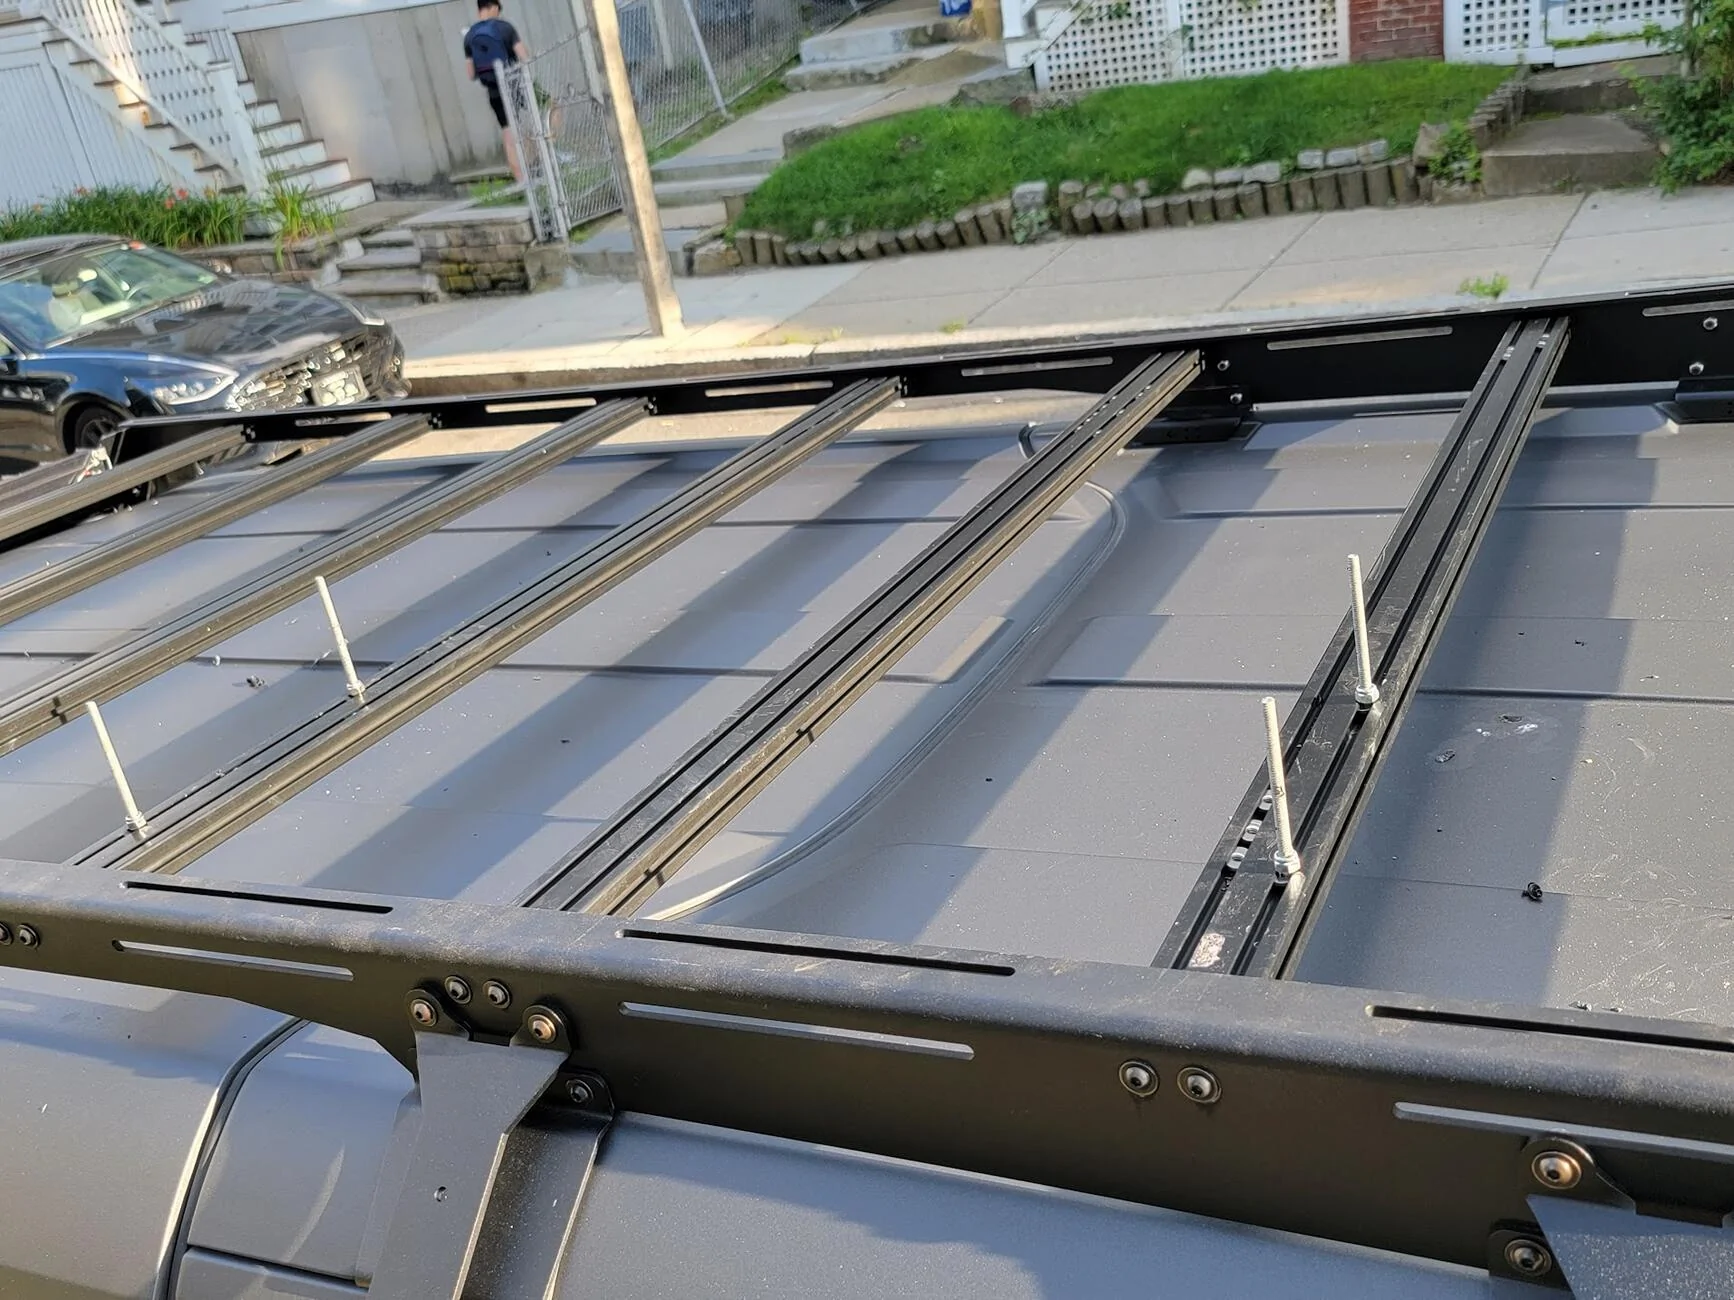
I removed all my crossbars, and slid four 1/4-20 stainless T-nuts into each slot. Then re-assembled the crossbars, and tightened them down. The T-nuts shift this way and that, no problem, and don't rattle (none which I can hear). They're recessed, so never catch on trees, carwash brushes, or anything.
Then I bought an assortment of 1/4-20 fittings: stainless and rubber washers, nuts and rings, and threaded posts of various lengths, etc. keep them in a small organizer washers Now I have a good variety of things I can attach straps, mounting plates, farm jacks, etc. to when I go off road. Then everything comes off and is returned to its proper storage place when I'm back to my daily drive.
Obviously, I don't have a RTT. But I can mount a Thule roof carrier. I removed the M6 fittings, and drilled out 1/2 holes in their place. Then I set up my fixtures as follows:
First, discard any M6 or metric fittings. You've been converted to SAE standard, halleluiah!
A) slide T-nuts (see above) to the approximate location of where the 1/2-holes in my roof carrier are likely to be.
B) screw in (four) 2-3" threaded studs (posts); leave them loose enough so they can slide around.
C) Put a rubber washer on each one.
D) Screw a 1/4-20 stainless washer onto the threaded stud, leaving it loose enough to slide around.
E) Drop the roof carrier onto the four threaded studs. I can do it myself, but two helpers on ladders will make a big difference, as you slide the threaded studs and manipulate the box.
F) Once the box is sitting on the threaded bolts, use a skinny open 1/4" wrench and tighten the nuts down.
6) Inside the box, secure the carrier with 4 wide fender washers and tightened 1/4-20 nuts.
Maybe an arrangement like this will work for your RTT. Be inventive!
I have used fittings like these to load all sorts of cargo, for example strapping lumber down to eye bolts, etc.
Check out that thread. Bet you find your solution somewhere in all those posts!
Edit: I had the same frustration factor with drop-in nuts. Sometimes they pulled out. That's why I went to full-time T-nuts which stay permanently in the crossbar slots.
https://www.bronco6g.com/forum/threads/trailrax-modular-roof-rack-for-your-bronco.40436/page-49
I removed all my crossbars, and slid four 1/4-20 stainless T-nuts into each slot. Then re-assembled the crossbars, and tightened them down. The T-nuts shift this way and that, no problem, and don't rattle (none which I can hear). They're recessed, so never catch on trees, carwash brushes, or anything.
Then I bought an assortment of 1/4-20 fittings: stainless and rubber washers, nuts and rings, and threaded posts of various lengths, etc. keep them in a small organizer washers Now I have a good variety of things I can attach straps, mounting plates, farm jacks, etc. to when I go off road. Then everything comes off and is returned to its proper storage place when I'm back to my daily drive.
Obviously, I don't have a RTT. But I can mount a Thule roof carrier. I removed the M6 fittings, and drilled out 1/2 holes in their place. Then I set up my fixtures as follows:
First, discard any M6 or metric fittings. You've been converted to SAE standard, halleluiah!
A) slide T-nuts (see above) to the approximate location of where the 1/2-holes in my roof carrier are likely to be.
B) screw in (four) 2-3" threaded studs (posts); leave them loose enough so they can slide around.
C) Put a rubber washer on each one.
D) Screw a 1/4-20 stainless washer onto the threaded stud, leaving it loose enough to slide around.
E) Drop the roof carrier onto the four threaded studs. I can do it myself, but two helpers on ladders will make a big difference, as you slide the threaded studs and manipulate the box.
F) Once the box is sitting on the threaded bolts, use a skinny open 1/4" wrench and tighten the nuts down.
6) Inside the box, secure the carrier with 4 wide fender washers and tightened 1/4-20 nuts.
Maybe an arrangement like this will work for your RTT. Be inventive!
I have used fittings like these to load all sorts of cargo, for example strapping lumber down to eye bolts, etc.
Check out that thread. Bet you find your solution somewhere in all those posts!
Edit: I had the same frustration factor with drop-in nuts. Sometimes they pulled out. That's why I went to full-time T-nuts which stay permanently in the crossbar slots.
Sponsored