
Sponsored

6GSooner

Badlands
Well-Known Member
Joined
Nov 20, 2019
Threads
22
Messages
284
Reaction score
483
Location
Coppell, TX
Vehicle(s)
2025 Bronco
Your Bronco Model
Badlands
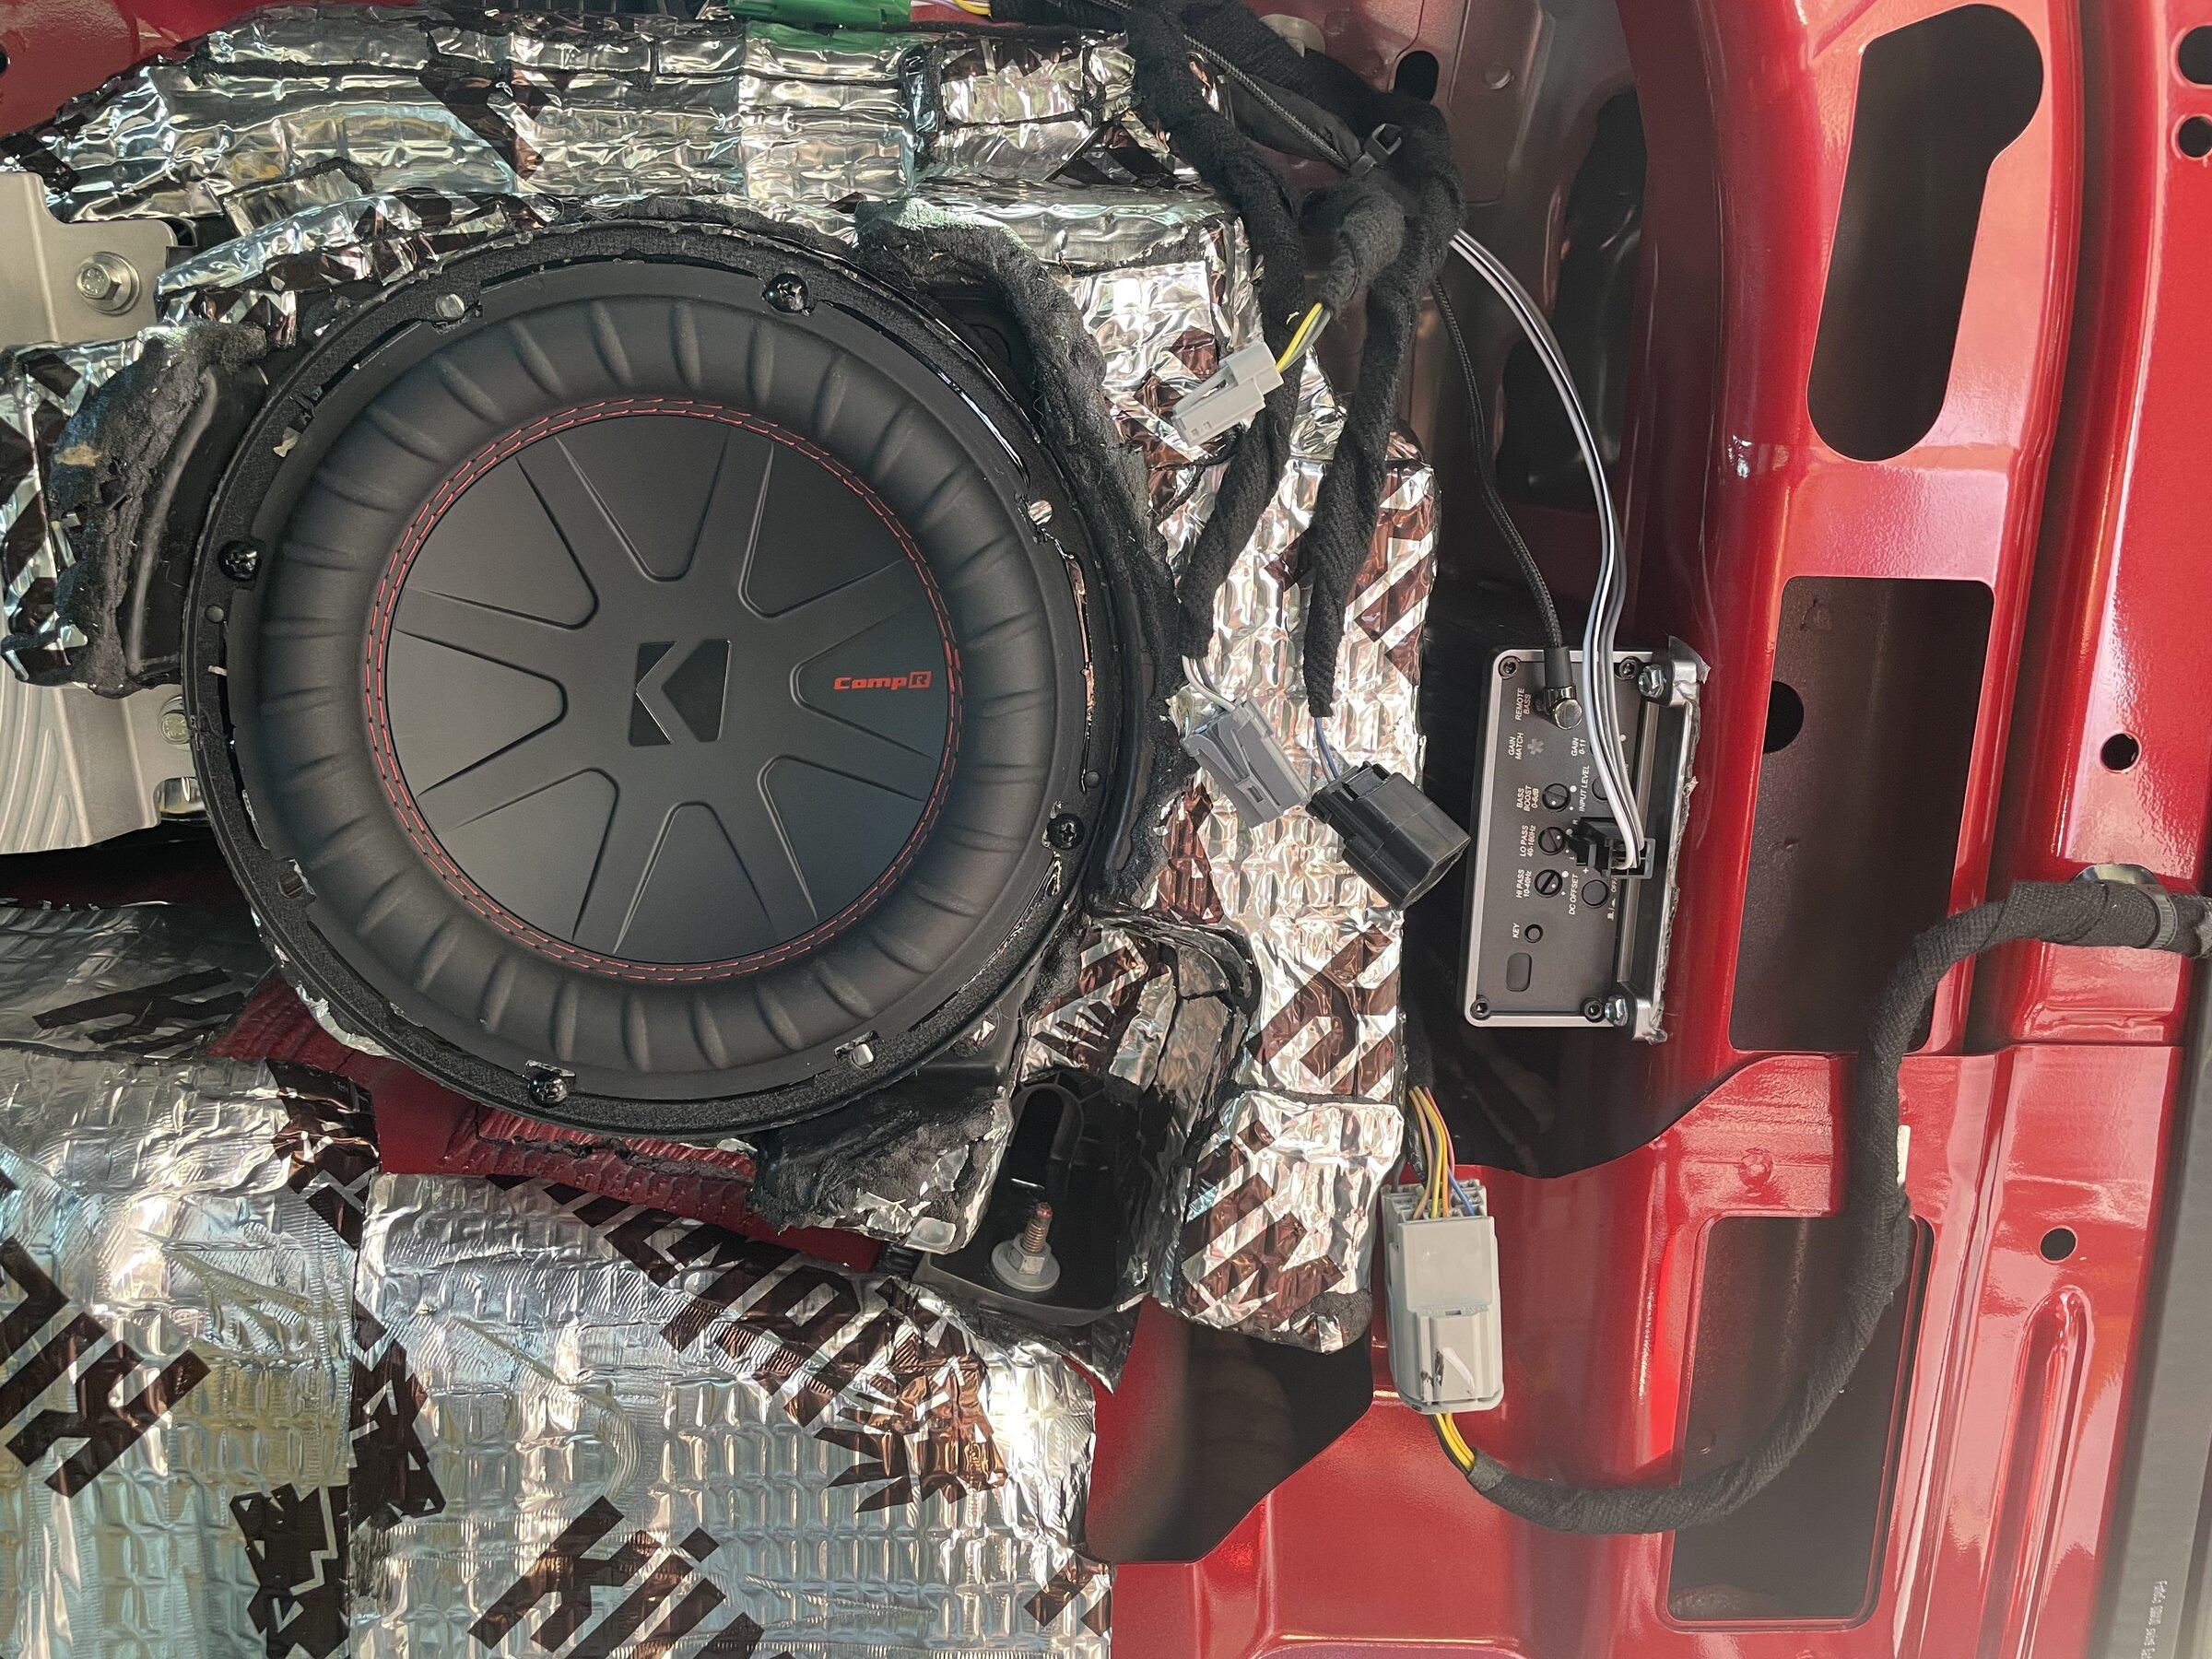
B&o 2025. Just replaced speakers all around with trail seven uograde with 5 Alpine speakers upfrontt. SSW rear pods. Kicker comp-r dual coil 8in.

Sounds flawless all the way to 30. My bass eq bar on Ford sync is at -4.
What are you driving the sub with?

notable difference in the front speakers?
Sponsored
 
First Name
Scotty
Joined
Aug 7, 2025
Threads
0
Messages
15
Reaction score
8
Location
Virginia
Vehicle(s)
Bronco
Your Bronco Model
Badlands
What are you driving the sub with?

notable difference in the front speakers?
The sub performs really well and I did not need to install aftermarket amp. Matter of fact it was so much kick to it I had to reduce my eq bass setting down to -3, -4.
Notable difference with upgrade soakers front and back.
 

Roofus

Outer Banks
Well-Known Member
Joined
Nov 26, 2021
Threads
80
Messages
1,115
Reaction score
1,620
Location
Swamp
Vehicle(s)
M3/Bronco
Your Bronco Model
Outer Banks
Clubs
 
Can someone ELI5 the difference between installing the OP’s suggested speakers with vs without the 300Mhz bass blockers?
 

Roofus

Outer Banks
Well-Known Member
Joined
Nov 26, 2021
Threads
80
Messages
1,115
Reaction score
1,620
Location
Swamp
Vehicle(s)
M3/Bronco
Your Bronco Model
Outer Banks
Clubs
 

Sponsored
Brian_B

Big Bend
Well-Known Member
First Name
Brian
Joined
Sep 14, 2023
Threads
62
Messages
8,399
Reaction score
14,860
Location
Central CA
Vehicle(s)
'23 BB 4dr 7MT, '22 BSport OBX, '87 B-II XL
Your Bronco Model
Big Bend
Clubs
 
Yes it’s slang. Certainly not new slang.
“Explain like I’m 5.”
Thanks. Some of us have gray hair around here

The difference is: depends on the speaker. Some speakers have built in cross overs already, so adding the blocker does nothing good.

Those that do not - the theory is for those speakers that can’t mechanically generate those low frequencies anyway, by blocking them you help the clarity and efficiency of the speaker.

YMMV - they are cheap and just plug in in line with the speaker, so try it, if you think it sounds better keep them. I tried it and absolutely could not stand it to the point I had to pull over at a gas station and rip them out. But I had speakers with an internal crossover already.
 

6GSooner

Badlands
Well-Known Member
Joined
Nov 20, 2019
Threads
22
Messages
284
Reaction score
483
Location
Coppell, TX
Vehicle(s)
2025 Bronco
Your Bronco Model
Badlands
Thanks. Some of us have gray hair around here

The difference is: depends on the speaker. Some speakers have built in cross overs already, so adding the blocker does nothing good.

Those that do not - the theory is for those speakers that can’t mechanically generate those low frequencies anyway, by blocking them you help the clarity and efficiency of the speaker.

YMMV - they are cheap and just plug in in line with the speaker, so try it, if you think it sounds better keep them. I tried it and absolutely could not stand it to the point I had to pull over at a gas station and rip them out. But I had speakers with an internal crossover already.
Piggybacking… do you know why the OPs speakers (JL C1) aren’t listed as compatible with the 2025 B&O system on crutchfield?
 

Brian_B

Big Bend
Well-Known Member
First Name
Brian
Joined
Sep 14, 2023
Threads
62
Messages
8,399
Reaction score
14,860
Location
Central CA
Vehicle(s)
'23 BB 4dr 7MT, '22 BSport OBX, '87 B-II XL
Your Bronco Model
Big Bend
Clubs
 
Piggybacking… do you know why the OPs speakers (JL C1) aren’t listed as compatible with the 2025 B&O system on crutchfield?
Crutchfield won't list a speaker as compatible if you have to do any trimming. There is a locator post molded into the dash that the factory speaker aligns to so the wiring stays at a consistent spot. A lot of aftermarket speakers you need to trim that locator pin off, so Crutchfield says it isn't compatible.

There are a few speakers that are legit hard to fit... so it's hard to sort that out. Mostly it would be deep speakers for the dash, like some Audiofrogs or Morels if you are looking at 3" and 4" speakers
 

Sparky575

Raptor
Well-Known Member
First Name
Joshua
Joined
Mar 27, 2025
Threads
4
Messages
56
Reaction score
66
Location
ohio
Vehicle(s)
2024 Ford Bronco Raptor
Your Bronco Model
Raptor
Yes it’s slang. Certainly not new slang.
“Explain like I’m 5.”
Lmao. I was going to accuse you of being young because of your slang use but then I saw the Gears of War profile pic so I know you gotta be around my age. Only OG’s appreciate Gears. Man I miss the original multiplayer before all the updates.
 

6GSooner

Badlands
Well-Known Member
Joined
Nov 20, 2019
Threads
22
Messages
284
Reaction score
483
Location
Coppell, TX
Vehicle(s)
2025 Bronco
Your Bronco Model
Badlands
Crutchfield won't list a speaker as compatible if you have to do any trimming. There is a locator post molded into the dash that the factory speaker aligns to so the wiring stays at a consistent spot. A lot of aftermarket speakers you need to trim that locator pin off, so Crutchfield says it isn't compatible.

There are a few speakers that are legit hard to fit... so it's hard to sort that out. Mostly it would be deep speakers for the dash, like some Audiofrogs or Morels if you are looking at 3" and 4" speakers
So there’s no incompatibility electronically?
 

Sponsored
Brian_B

Big Bend
Well-Known Member
First Name
Brian
Joined
Sep 14, 2023
Threads
62
Messages
8,399
Reaction score
14,860
Location
Central CA
Vehicle(s)
'23 BB 4dr 7MT, '22 BSport OBX, '87 B-II XL
Your Bronco Model
Big Bend
Clubs
 
So there’s no incompatibility electronically?
Nope. Electrically you could wire a 15" subwoofer into the dash if you really wanted to. That goes for B&O or Standard radios.

The factory speaker is a standard 4 Ohm for all locations and both trim types except the subwoofer.
The B&O has a dual 4Ohm voice coil sub, the Standard has a dual 2Ohm voice coil sub.
 

23OBX2.7

Outer Banks
Well-Known Member
First Name
2.7
Joined
Sep 3, 2025
Threads
38
Messages
2,334
Reaction score
1,227
Location
AB Canada
Vehicle(s)
2023 Bronco
Your Bronco Model
Outer Banks
Crutchfield won't list a speaker as compatible if you have to do any trimming. There is a locator post molded into the dash that the factory speaker aligns to so the wiring stays at a consistent spot. A lot of aftermarket speakers you need to trim that locator pin off, so Crutchfield says it isn't compatible.

There are a few speakers that are legit hard to fit... so it's hard to sort that out. Mostly it would be deep speakers for the dash, like some Audiofrogs or Morels if you are looking at 3" and 4" speakers
You can do 1/8 in adapter plates with the locator pin holes if must have them and cutout for speakers easily enough I used Ground Zero BMW specific 4 " and while not cheap sound amazing.

With the Broncos flat windshield I don't believe the exact location precision down to a few mm makes any difference, not to mention the noisy interior.
 

Nibroc99

Wildtrak
Well-Known Member
First Name
Corbin
Joined
Apr 22, 2025
Threads
19
Messages
538
Reaction score
464
Location
Rochester, MA, USA
Website
www.corbonthecob.com
Vehicle(s)
2022 Wildtrak: The WildeBeast
Your Bronco Model
Wildtrak
Clubs
 
Piggybacking… do you know why the OPs speakers (JL C1) aren’t listed as compatible with the 2025 B&O system on crutchfield?
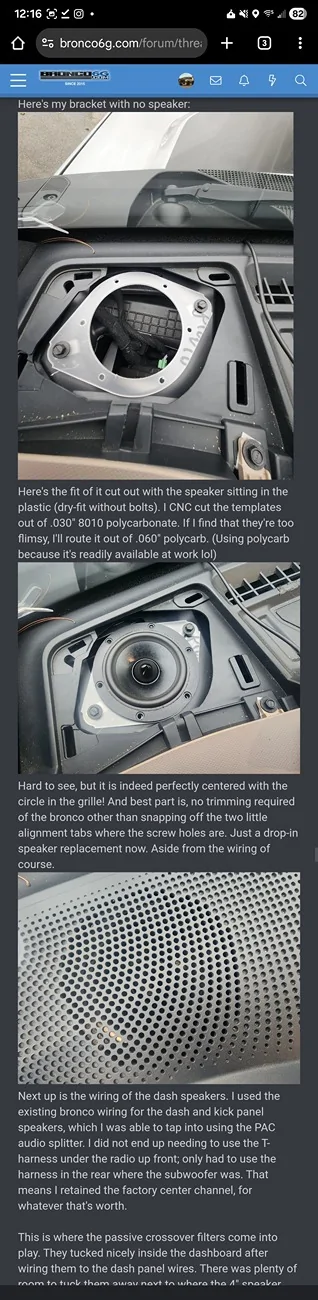
If you did want to custom fit another speaker in the dash corners, I reverse engineered a speaker bracket blank out of the B&O speakers! Here are the files if you wanted to use them as a template - they're to size in the PDFs. One has the cutouts for the Dayton Audio RS100P-4 4" Reference Paper Woofer 4 Ohm drivers I used in my setup.
Ford Bronco B&O sound system complete upgrade - Done ✅ 1000024570
 

Attachments

hobee88

Badlands
New Member
First Name
peter
Joined
Nov 27, 2025
Threads
0
Messages
2
Reaction score
1
Location
Denver, Co
Vehicle(s)
2022 Ford Bronco 4 door
Your Bronco Model
Badlands
I just swapped our the two front dash corner speakers with Focal ACX100s and immediately ordered 2 more pairs for the center speaker and rears (will have an extra if anyone is interested). Wow, what a difference.

Will probably end up replacing the kick panel speakers as well. For $130, why not?
Still have that extra!? Doing my upgrade and hate to order two pairs needing lol
 

hobee88

Badlands
New Member
First Name
peter
Joined
Nov 27, 2025
Threads
0
Messages
2
Reaction score
1
Location
Denver, Co
Vehicle(s)
2022 Ford Bronco 4 door
Your Bronco Model
Badlands
I started my overhaul of the B&O system a couple months ago, and finished buttoning it up this weekend. It’s been a long journey of trial and error, and parts returned or wasted, but I’m thrilled with the final results. I have contributed to many threads along the way, but wanted to consolidate it all into a completed build thread as I get many questions about what I’ve done.

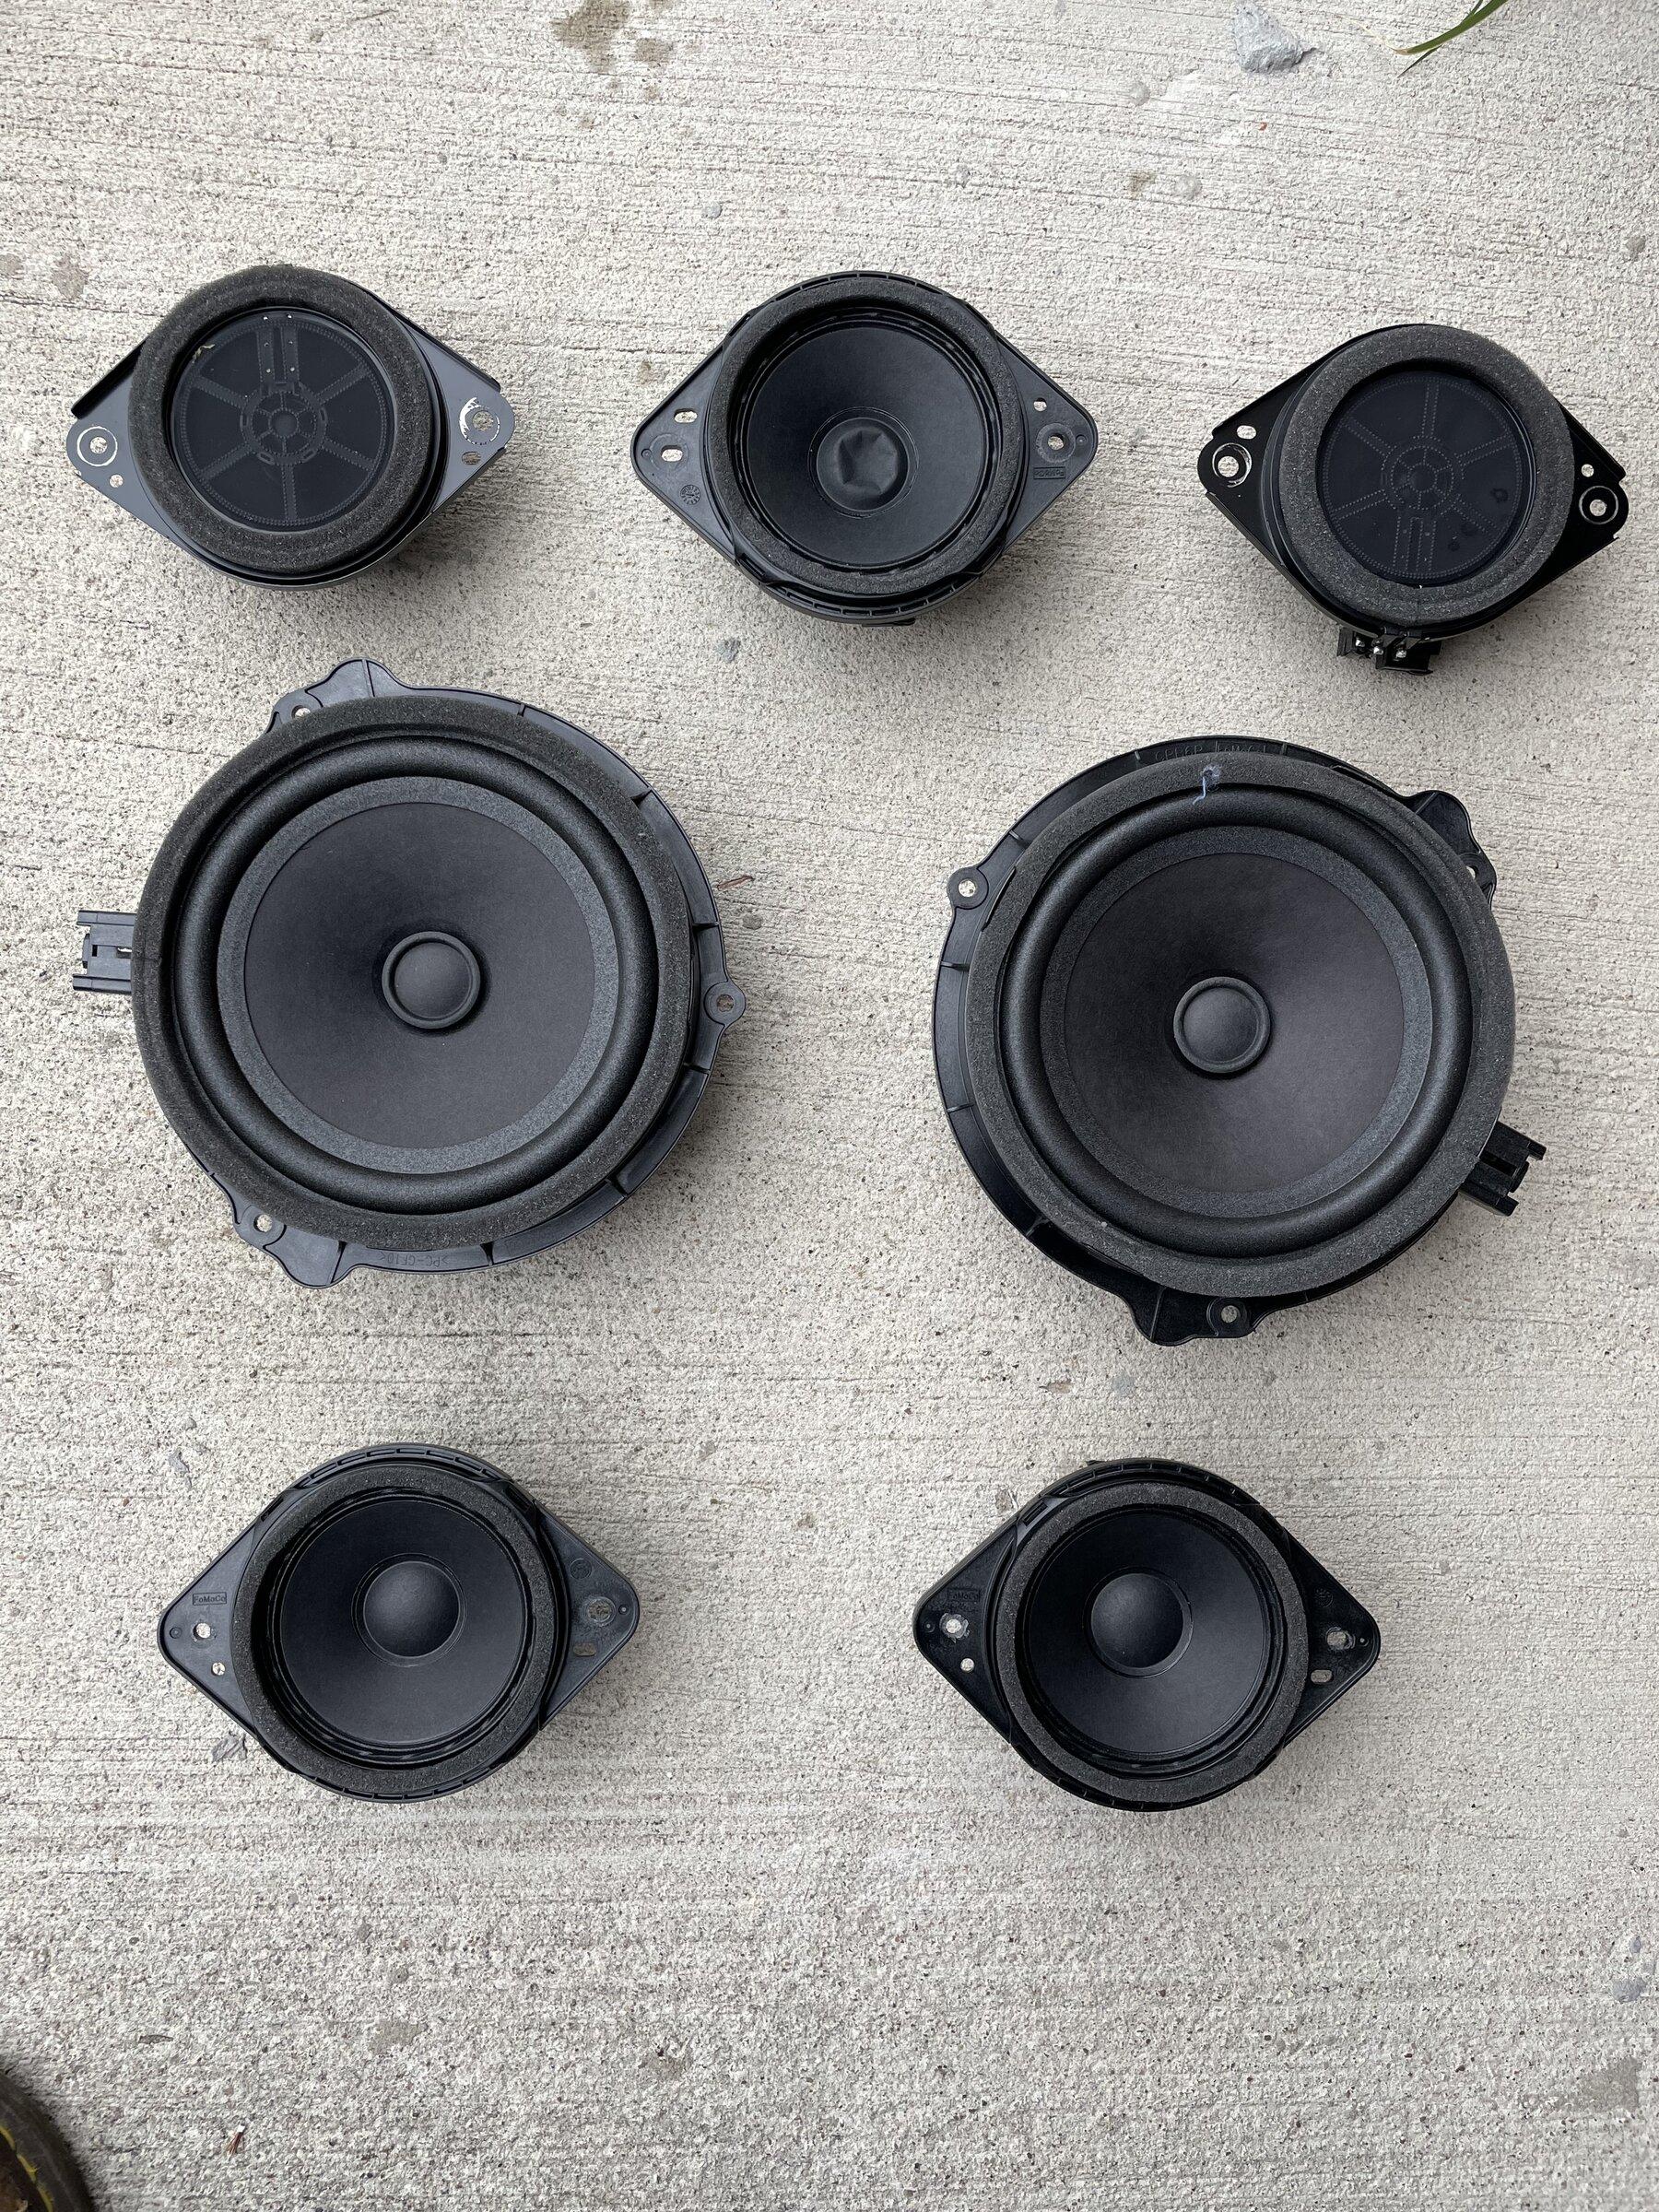
I’ll start out with why I got started on this project. To put it bluntly, I think the B&O system is pretty bad for a “premium“ system. It’s pretty much lacking in every way, low power, muddy highs, boomy rattly bass, and really bad soundstage with most all of the sound coming from the windshield. The speakers are cheap, paper, and half of them are the same speakers used in the base system.

FCB1F91B-B208-4A7F-8420-8109E06454D9.jpeg


I would rate the system 4/10 stock, and 15/10 after upgrades. This rating is based solely on my expectations/experiences of a factory “premium” system with cost as a factor. From the factory it severely missed expectations, after upgrades it blows away my expectations, as it should. The sub kicks. I haven't had a system that can rattle the mirrors since high school. I won’t be rattling mirrors, but I could if I want :cool:

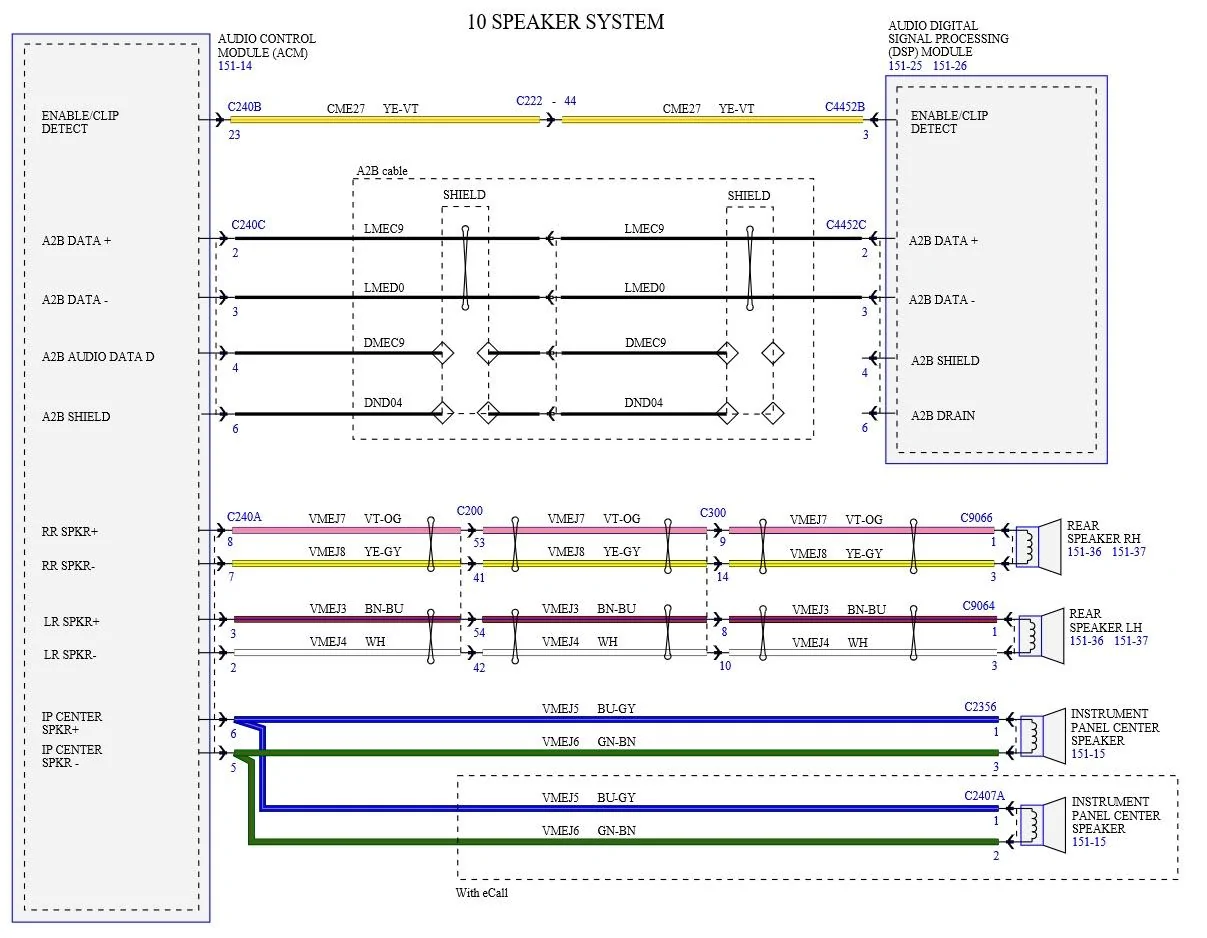
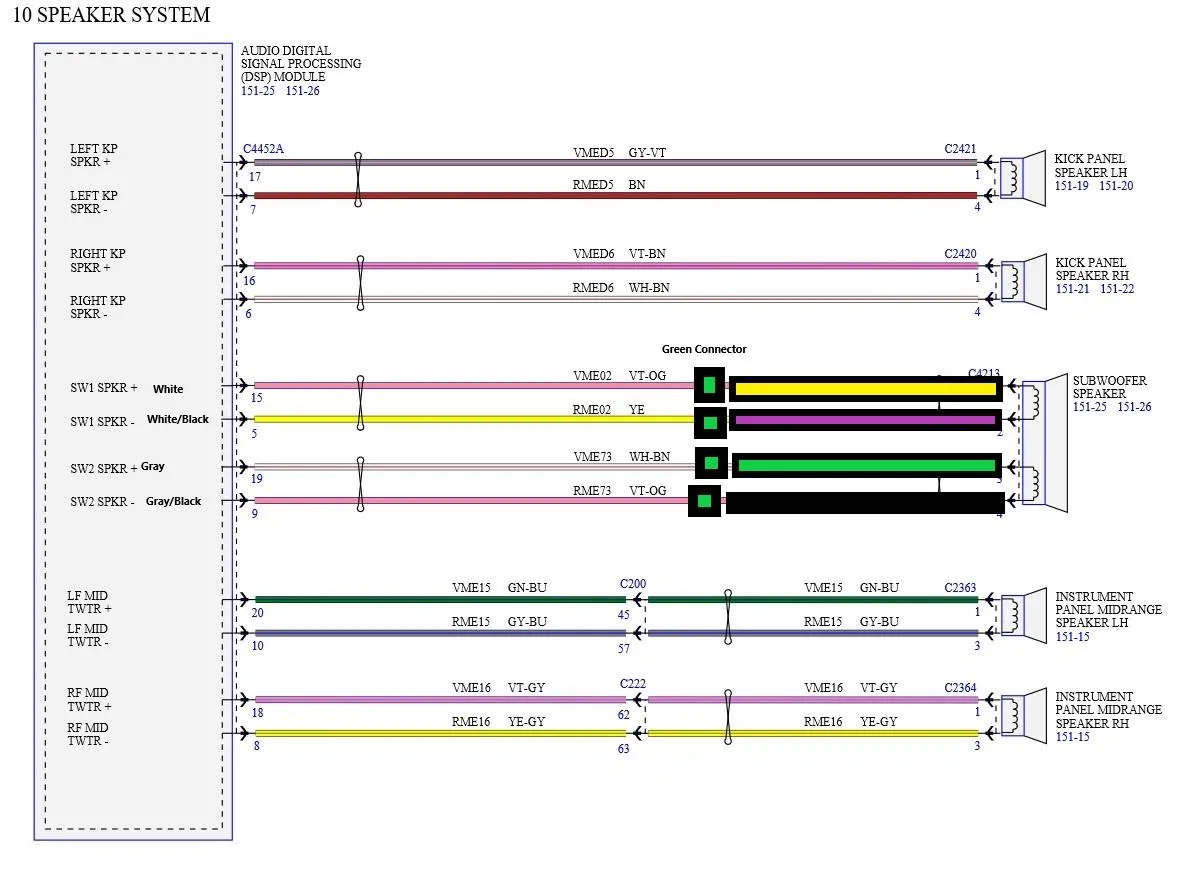
I will list the parts ”I” used. Wiring diagrams and shop manuals for removal/install are attached.

Parts

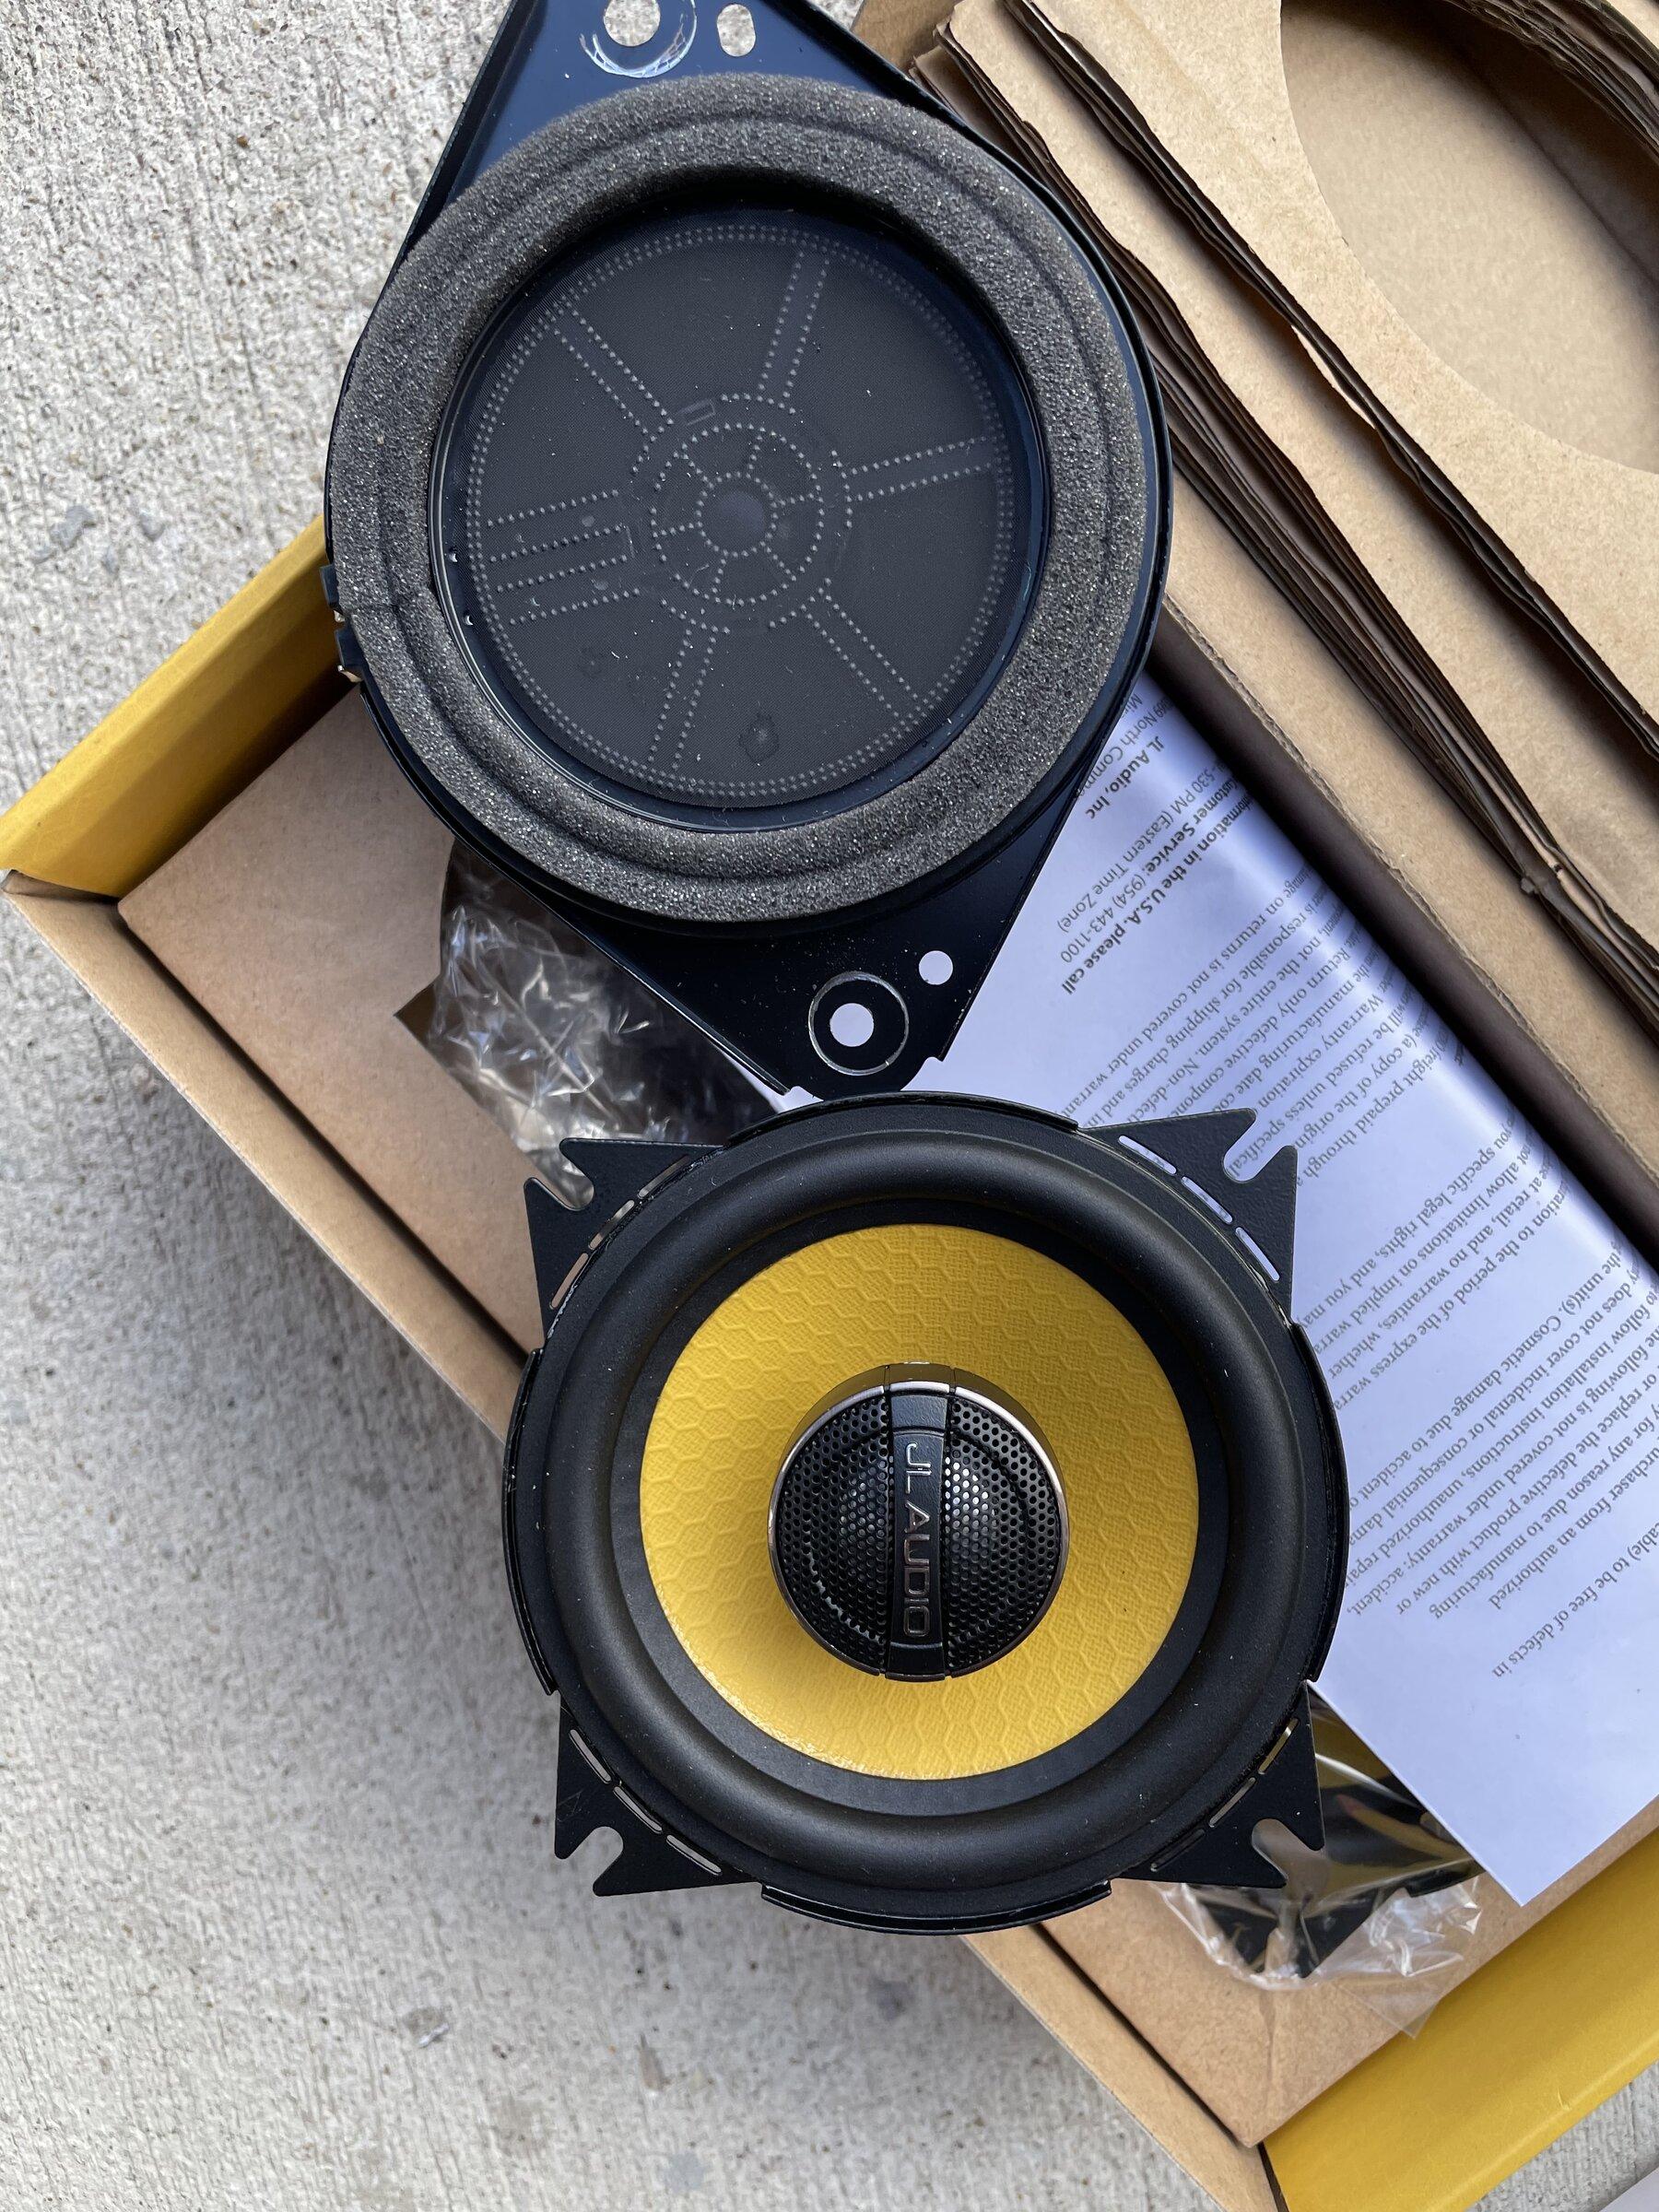
JL C1 4” - $99 pair x2
https://www.crutchfield.com/p_13699040/JL-Audio-C1-400x.html

JL C1 6.5” - $149 pair
https://www.crutchfield.com/p_13699042/JL-Audio-C1-650x.html

Focal ACX 4” - $109 pair
https://www.crutchfield.com/p_091ACX100/Focal-ACX-100.html

Kicker Comp R 8” 4ohm DVC sub - $89
https://www.amazon.com/gp/product/B08NFHJZNP/ref=ppx_yo_dt_b_asin_title_o02_s00?ie=UTF8&psc=1

Kicker Key 500.1 amp - $270
https://www.amazon.com/gp/product/B084HLH77B/ref=ppx_yo_dt_b_asin_title_o09_s00?ie=UTF8&psc=1

Kicker wired remote bass control - $39
https://www.amazon.com/gp/product/B08D3TVFBX/ref=ppx_yo_dt_b_asin_title_o08_s01?ie=UTF8&psc=1

right angle extension wire for bass control knob - $11
https://www.amazon.com/gp/product/B0793KZYXD/ref=ppx_yo_dt_b_asin_title_o03_s00?ie=UTF8&th=1

25’ 8guage copper amp wire - $25
https://www.amazon.com/gp/product/B079RZF94M/ref=ppx_yo_dt_b_asin_title_o08_s01?ie=UTF8&psc=1

8 gauge amp fuse/battery connector - $9
https://www.amazon.com/gp/product/B071ZZZK5W/ref=ppx_yo_dt_b_asin_title_o08_s01?ie=UTF8&th=1

8 gauge ring terminal for ground - $7
https://www.amazon.com/gp/product/B0747M3SYQ/ref=ppx_yo_dt_b_asin_title_o08_s00?ie=UTF8&psc=1

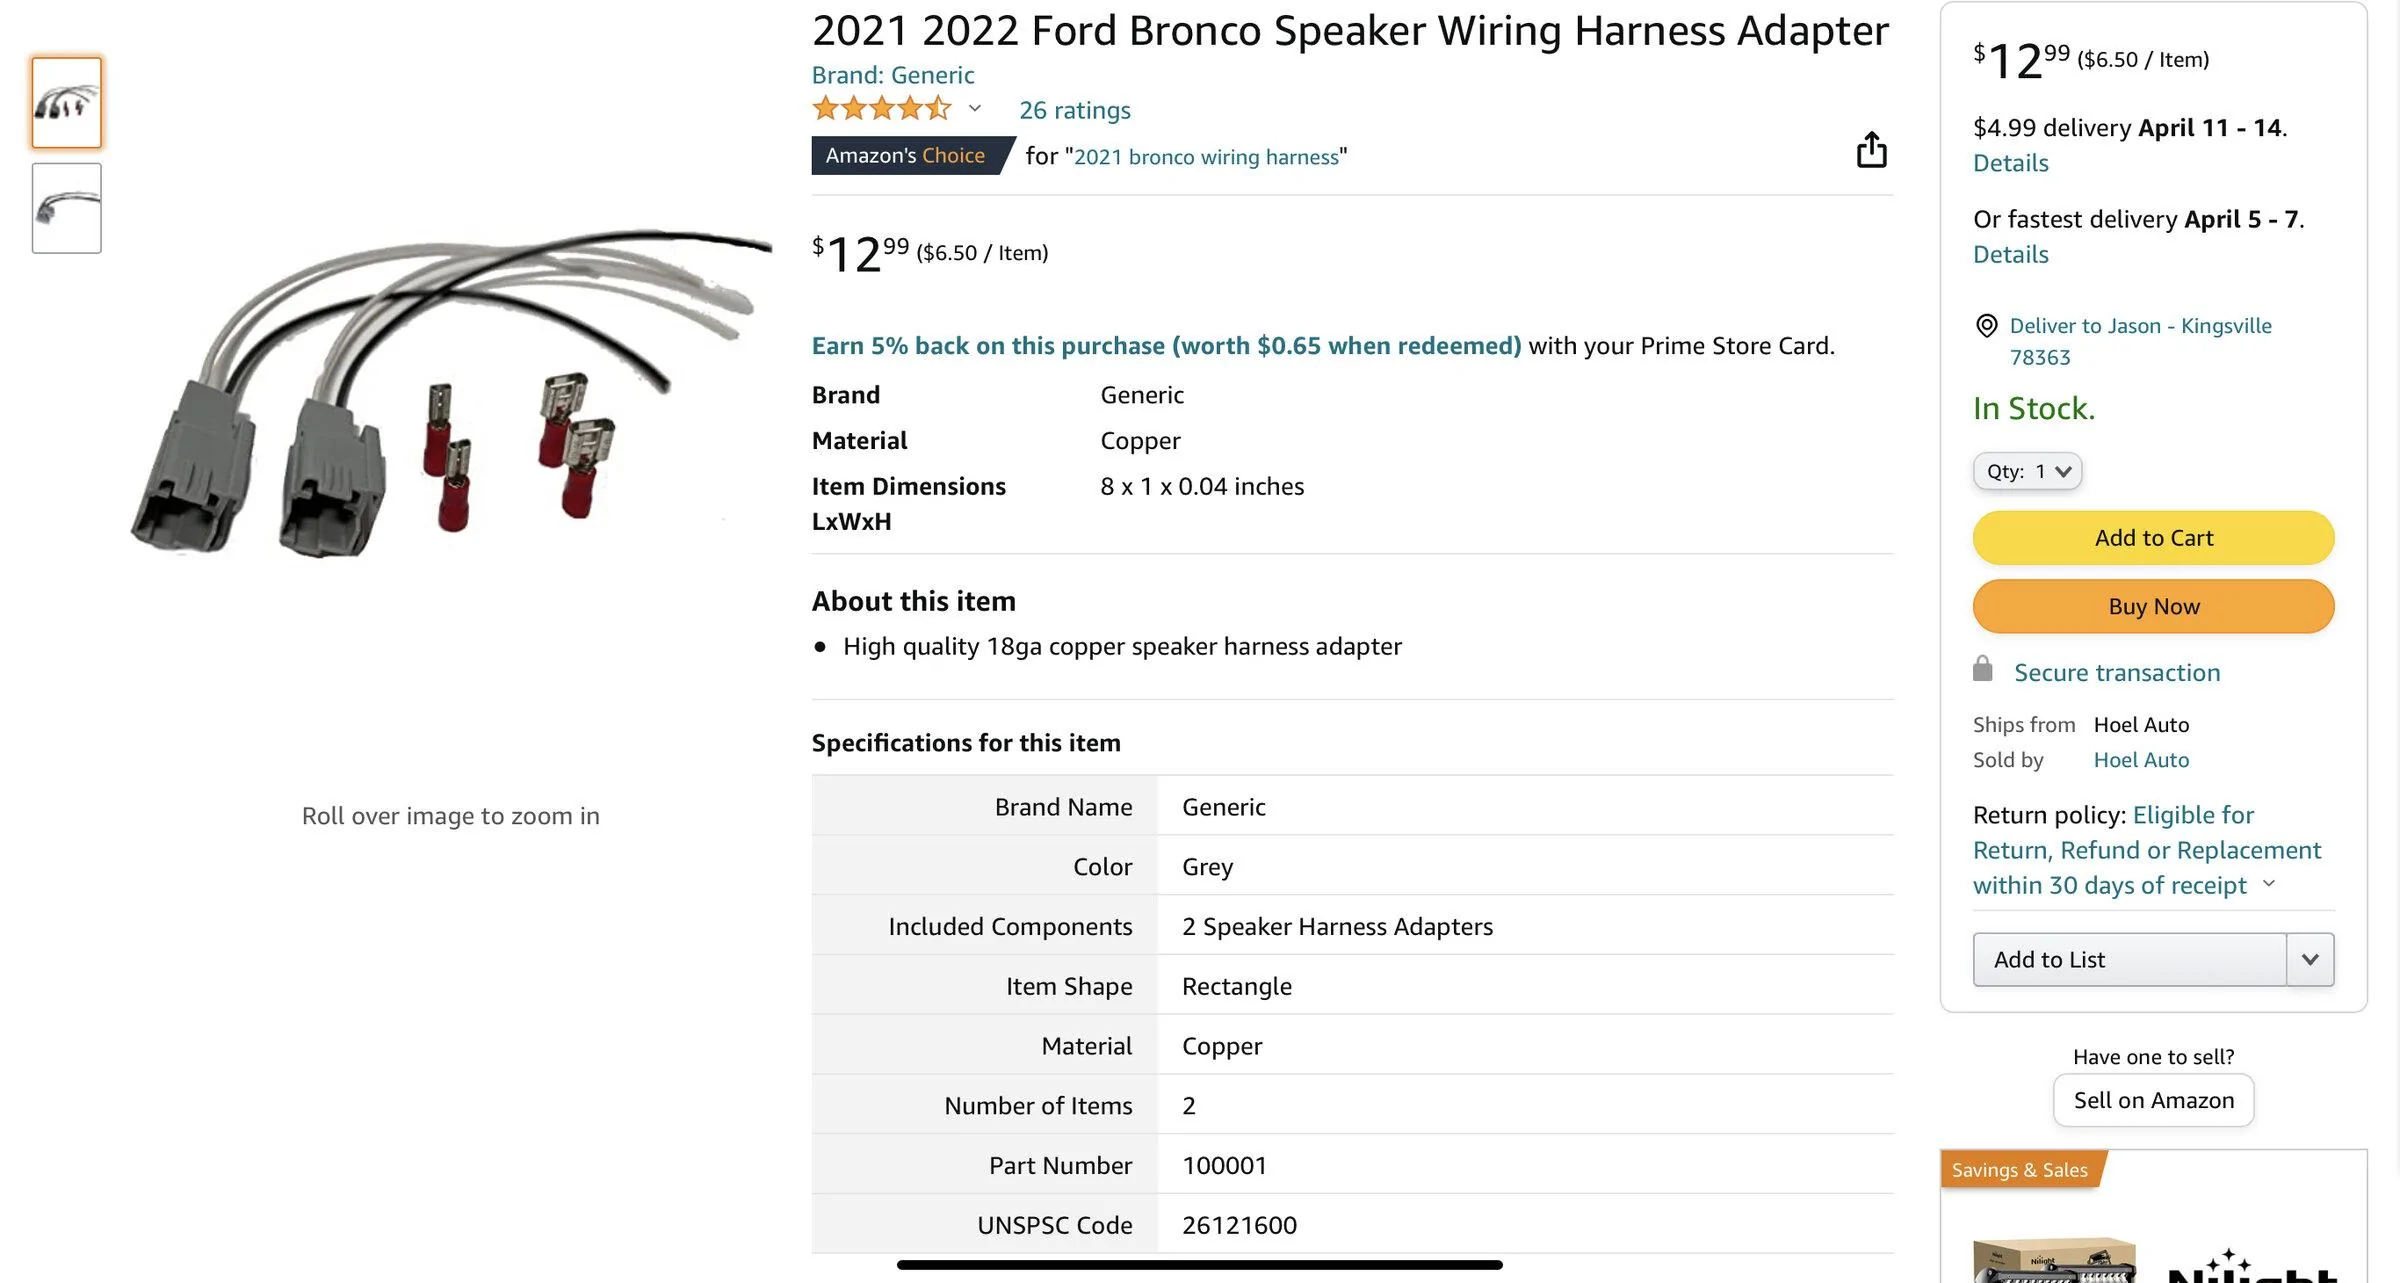
4“ speaker wire harness adapter - x3 - $12.99 each pair
search Amazon
1670B520-8B2E-4CF1-B261-B8D85BB9B963.webp


Kilmat sound deadening sheets - $35
https://www.amazon.com/gp/product/B082Q2J2T4/ref=ppx_yo_dt_b_asin_title_o03_s00?ie=UTF8&psc=1

Total - $979.97

Dash Speakers

There are three 4” speakers in the dash. I used JL C1 for all three. I originally tried Focal ACX, but found them very “bright”. I ended up using the Focals in the rear pods and the JLs in the dash. This combination works great, as the bright Focal pods allow more rear fill, that was canceled out having Focals in the dash as well. This combination makes huge improvements to the overall soundstage, actually having some rear fill is an amazing improvement. Don’t skip the center channel! It’s is the workhorse up front, especially if you use surround mode.

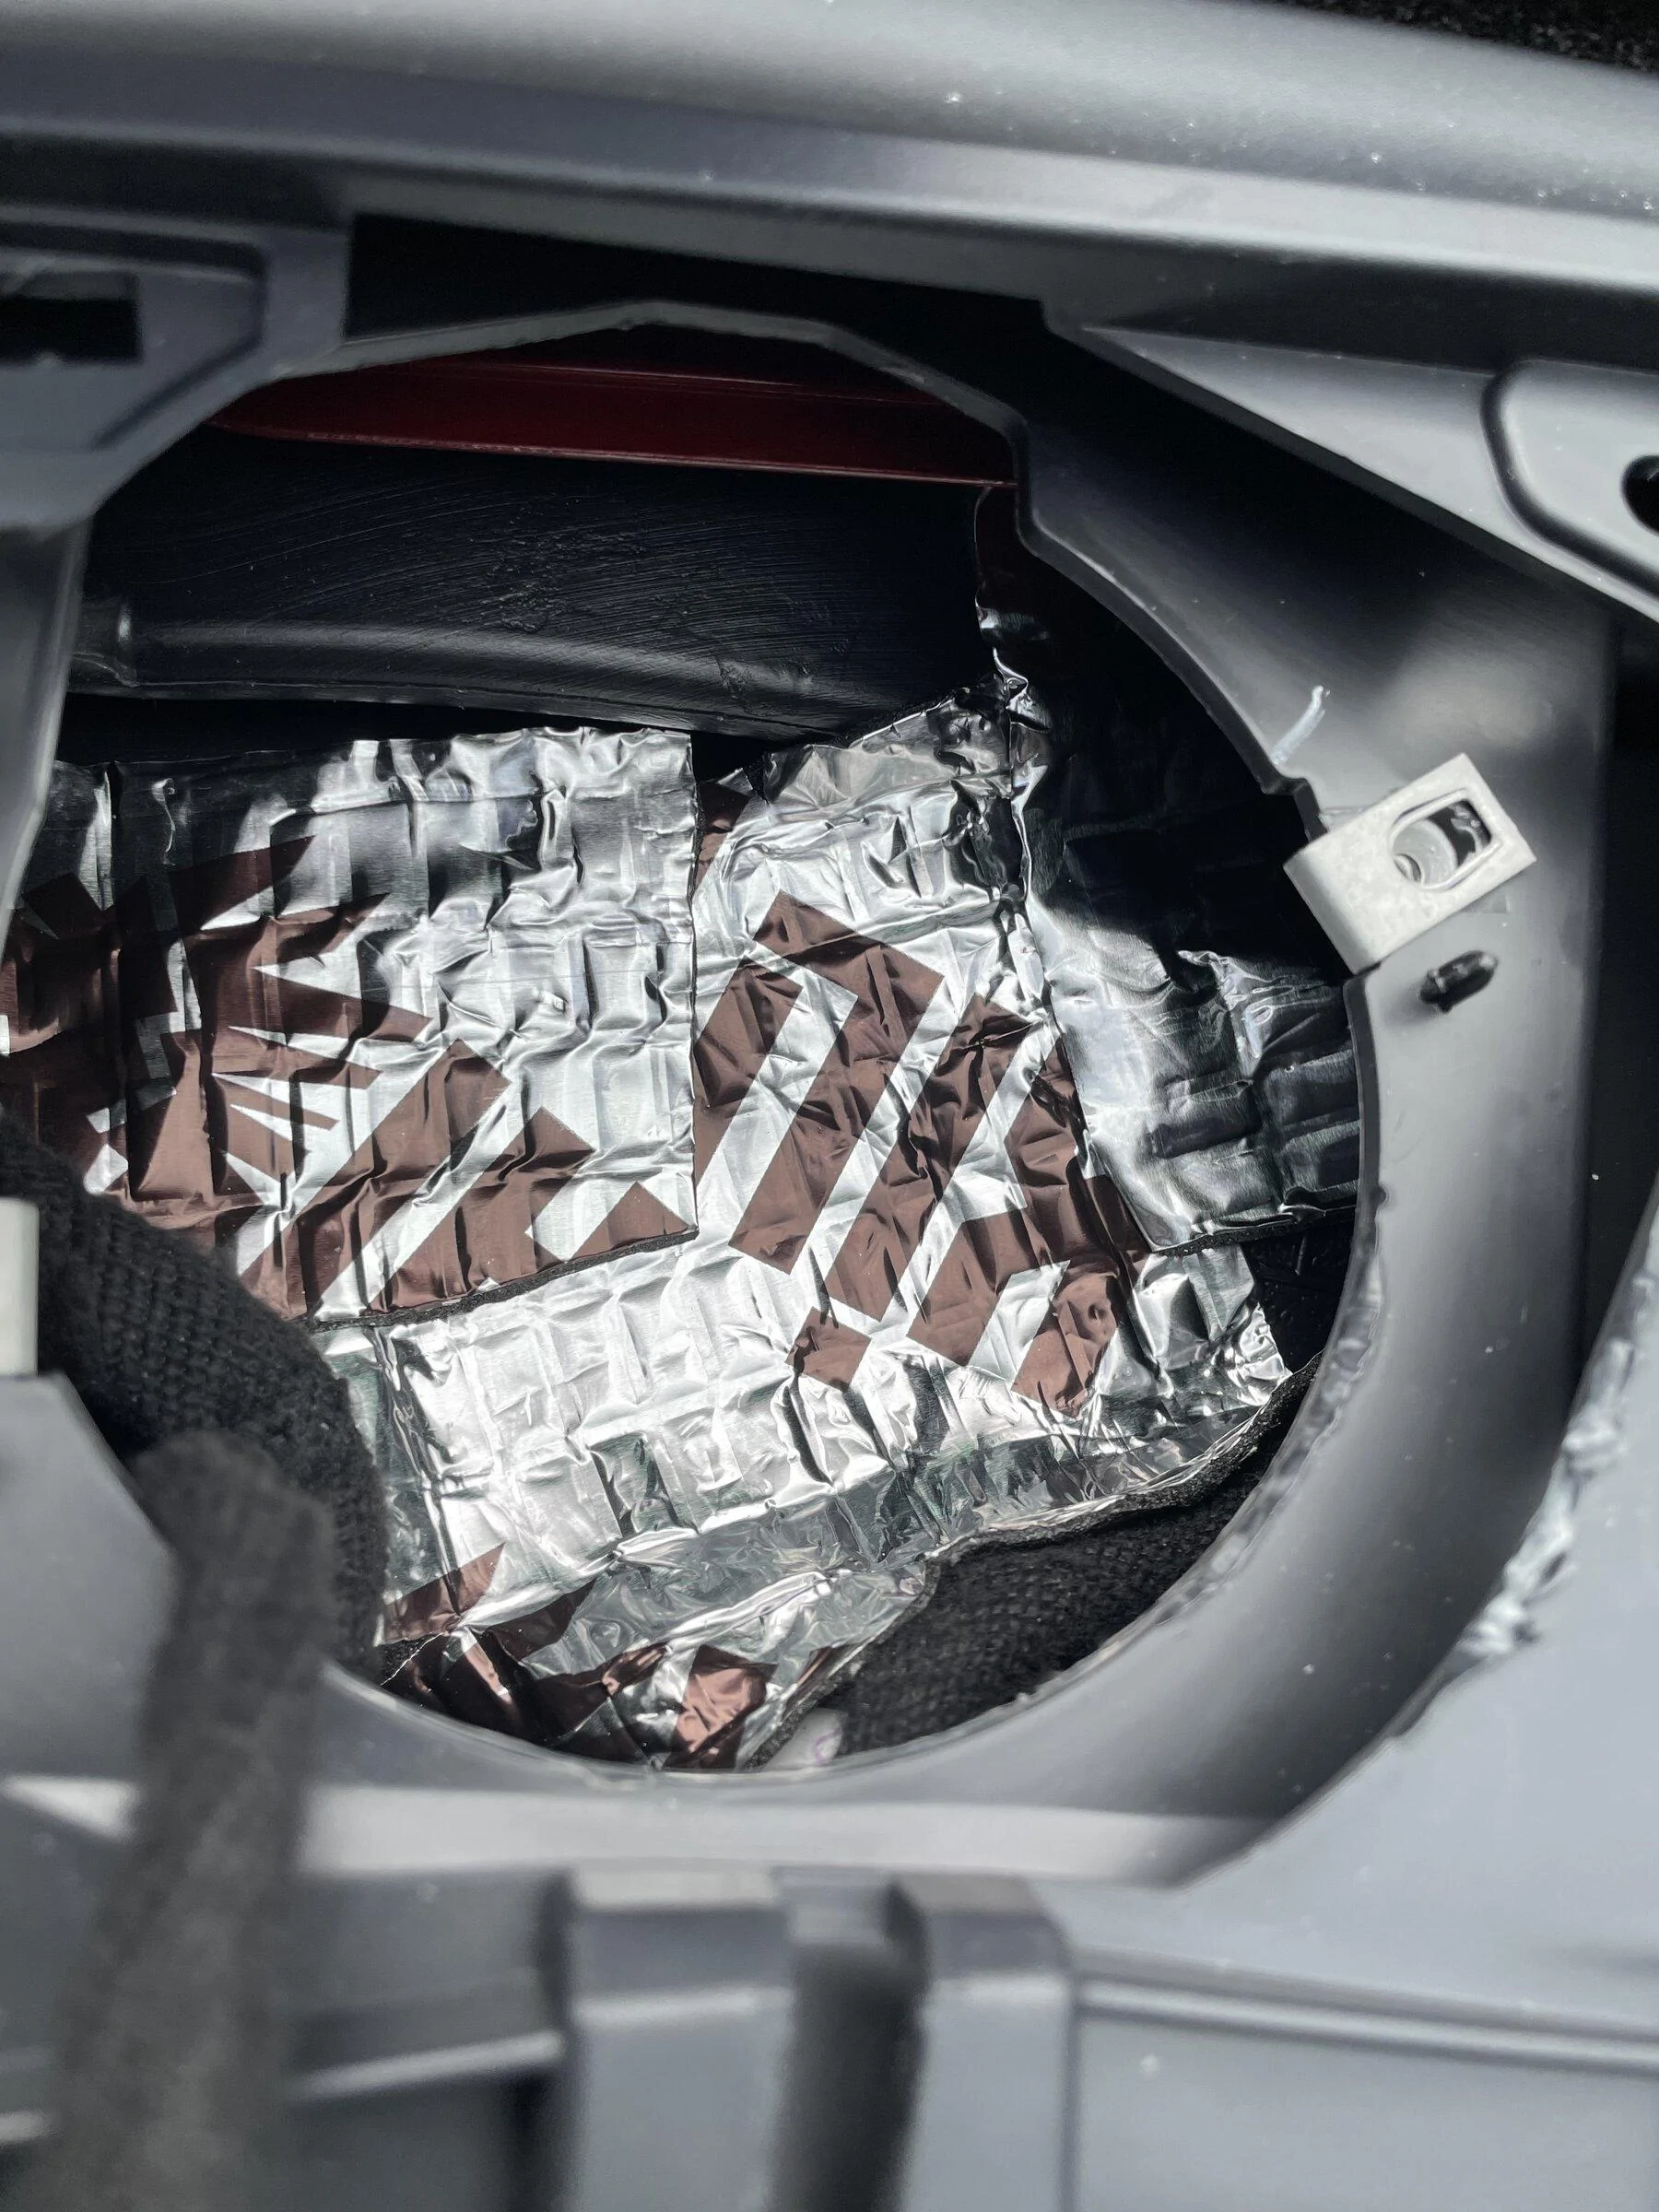
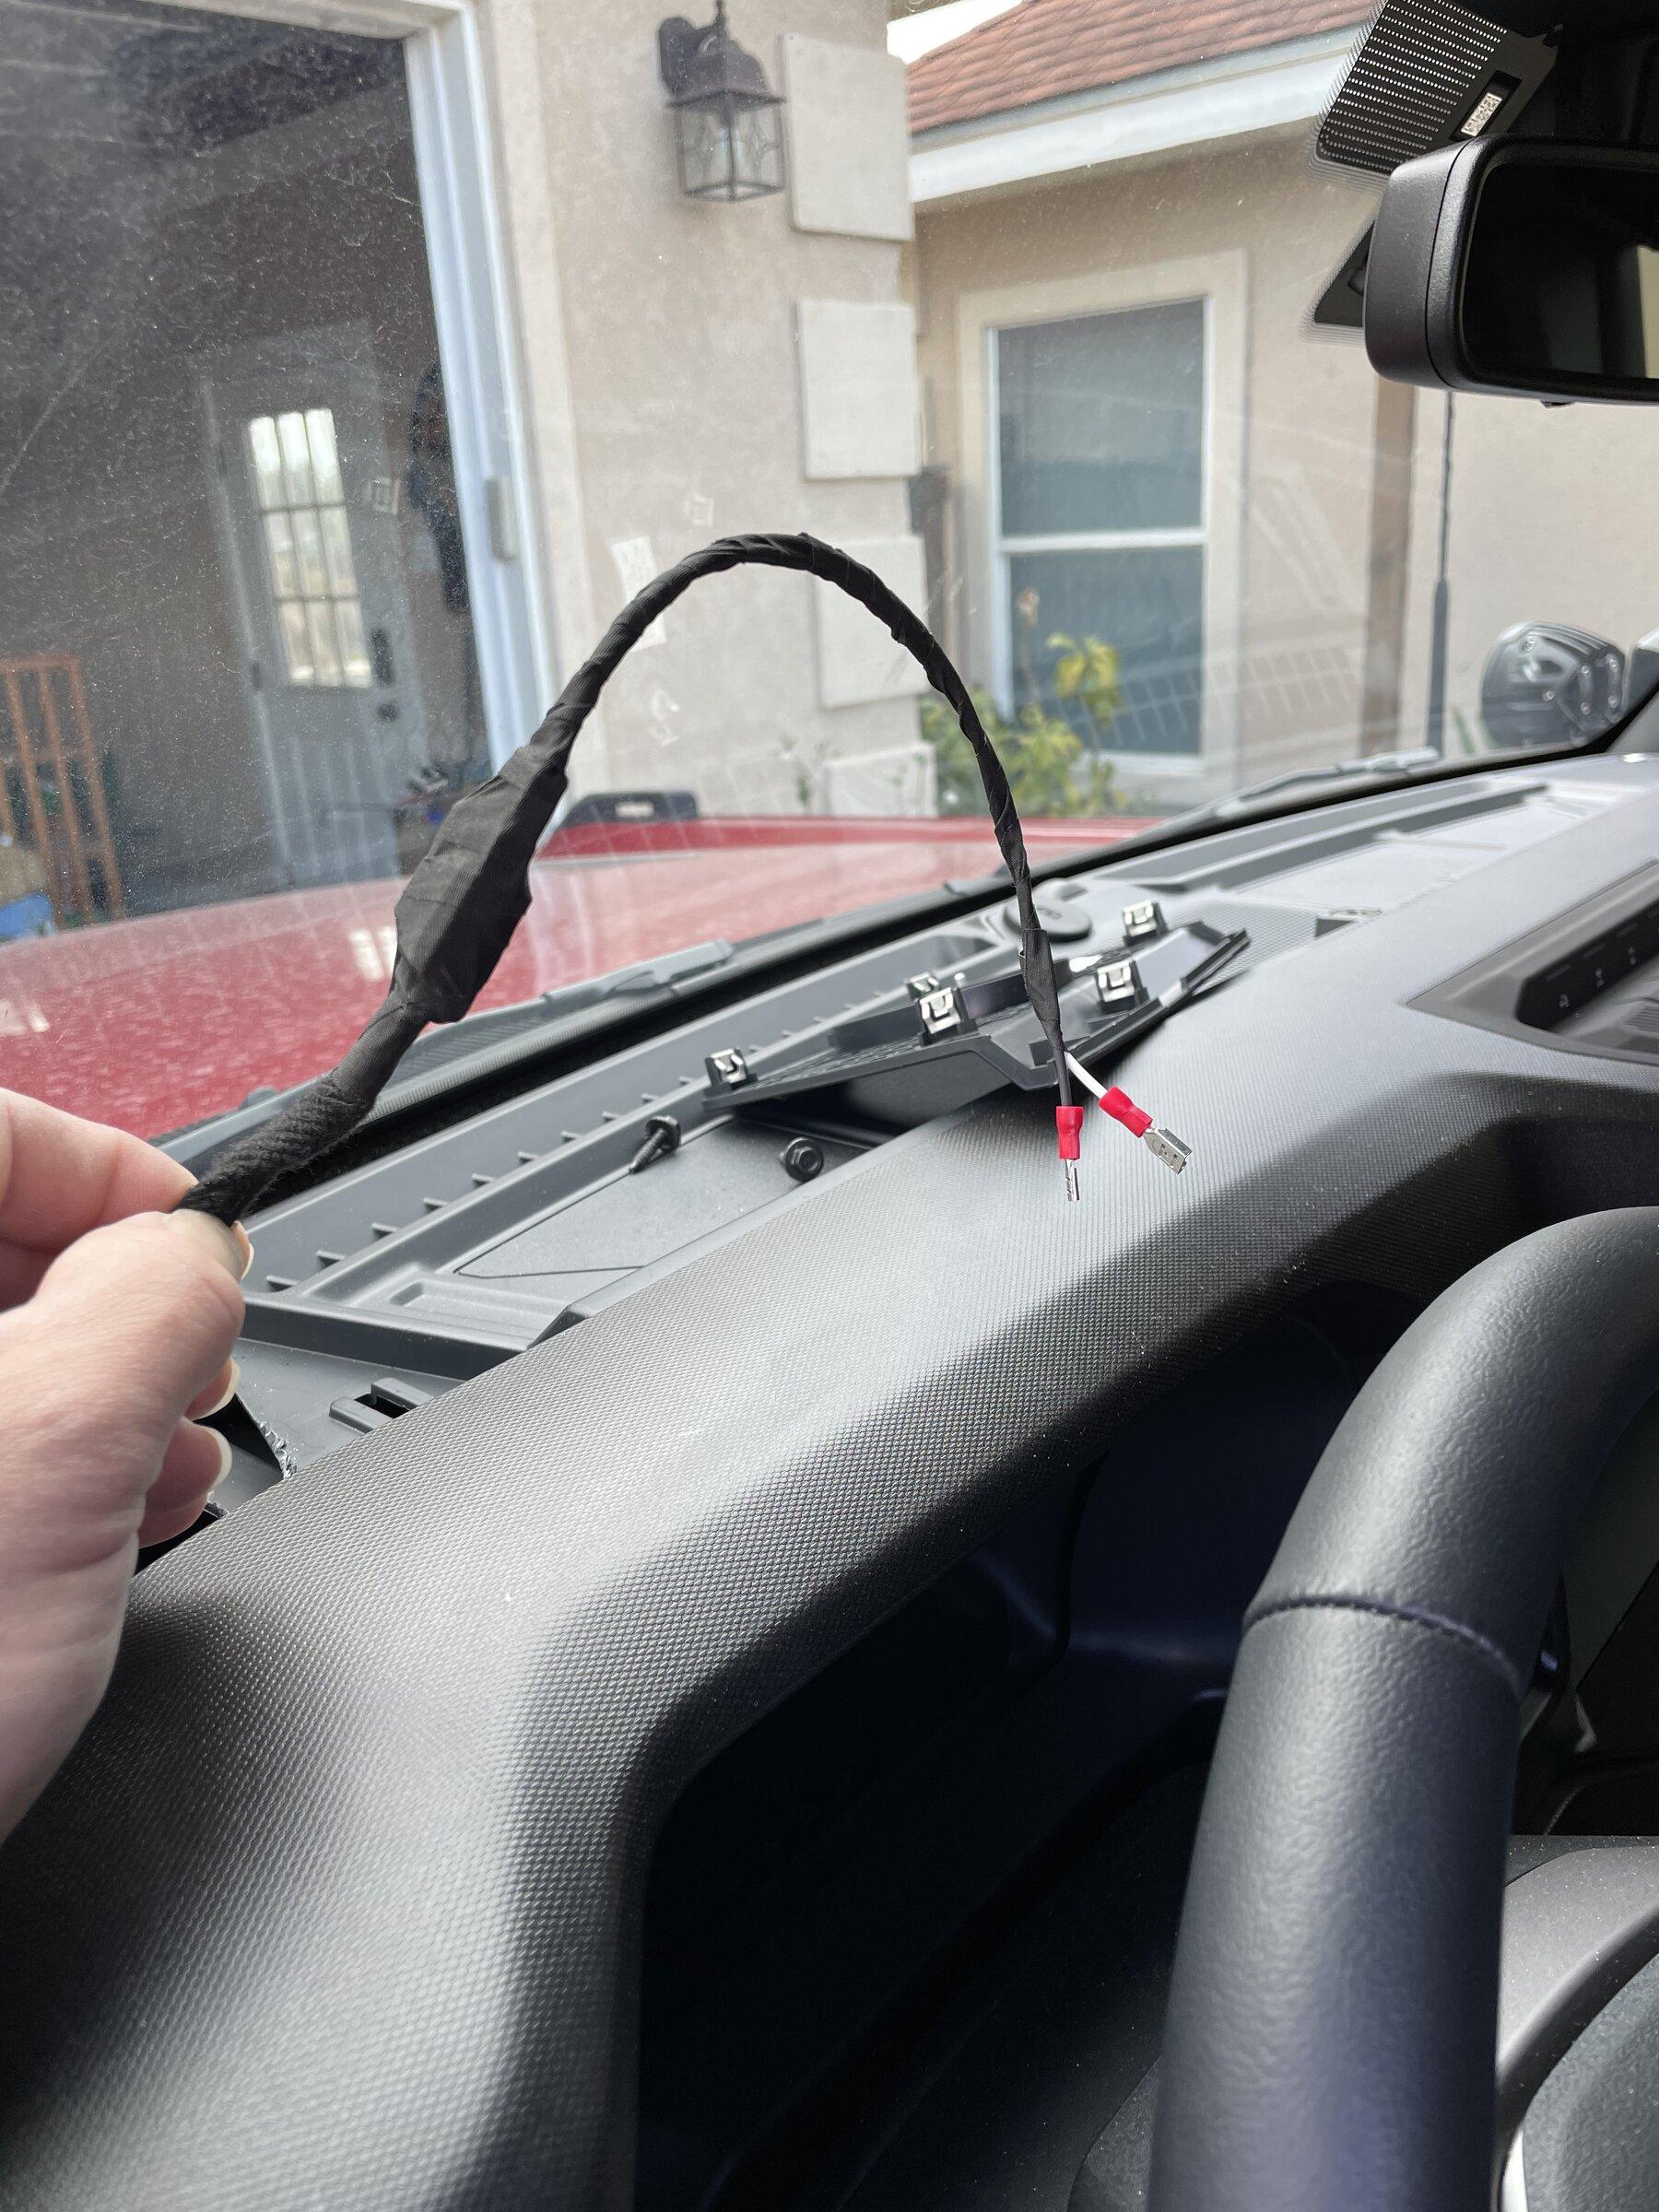
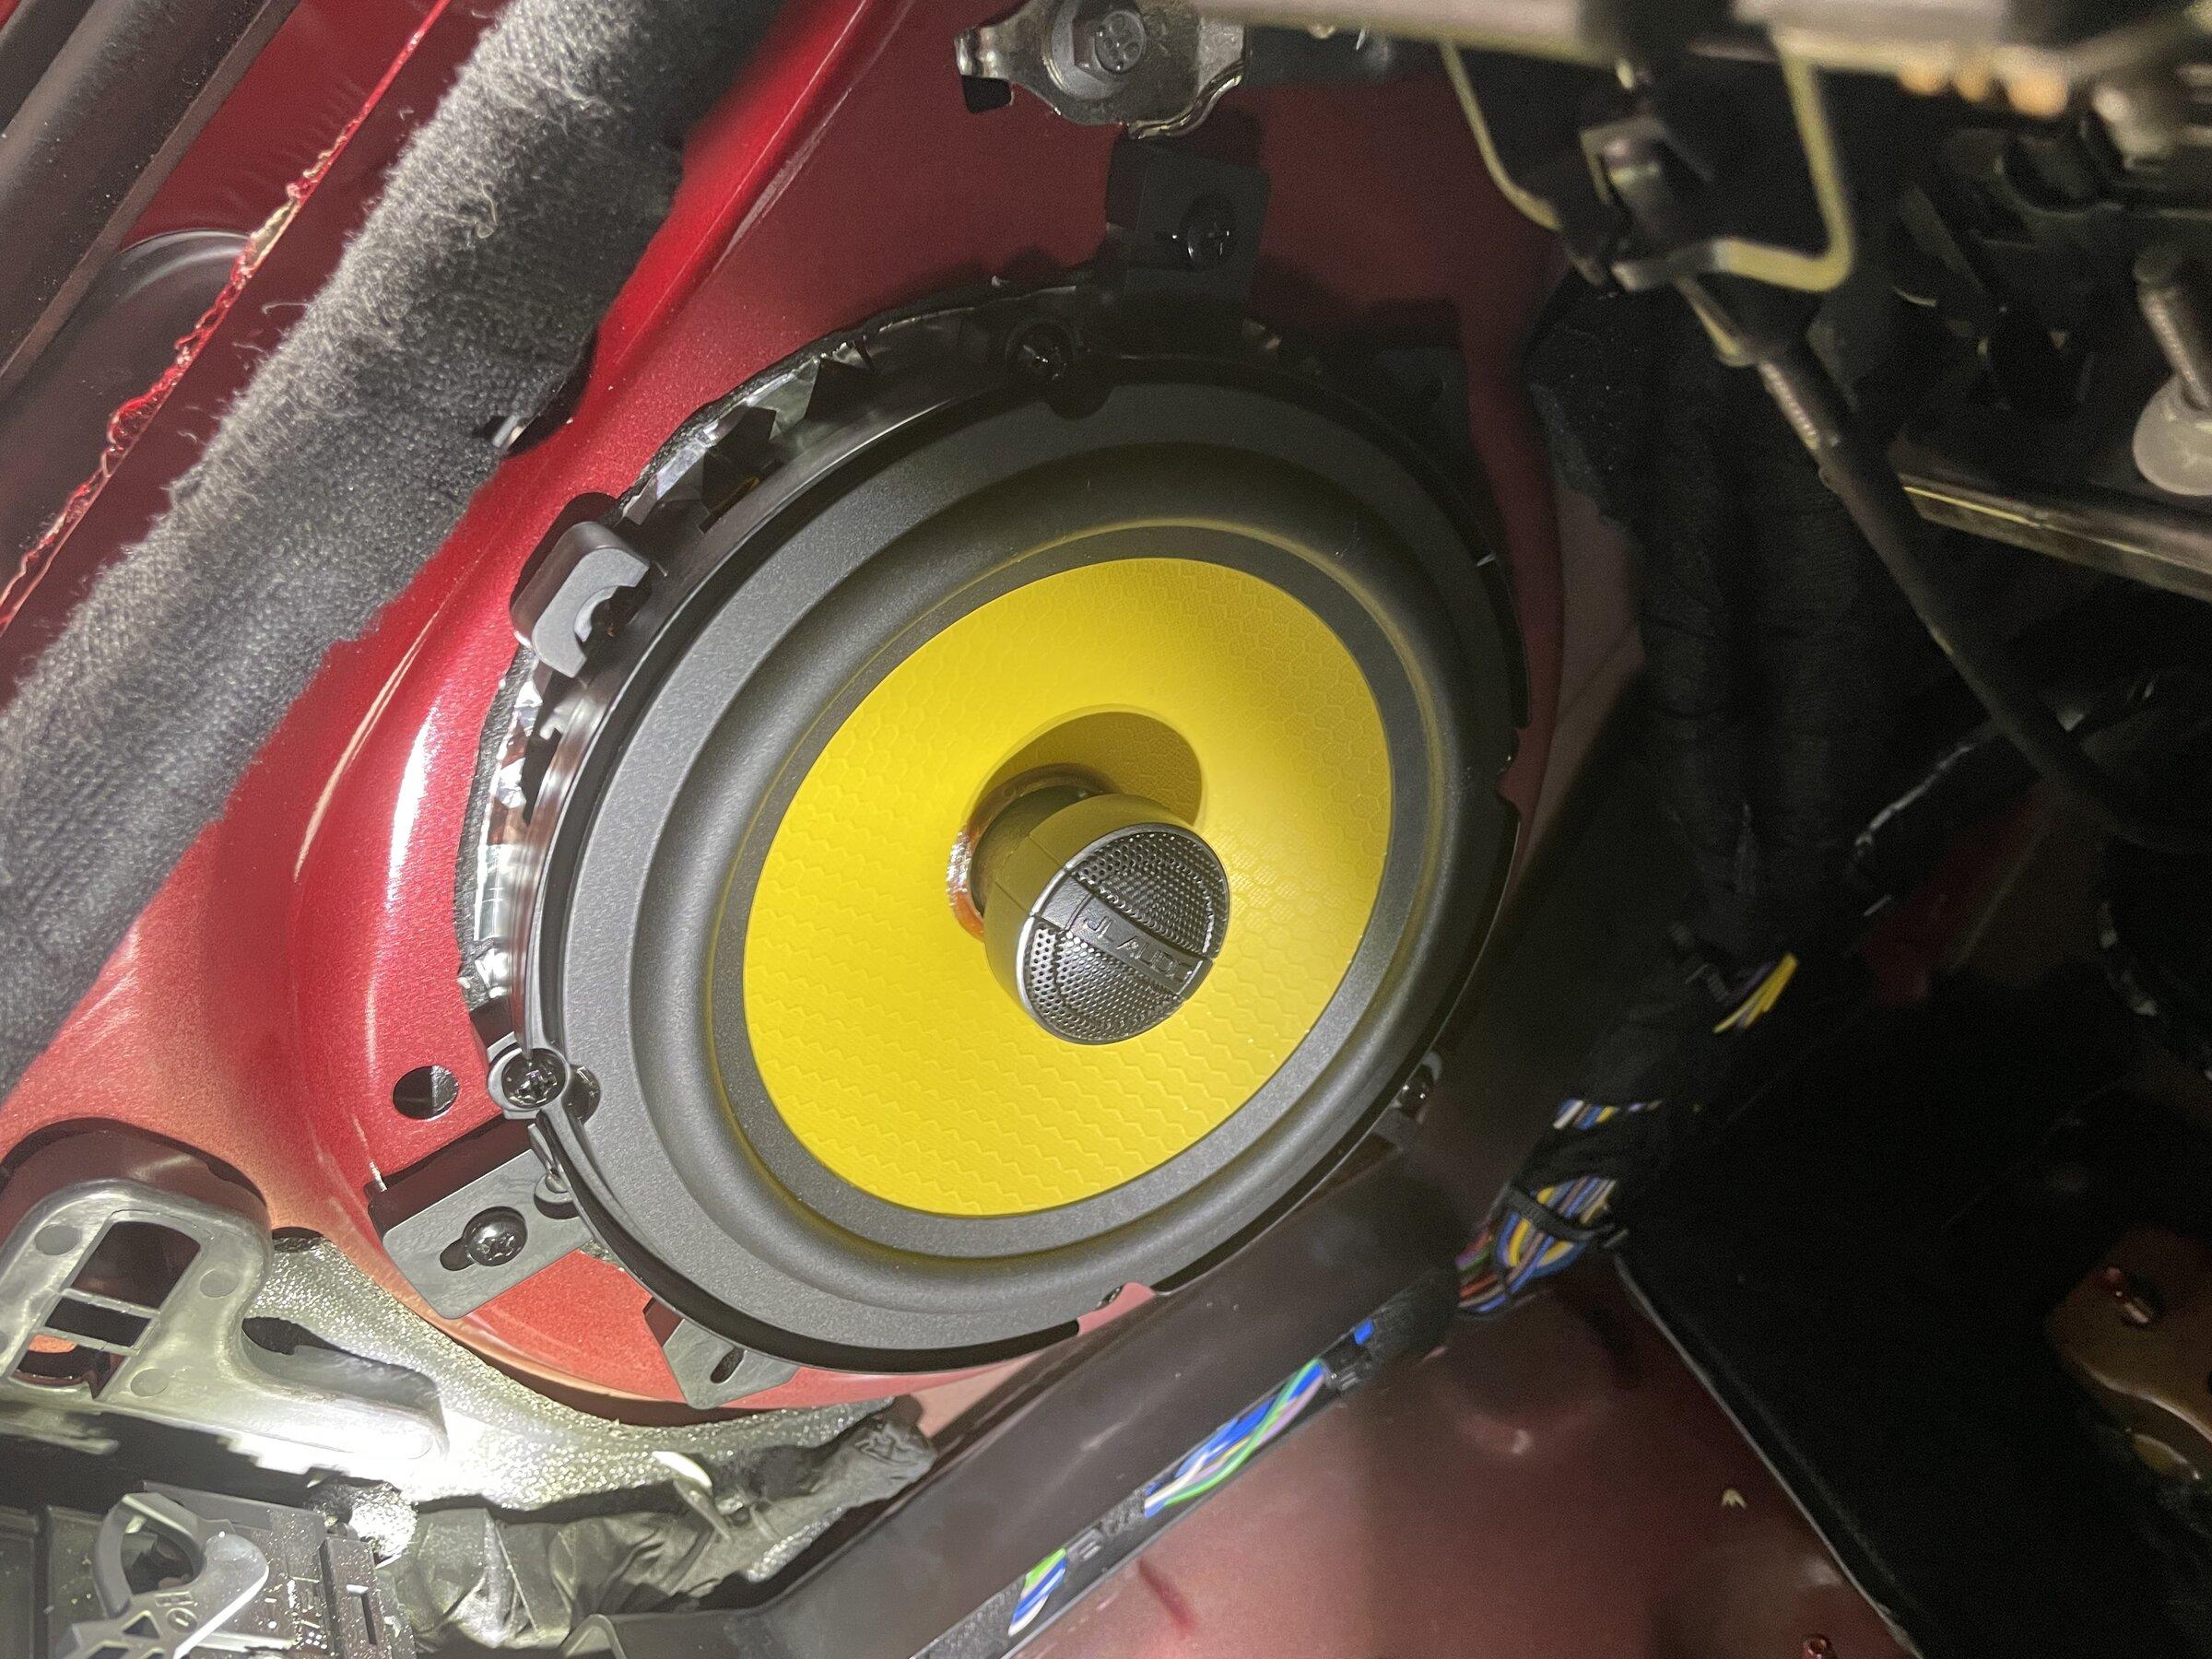
Replacing these speakers is pretty straightforward, remove trim panel, unbolt speaker, attach harness adapter, reinstall. Shop manual attached if you need it. I highly suggest a nice set of panel removal tools so you don’t scratch up the plastic. I tossed some kilmat underneath each speaker, trying to make the hollow space underneath more of a pocket.

6EB6069E-35F0-4188-8D19-D82628C69730.jpeg

3DB65EFD-E4B9-4443-9146-17359F8DE049.webp

789CC5B0-4F40-4FB0-B0D6-218BCF082B1A.jpeg


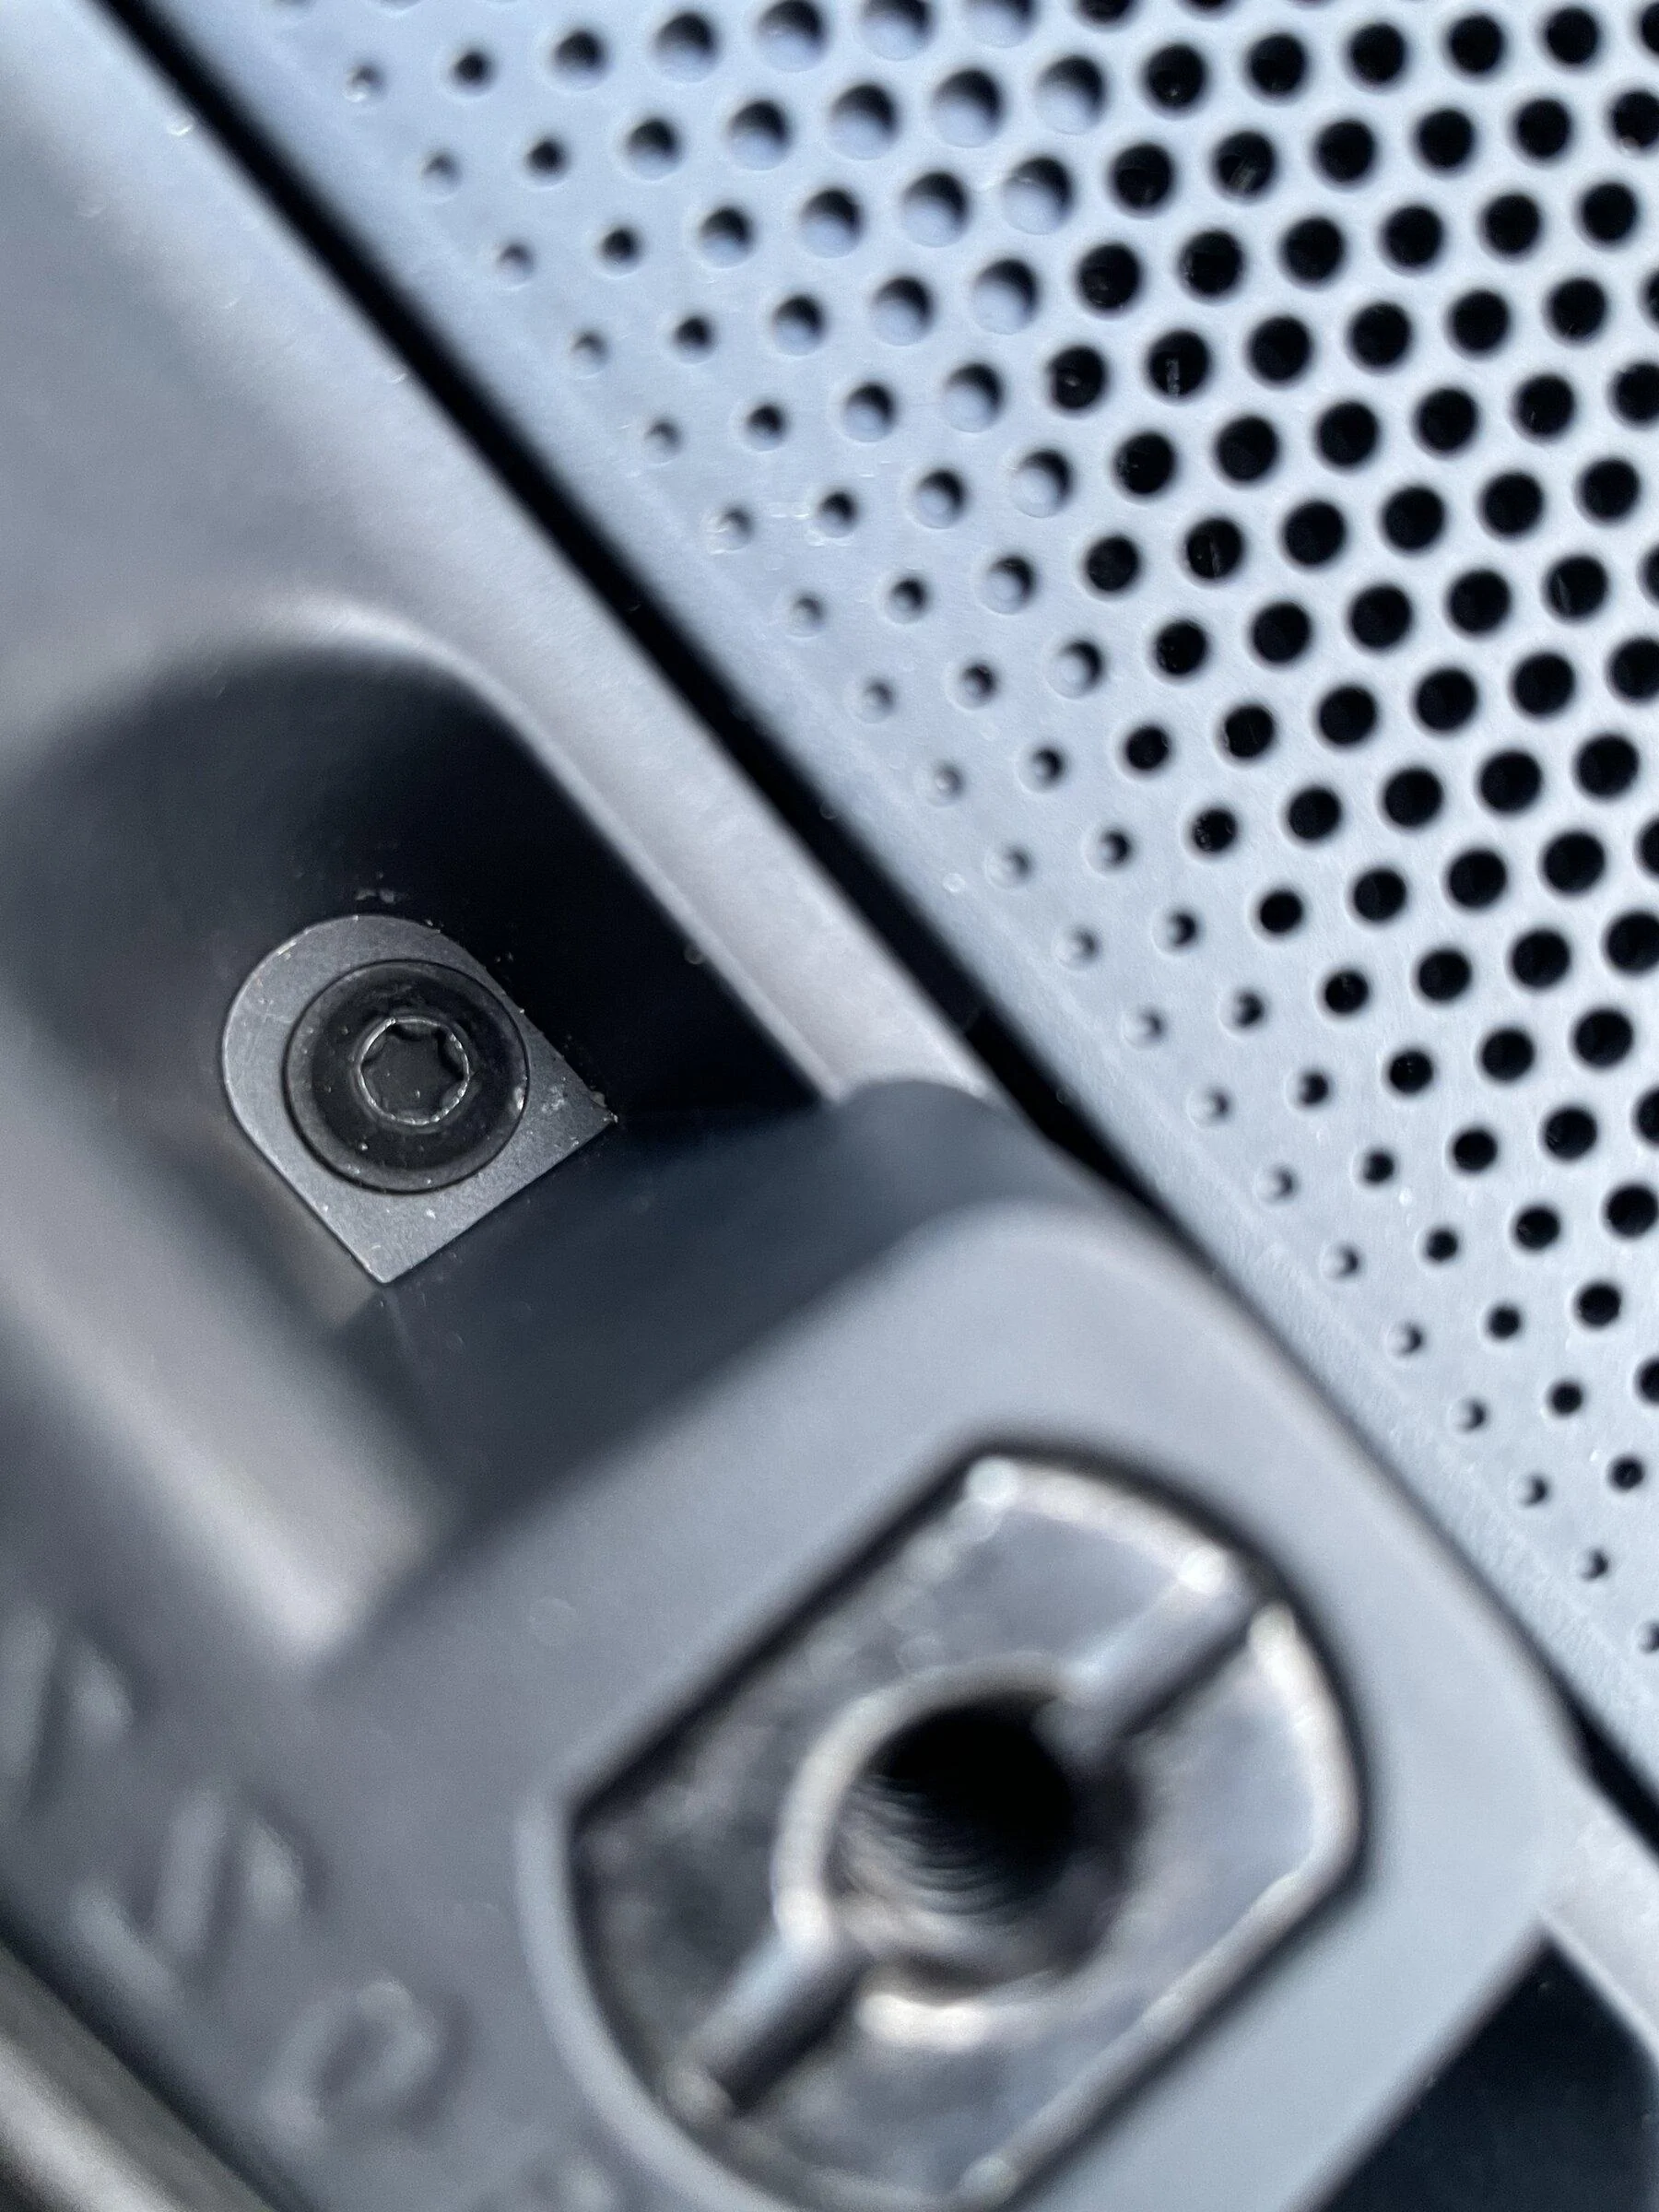
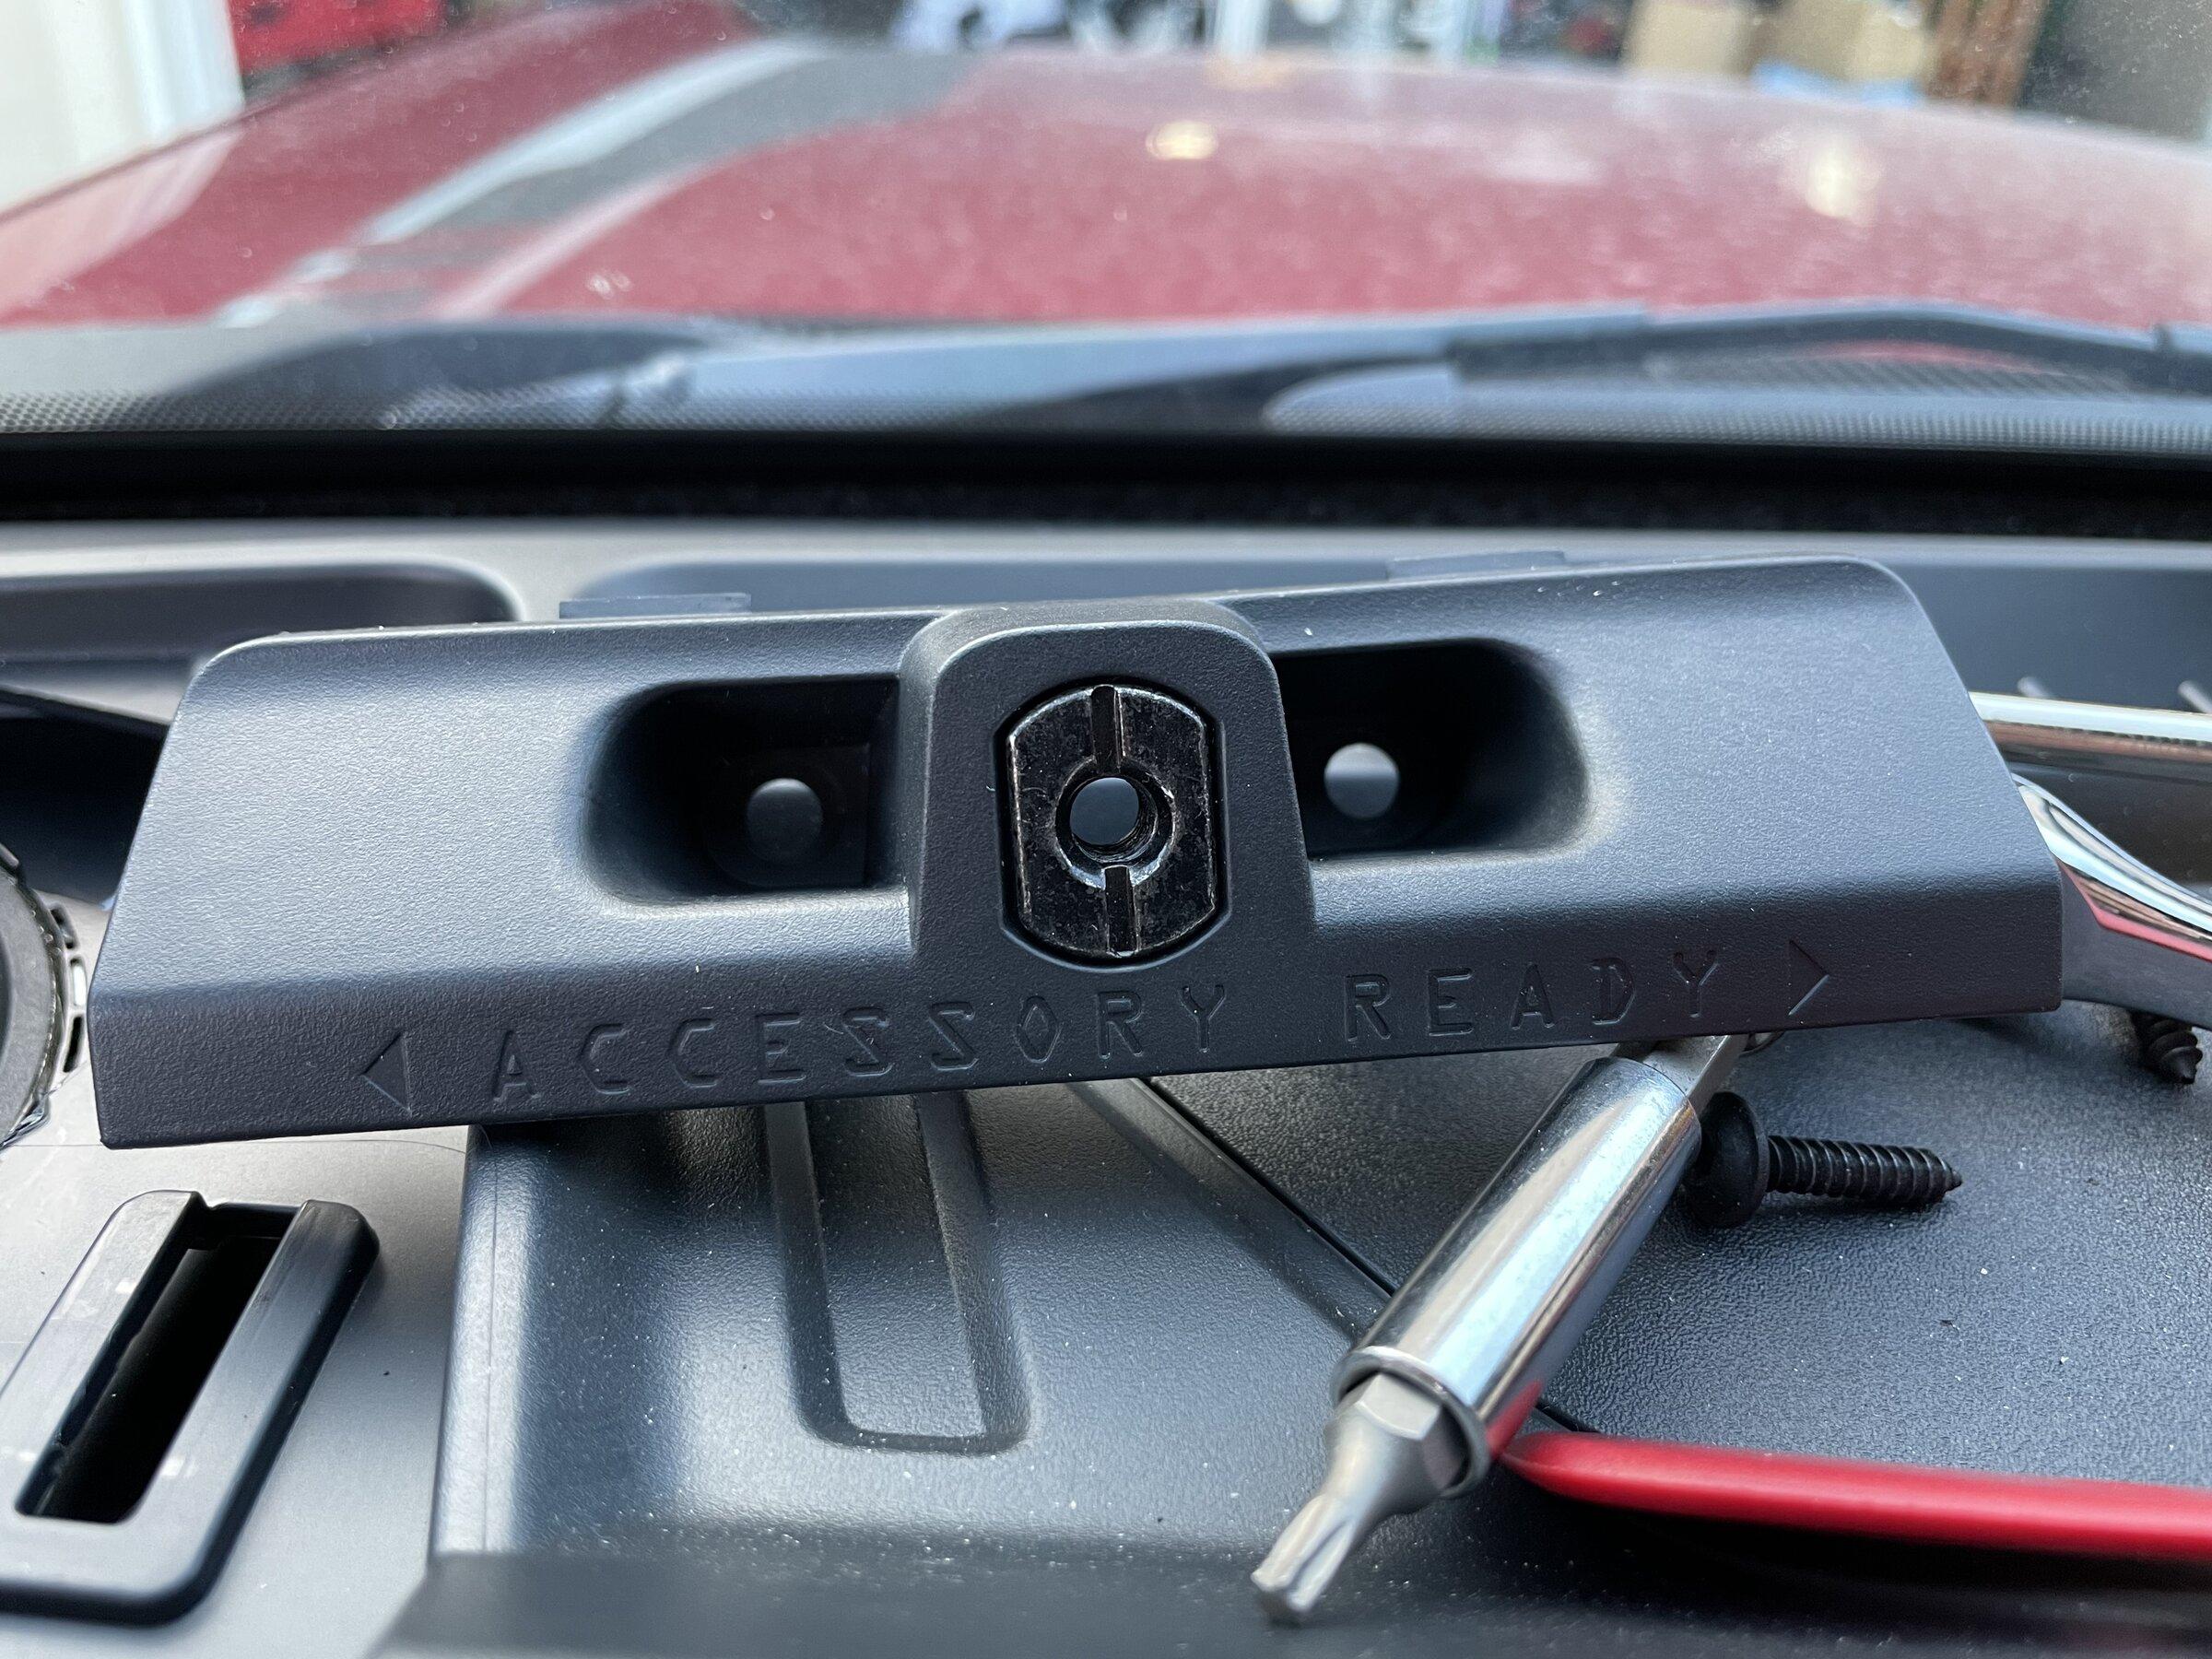
The center channel is a little tricky, you need to remove a screw on each side of the “accessory ready” bolt, remove that, then you can remove the speaker cover panel.

788548E7-EB84-4450-A00B-152CEE30B4B4.webp

73B6177C-30D6-44BC-9CCA-3F98B356B95C.jpeg


Kick Panel

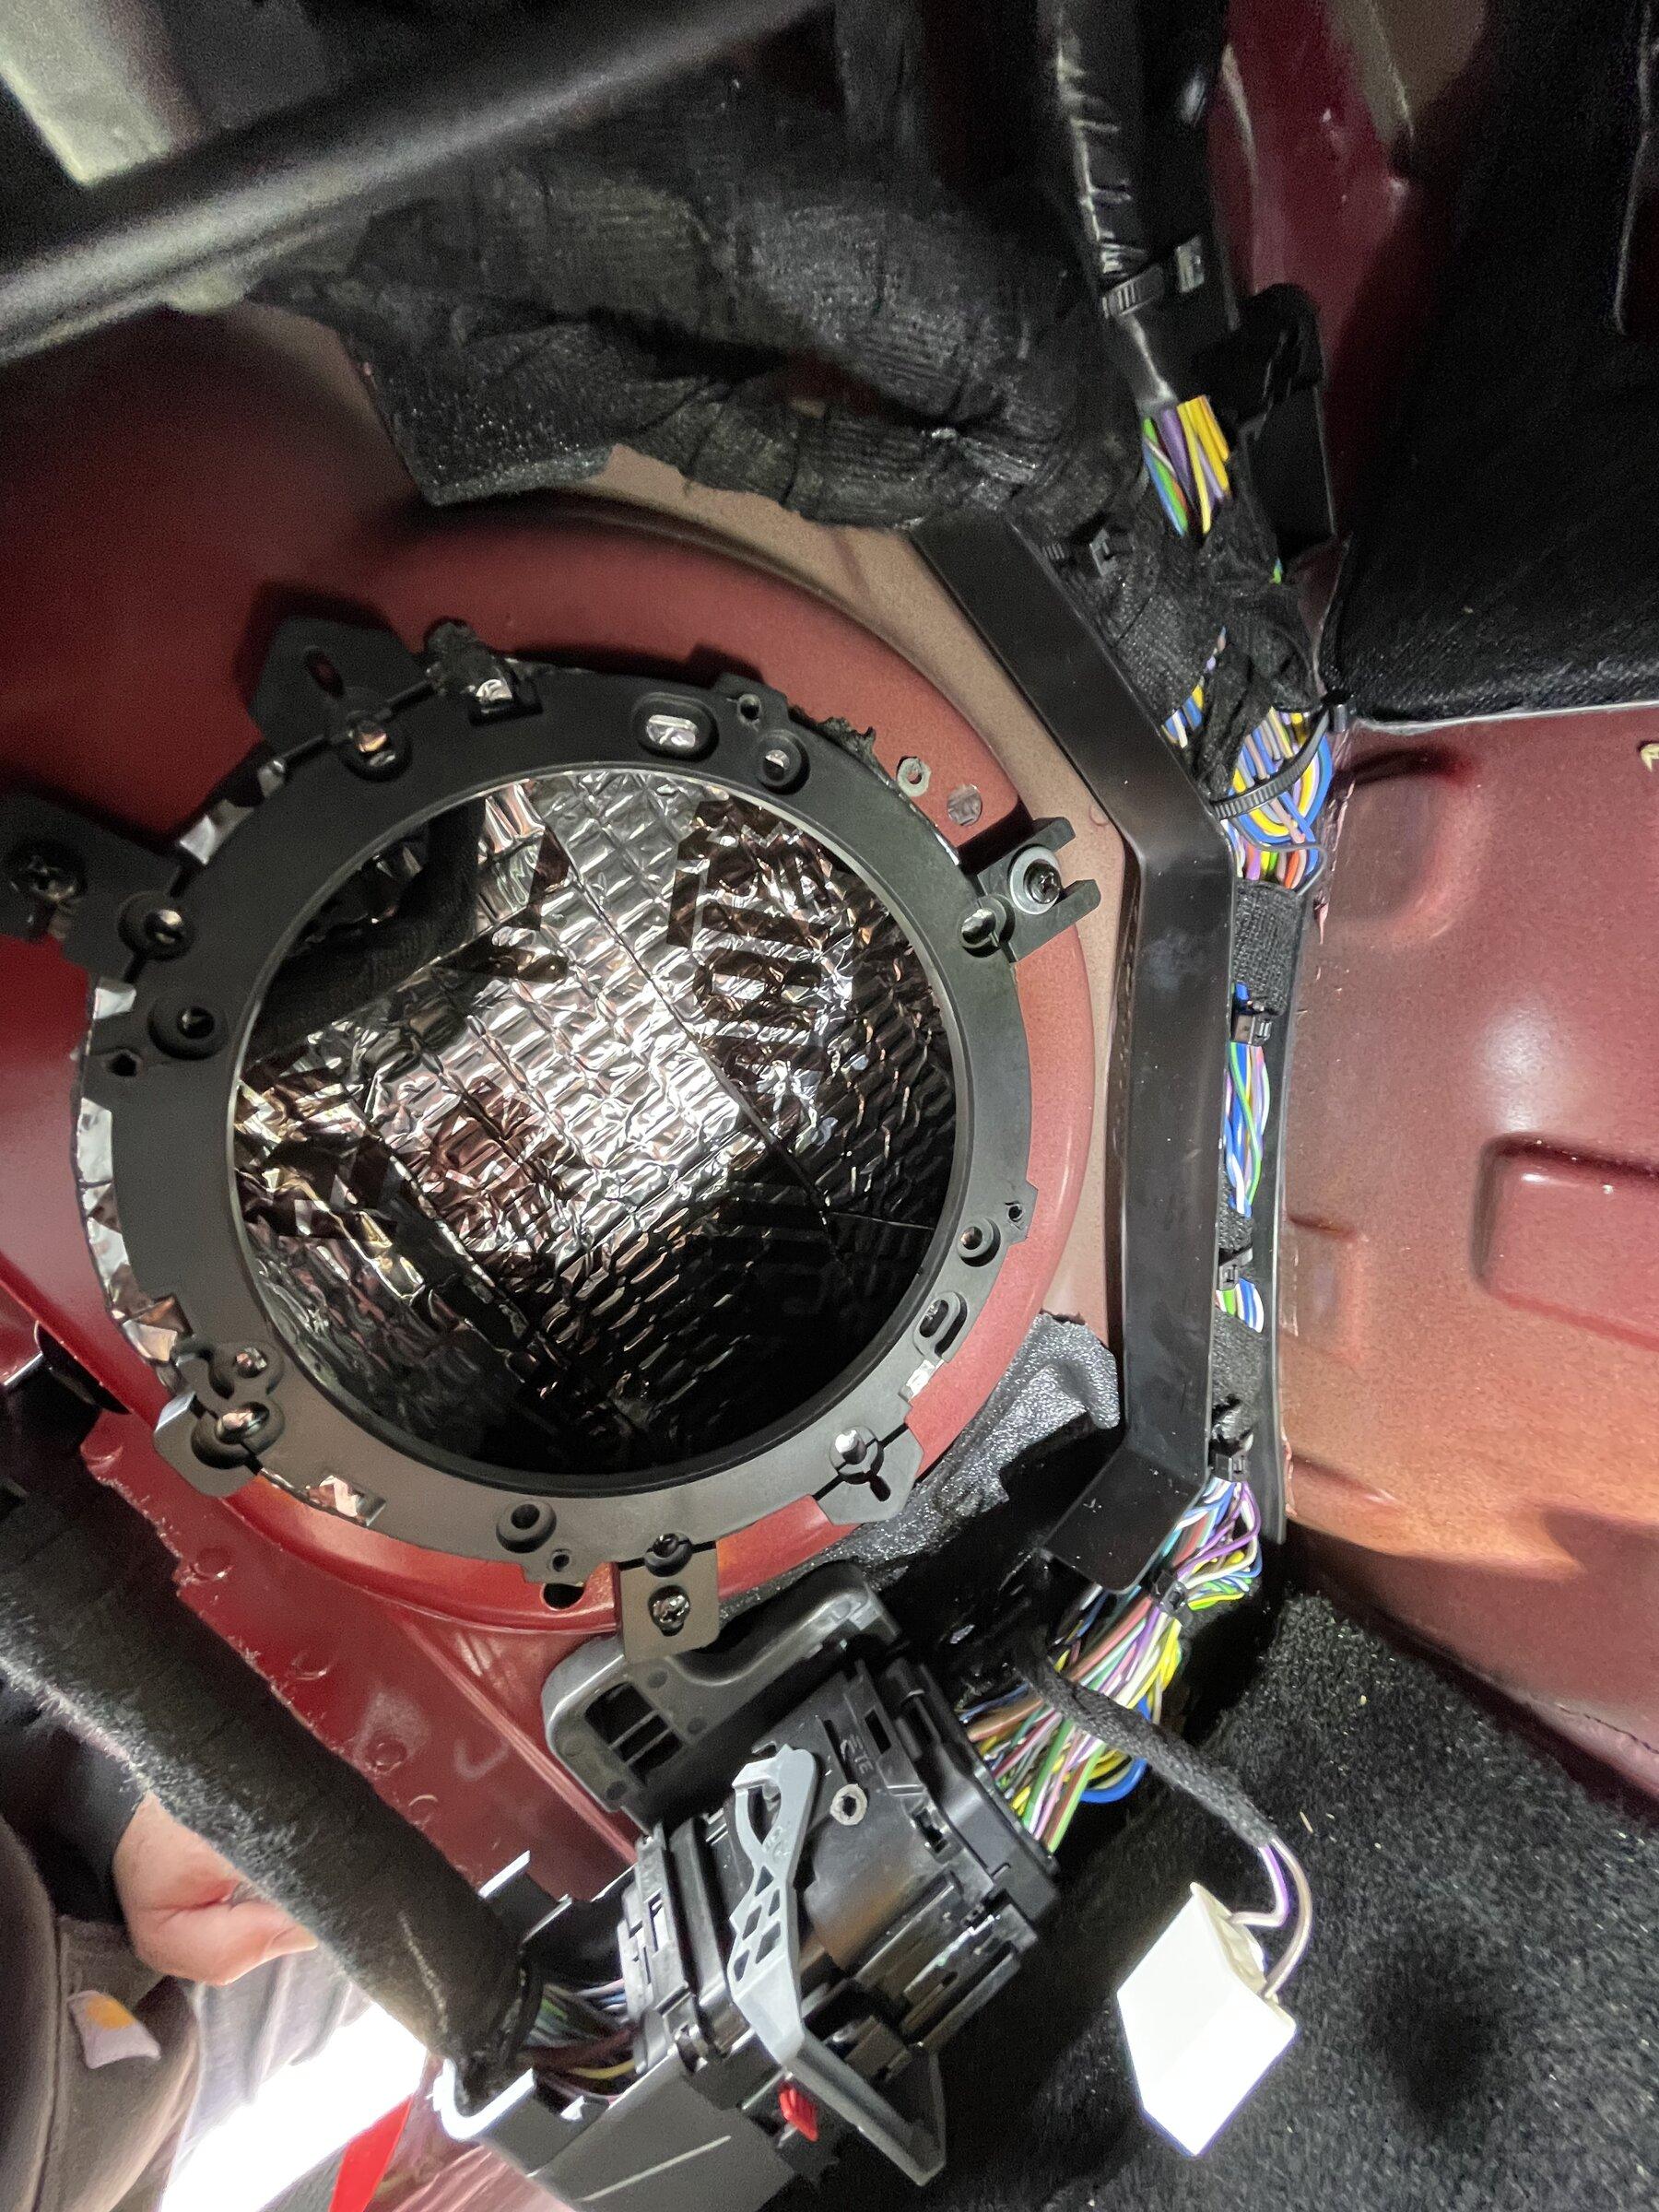
I used JL C1s here as well. Honestly a 2 way speaker is not needed here in the kick panels. The DSP/amp filters out highs, this is a place you could cheap out a bit If you want. The C1s came with a trim ring mounting adapter that worked great. Crutchfield also sent a Metra adapter that I did not use, and also sent a wiring harness adapter that I did use, both free. I used Kilmat behind these speakers as well. Removing the panels is easy enough, but it’s kind of an awkward spot to work in. There is a foam section below the speaker housing you will need to make a slit in and feed the wiring through. Button everything up with zip ties. Shop manual attached.

2CF2282C-4AC8-41BB-827E-18F6963B2D83.jpeg

A2B60198-7BA9-4D82-8A8B-96121BB69AC5.jpeg

9C3C4F7B-BC22-4932-BAF9-80B868011766.jpeg


Rear Pod Speakers

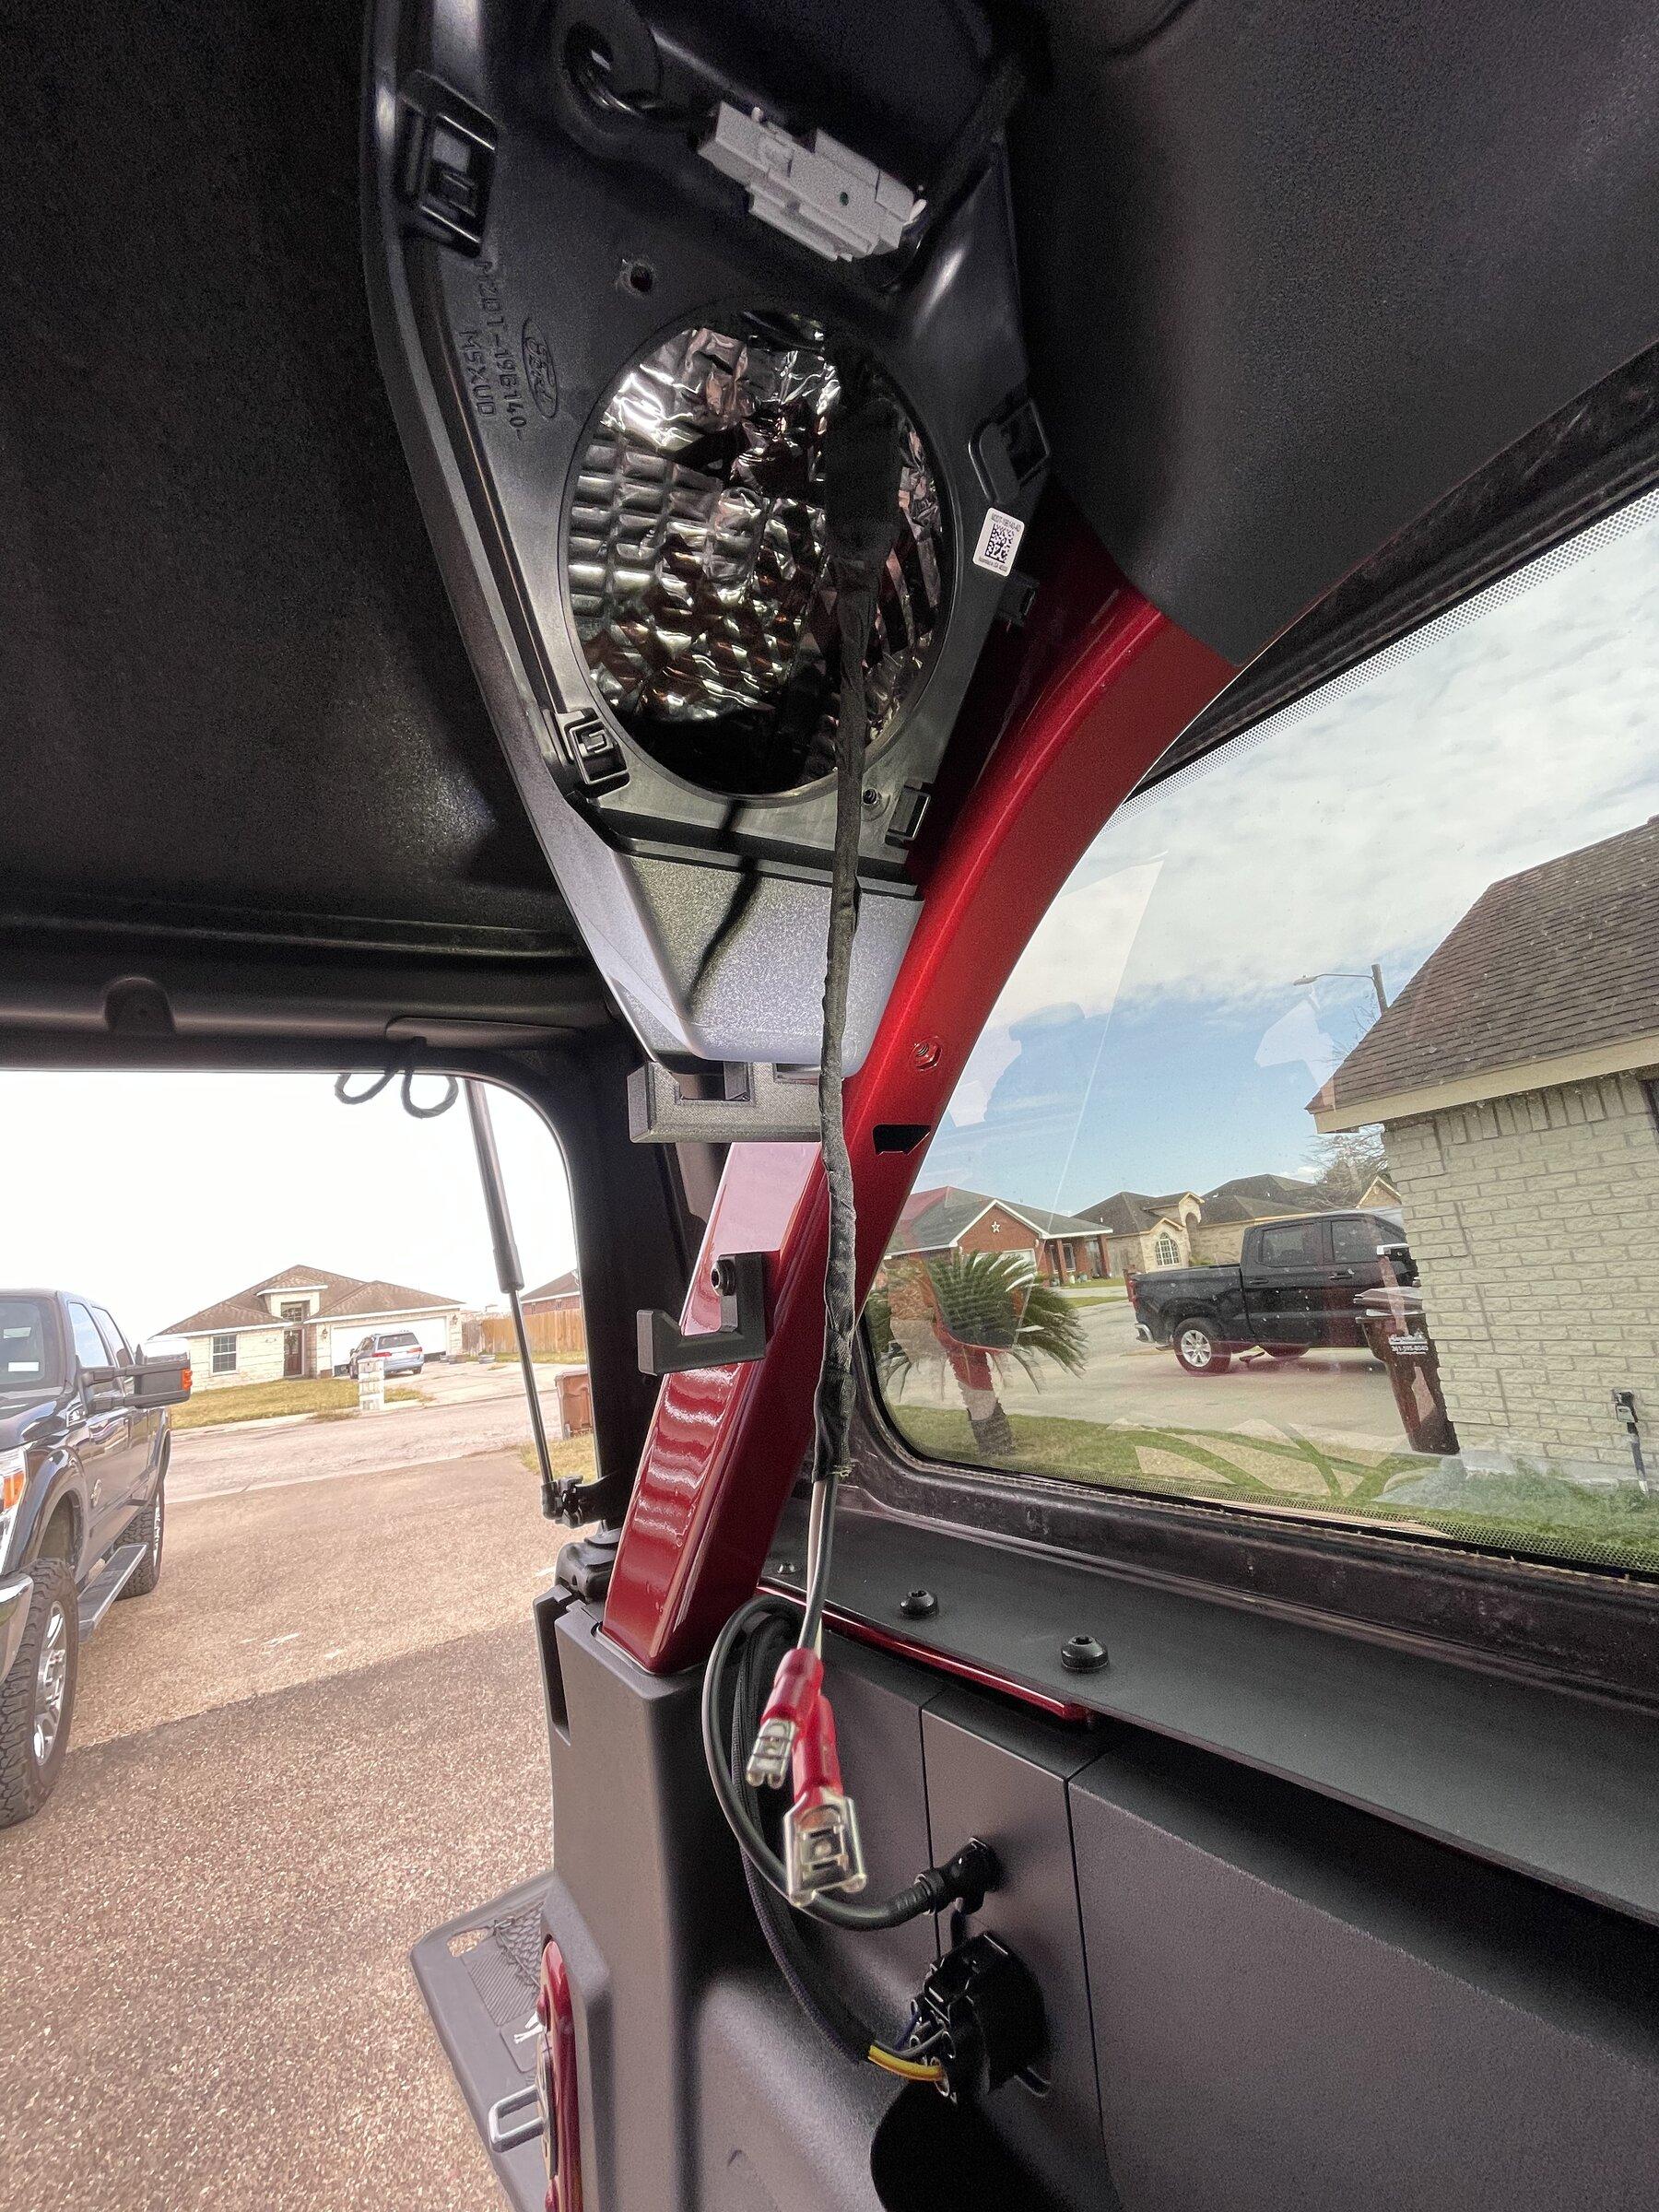
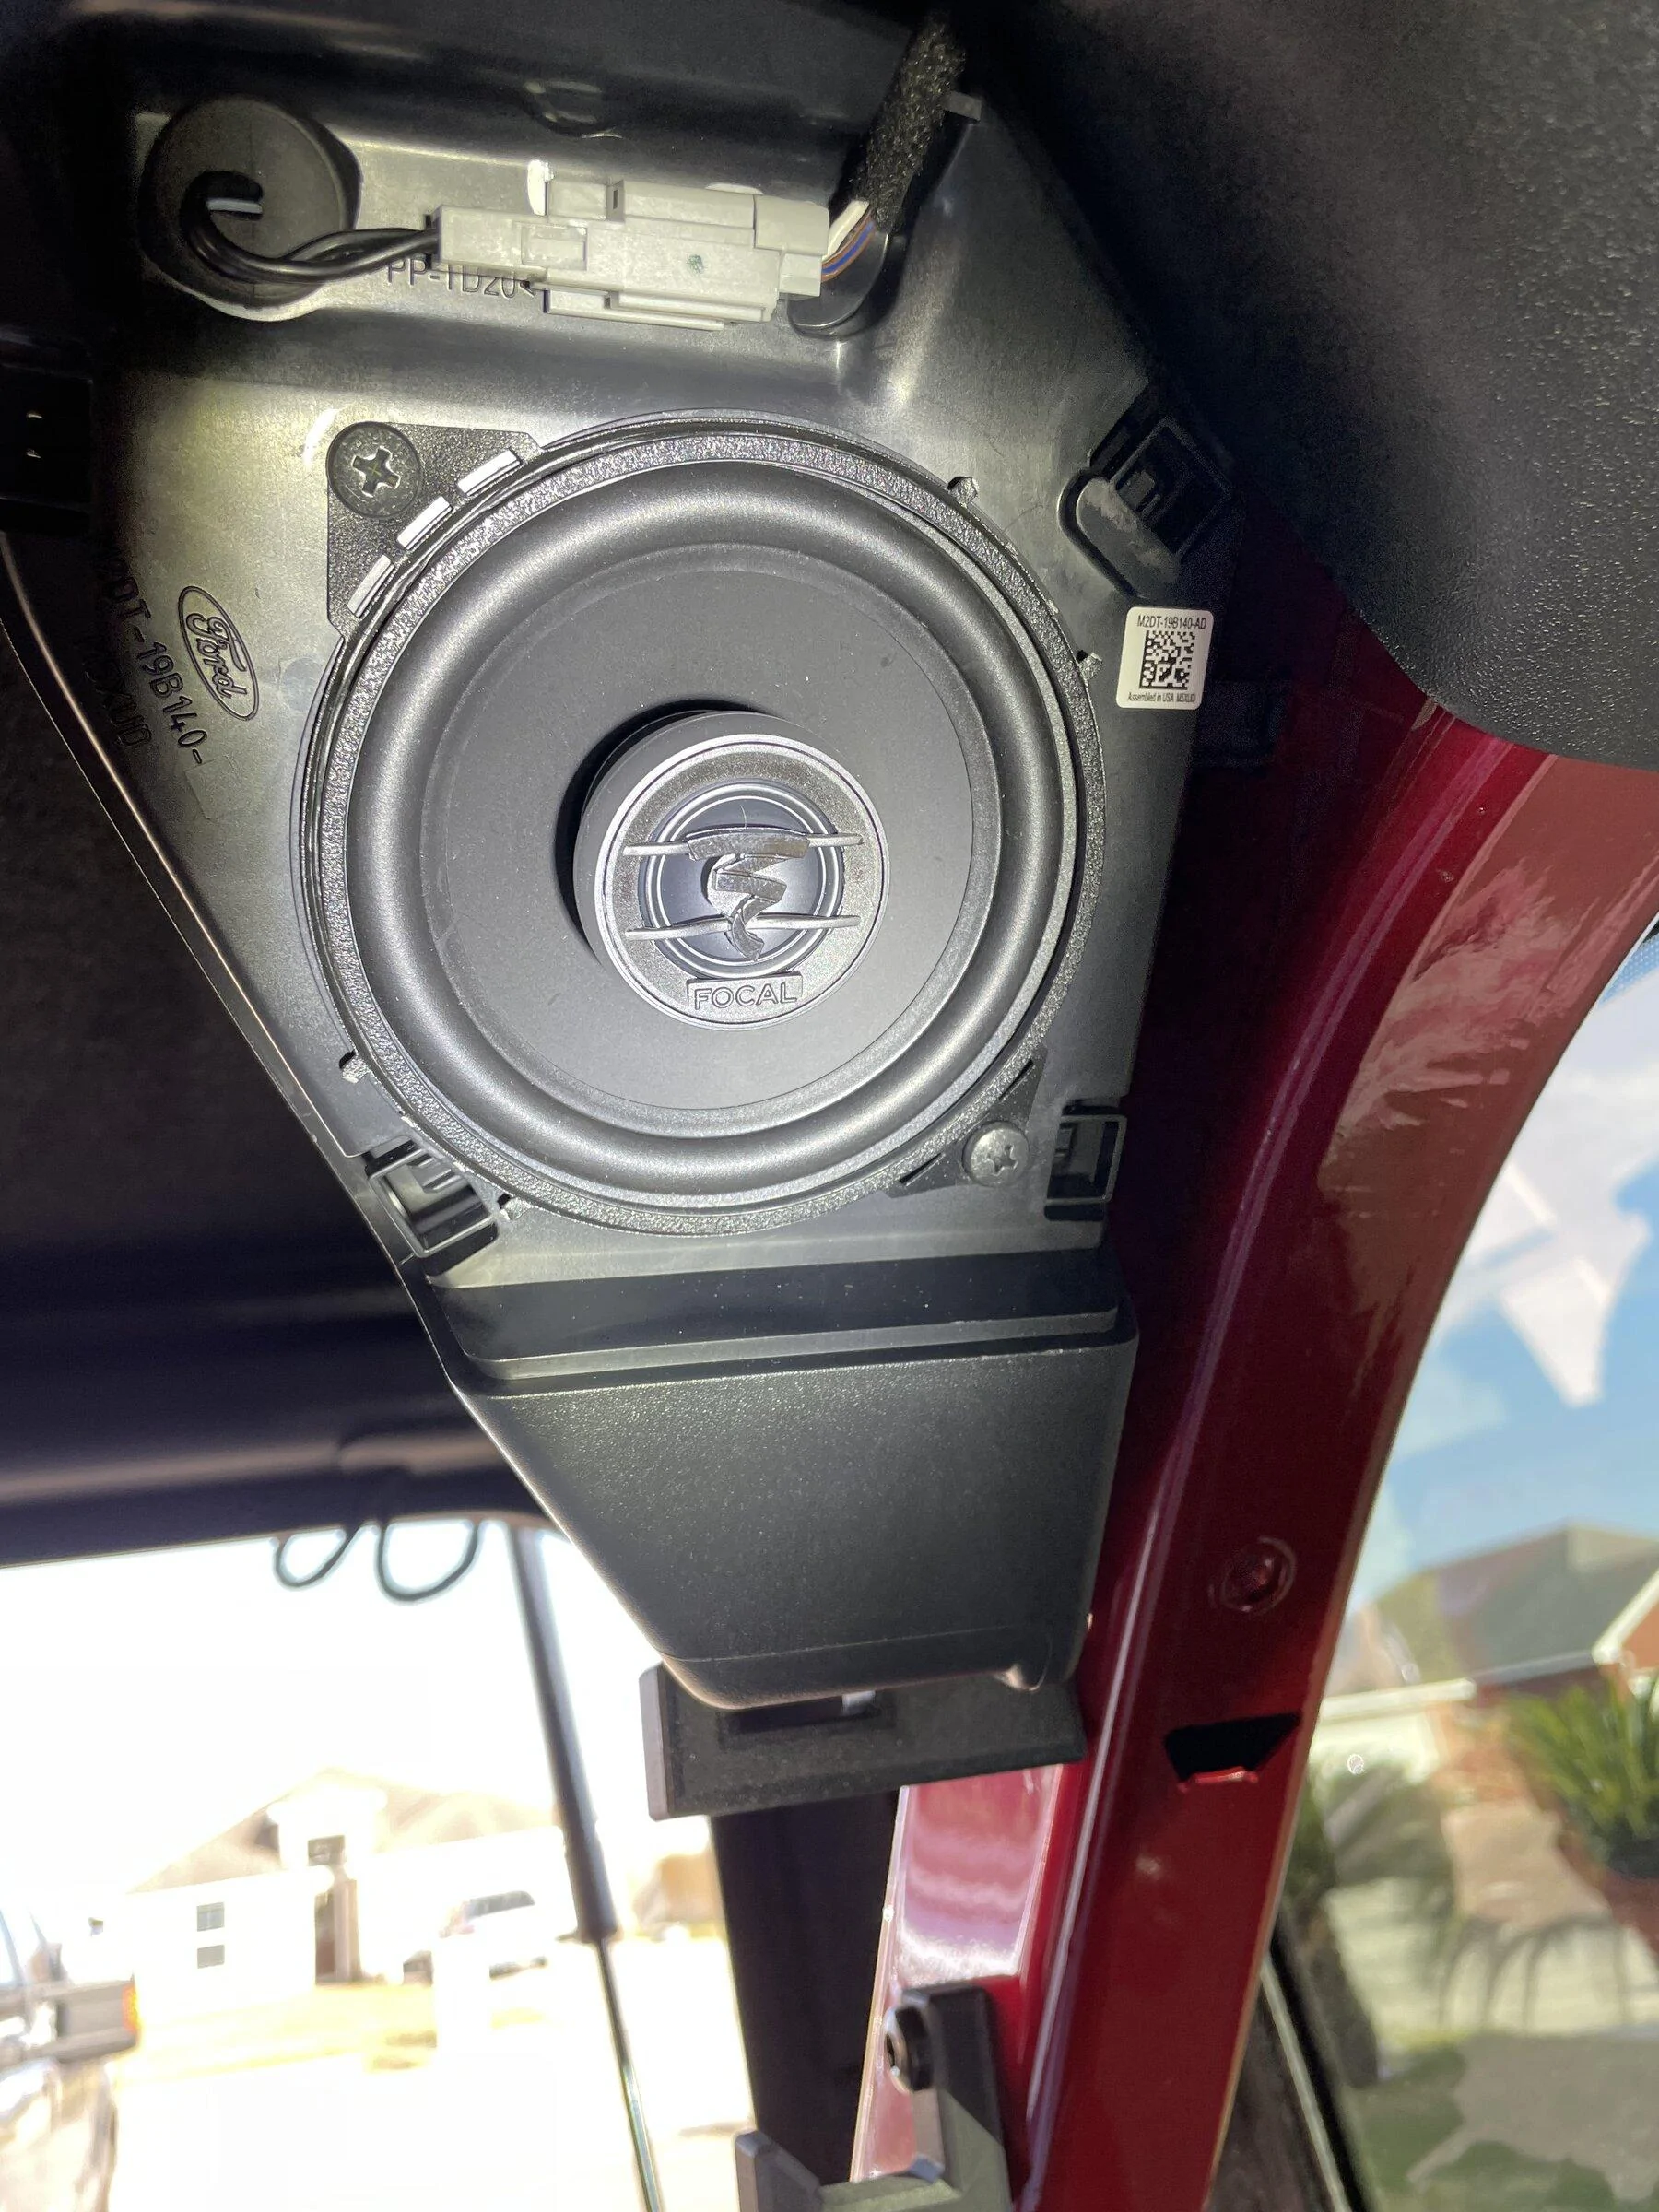
As mentioned before I used Focal ACX back here. They work great to provide some much needed rear fill. These are the easiest speakers to replace. Pop the cover off by squeezing both sides and it will pop right off. Unscrew speaker, install wiring harness, reinstall. I filled the entire cavity with kilmat again. Shop manual attached.

453A1B23-4B0B-4BEA-8A61-1FC13CA1F04D.jpeg

CB2457E0-2E45-471C-B9C4-774F92A9A933.webp


Sub/Amp

This is where things got interesting. I first tried to just swap the sub speaker, and long story short that was a huge fail. I tried two different subs. A $300 Rockford P3 that popped and clicked, underpowered to say the least. A $19 Pyle sub worked, but wasn’t much if any improvement over the stock sub. I took a pause here as life got busy. Then got re-interested by @cmcbronco and his great thread on installing the B&O sub enclosure on a base system. Lots of great info here.

https://www.bronco6g.com/forum/threads/b-o-sub-installed-on-base-bronco-…-sorta….37207/

I ended up going with a Kicker Comp R 4 ohm DVC sub and Kicker key 500.1 amp. I wired the sub parallel to get 2 ohm at the amp. The beauty of this amp is you can use the speaker wires going to the factory sub as high level inputs. This will also work for the power on, so no need to find a trigger on circuit. I called Kicker and confirmed the sub wires coming from the factory amp will work for high level inputs, no line output converter needed. They said this is exactly what this amp was designed for.

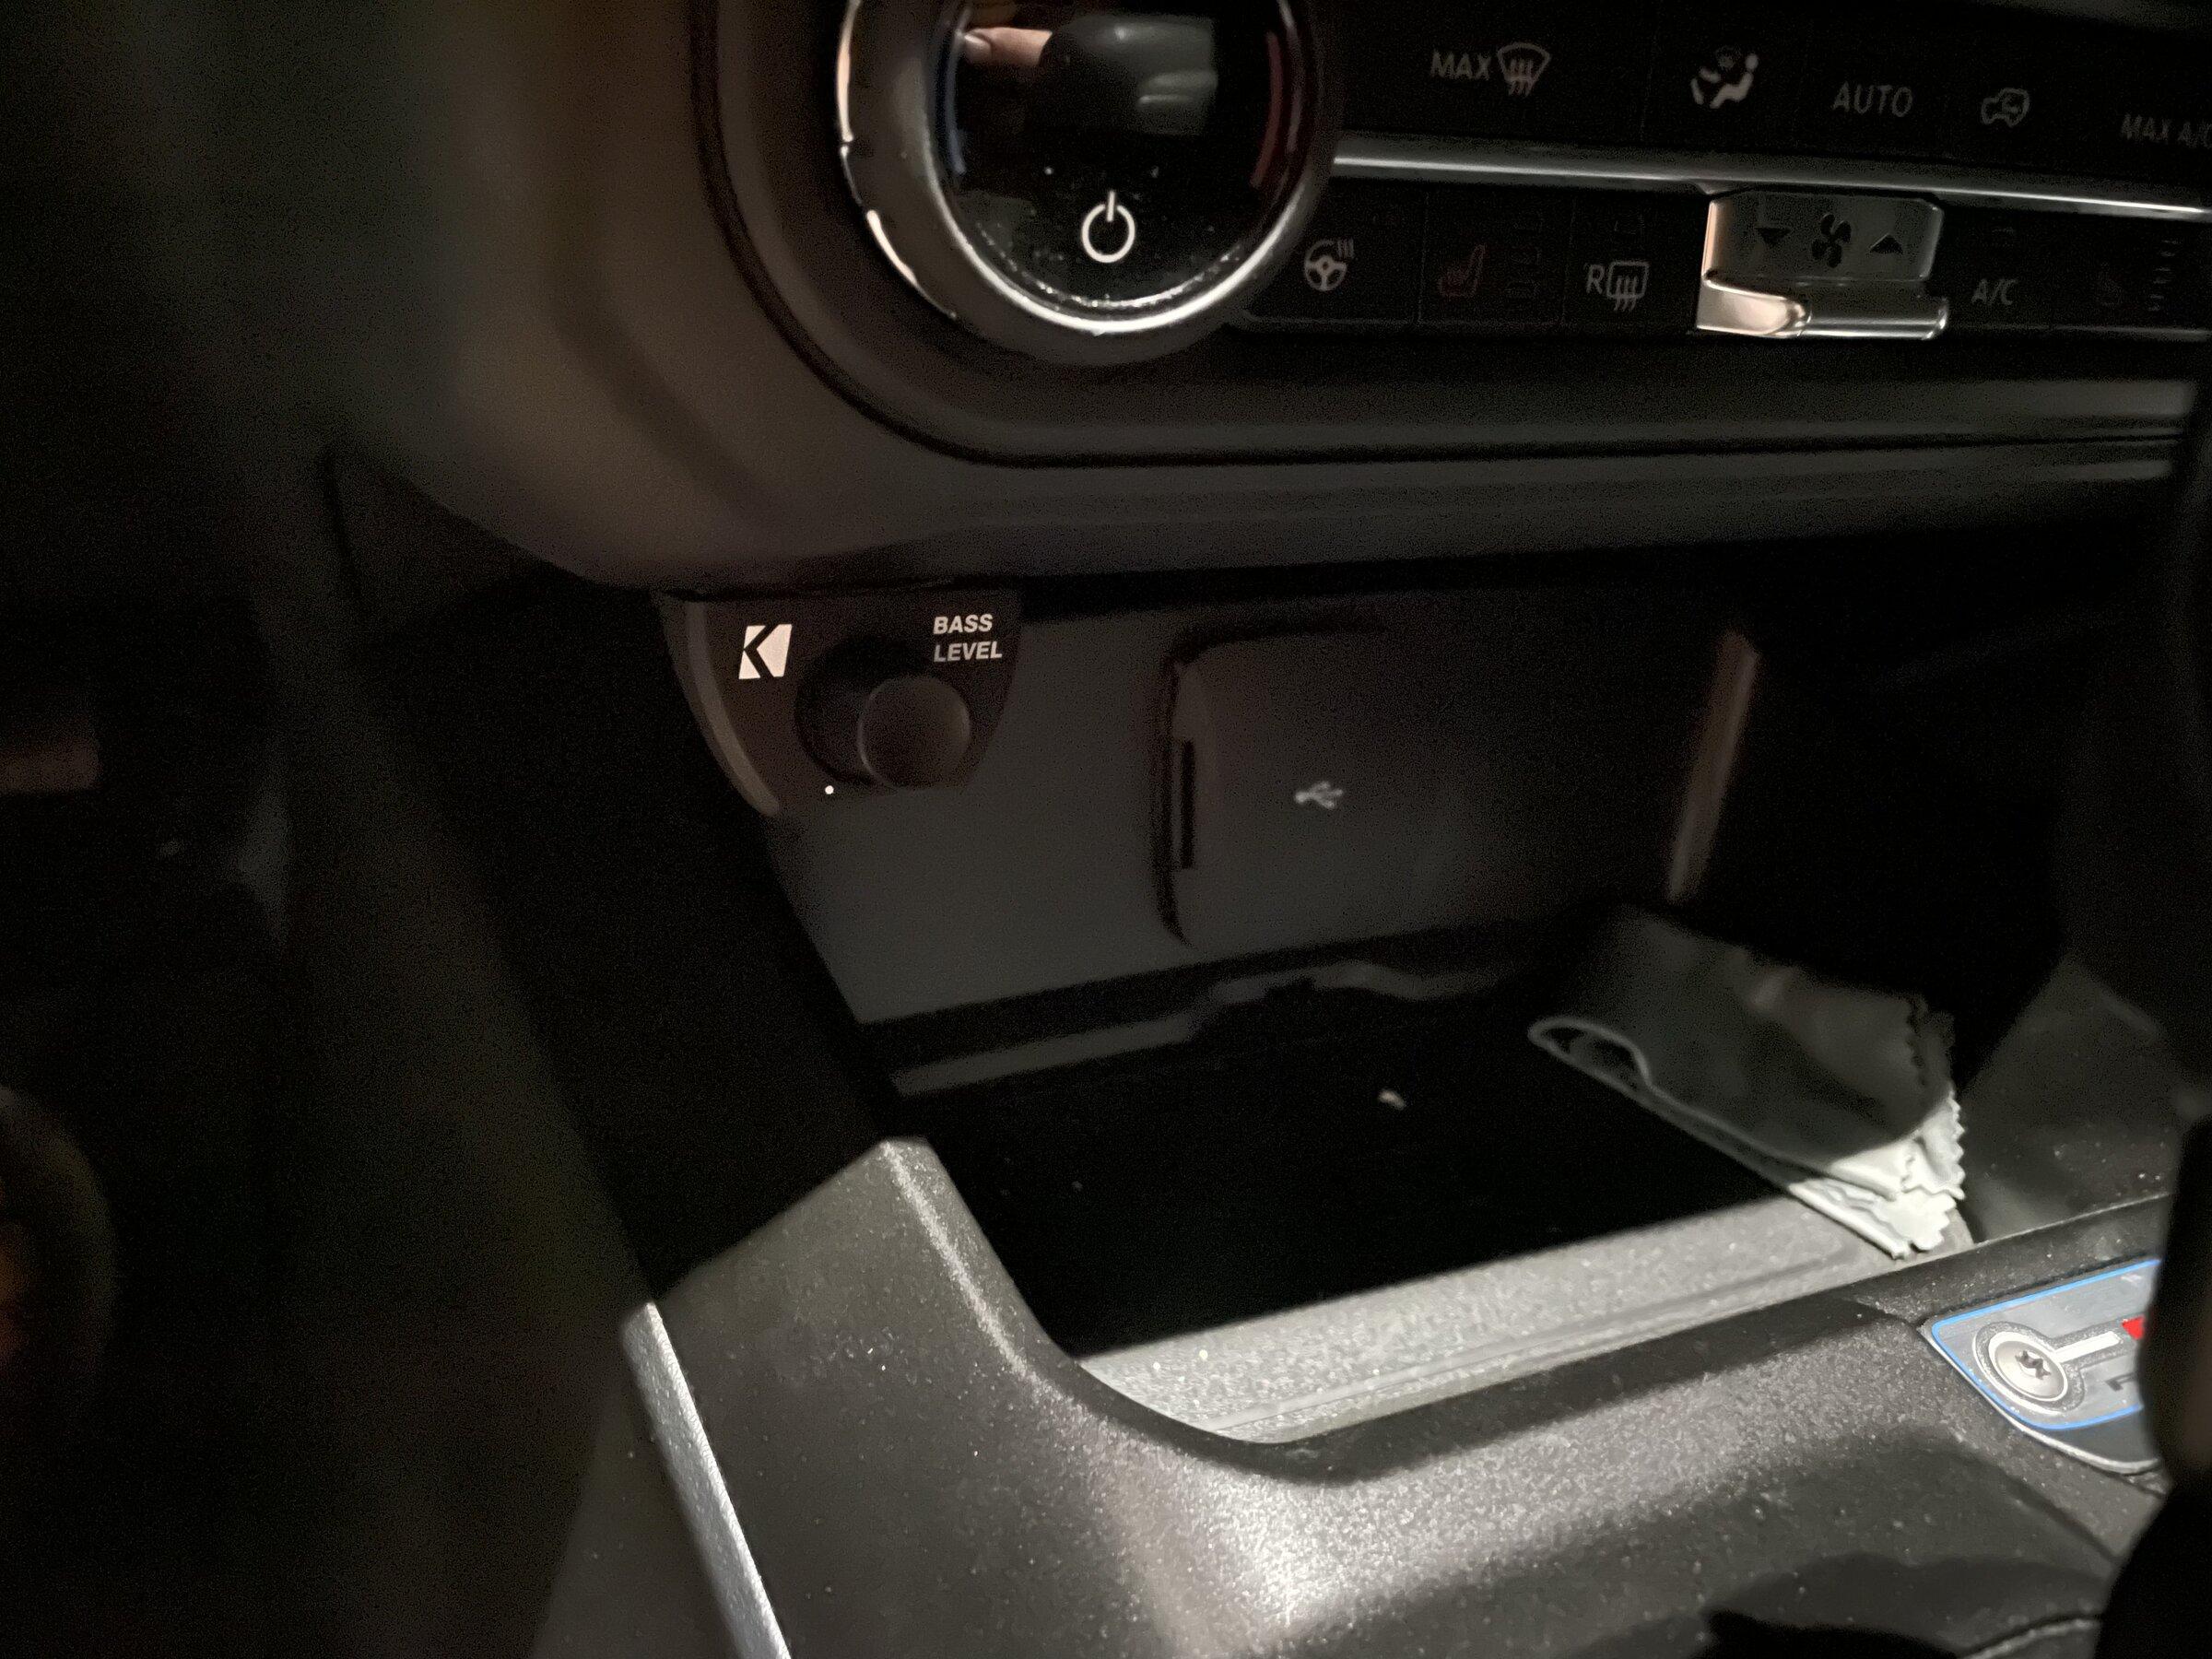
The Comp R sub fits the factory enclosure great, but you need to pry the plastic trim ring off with a screwdriver. No modification needed to the enclosure with this sub. Shout out to @SCTWNB for the great mounting location for the amp, I wouldn’t of thought of this location myself. It’s mounted to the roll bar, snugged in there next to sub enclosure. It is a bit tricky, but take your time, mark your holes, drill some pilot holes. Use double sided mounting tape to hold it up for install and cushion it from the body. If you plan to use this location pay close attention to where i have it, any higher and the PATS antenna mounted on the quarter panel will interfere. A right angle adapter is needed for the remote volume wire, which I installed under the HVAC controls. Wire runs down the passenger side wire channel, up kick panel, behind glovebox.

2F409D2A-206D-4699-A809-D31E0E9E3B52.jpeg


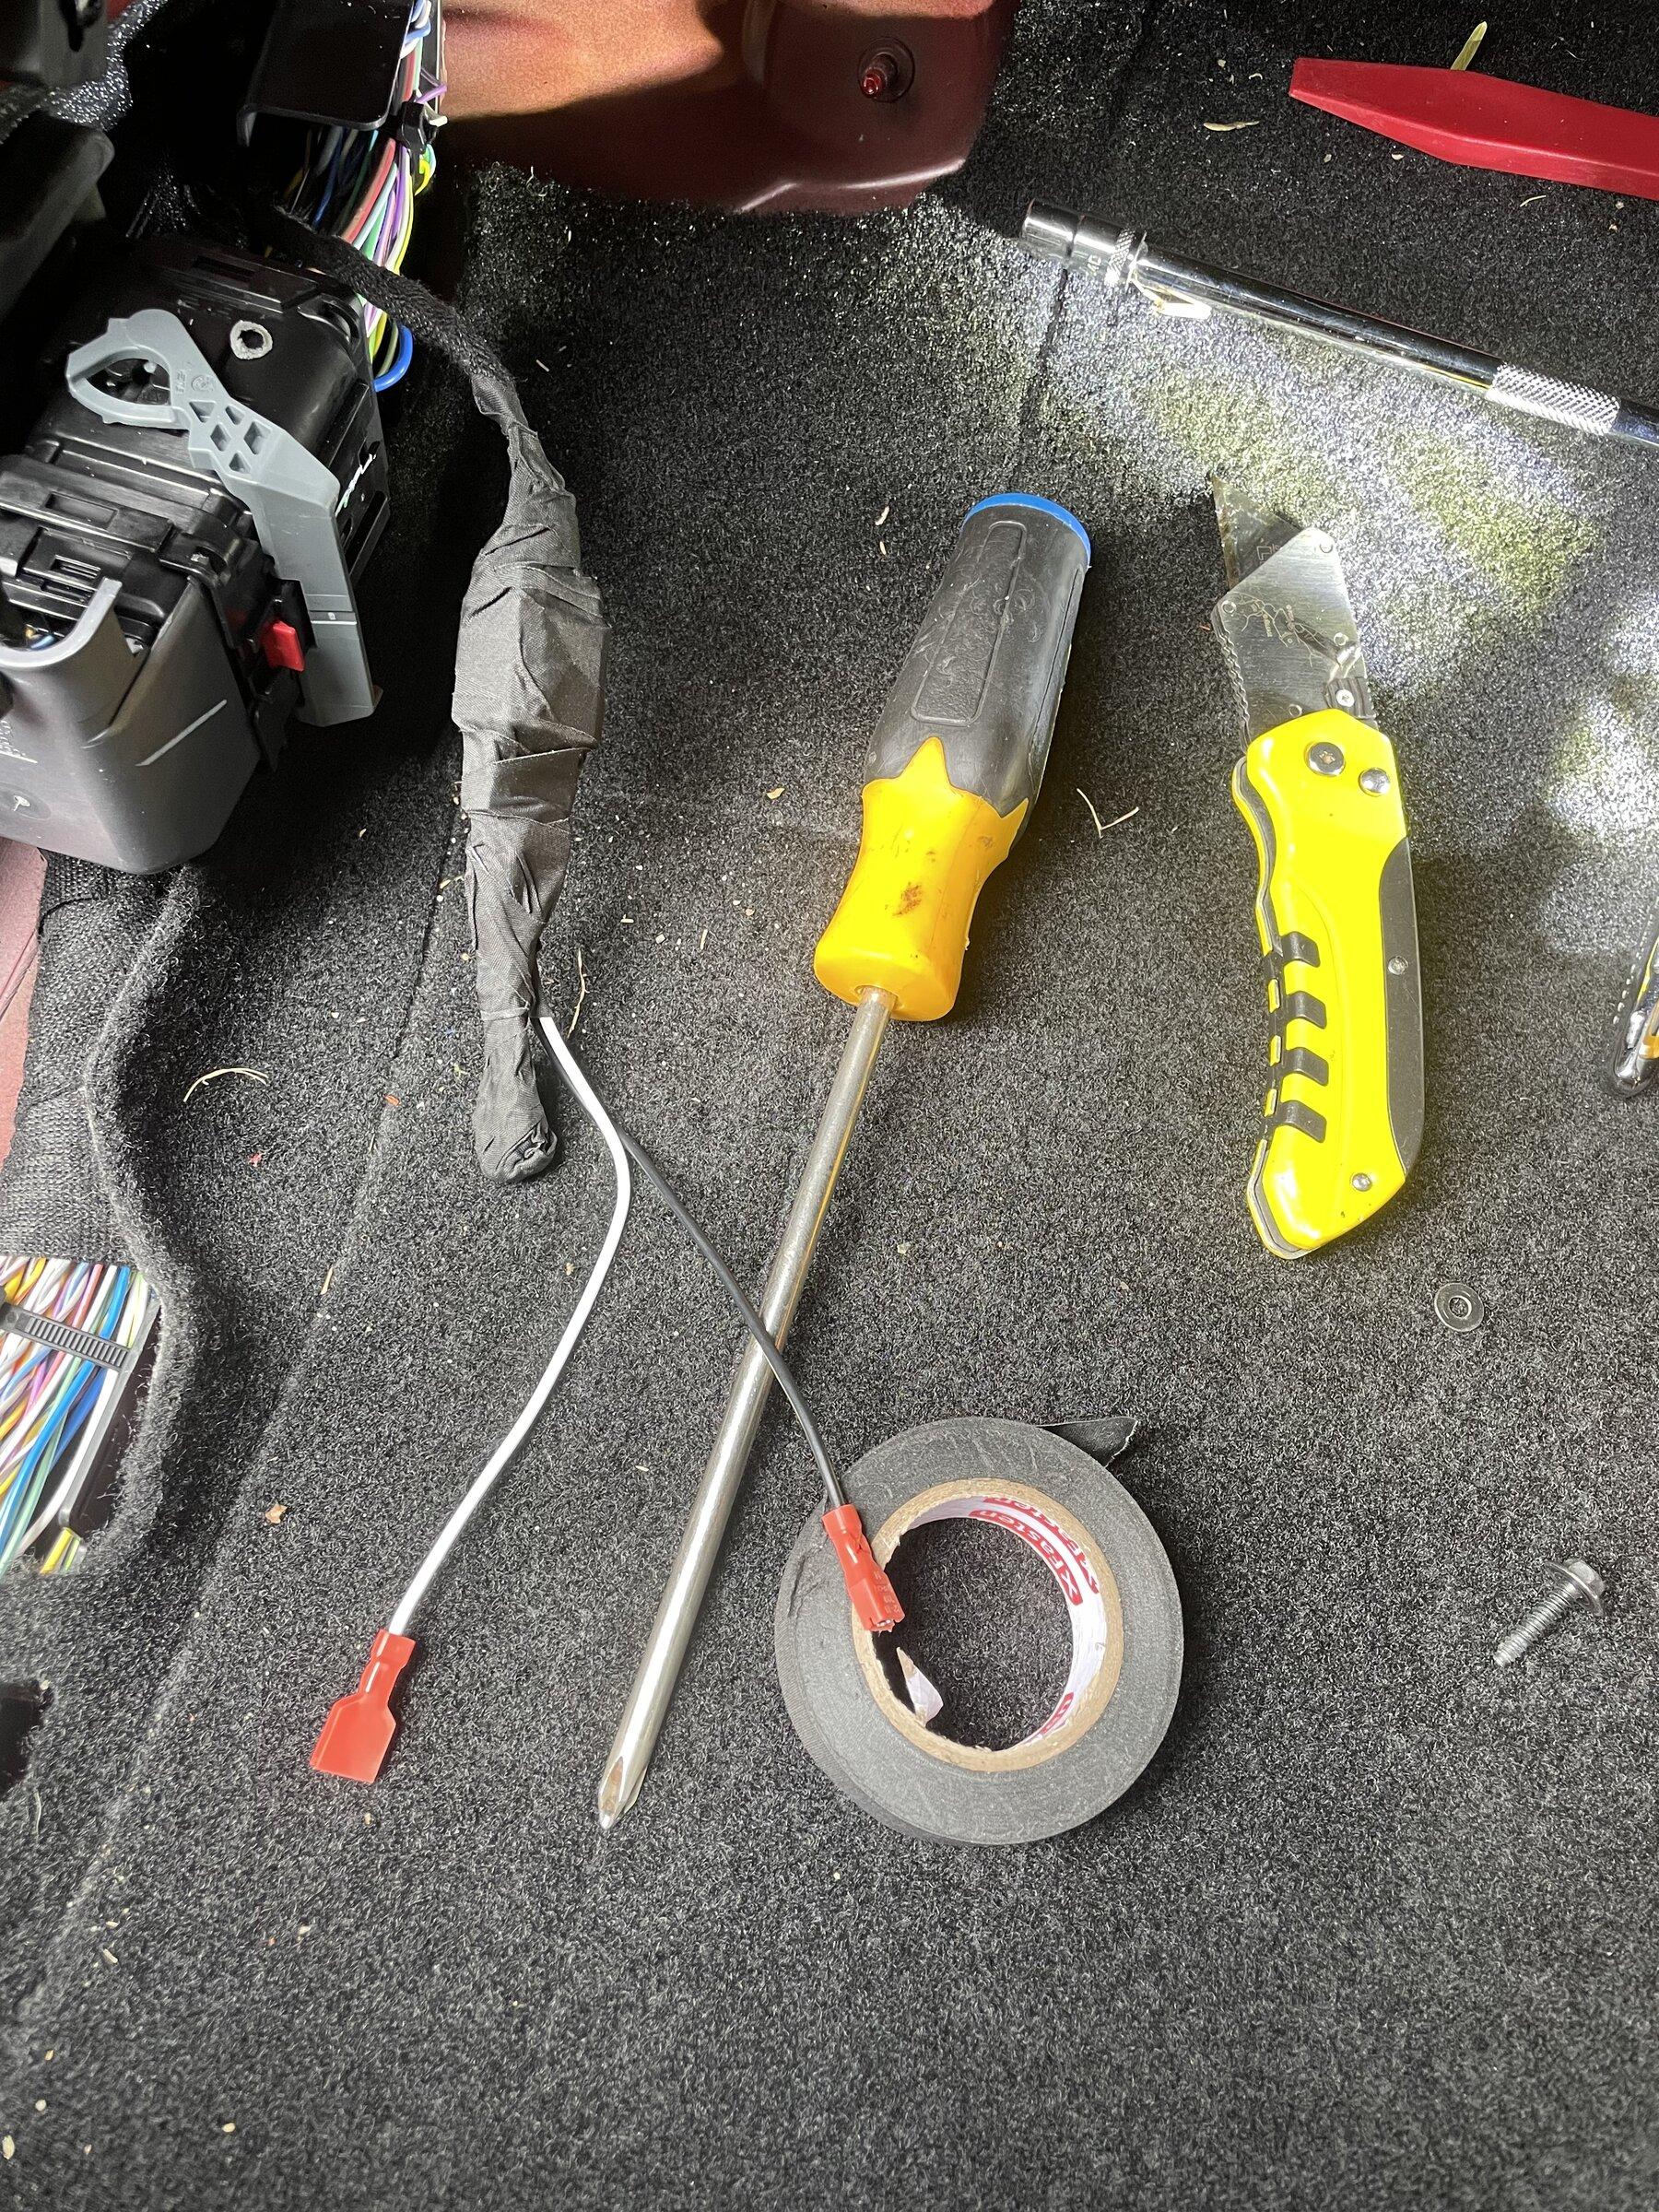
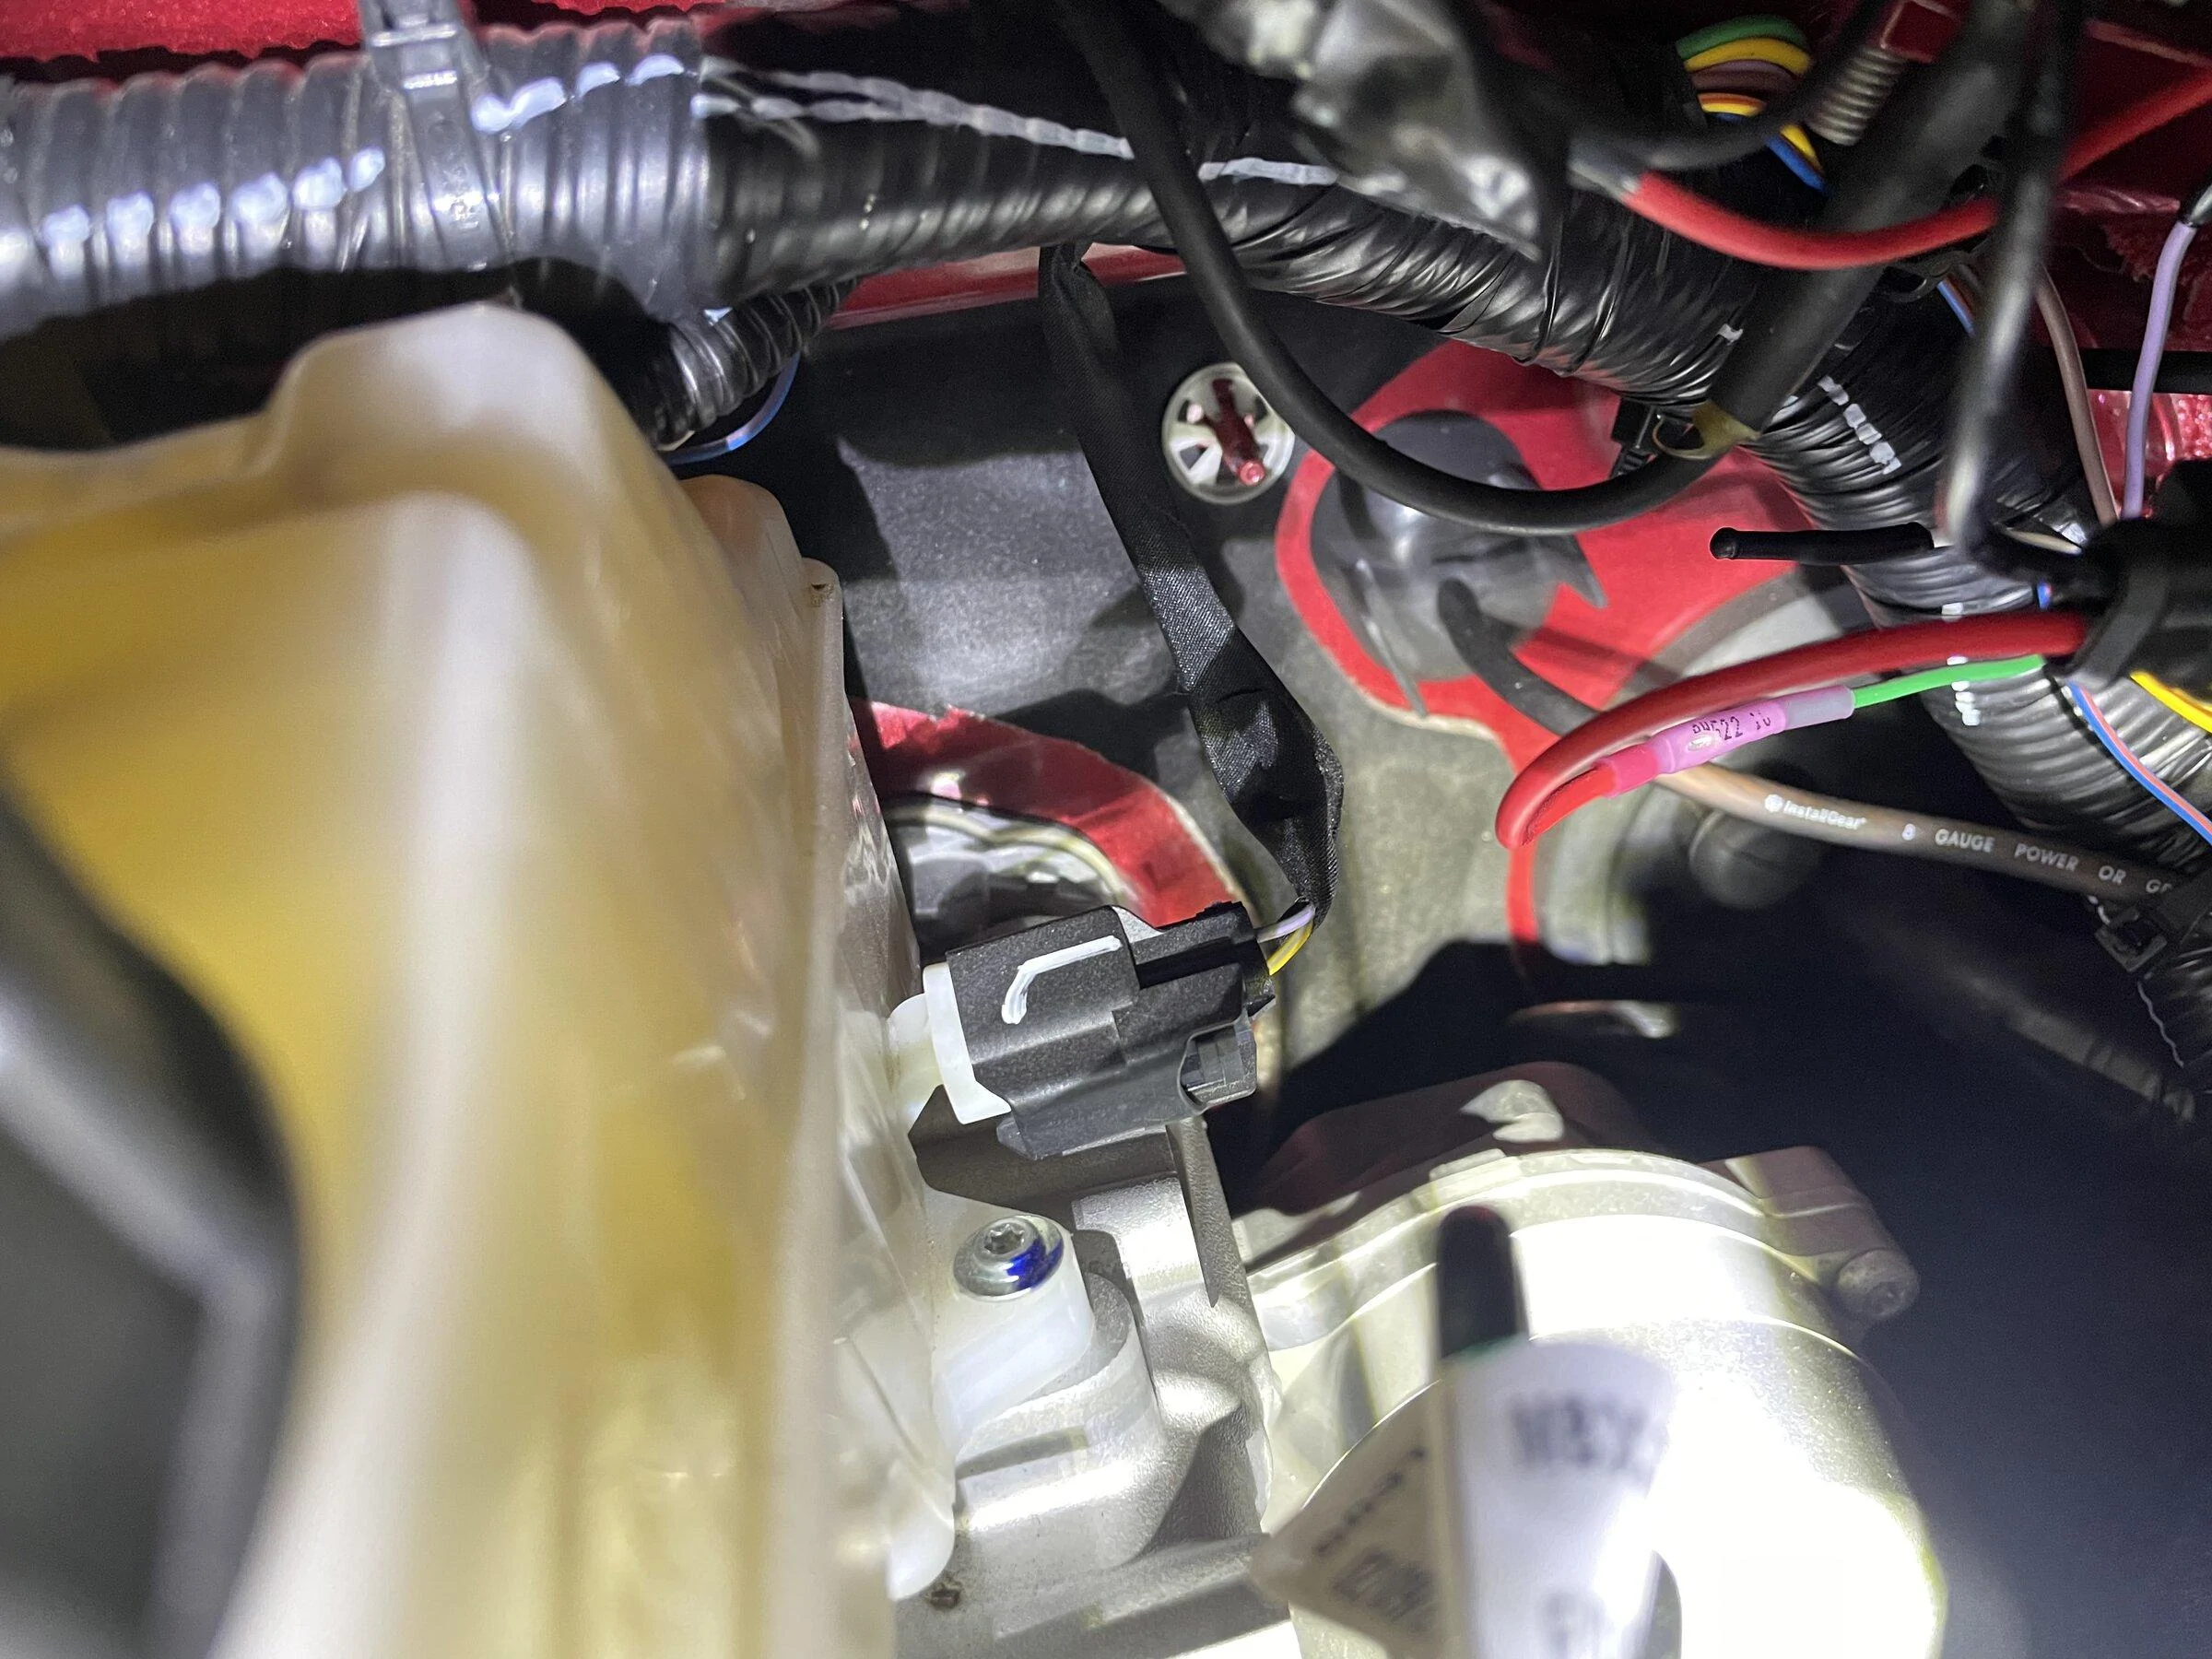
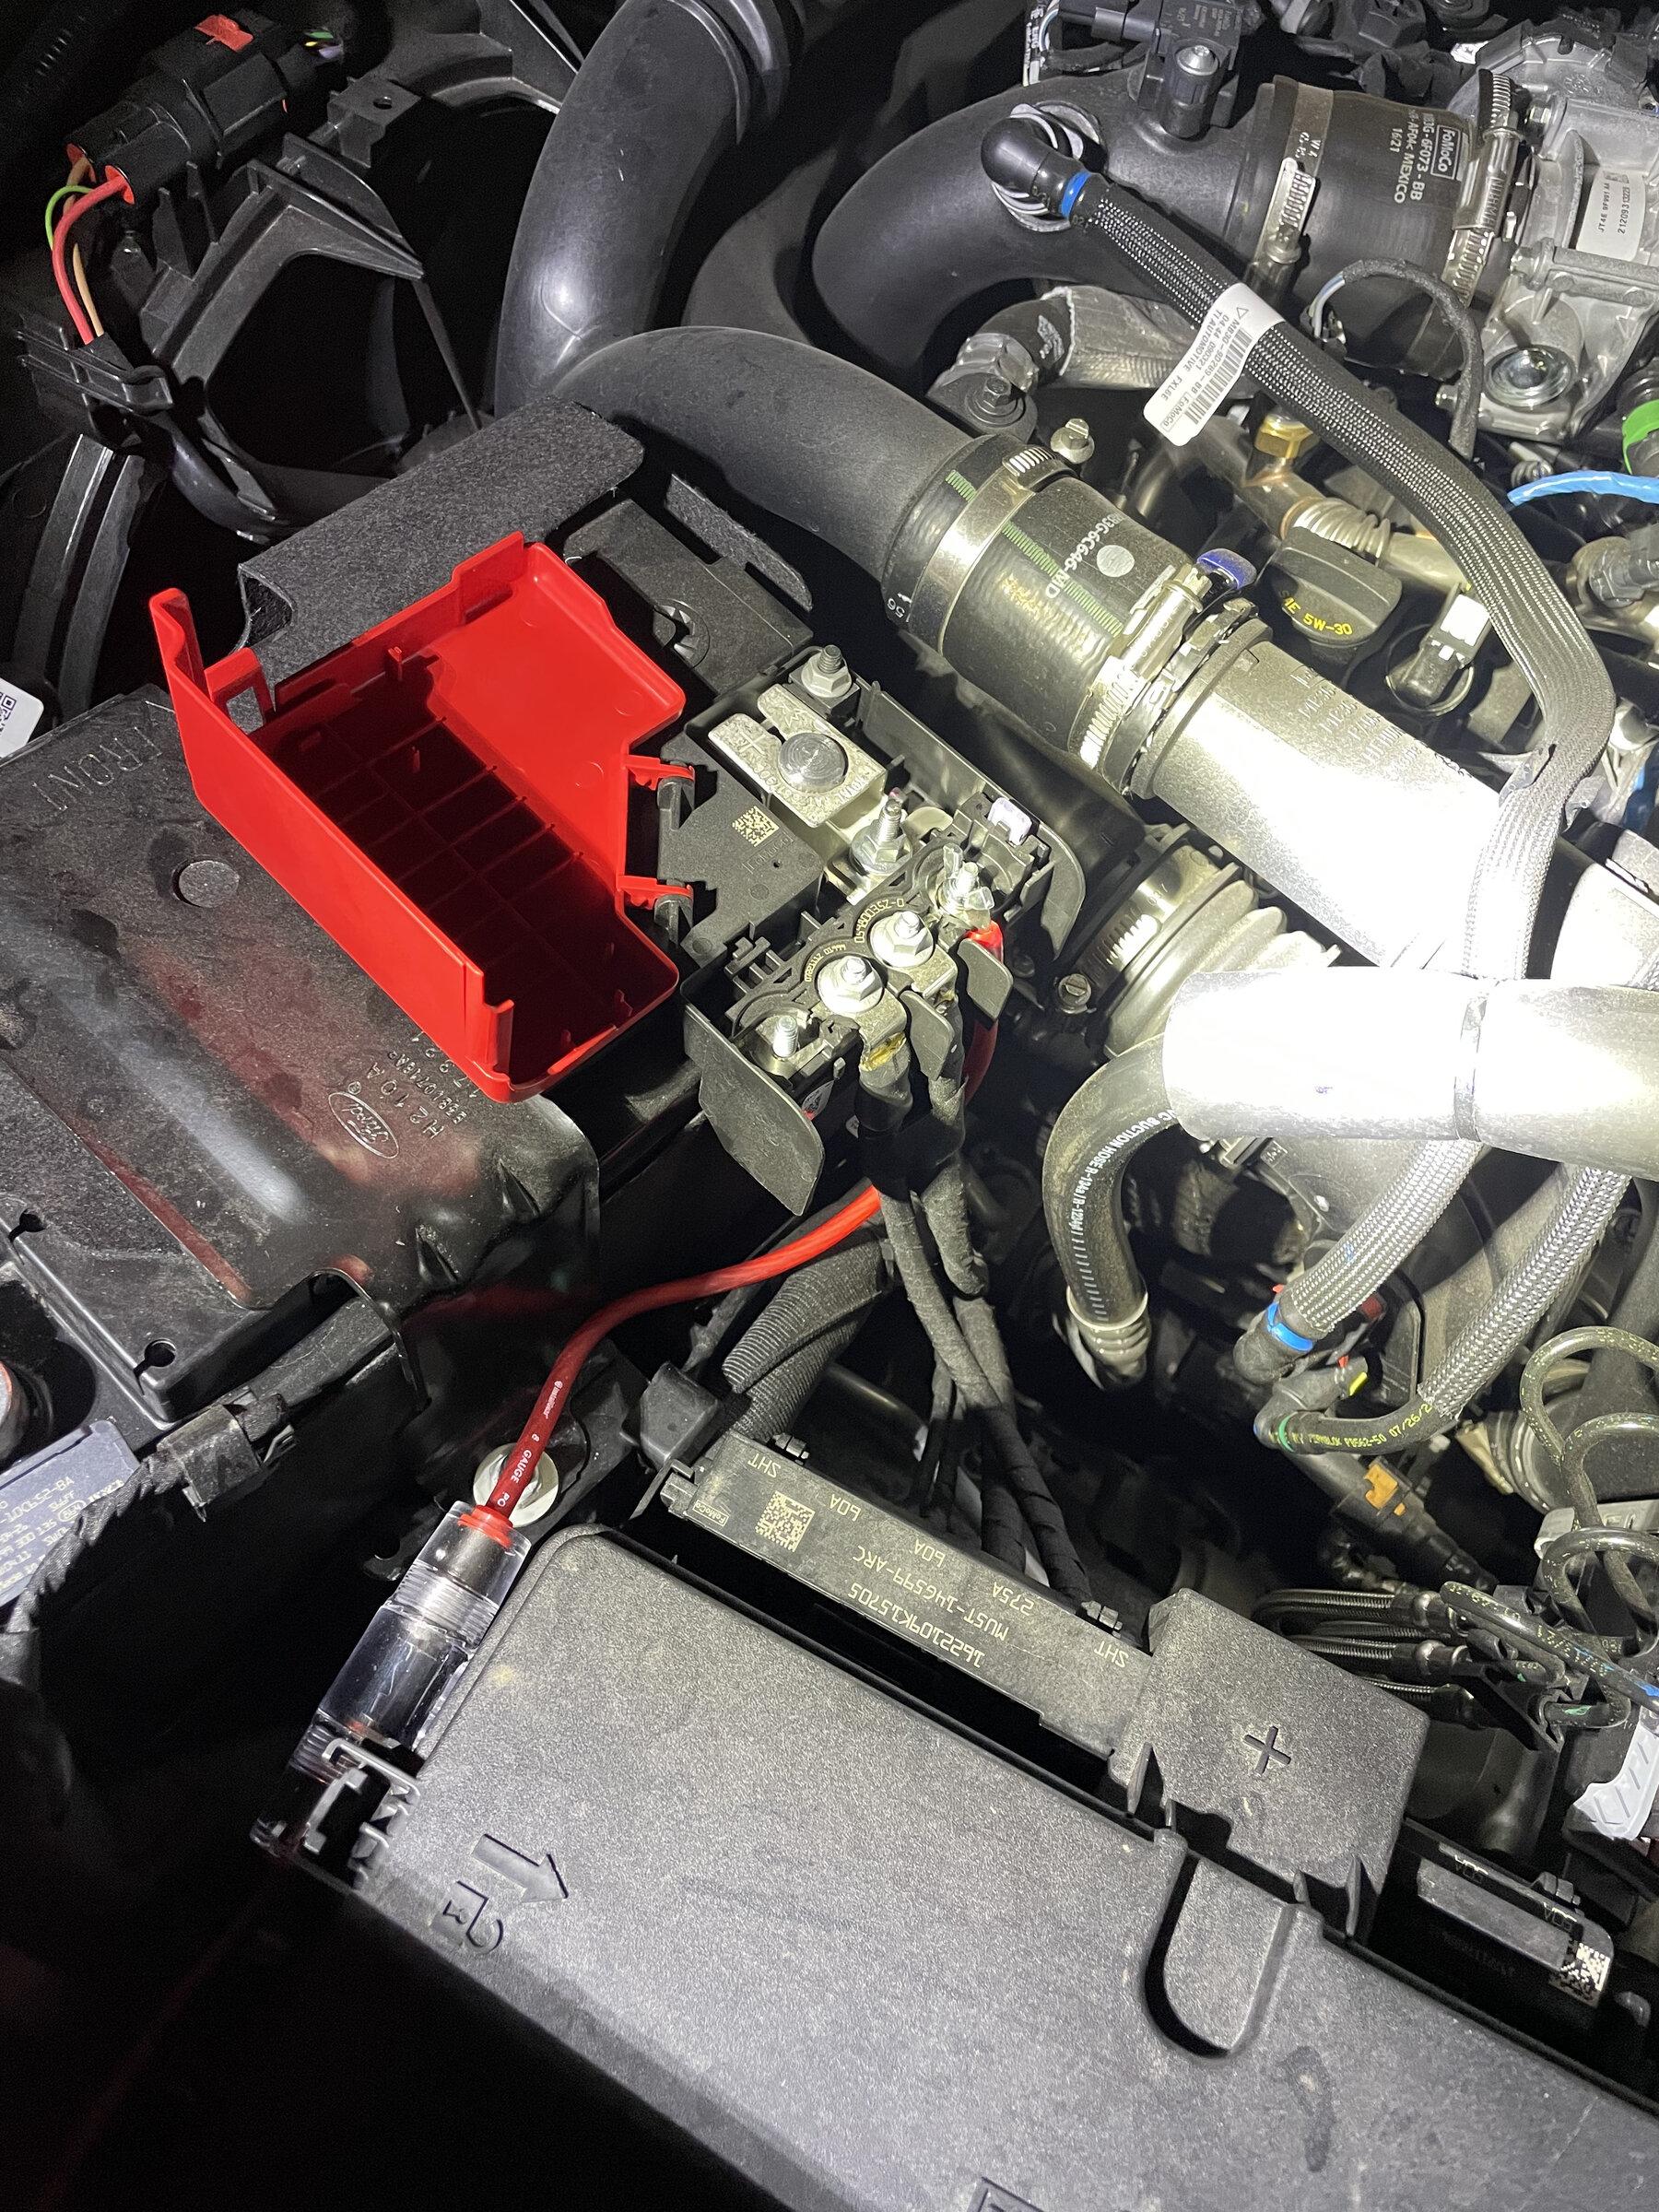
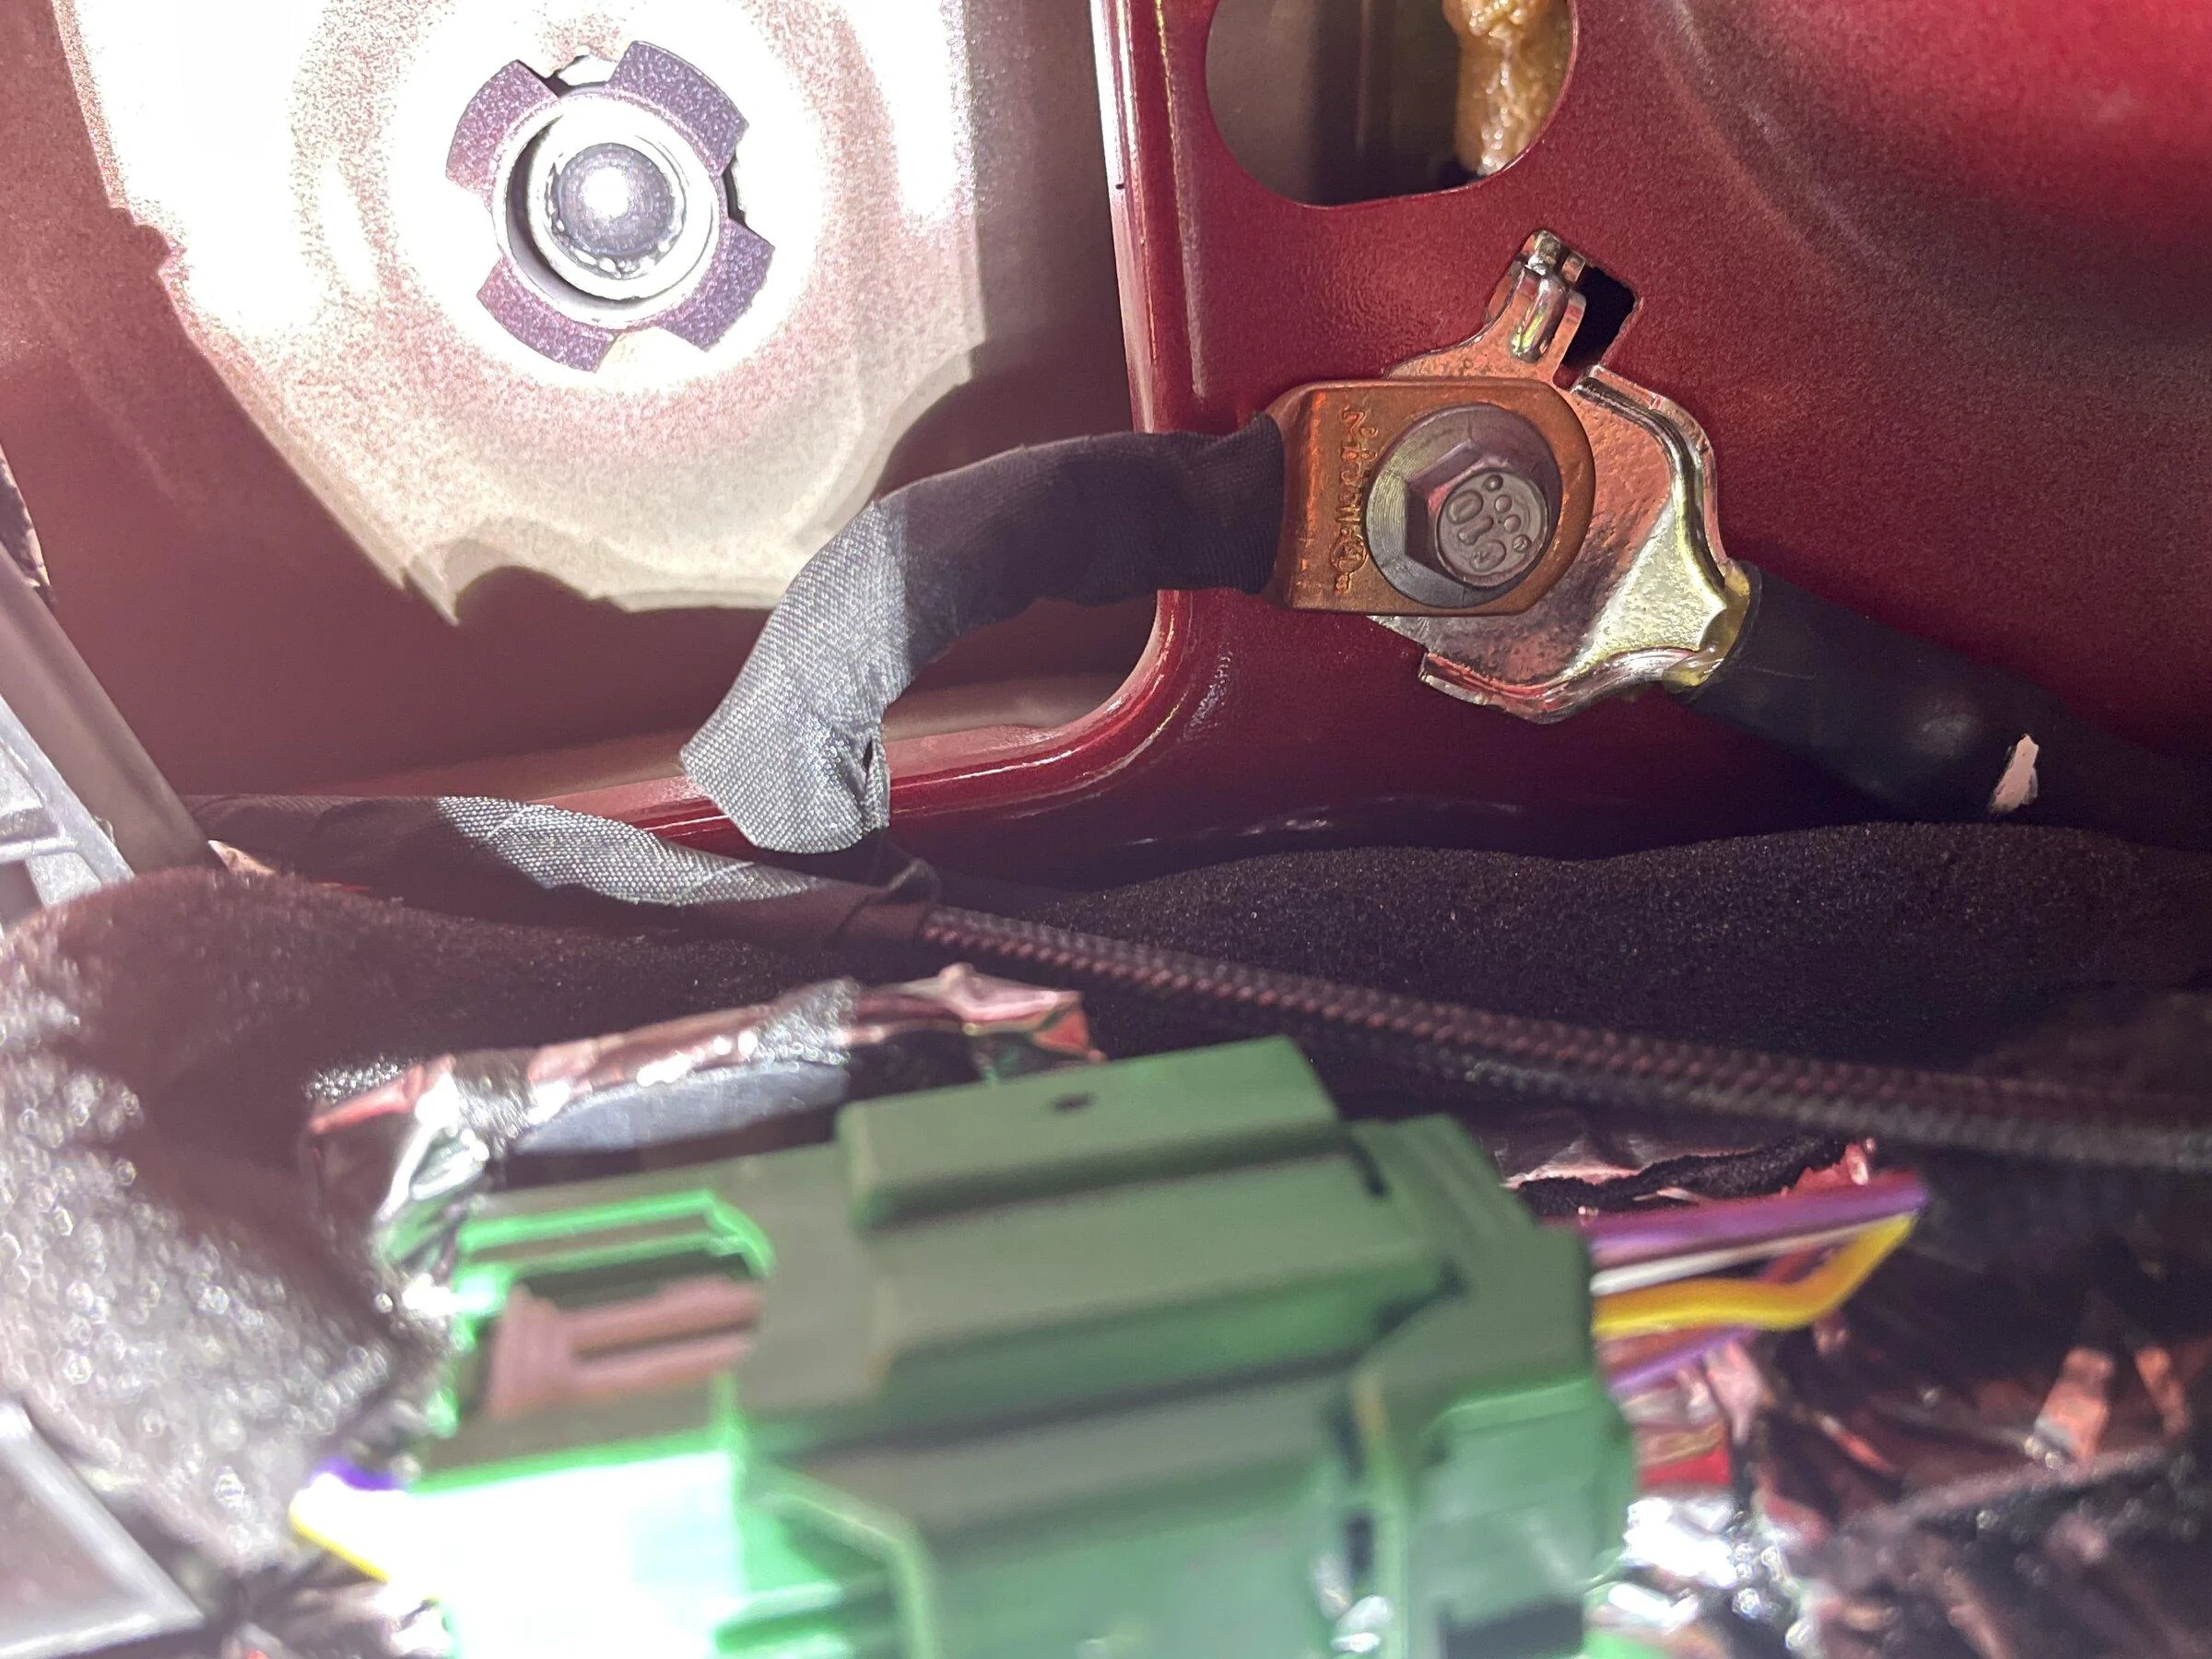
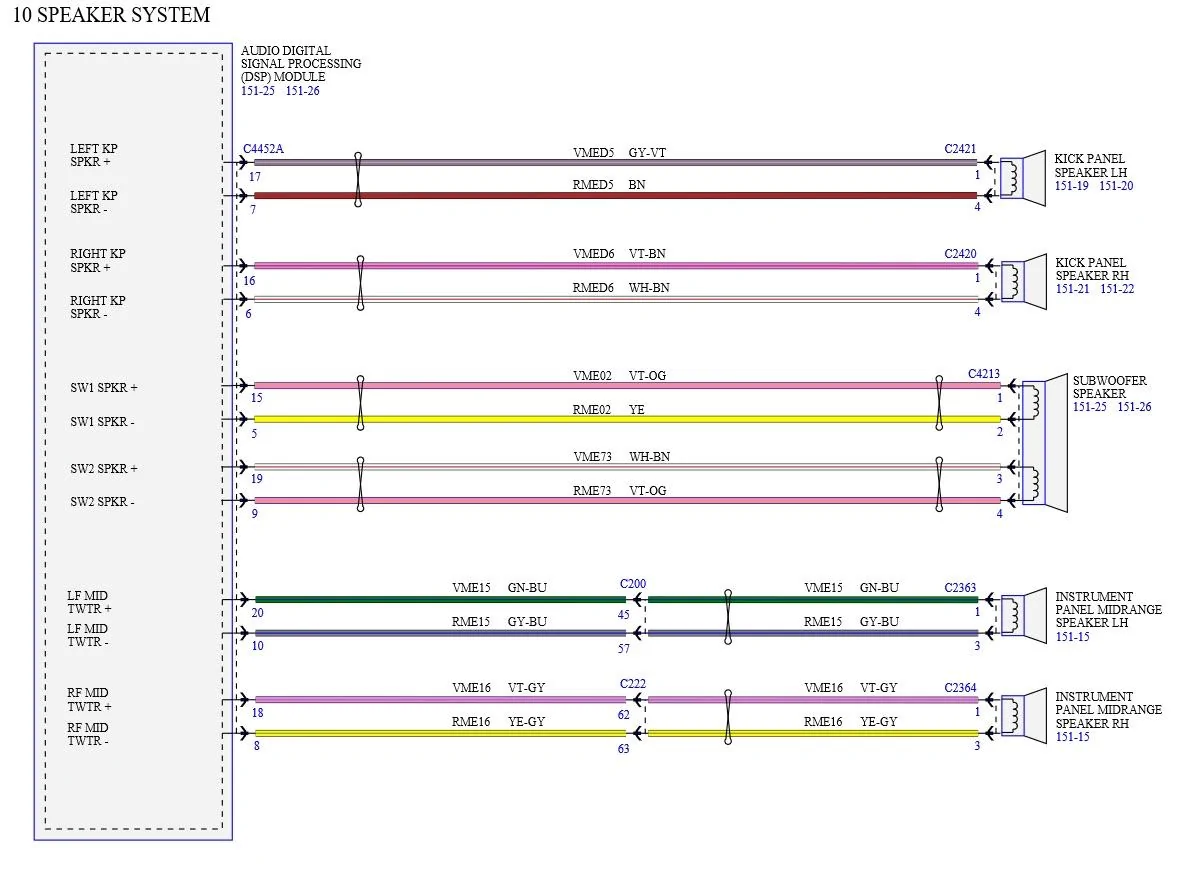
I ran 8 gauge power wire across the cargo area behind rear seats, down floor wiring panels under door, up front kick panels, and through grommet in the firewall. Fused at battery, and connected to one of the spare spots Ford gave us. Need an M5 or M6 nut here, depending which you use. Ground is wired To the factory ground found right above sub. I cut the factory sub wires that are sealed in the grommet in sub enclosure, and connected them to the high level inputs on the amp. Cut off the RCA ends, and connected them with butt connectors, make sure you get polarity correct! Wiring drawing below. I drilled holes in the same grommet to run 14g speaker wire to the sub. Apologies for the lack of installation pics on most of this, I will grab some and update later if needed.

E1C1CC7A-D8AE-41C6-94BC-BF4CFABD6A9E.jpeg

341AC928-BA0A-4304-8E60-61A8DCC211F1.webp

B2A8257F-9DB3-49AC-9635-150D01E60BE2.jpeg

C5C95A97-5B46-45F5-B8CC-7EEAD7E4B019.webp


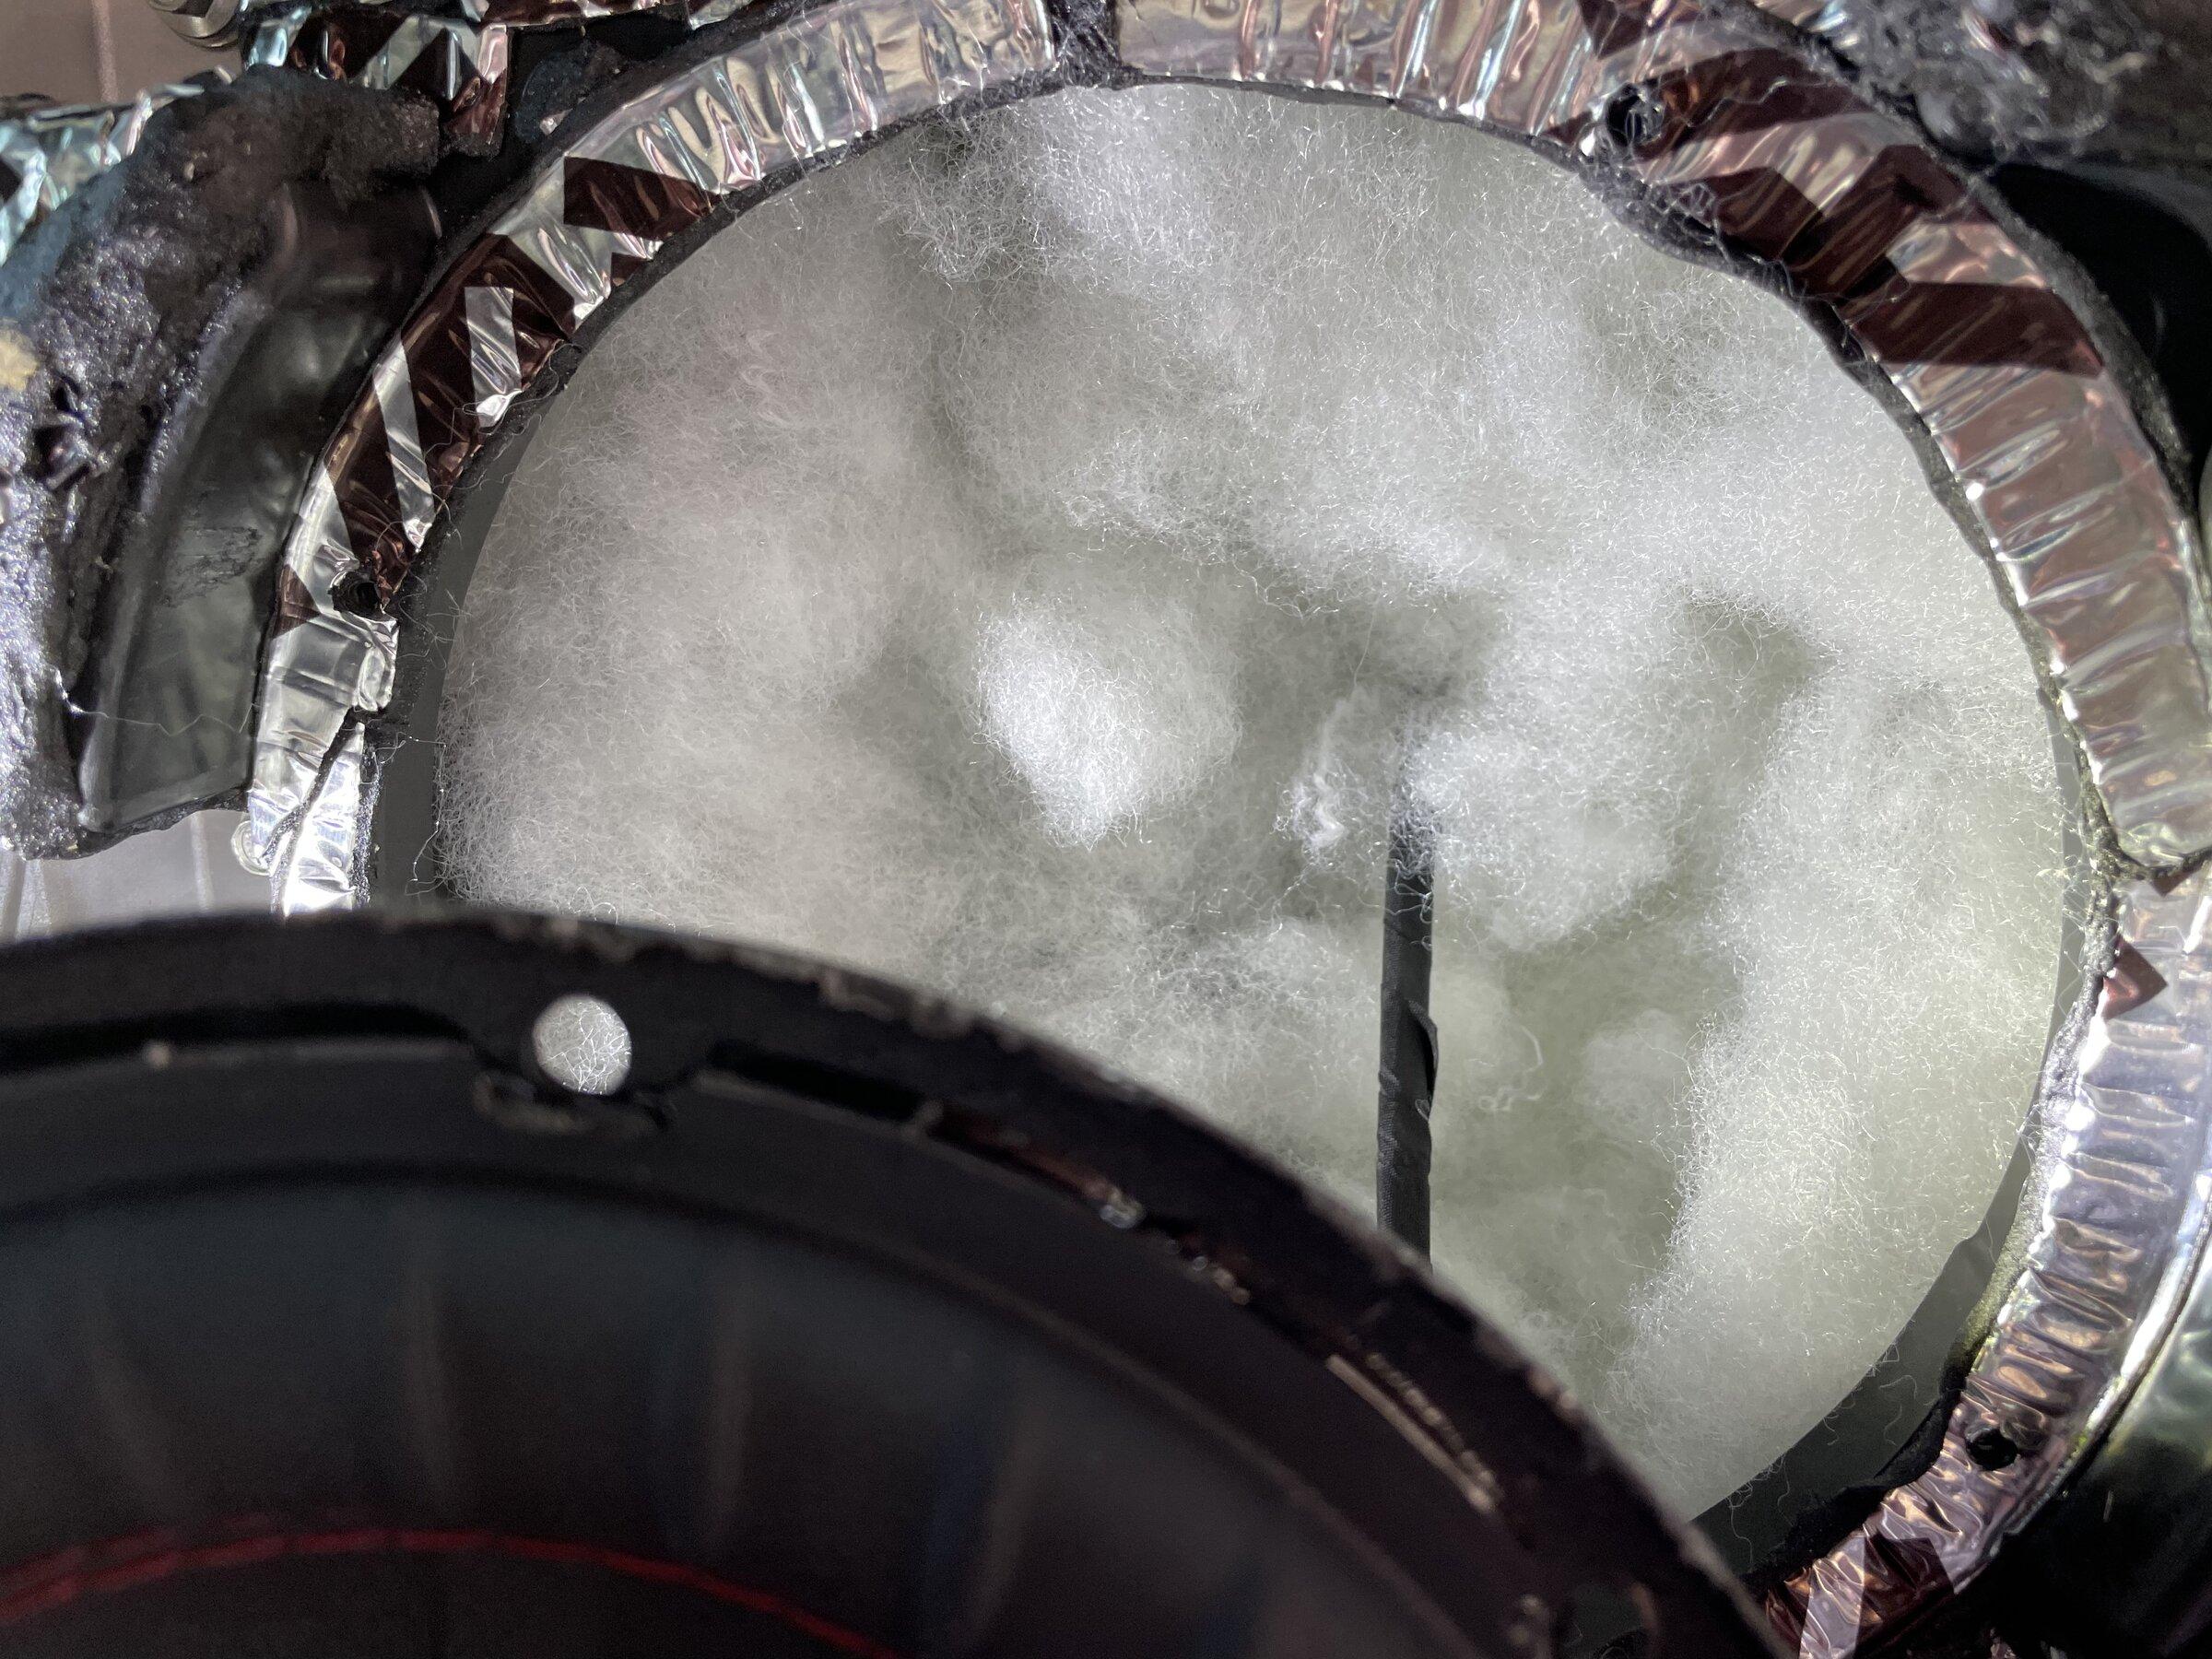
I ended up stuffing the enclosure with PolyFil. This really helped, the bass is less boomy, hits harder and tighter if that makes sense. I had to re-adjust my preferred settings afterwards, it makes a difference. Someone that doesn’t want to bother with a sub/amp should try adding polyfil to the oem sub. I bet it helps alot.

2233DC51-8D2C-454B-8549-E8955117920B.jpeg


Rattle Battle

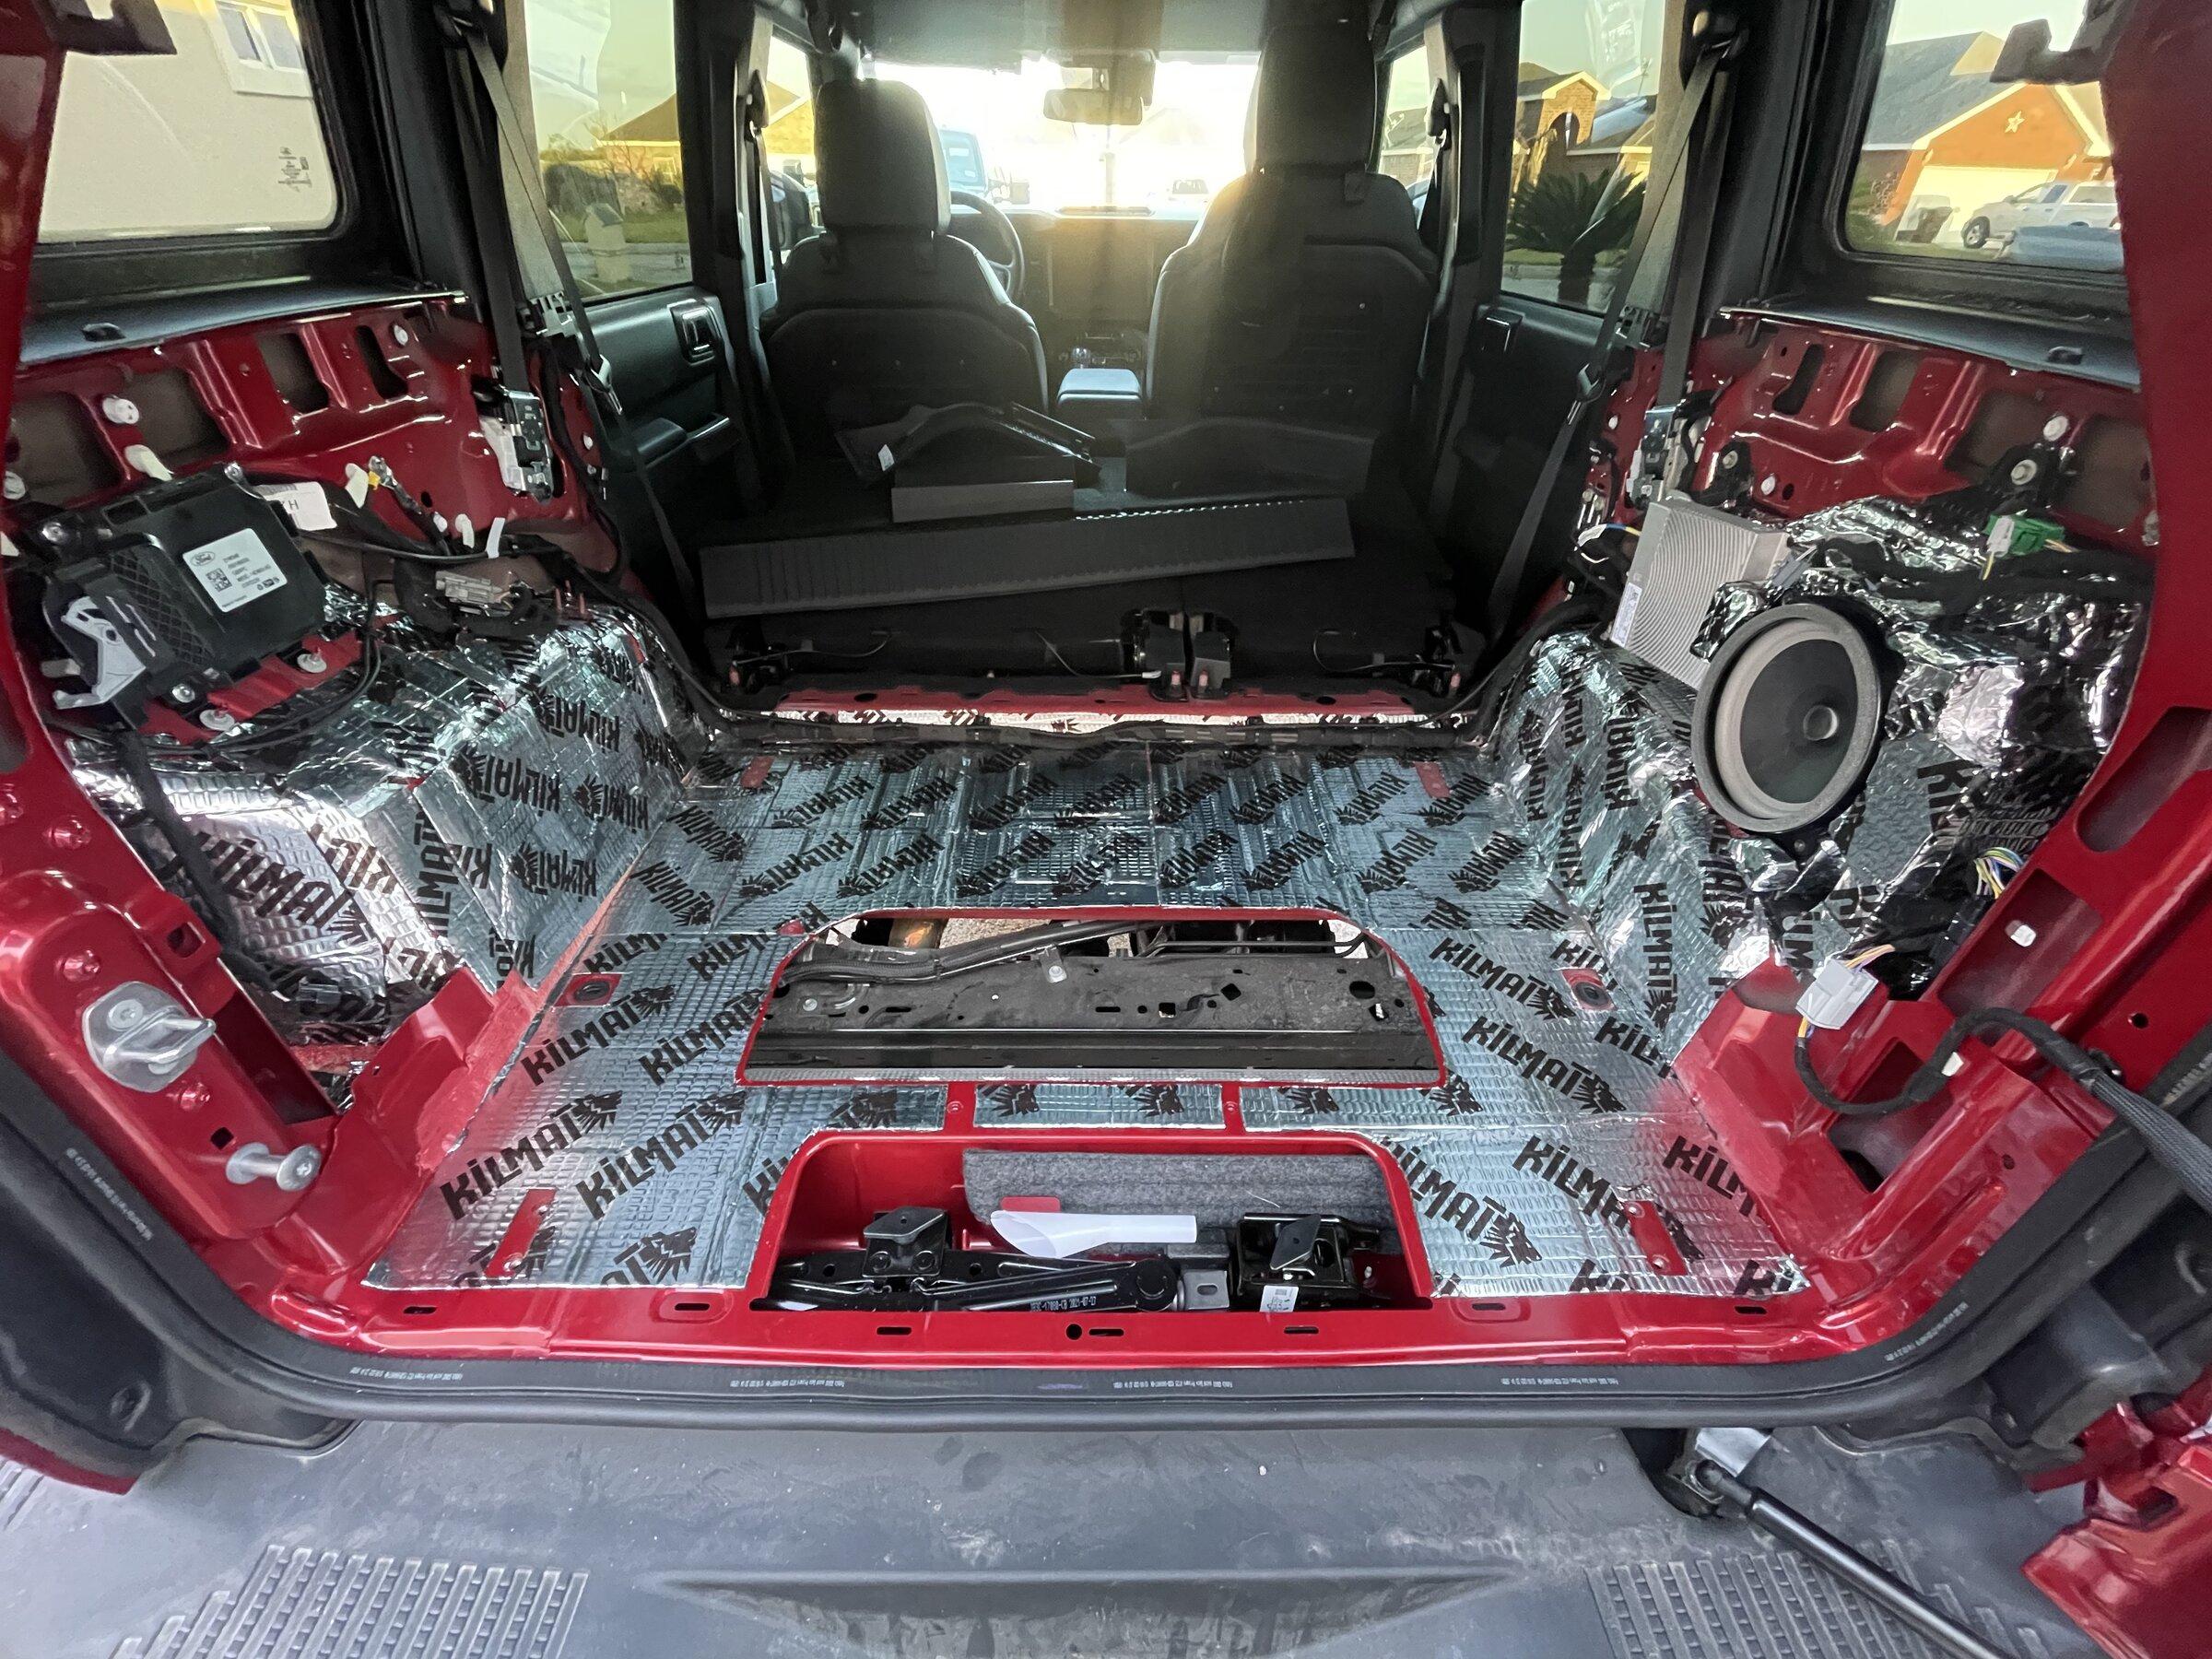
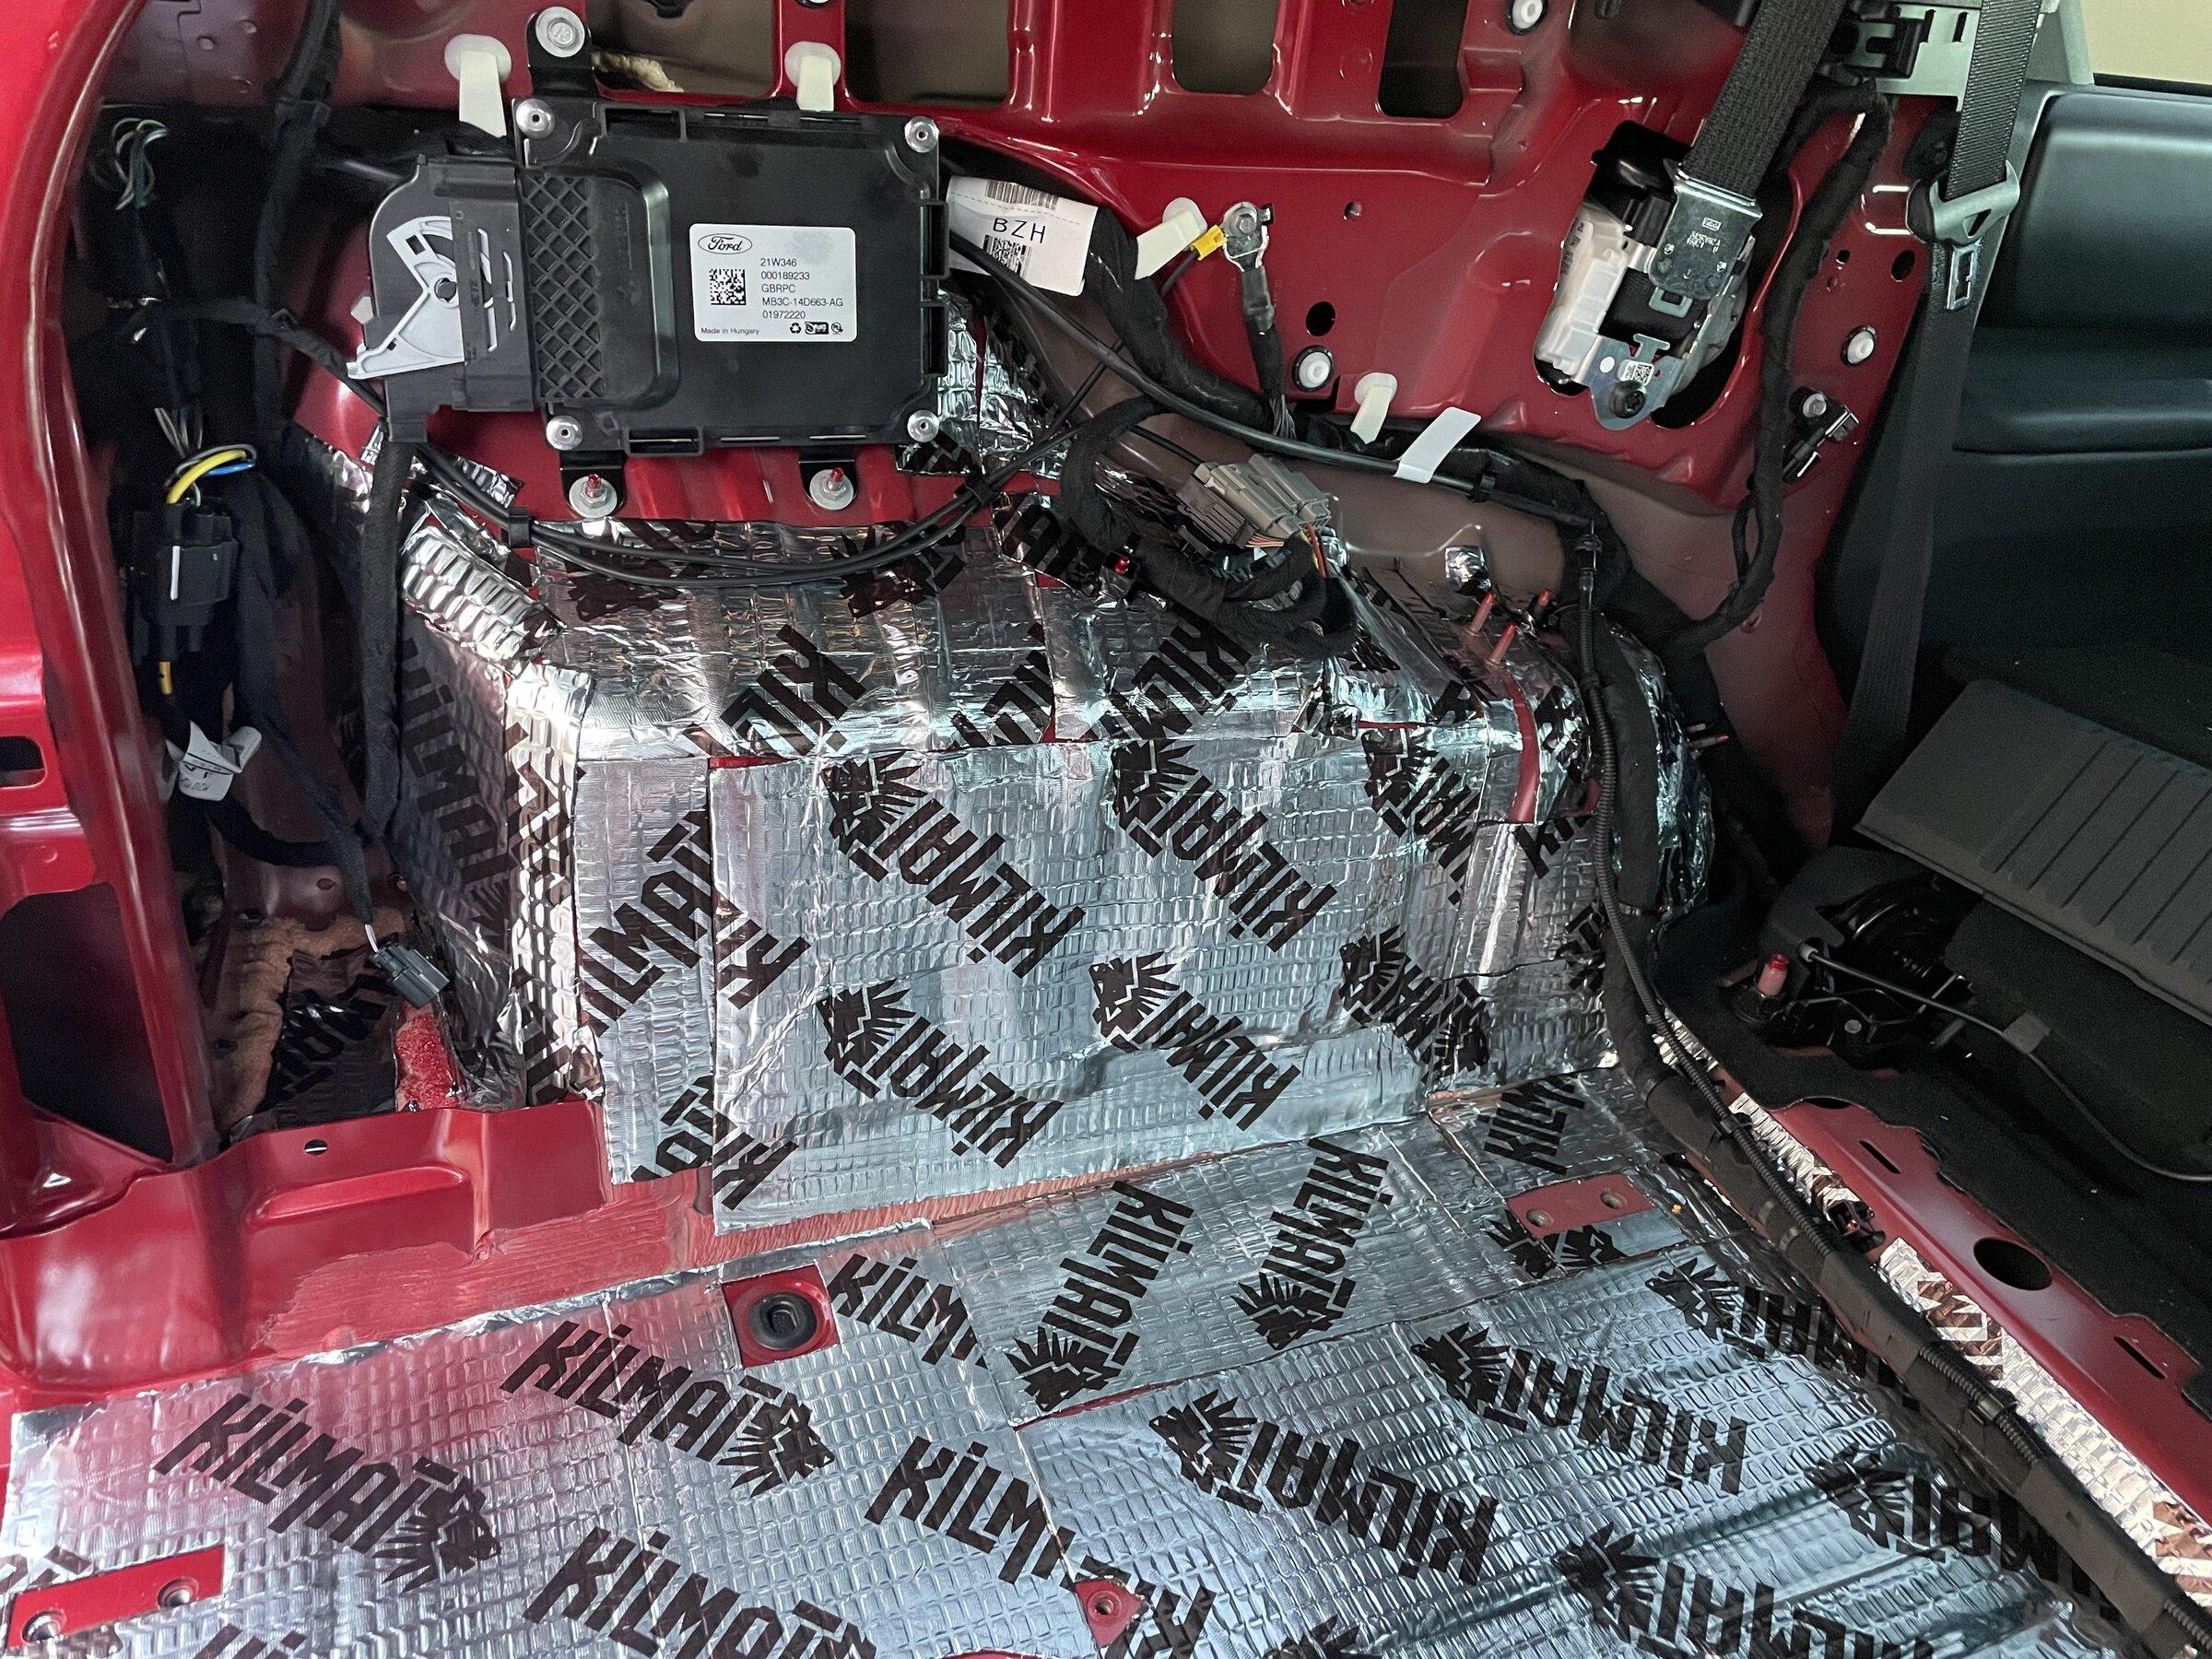
Anyone with the B&O system knows the sub is a rattle machine at higher volumes. I had the rear panels off no less than 5 times prior to upgrade finding and fixing rattles. I had my doubts if it could ever be rattle free with an aftermarket sub and amp. I am declaring 98% victory on rattles. For my everyday listening music and volumes it’s 100% victory.

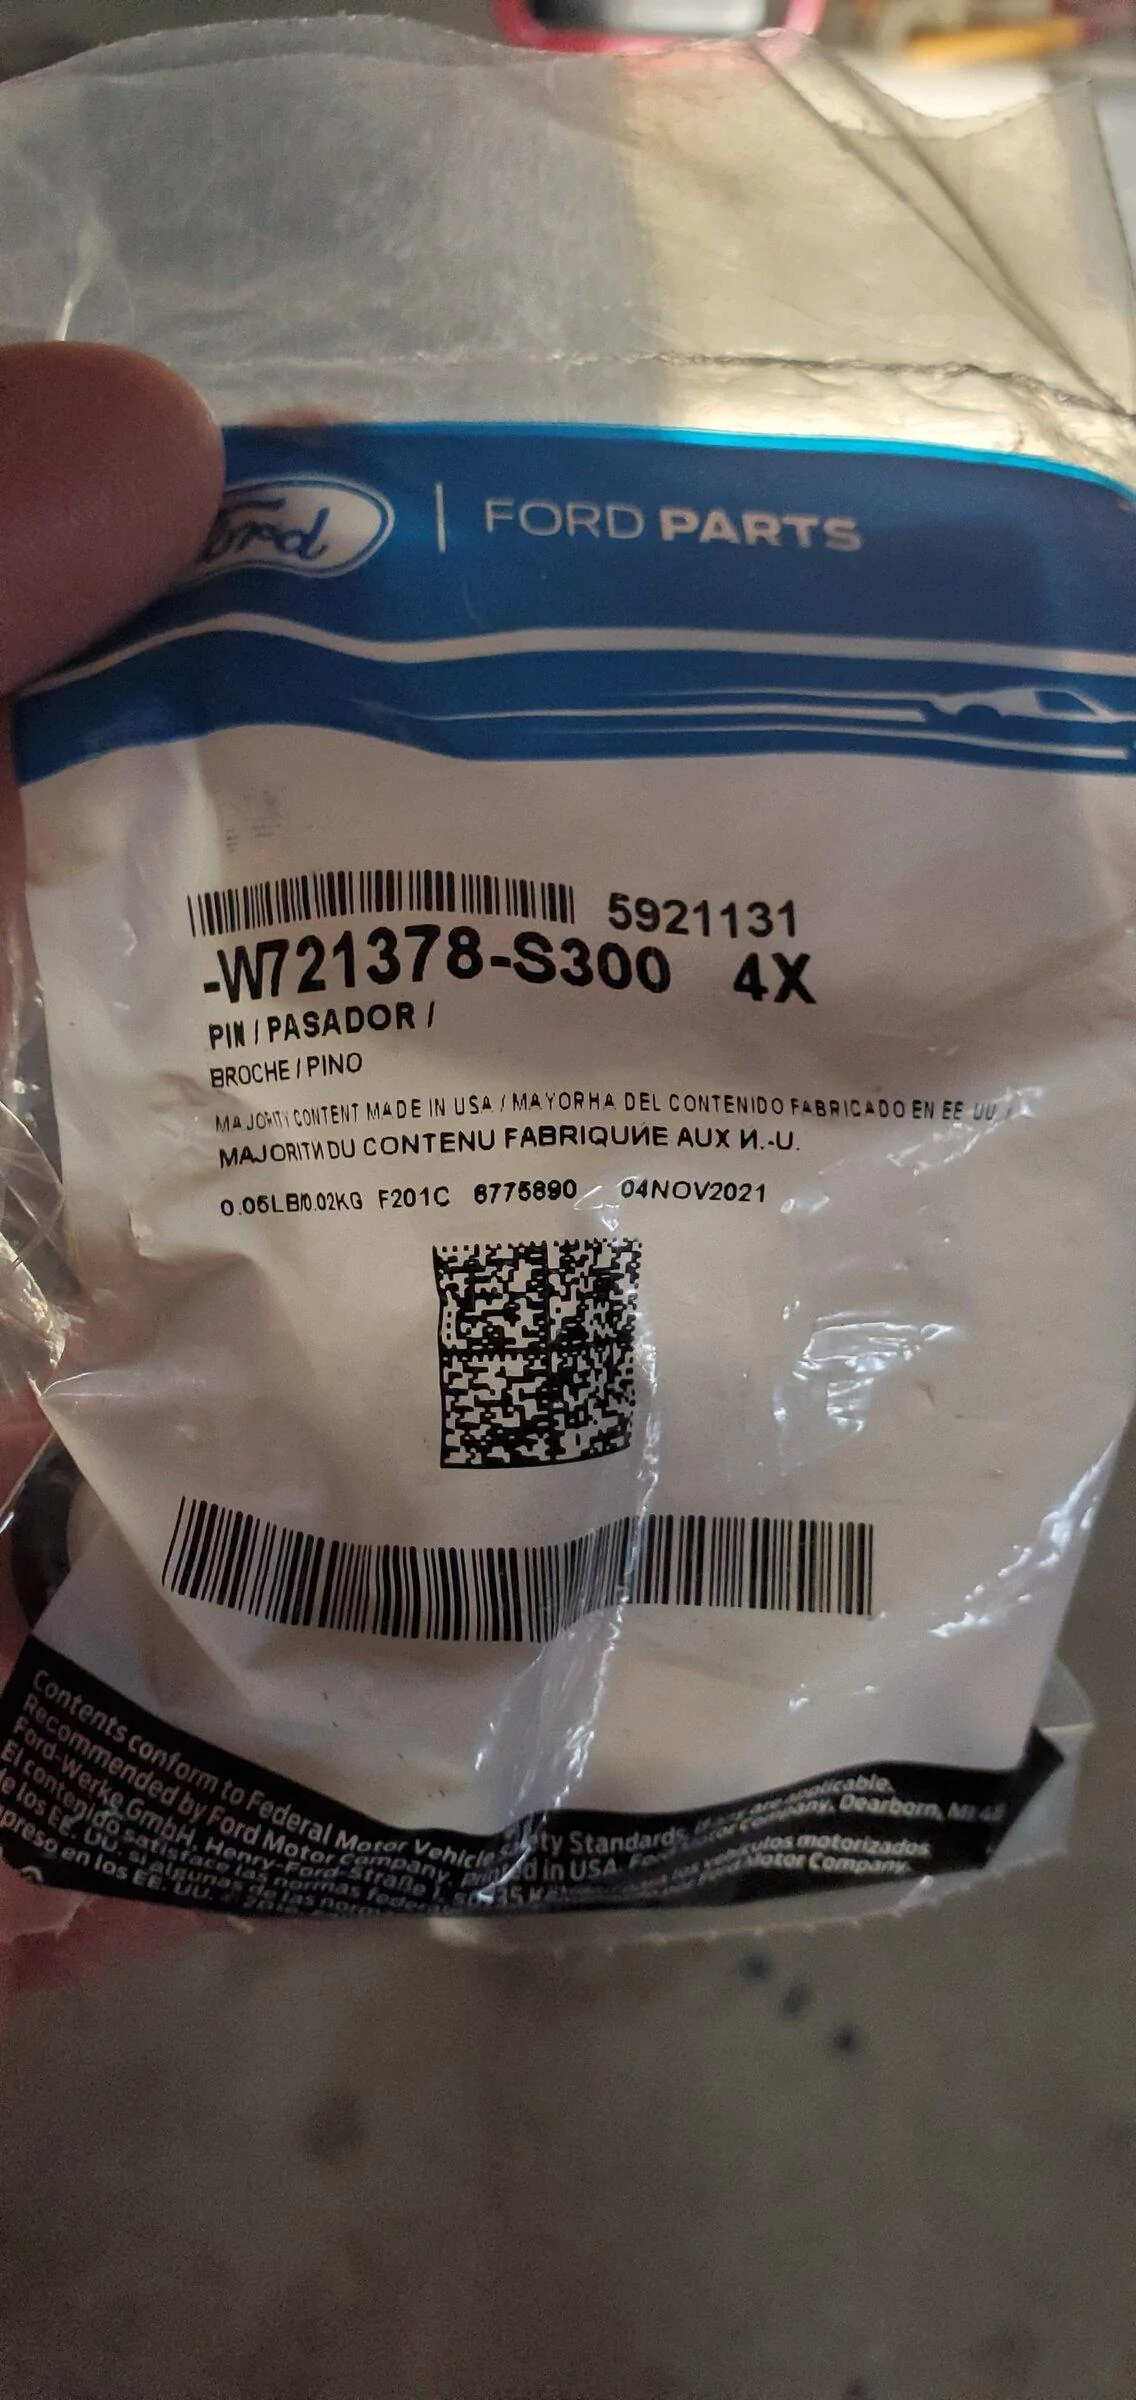
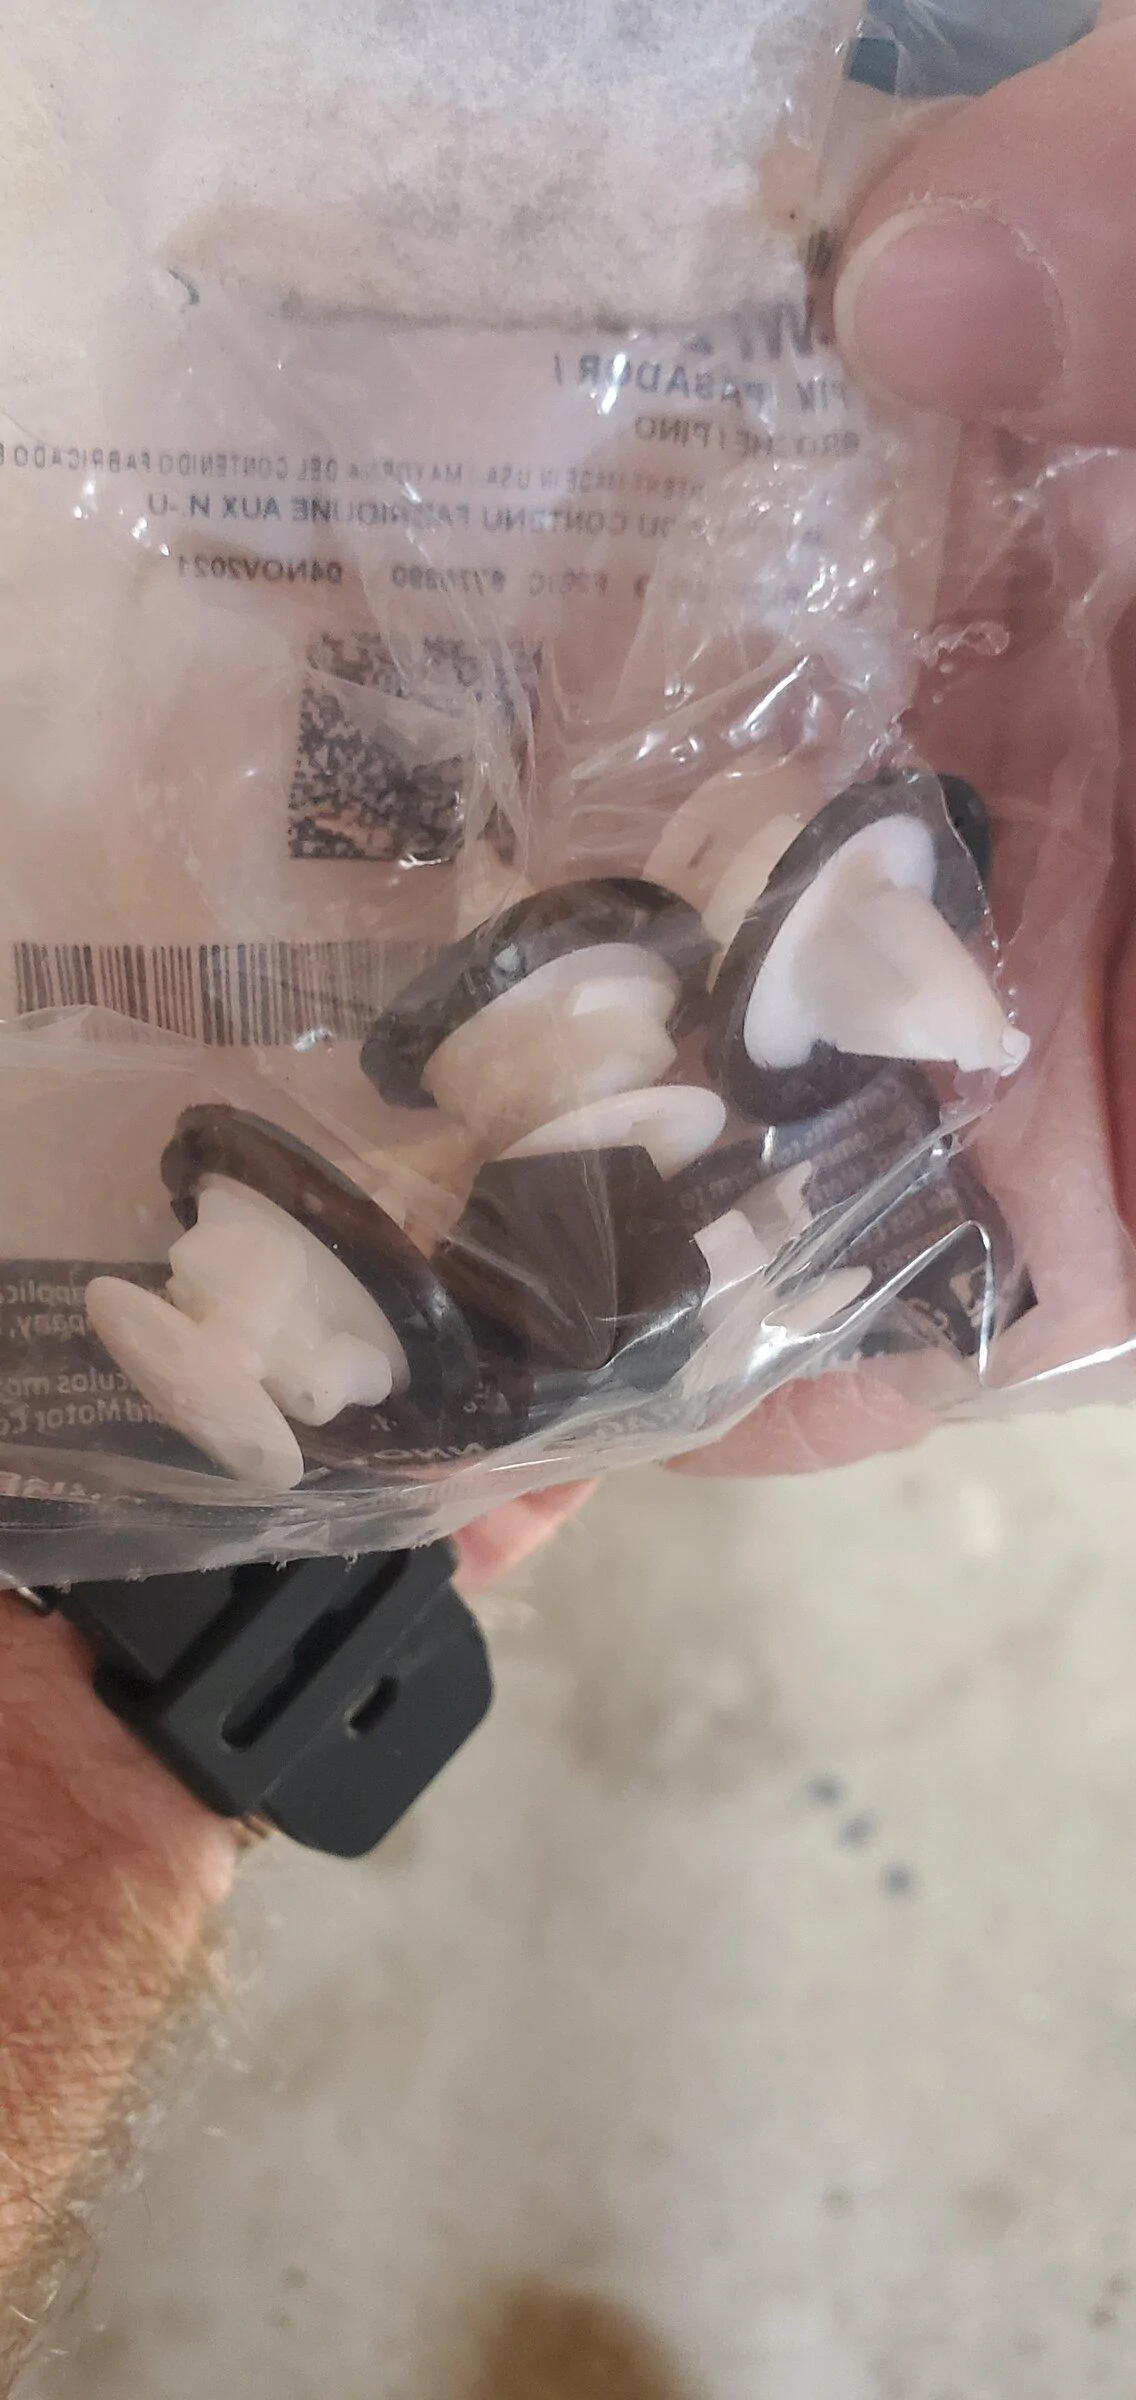
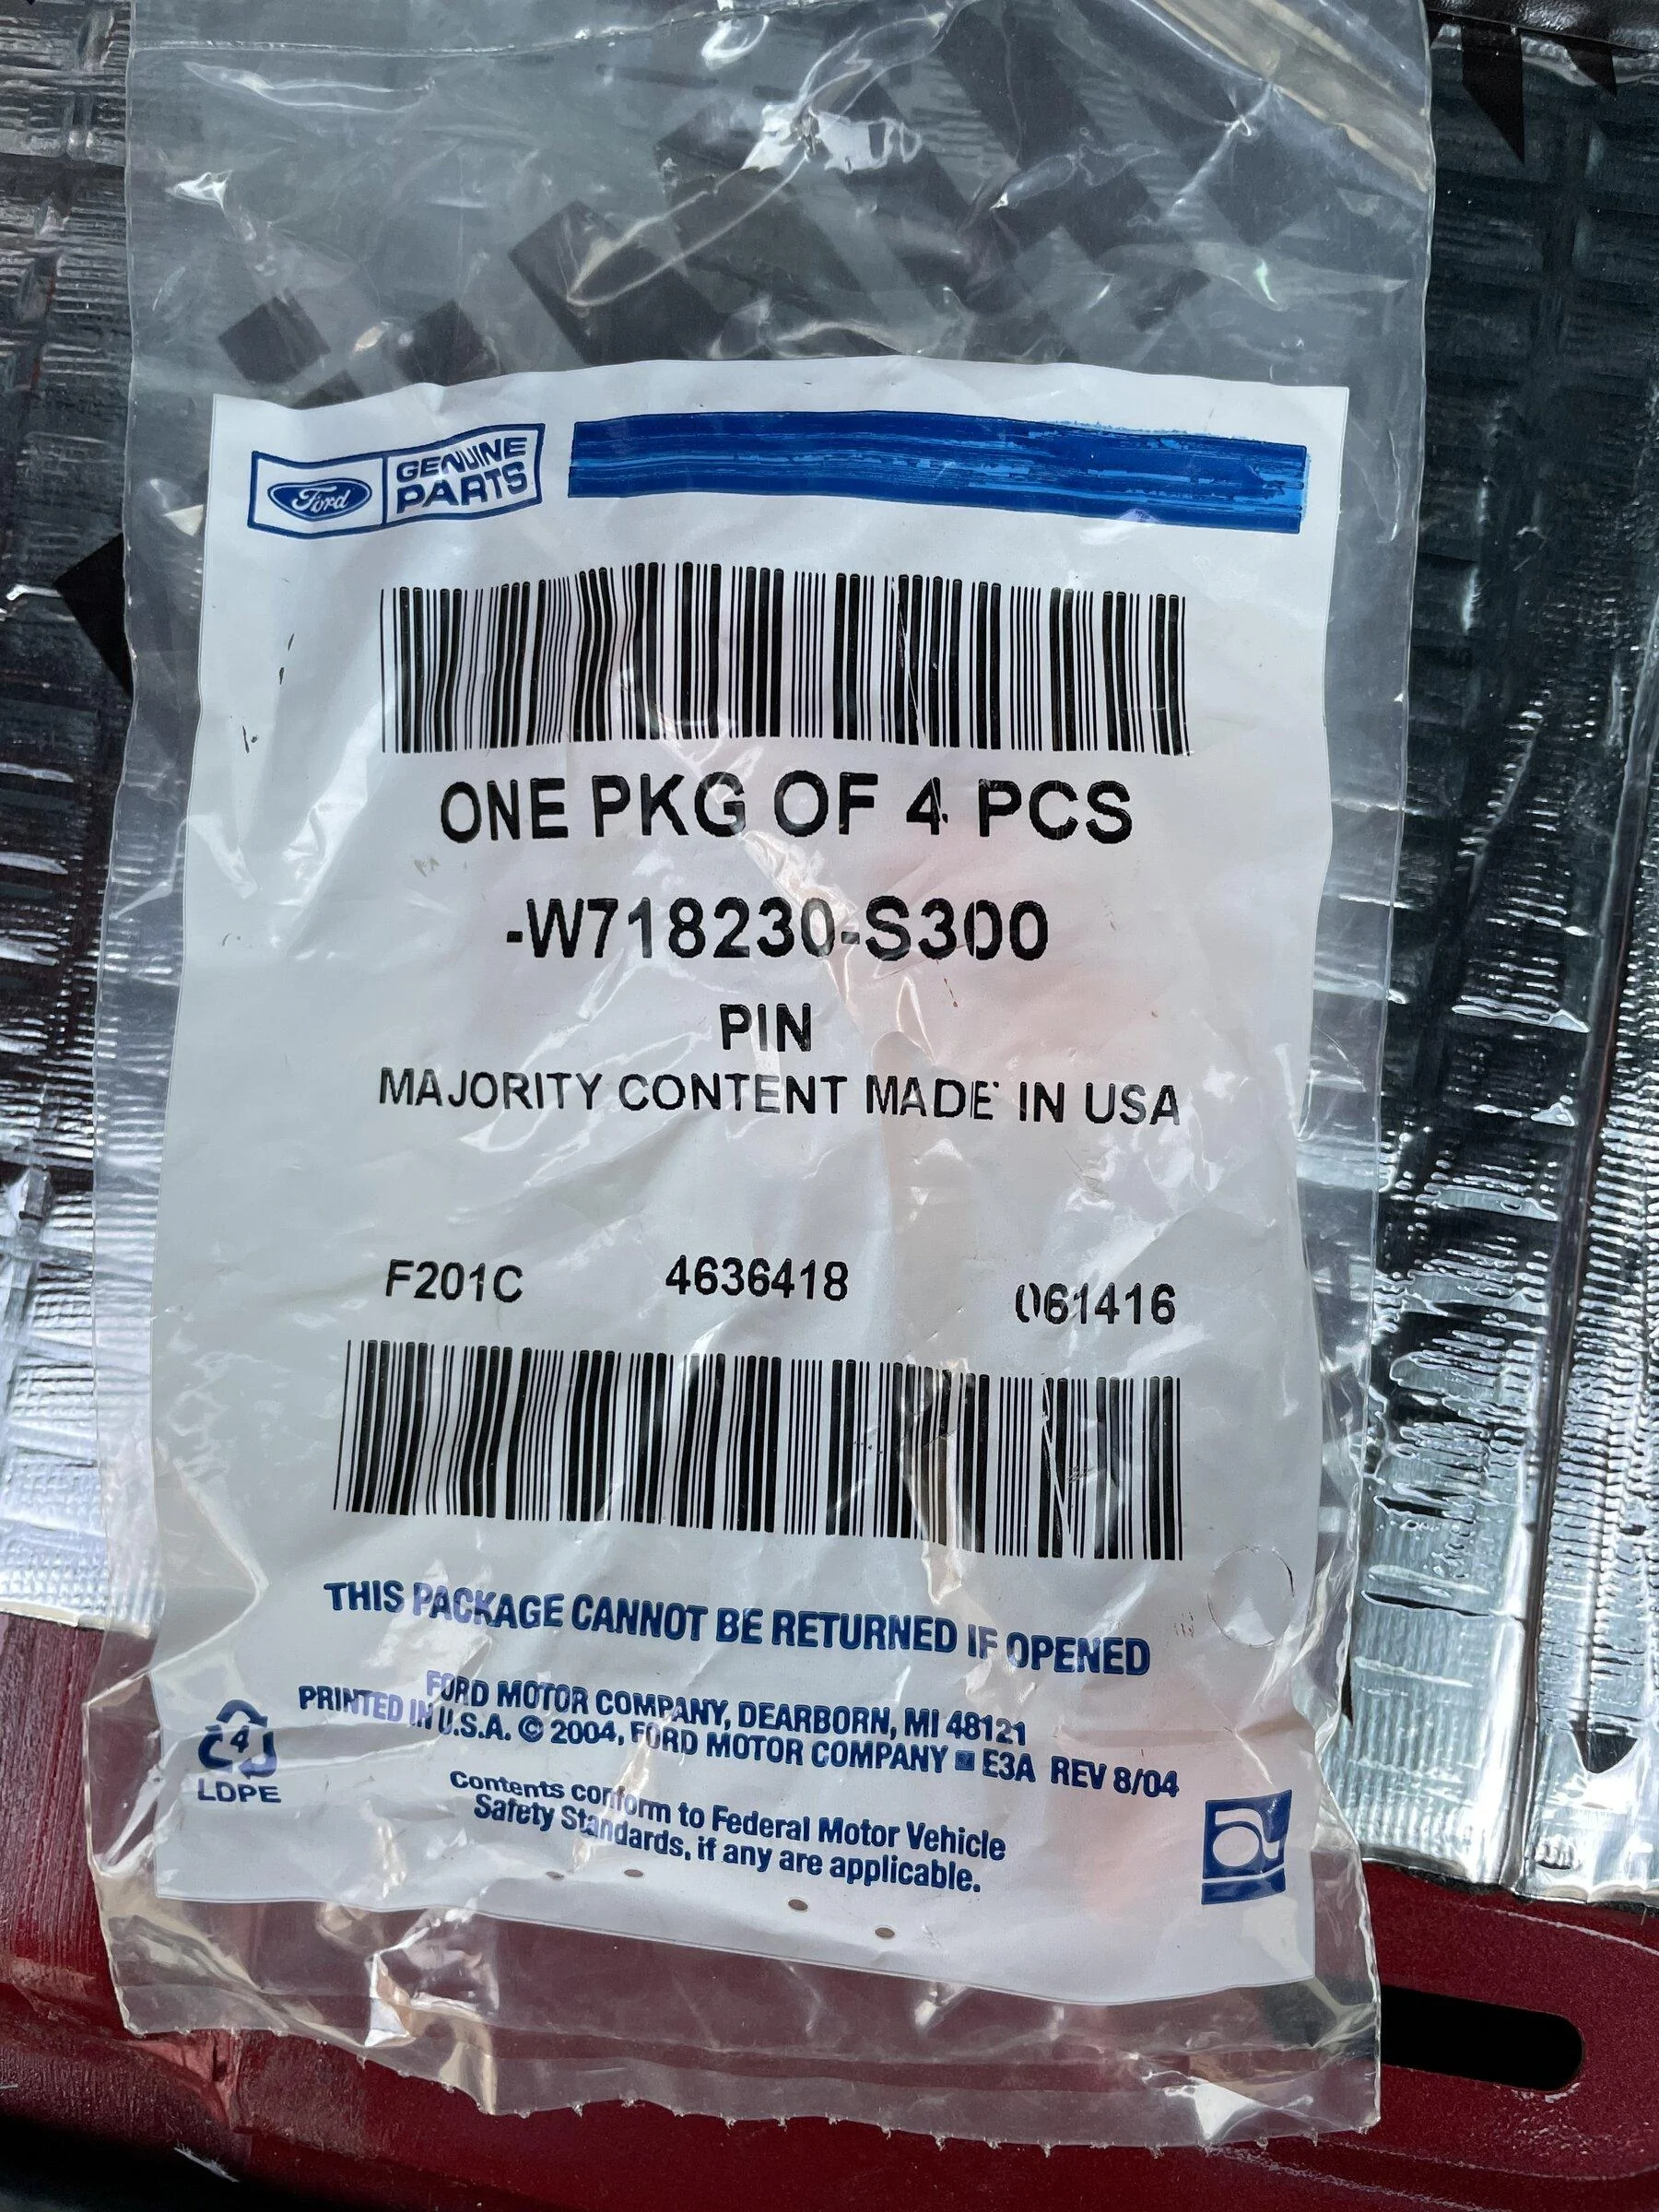
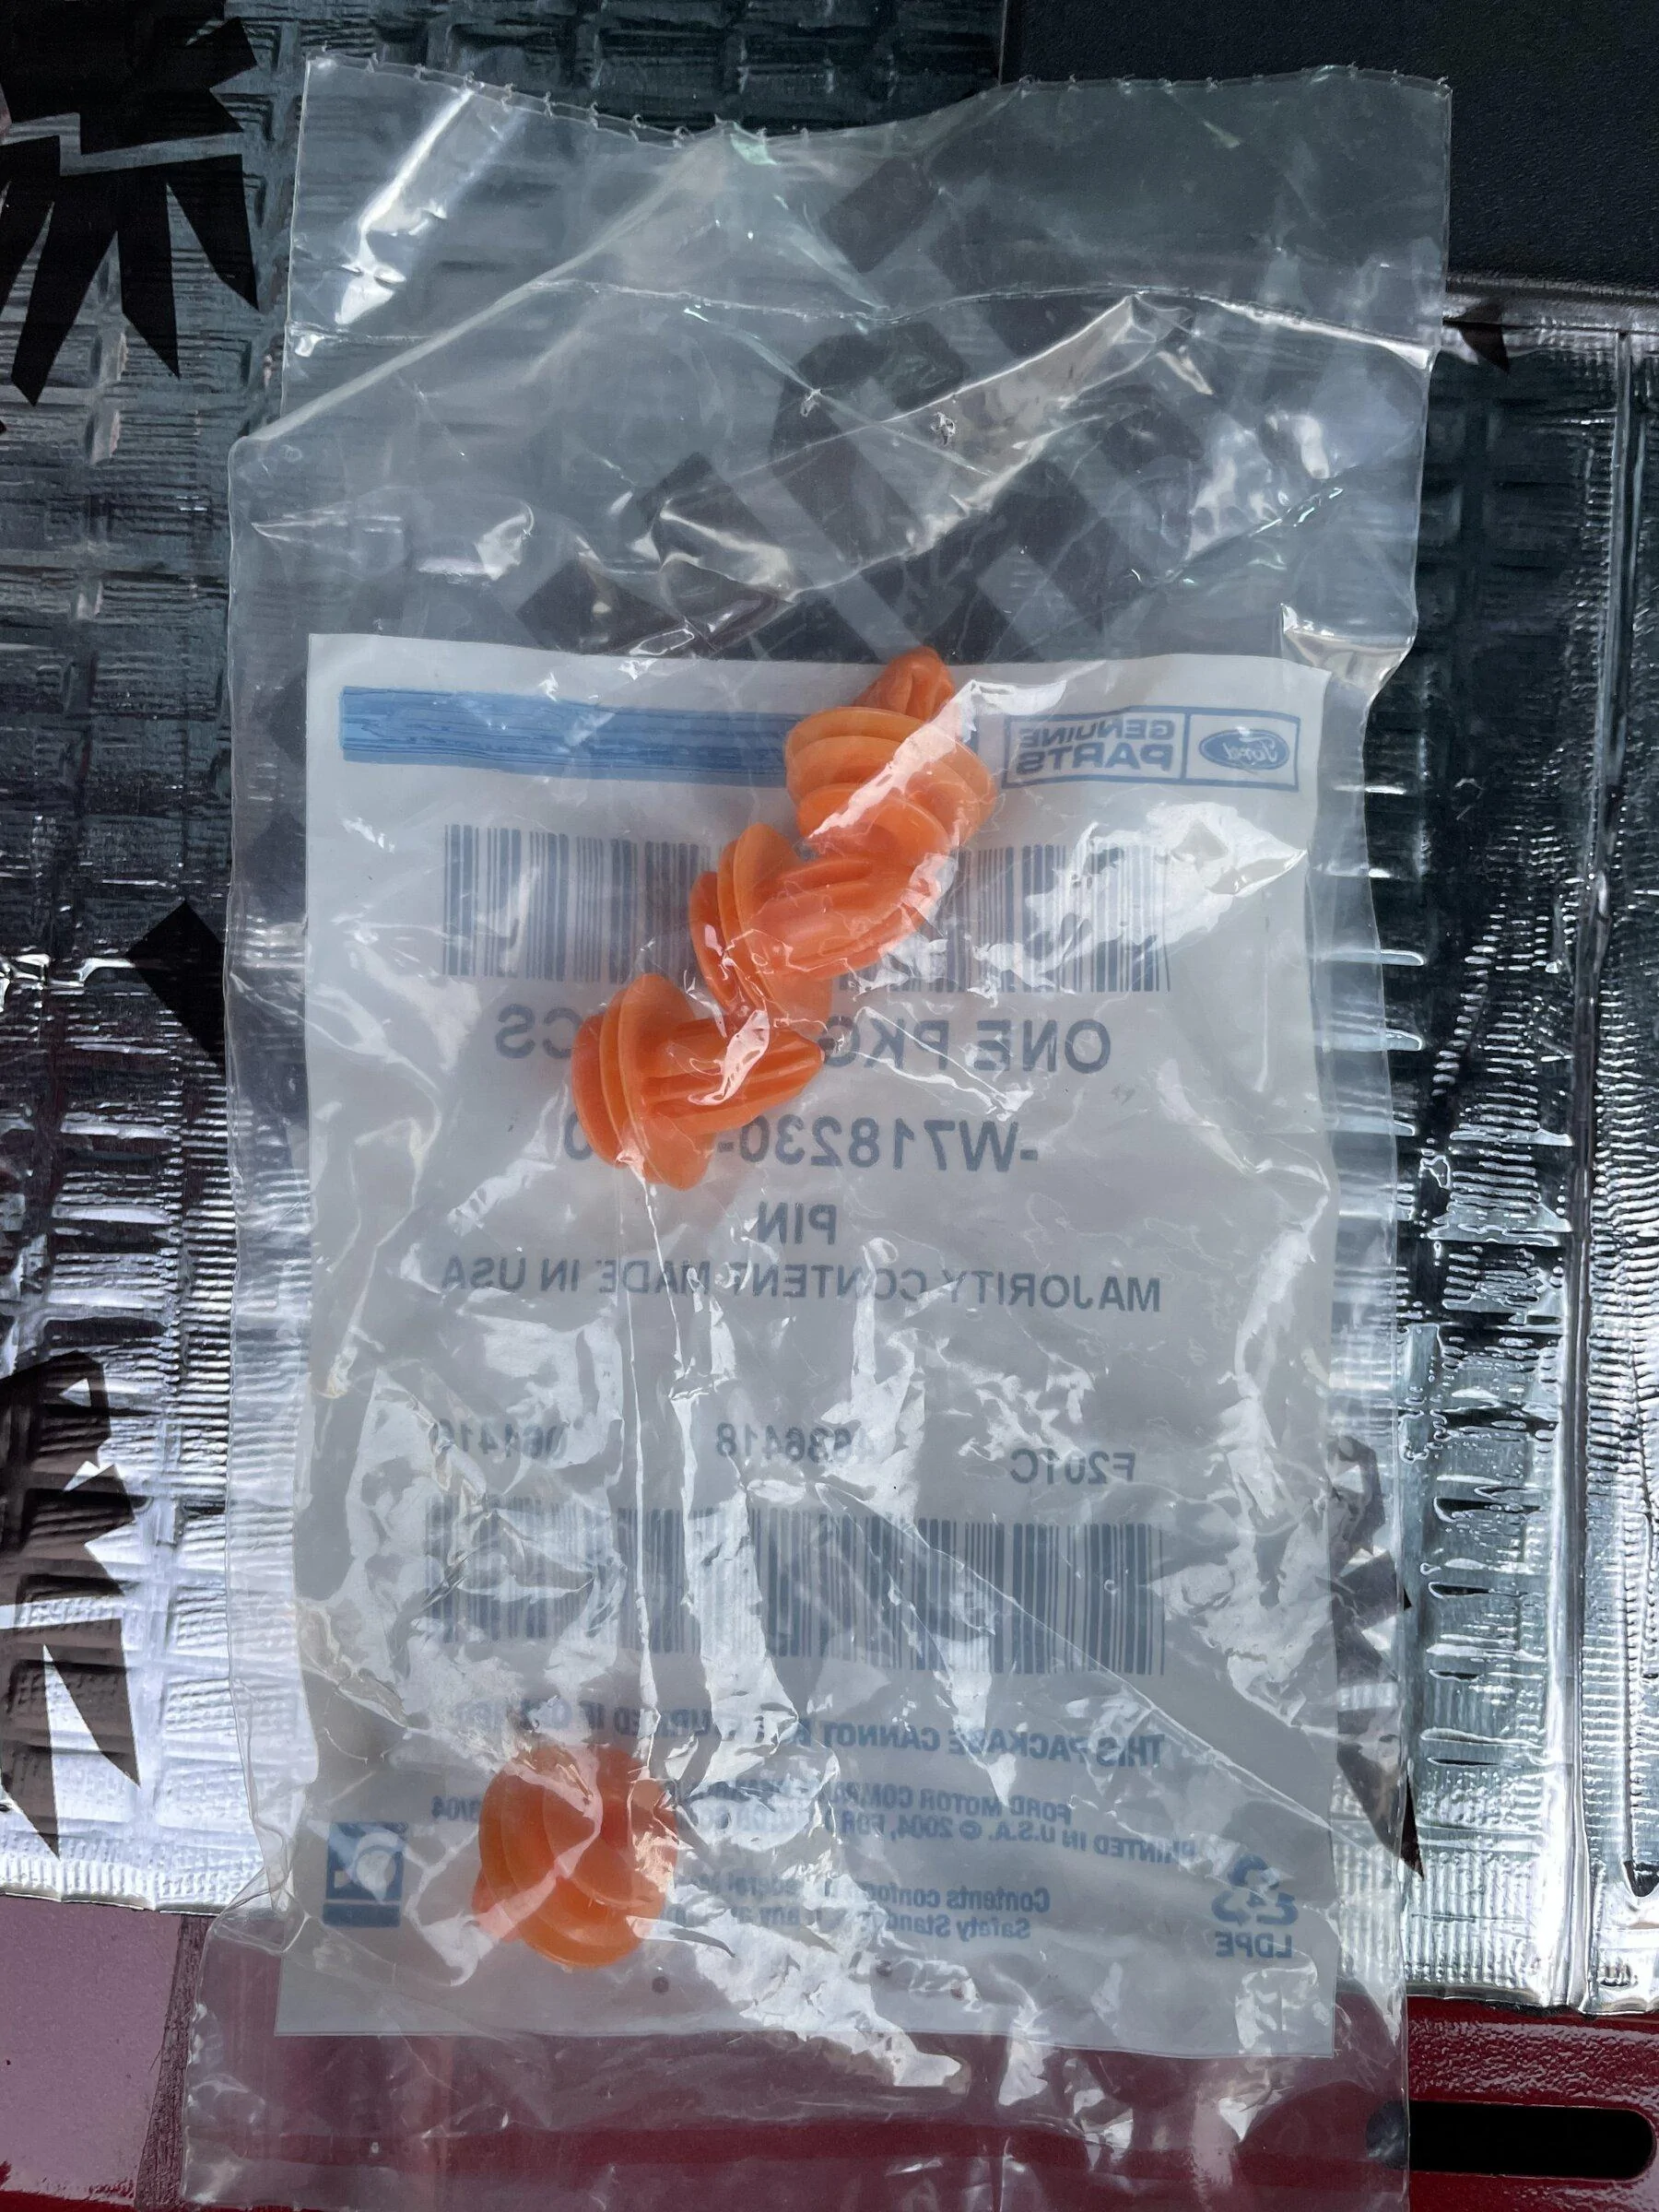
I did so much fighting rattles it’s impossible to remember and list it all. My method was simple, play certain 90s gangsta rap songs with repeated bass frequencies on loop that generate rattle everytime. Loud. When neighbors were out that turned to bass frequency sweeps and loops I found online. Play loud and go around using your ears to pinpoint and your hands to feel and absorb. What I ended up with is Kilmat in the entire cargo area, 3 rolls of cloth tape wrapping wires, connectors, insulating behind pins, wiring under rear seats, etc. Used Kilmat to insulate behind most things touching the body. Suspect panel clips were replaced (and several broken). Be diligent in your battle and you can win!

8E21CFC7-1C70-4899-9843-AFFA71995826.jpeg

CB3928B8-4A62-48ED-B19B-808ACE461E28.jpeg


Panel clips and part #s

B222F1AF-3BEF-41C5-ABDD-7C42038DC7D9.webp

26699692-752A-48A1-A836-B1476371555A.webp

F630E772-595D-4407-BF06-00B96DA70D51.webp

8F029899-9CD6-4E90-841B-07CDAD8F9E2F.webp


Wiring drawing

9FECE6C4-3926-46C0-ABAD-983AC0E79792.webp

06D39505-54BC-45BB-B31F-617775D85F52.webp

11/14/22 Edit to add modified drawing, showing wire changes color after the green connector
1668443137898.webp


Shop Manuals for removing trim
I started my overhaul of the B&O system a couple months ago, and finished buttoning it up this weekend. It’s been a long journey of trial and error, and parts returned or wasted, but I’m thrilled with the final results. I have contributed to many threads along the way, but wanted to consolidate it all into a completed build thread as I get many questions about what I’ve done.

I’ll start out with why I got started on this project. To put it bluntly, I think the B&O system is pretty bad for a “premium“ system. It’s pretty much lacking in every way, low power, muddy highs, boomy rattly bass, and really bad soundstage with most all of the sound coming from the windshield. The speakers are cheap, paper, and half of them are the same speakers used in the base system.

FCB1F91B-B208-4A7F-8420-8109E06454D9.jpeg


I would rate the system 4/10 stock, and 15/10 after upgrades. This rating is based solely on my expectations/experiences of a factory “premium” system with cost as a factor. From the factory it severely missed expectations, after upgrades it blows away my expectations, as it should. The sub kicks. I haven't had a system that can rattle the mirrors since high school. I won’t be rattling mirrors, but I could if I want :cool:

I will list the parts ”I” used. Wiring diagrams and shop manuals for removal/install are attached.

Parts

JL C1 4” - $99 pair x2
https://www.crutchfield.com/p_13699040/JL-Audio-C1-400x.html

JL C1 6.5” - $149 pair
https://www.crutchfield.com/p_13699042/JL-Audio-C1-650x.html

Focal ACX 4” - $109 pair
https://www.crutchfield.com/p_091ACX100/Focal-ACX-100.html

Kicker Comp R 8” 4ohm DVC sub - $89
https://www.amazon.com/gp/product/B08NFHJZNP/ref=ppx_yo_dt_b_asin_title_o02_s00?ie=UTF8&psc=1

Kicker Key 500.1 amp - $270
https://www.amazon.com/gp/product/B084HLH77B/ref=ppx_yo_dt_b_asin_title_o09_s00?ie=UTF8&psc=1

Kicker wired remote bass control - $39
https://www.amazon.com/gp/product/B08D3TVFBX/ref=ppx_yo_dt_b_asin_title_o08_s01?ie=UTF8&psc=1

right angle extension wire for bass control knob - $11
https://www.amazon.com/gp/product/B0793KZYXD/ref=ppx_yo_dt_b_asin_title_o03_s00?ie=UTF8&th=1

25’ 8guage copper amp wire - $25
https://www.amazon.com/gp/product/B079RZF94M/ref=ppx_yo_dt_b_asin_title_o08_s01?ie=UTF8&psc=1

8 gauge amp fuse/battery connector - $9
https://www.amazon.com/gp/product/B071ZZZK5W/ref=ppx_yo_dt_b_asin_title_o08_s01?ie=UTF8&th=1

8 gauge ring terminal for ground - $7
https://www.amazon.com/gp/product/B0747M3SYQ/ref=ppx_yo_dt_b_asin_title_o08_s00?ie=UTF8&psc=1

4“ speaker wire harness adapter - x3 - $12.99 each pair
search Amazon
1670B520-8B2E-4CF1-B261-B8D85BB9B963.webp


Kilmat sound deadening sheets - $35
https://www.amazon.com/gp/product/B082Q2J2T4/ref=ppx_yo_dt_b_asin_title_o03_s00?ie=UTF8&psc=1

Total - $979.97

Dash Speakers

There are three 4” speakers in the dash. I used JL C1 for all three. I originally tried Focal ACX, but found them very “bright”. I ended up using the Focals in the rear pods and the JLs in the dash. This combination works great, as the bright Focal pods allow more rear fill, that was canceled out having Focals in the dash as well. This combination makes huge improvements to the overall soundstage, actually having some rear fill is an amazing improvement. Don’t skip the center channel! It’s is the workhorse up front, especially if you use surround mode.

Replacing these speakers is pretty straightforward, remove trim panel, unbolt speaker, attach harness adapter, reinstall. Shop manual attached if you need it. I highly suggest a nice set of panel removal tools so you don’t scratch up the plastic. I tossed some kilmat underneath each speaker, trying to make the hollow space underneath more of a pocket.

6EB6069E-35F0-4188-8D19-D82628C69730.jpeg

3DB65EFD-E4B9-4443-9146-17359F8DE049.webp

789CC5B0-4F40-4FB0-B0D6-218BCF082B1A.jpeg


The center channel is a little tricky, you need to remove a screw on each side of the “accessory ready” bolt, remove that, then you can remove the speaker cover panel.

788548E7-EB84-4450-A00B-152CEE30B4B4.webp

73B6177C-30D6-44BC-9CCA-3F98B356B95C.jpeg


Kick Panel

I used JL C1s here as well. Honestly a 2 way speaker is not needed here in the kick panels. The DSP/amp filters out highs, this is a place you could cheap out a bit If you want. The C1s came with a trim ring mounting adapter that worked great. Crutchfield also sent a Metra adapter that I did not use, and also sent a wiring harness adapter that I did use, both free. I used Kilmat behind these speakers as well. Removing the panels is easy enough, but it’s kind of an awkward spot to work in. There is a foam section below the speaker housing you will need to make a slit in and feed the wiring through. Button everything up with zip ties. Shop manual attached.

2CF2282C-4AC8-41BB-827E-18F6963B2D83.jpeg

A2B60198-7BA9-4D82-8A8B-96121BB69AC5.jpeg

9C3C4F7B-BC22-4932-BAF9-80B868011766.jpeg


Rear Pod Speakers

As mentioned before I used Focal ACX back here. They work great to provide some much needed rear fill. These are the easiest speakers to replace. Pop the cover off by squeezing both sides and it will pop right off. Unscrew speaker, install wiring harness, reinstall. I filled the entire cavity with kilmat again. Shop manual attached.

453A1B23-4B0B-4BEA-8A61-1FC13CA1F04D.jpeg

CB2457E0-2E45-471C-B9C4-774F92A9A933.webp


Sub/Amp

This is where things got interesting. I first tried to just swap the sub speaker, and long story short that was a huge fail. I tried two different subs. A $300 Rockford P3 that popped and clicked, underpowered to say the least. A $19 Pyle sub worked, but wasn’t much if any improvement over the stock sub. I took a pause here as life got busy. Then got re-interested by @cmcbronco and his great thread on installing the B&O sub enclosure on a base system. Lots of great info here.

https://www.bronco6g.com/forum/threads/b-o-sub-installed-on-base-bronco-…-sorta….37207/

I ended up going with a Kicker Comp R 4 ohm DVC sub and Kicker key 500.1 amp. I wired the sub parallel to get 2 ohm at the amp. The beauty of this amp is you can use the speaker wires going to the factory sub as high level inputs. This will also work for the power on, so no need to find a trigger on circuit. I called Kicker and confirmed the sub wires coming from the factory amp will work for high level inputs, no line output converter needed. They said this is exactly what this amp was designed for.

The Comp R sub fits the factory enclosure great, but you need to pry the plastic trim ring off with a screwdriver. No modification needed to the enclosure with this sub. Shout out to @SCTWNB for the great mounting location for the amp, I wouldn’t of thought of this location myself. It’s mounted to the roll bar, snugged in there next to sub enclosure. It is a bit tricky, but take your time, mark your holes, drill some pilot holes. Use double sided mounting tape to hold it up for install and cushion it from the body. If you plan to use this location pay close attention to where i have it, any higher and the PATS antenna mounted on the quarter panel will interfere. A right angle adapter is needed for the remote volume wire, which I installed under the HVAC controls. Wire runs down the passenger side wire channel, up kick panel, behind glovebox.

2F409D2A-206D-4699-A809-D31E0E9E3B52.jpeg


I ran 8 gauge power wire across the cargo area behind rear seats, down floor wiring panels under door, up front kick panels, and through grommet in the firewall. Fused at battery, and connected to one of the spare spots Ford gave us. Need an M5 or M6 nut here, depending which you use. Ground is wired To the factory ground found right above sub. I cut the factory sub wires that are sealed in the grommet in sub enclosure, and connected them to the high level inputs on the amp. Cut off the RCA ends, and connected them with butt connectors, make sure you get polarity correct! Wiring drawing below. I drilled holes in the same grommet to run 14g speaker wire to the sub. Apologies for the lack of installation pics on most of this, I will grab some and update later if needed.

E1C1CC7A-D8AE-41C6-94BC-BF4CFABD6A9E.jpeg

341AC928-BA0A-4304-8E60-61A8DCC211F1.webp

B2A8257F-9DB3-49AC-9635-150D01E60BE2.jpeg

C5C95A97-5B46-45F5-B8CC-7EEAD7E4B019.webp


I ended up stuffing the enclosure with PolyFil. This really helped, the bass is less boomy, hits harder and tighter if that makes sense. I had to re-adjust my preferred settings afterwards, it makes a difference. Someone that doesn’t want to bother with a sub/amp should try adding polyfil to the oem sub. I bet it helps alot.

2233DC51-8D2C-454B-8549-E8955117920B.jpeg


Rattle Battle

Anyone with the B&O system knows the sub is a rattle machine at higher volumes. I had the rear panels off no less than 5 times prior to upgrade finding and fixing rattles. I had my doubts if it could ever be rattle free with an aftermarket sub and amp. I am declaring 98% victory on rattles. For my everyday listening music and volumes it’s 100% victory.

I did so much fighting rattles it’s impossible to remember and list it all. My method was simple, play certain 90s gangsta rap songs with repeated bass frequencies on loop that generate rattle everytime. Loud. When neighbors were out that turned to bass frequency sweeps and loops I found online. Play loud and go around using your ears to pinpoint and your hands to feel and absorb. What I ended up with is Kilmat in the entire cargo area, 3 rolls of cloth tape wrapping wires, connectors, insulating behind pins, wiring under rear seats, etc. Used Kilmat to insulate behind most things touching the body. Suspect panel clips were replaced (and several broken). Be diligent in your battle and you can win!

8E21CFC7-1C70-4899-9843-AFFA71995826.jpeg

CB3928B8-4A62-48ED-B19B-808ACE461E28.jpeg


Panel clips and part #s

B222F1AF-3BEF-41C5-ABDD-7C42038DC7D9.webp

26699692-752A-48A1-A836-B1476371555A.webp

F630E772-595D-4407-BF06-00B96DA70D51.webp

8F029899-9CD6-4E90-841B-07CDAD8F9E2F.webp


Wiring drawing

9FECE6C4-3926-46C0-ABAD-983AC0E79792.webp

06D39505-54BC-45BB-B31F-617775D85F52.webp

11/14/22 Edit to add modified drawing, showing wire changes color after the green connector
1668443137898.webp


Shop Manuals for removing trim
This was an amazing write up. I followed this exactly except went with kicker speakers throughout instead of the Jls and focals and stuck with kicker key amp and sub. I also upgraded the roll bar speakers to 6.5s. I bought everything in Black Friday and saved about 20%. I then found a guy on task rabbit to install for me as there was no way I felt comfortable pulling this off. I’m picking it up today but my installer says it sounds amazing. Can’t wait to hear it. And will update once I pick it up!
Sponsored


Top