OP
OP

- Thread starter
- #61
Still not what I said. You no can read good.I guess you just help some people.
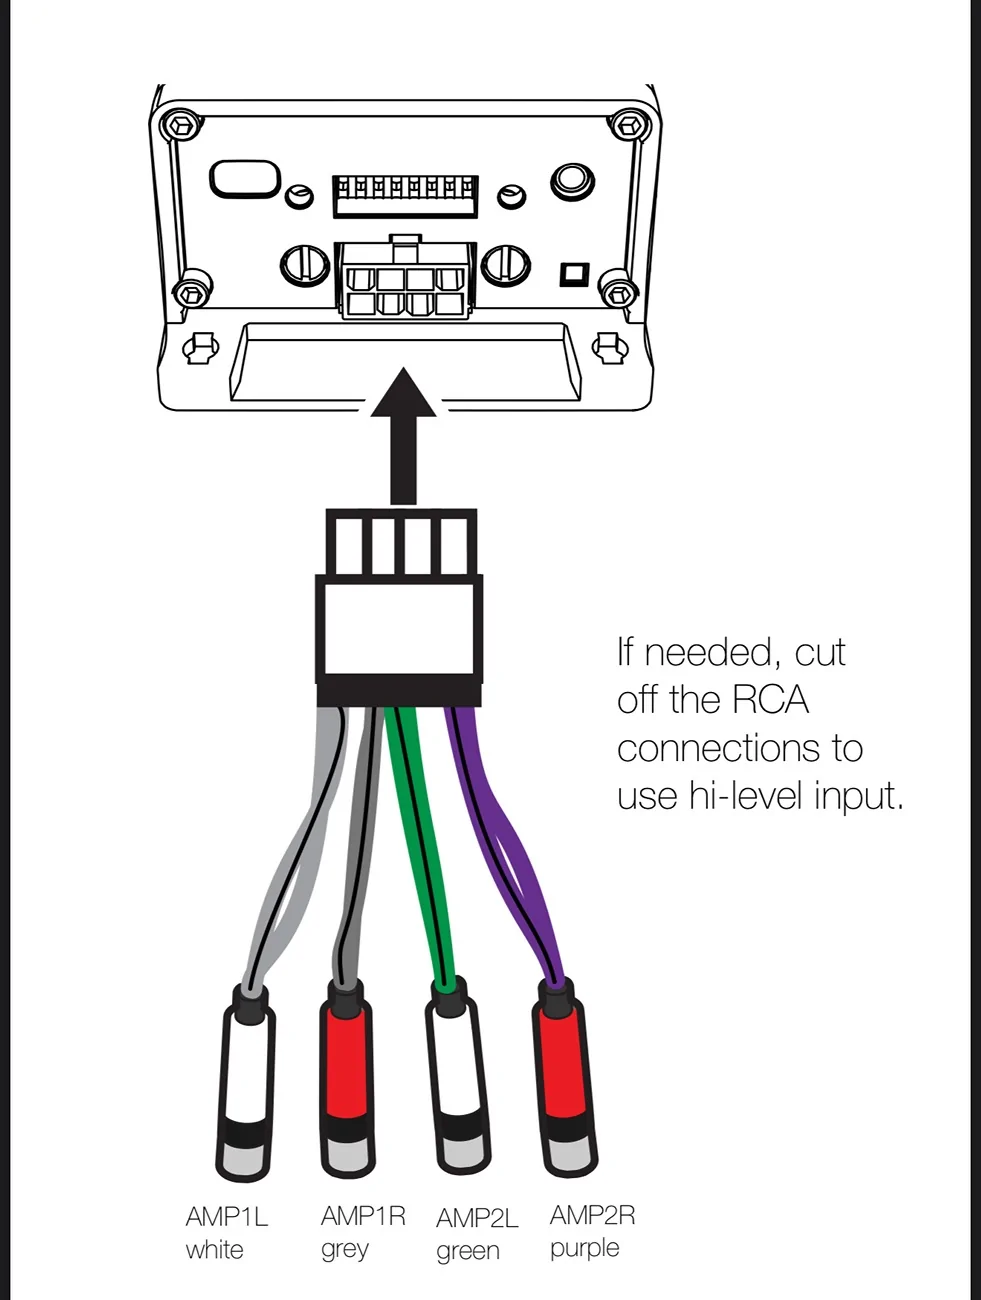
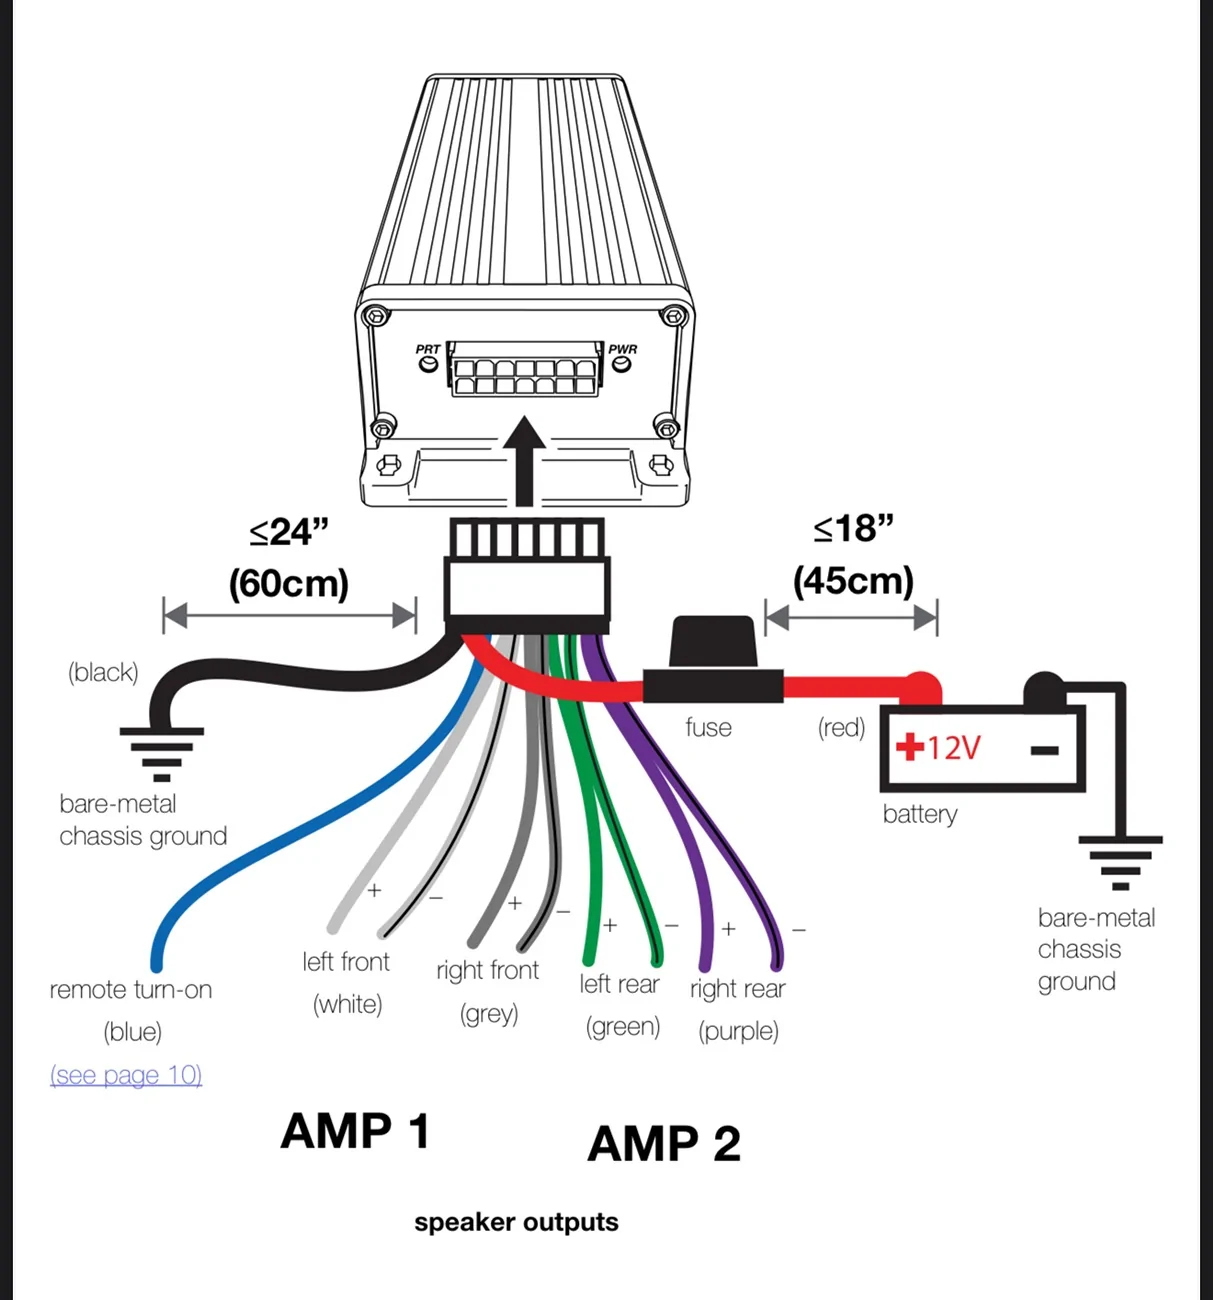
Your biamp wiring to the dash is running two speakers in parallel, Alpine built a nice little crossover to make it one speaker on it, but at its heart it is two, 4 ohm speakers wired in parallel which at your insistence makes it two ohms and is wrong based on how electric circuits work when you factor in how speakers and crossovers actually work.
Why are you here again? What is your purpose?
Yes. Two 4 ohm speakers wired in parallel (without a cap) will net 2 ohms. That is unarguable fact. Thank you for proving me right. This has never been about passive crossovers on coaxials or otherwise. You win the “capacitors on coaxials” argument. Good job.
Now back to what the rest of us were talking about.
Sponsored