- Thread starter
- #1
Hi!
This is going to be a heck of a first post to this forum.
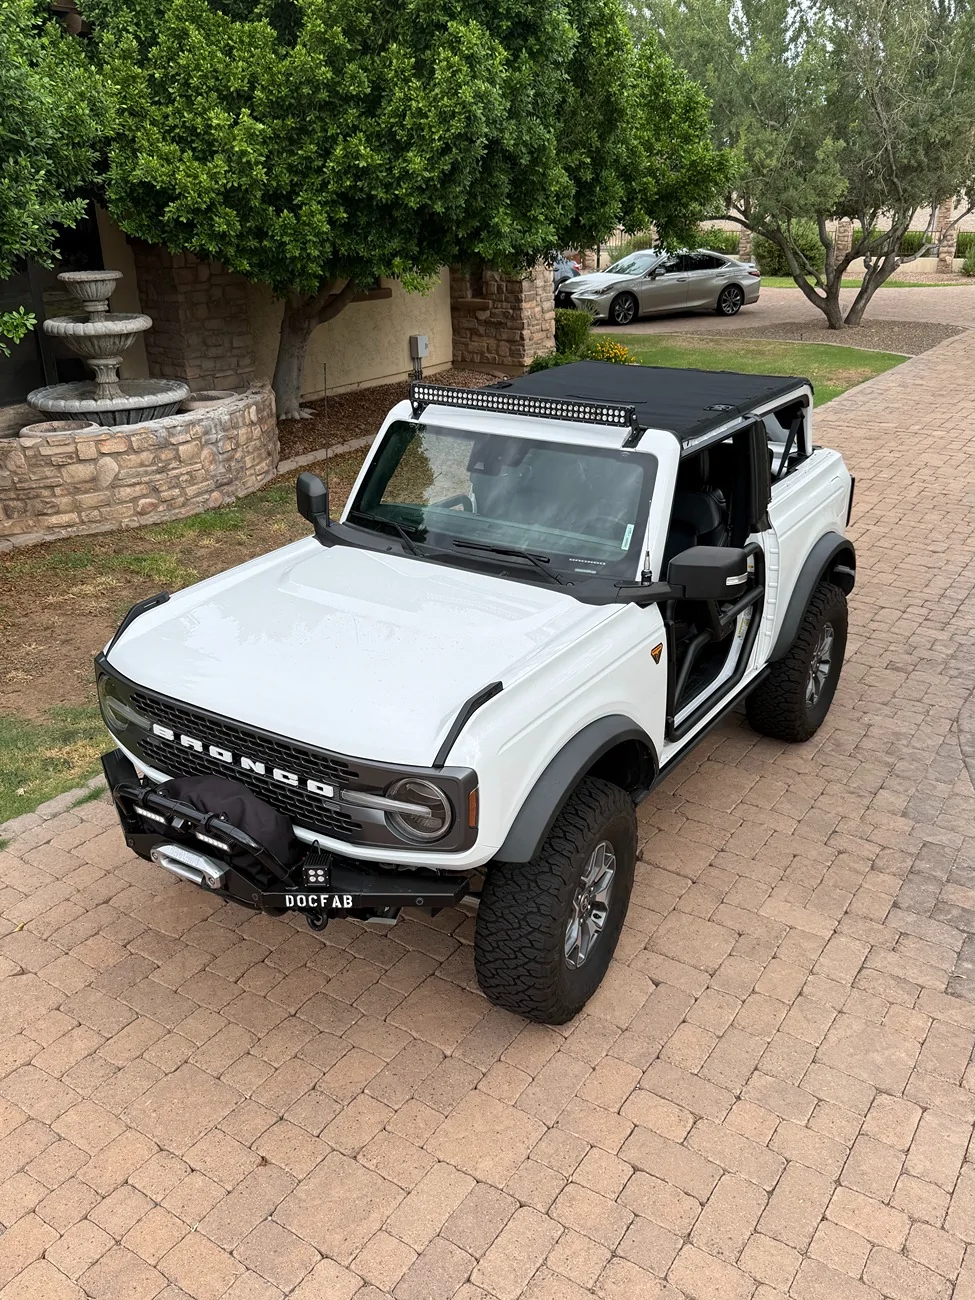
I thought I'd share some pics of the central feature modification I've done for my Bronco, a '21 2 door Badlands I picked up recently certified/pre-owned, with about 18.5k miles.
Winch mount bumper builds hold several unique challenges compared to other kinds of projects.
1) First off, it has got to be really strong. Severe forces are exerted on these things. Breakage is major disaster.
2) You want to tuck the winch in as close as you can to the grill, and you want it as close to on-plane with the frame rails as you can muster. It should pull, not torque on the mount.
3) You want the bumper itself out of the way for the tire to make contact on obstacles first, and you want to minimize degrading the approach angle.
4) Next, it should be reasonably light. It's not for bulldozing stumps, but there should be protection, especially below bumper line.
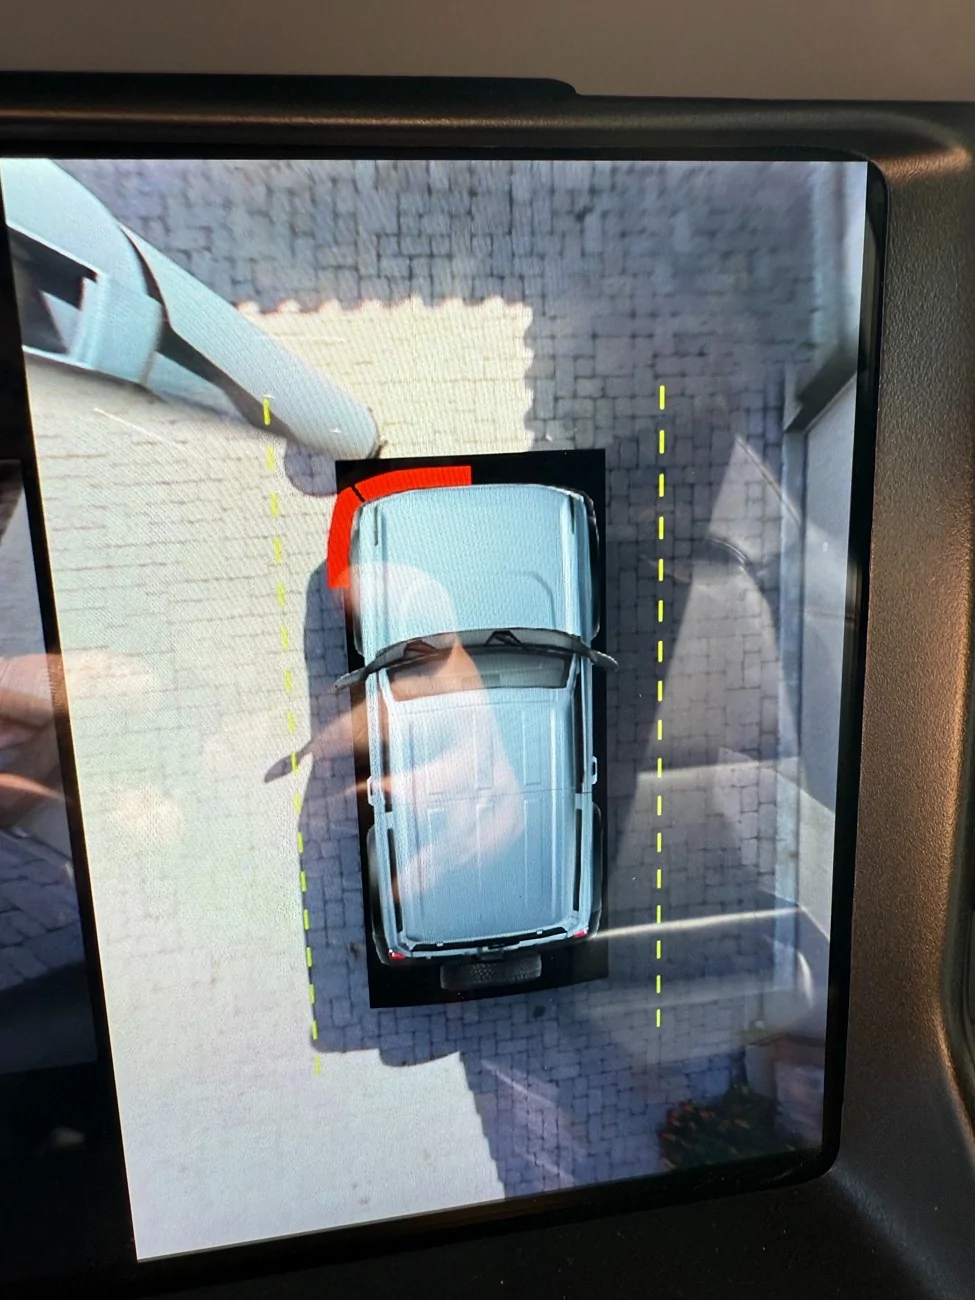
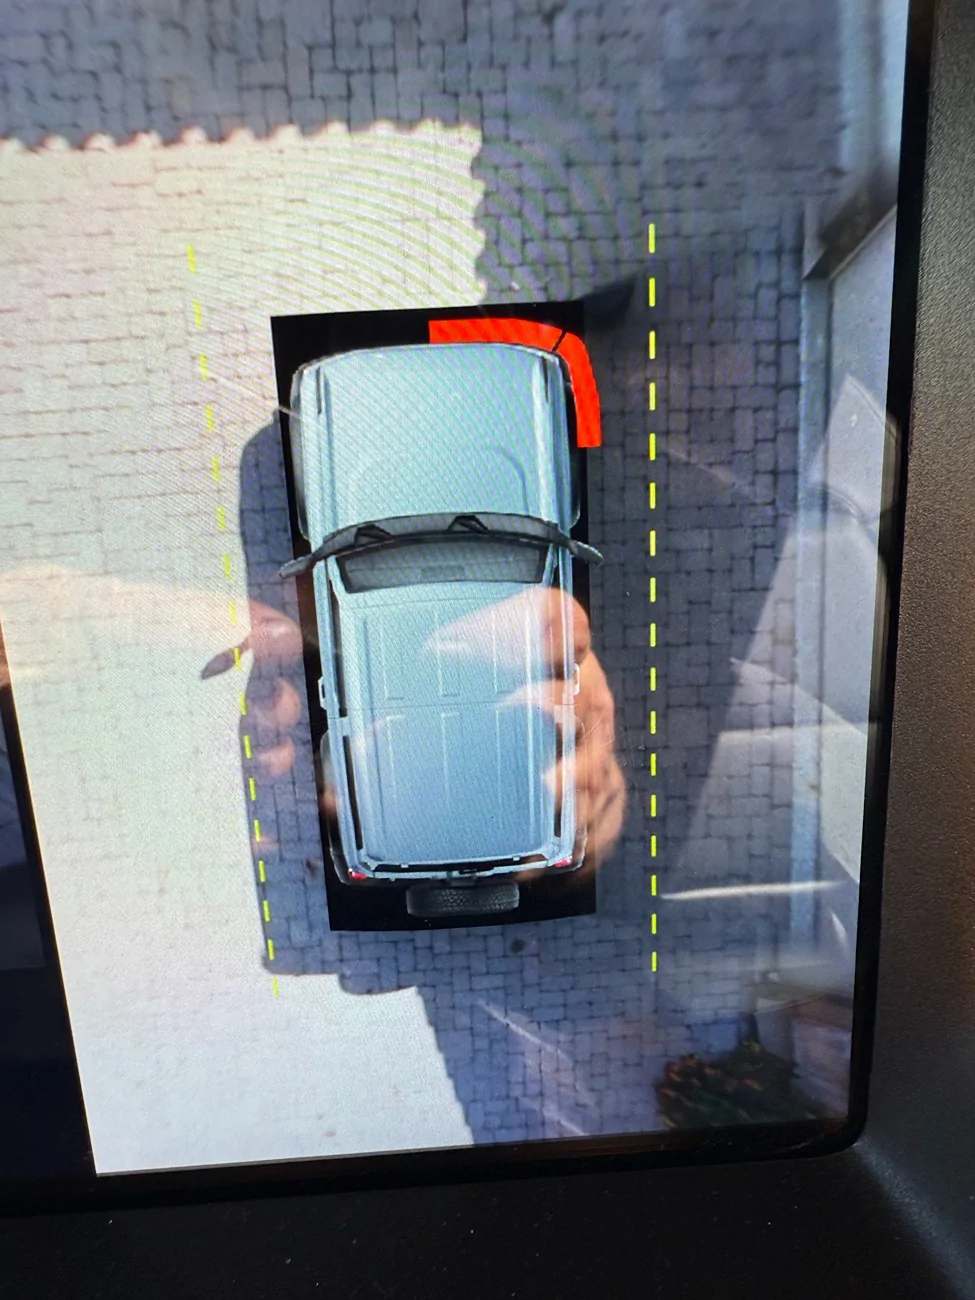
5) There's some nifty tech up front worth preserving, like parking sensors and a seriously useful front facing camera with it's own washer hose, hiding between the "O" and the "N" in the grill.
6) Critically important: For the Bronco in particular, you can't choke the intercooler's air flow.
7) Less specific to bumpers and more of a general principle of designing things, it shouldn't be a puzzle how to assemble, disassemble and service the entire system of parts. In this case, that includes bumper, tow points, winch, lights and wiring.
On a previous bumper build, I did really well on some points but failed egregiously on others...
For reference:

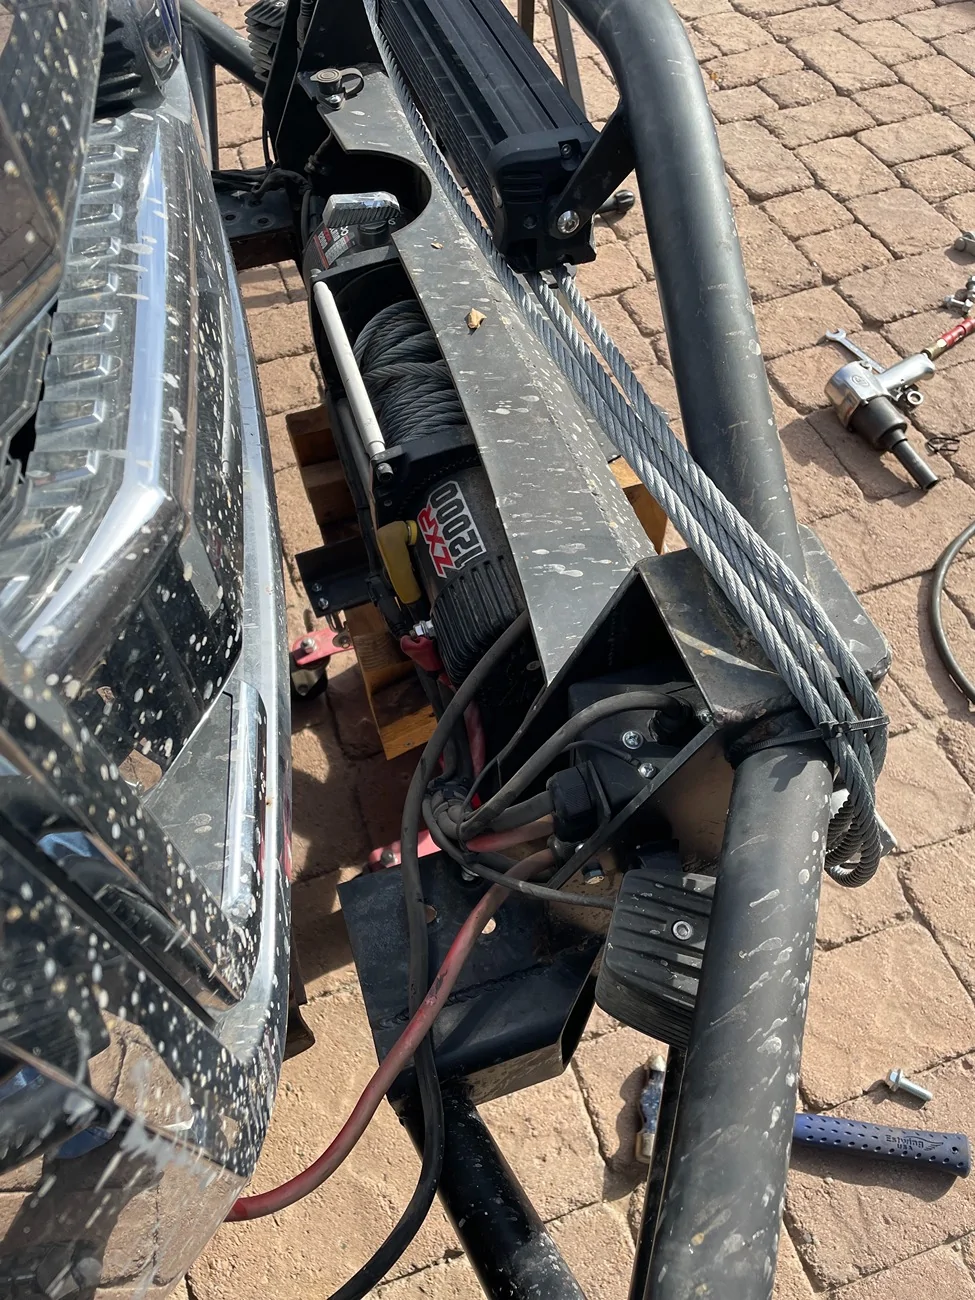
This is the winch mount bumper on my F350. It's got a Harbor Freight 12000 pound winch with synthetic line.
I give it an A++ on "strength".
The central portion is 3/16" plate. The pods on the sides are cut out of 4x6 .250 wall rectangle tube, and contain the mounting points on the frame rails. The frame rails are not as accurate as the bumper so it custom fits and *corrects* the misalignment deficiencies like a well made prosthetic. To get this, I assembled the whole thing with tack welds while on the frame mounts and then unbolted to burn it all in.
I give it an A++ on "tucked in"
The winch itself is mounted "foot forward" and is tucked up till it's almost touching the lower edge of the radiator, and I had to shave down some of the plastic grill and some of the metal from the in-gear/freewheel lever so they'd clear each other. The solenoid pack was installed within the passenger-side pod. The plug for the remote was mounted on an extension wired across to the driver's side. Viewed from the side, this sticks out no more than the factory bumper.
Here it is dismounted, when I was overhauling some corroded cables and replacing the wire rope with synthetic:

You can see the winch tucked in foot forward, the solenoid pack offset to the passenger's side, and the remote plug off to the driver's side. If you've got sharp eyes, you can also pick out that I've built a lifting adapter out of wood that goes on top of my transmission jack in order to detach and service this beast. That's because I get a D- on "light" and I get an F on "servicability". Everything important is inside. The weight isn't enough to challenge the suspension, but it's way more than I can manage, solo.
So... wanting to demonstrate my ability to learn from mistakes, I set out to make a bumper for the Bronco. Similar to the F350 build, the project started in the scrap piles at local steel vendors. I already had some ideas based on what was on my own racks, but climbing over the chunks and drops really gets me thinking. I settled in on a plan hybridizing some round and rectangular tube sections as well as some plate and some angle. Scrap steel is generally sold by the pound, and goes for about 60-65 cents per. Sections of useful profiles are typically 10-20 pounds, and sometimes more. At scrap price, I don't object to buying things I'll only use part of. I already have a lot on hand, so what I'm really looking for is other bits that come with new ideas about how to proceed.
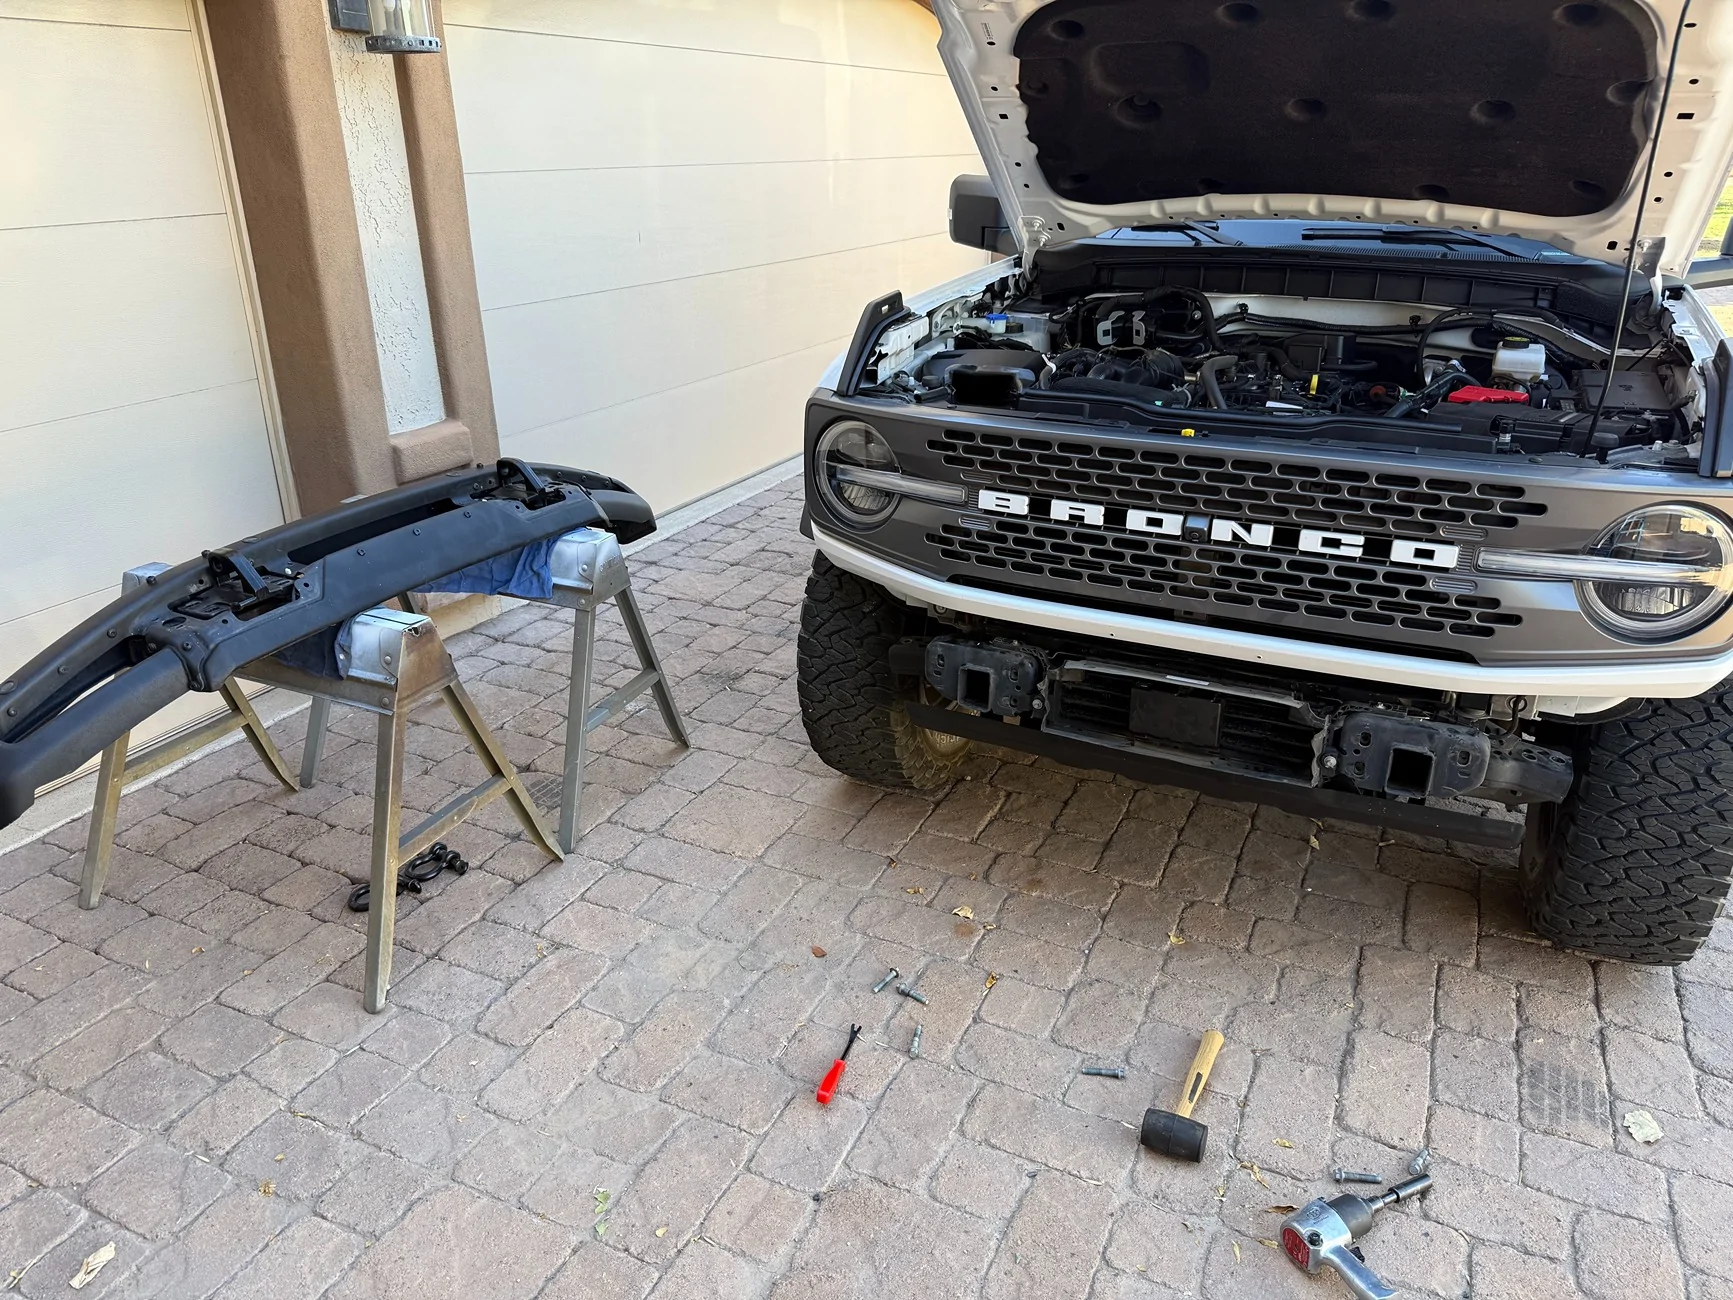
I started by dismounting the factory modular bumper. This includes a unplugging a wiring harness to the parking sensors coming in on the driver's side. The factory bumper and cast tow points have slotted holes for bolts that go cross ways. The holes on the frame mounted bolting flanges go up/down. With these, you can "correct" the factory bumper to the body even if the welded frame is slightly wonky. My builds don't need that because I can fit to the frame as I go. For reference, I found no misalignment between the passenger and driver side frame mounts on the Bronco.
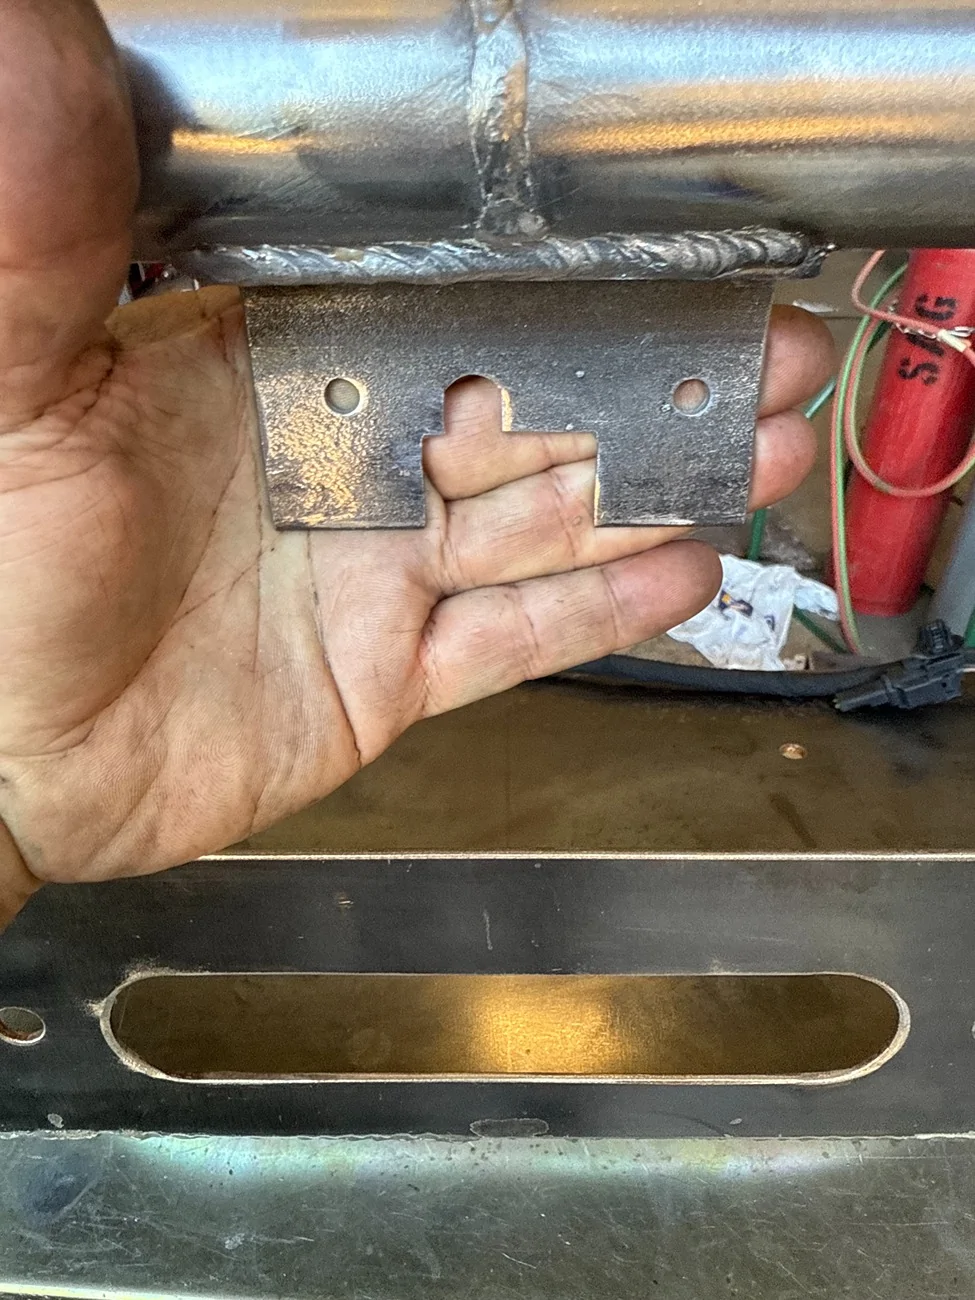
The frame mount bolting flanges have 3 holes on each side, 2 inboard and 1 outboard from the end of the frame rail. Why not 4? No clue, but it's helpful in tapering the bumper up and away from the ground in front of the tire so I'm not complaining. 3 holes each side is plenty.
The end of the frame sits out proud from the flange surface about a quarter inch. There is weld on this side, so you can't just grind it smooth and make a flat plate bolt up across the front face. The factory cast steel tow point bolts right across this with a cavity on the back.
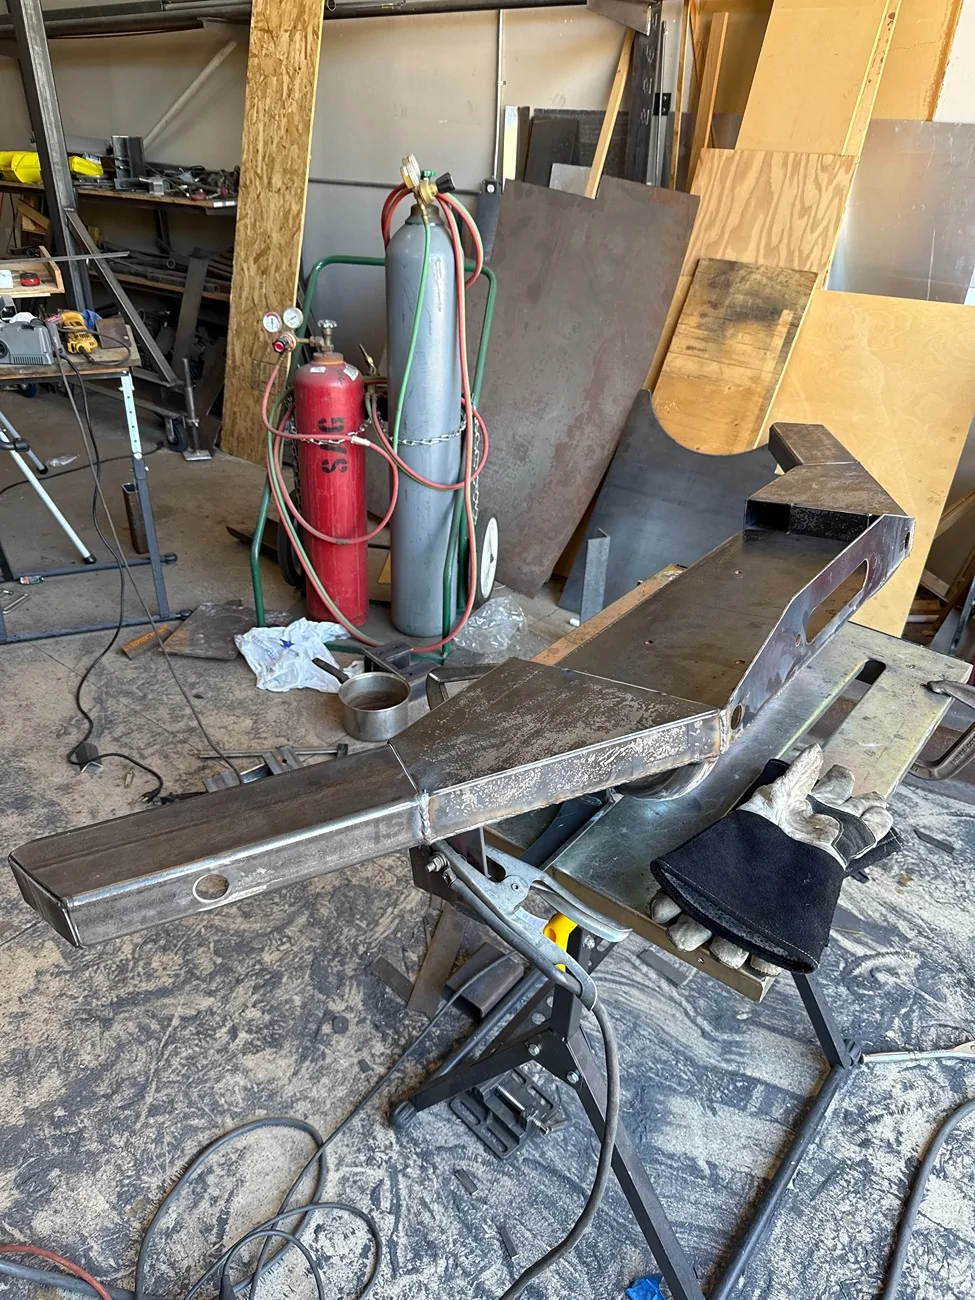
I actually started one plan to cut out a plate with a window in the middle to accept that frame rail end, and then welded a bridge across that, and then a tow-point on the bridge, but one thing led to another, the weight and complexity started adding up, and I decided this was a plan that was going a direction I didn't like. I started over. I went with sections of 1/4" wall angle iron to create bolting flanges, and left room to re-purpose the factory tow points and sandwich everything together.
The angle iron on top is a temporary piece to align the two flanges together internally and across the gap. Once bolted straight, these snapped off and I replaced with the winch plate.
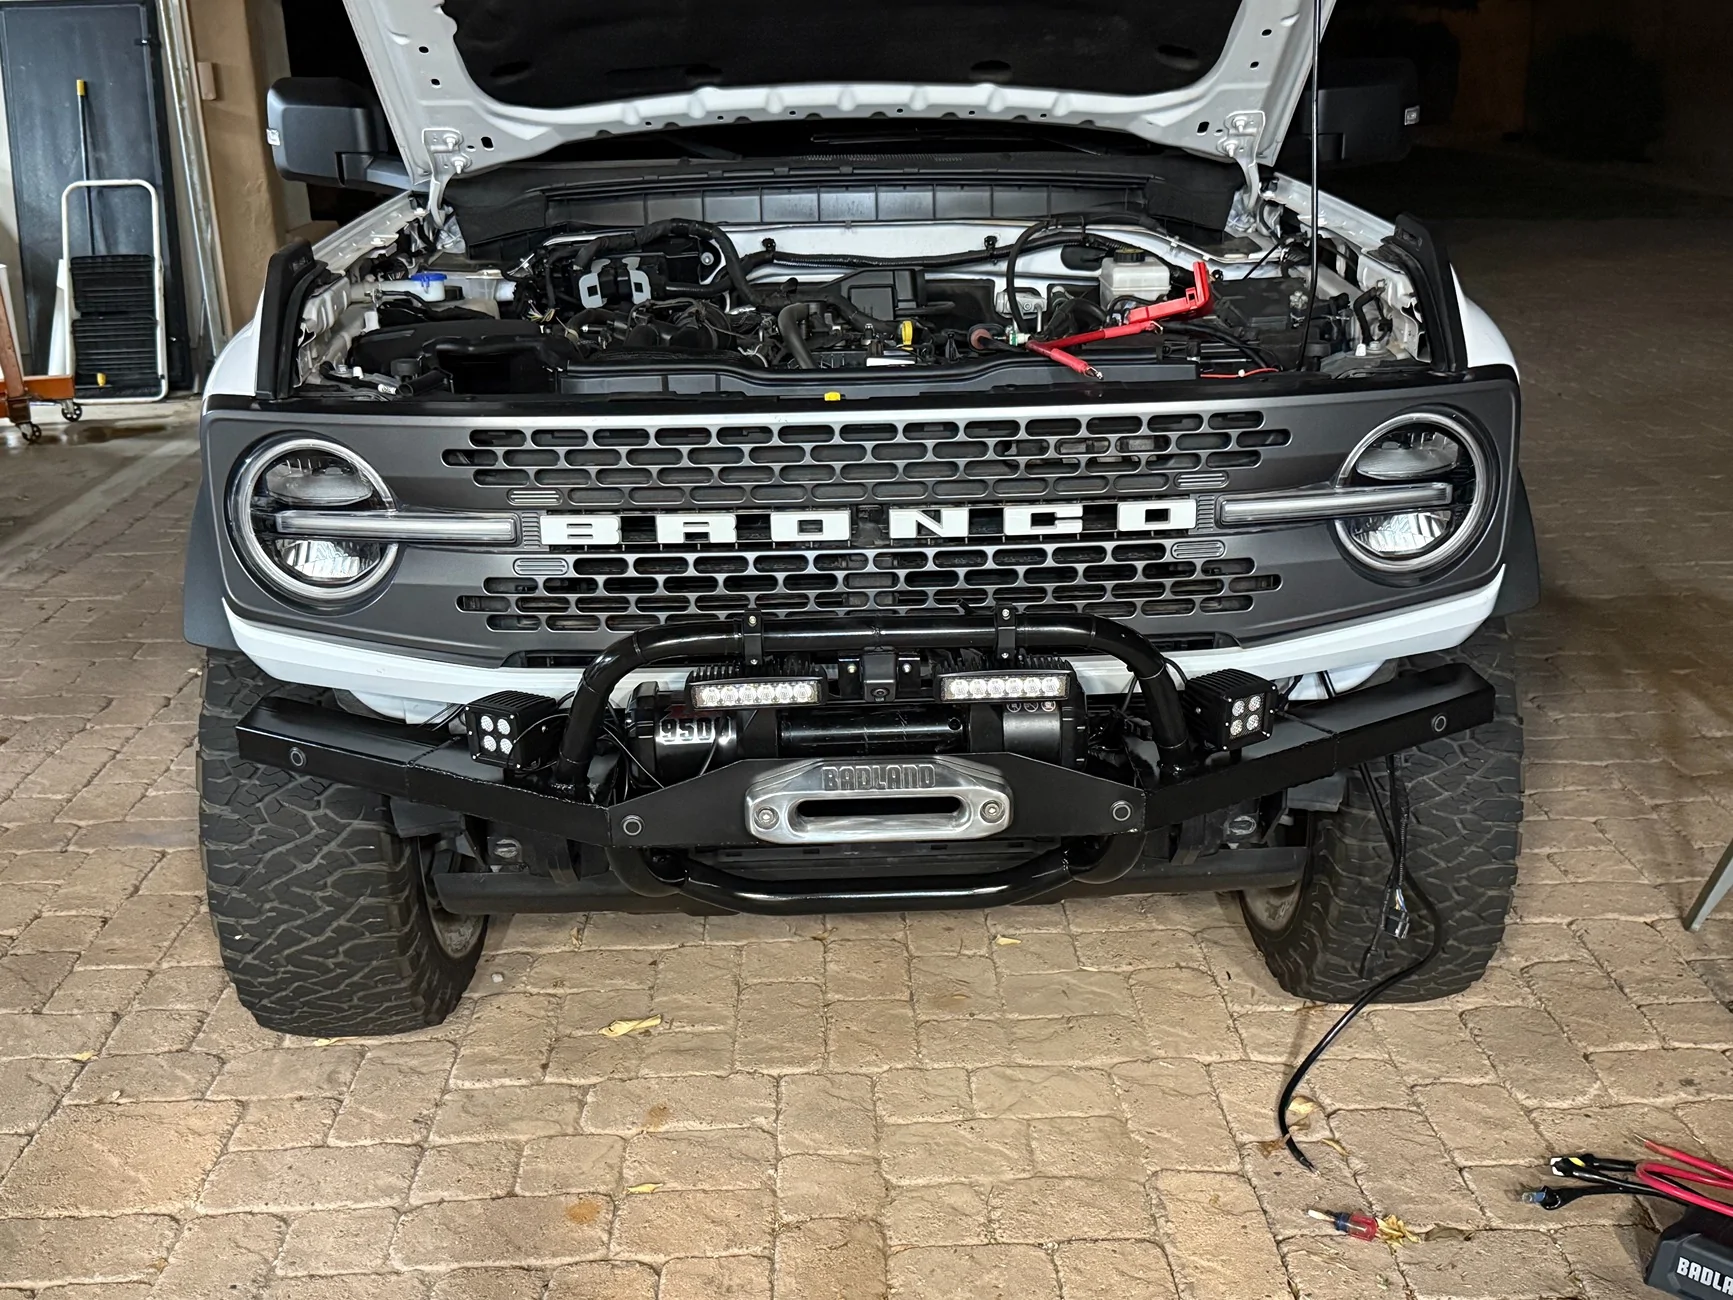
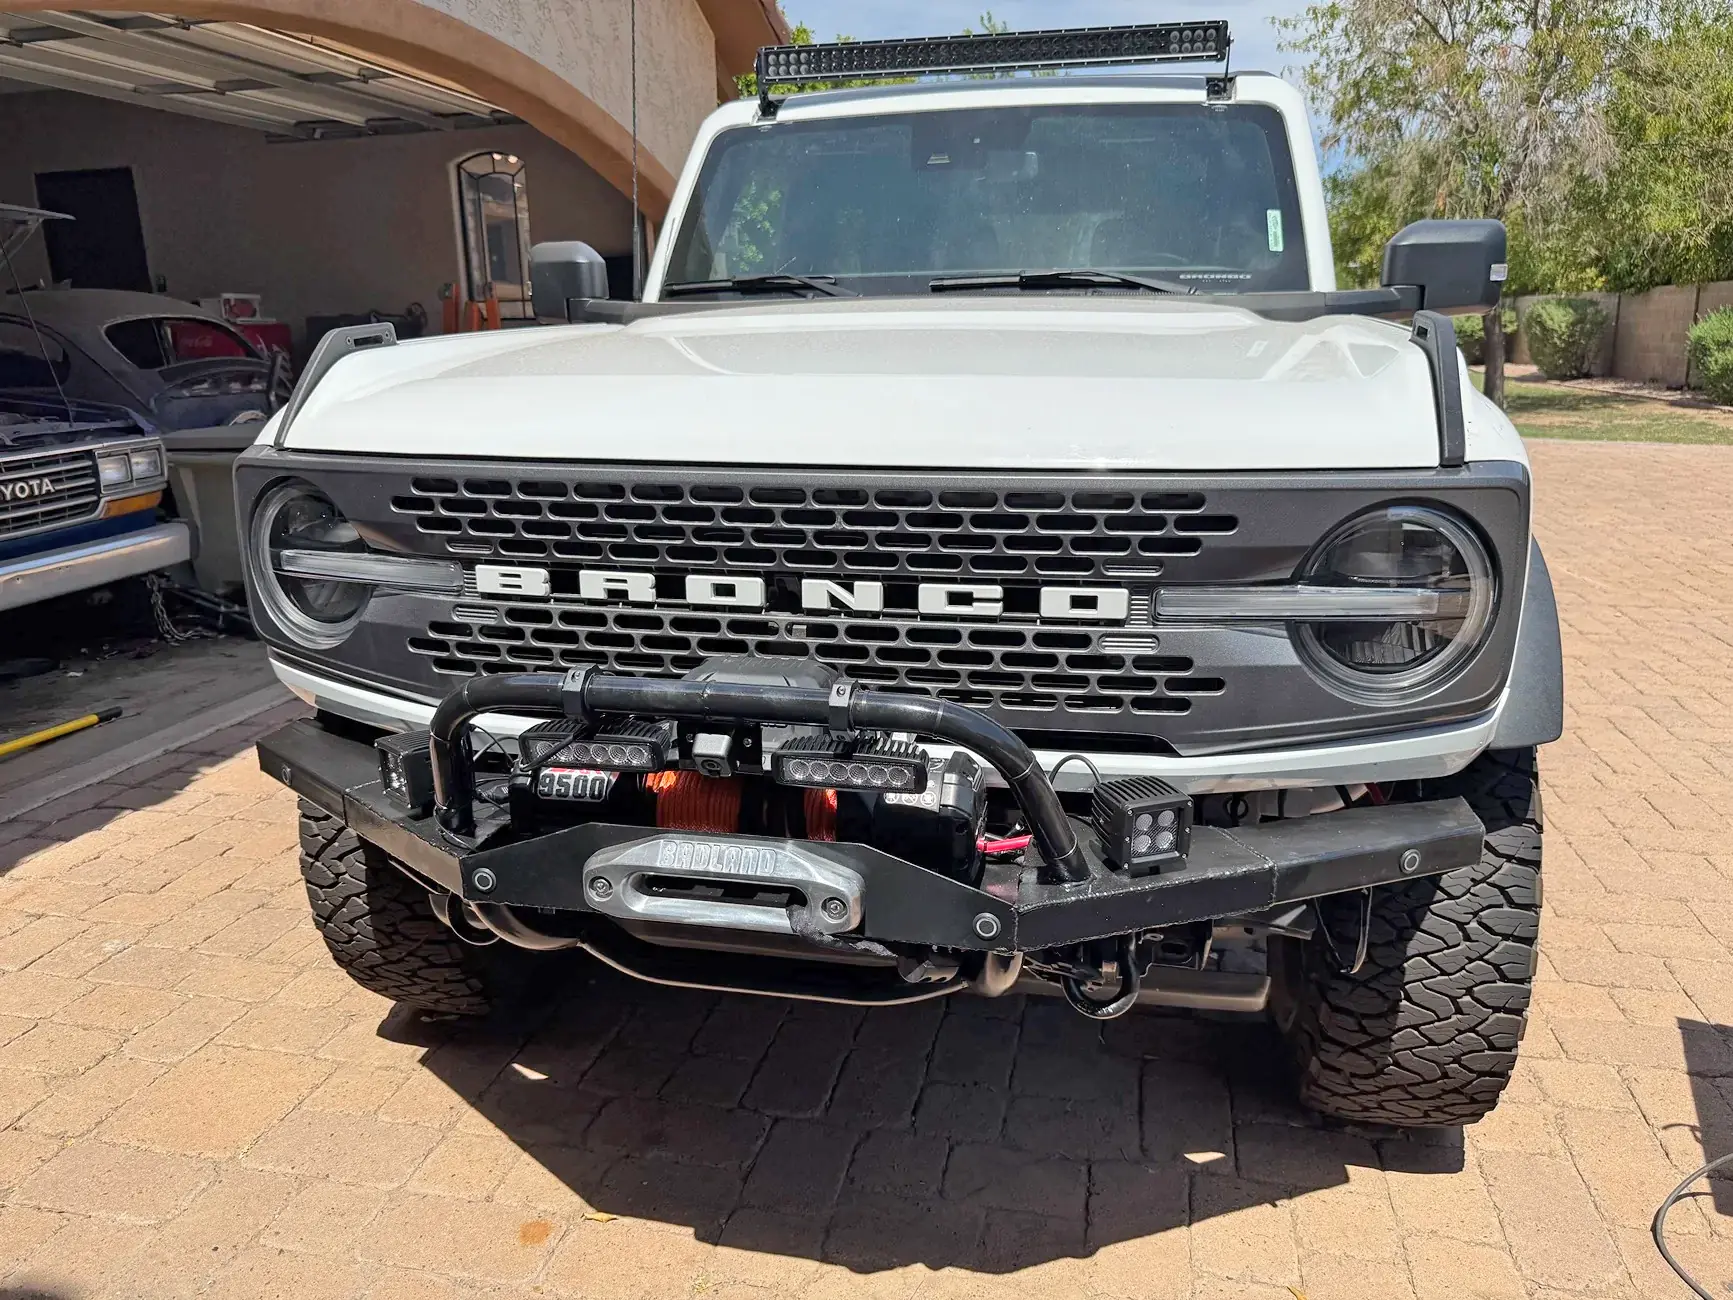
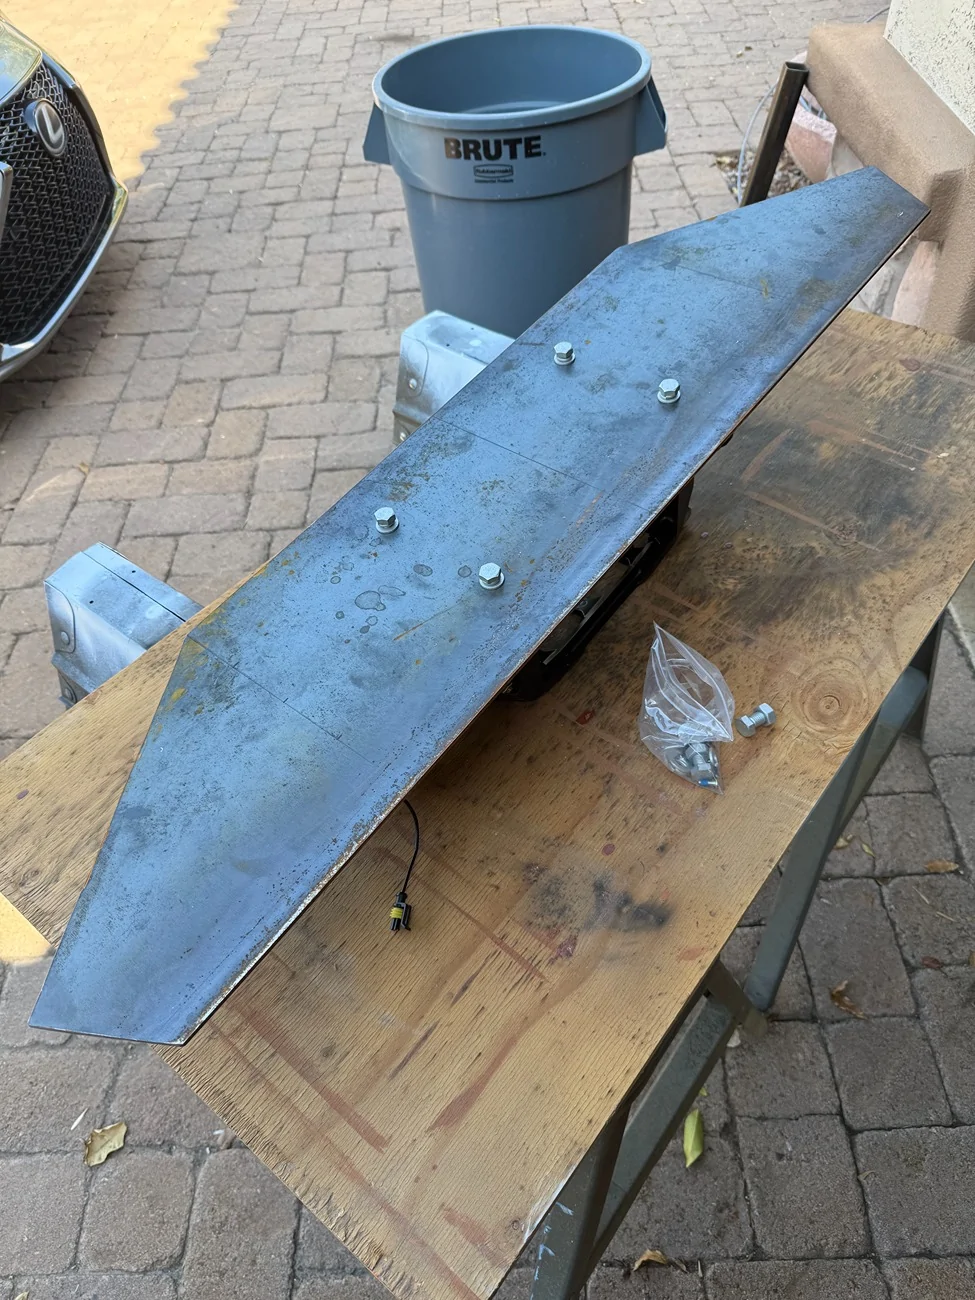
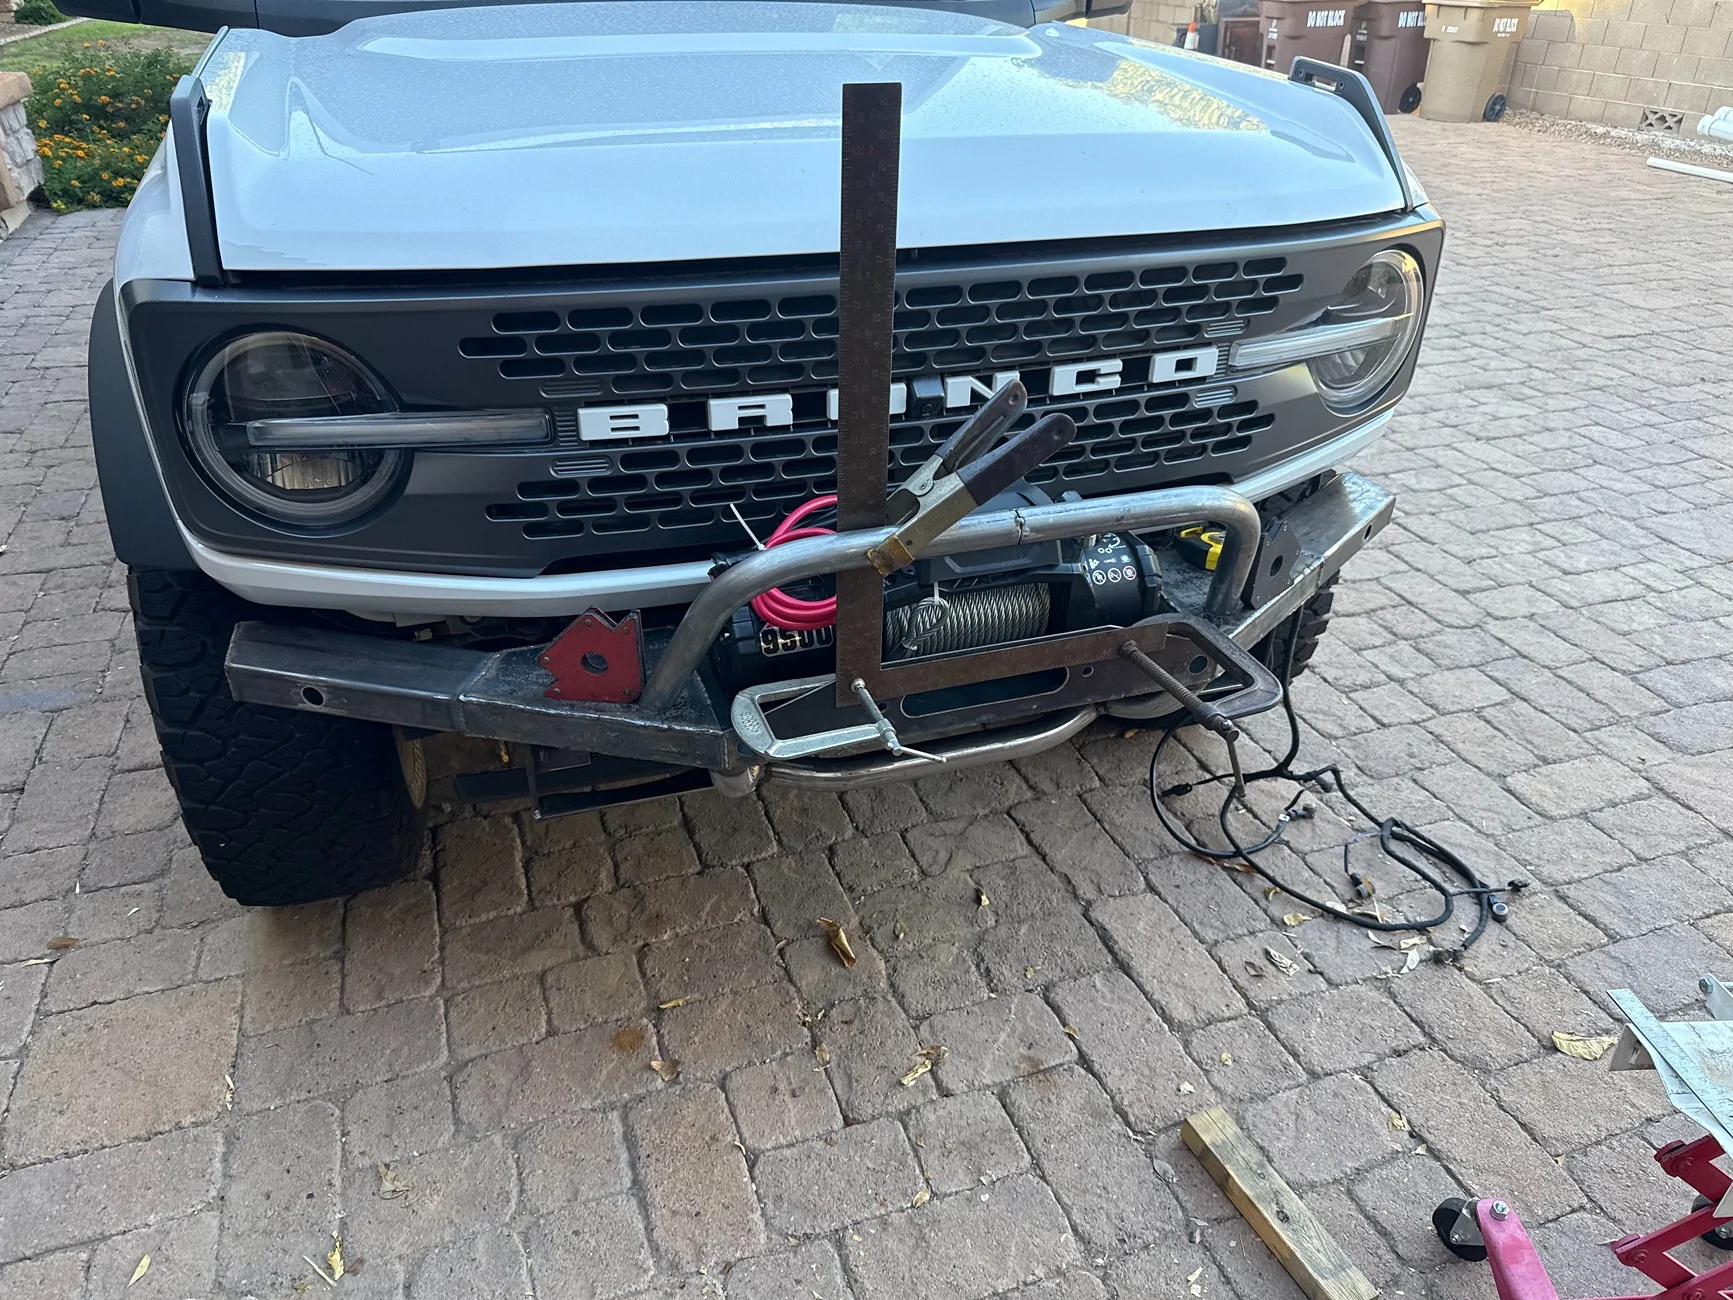
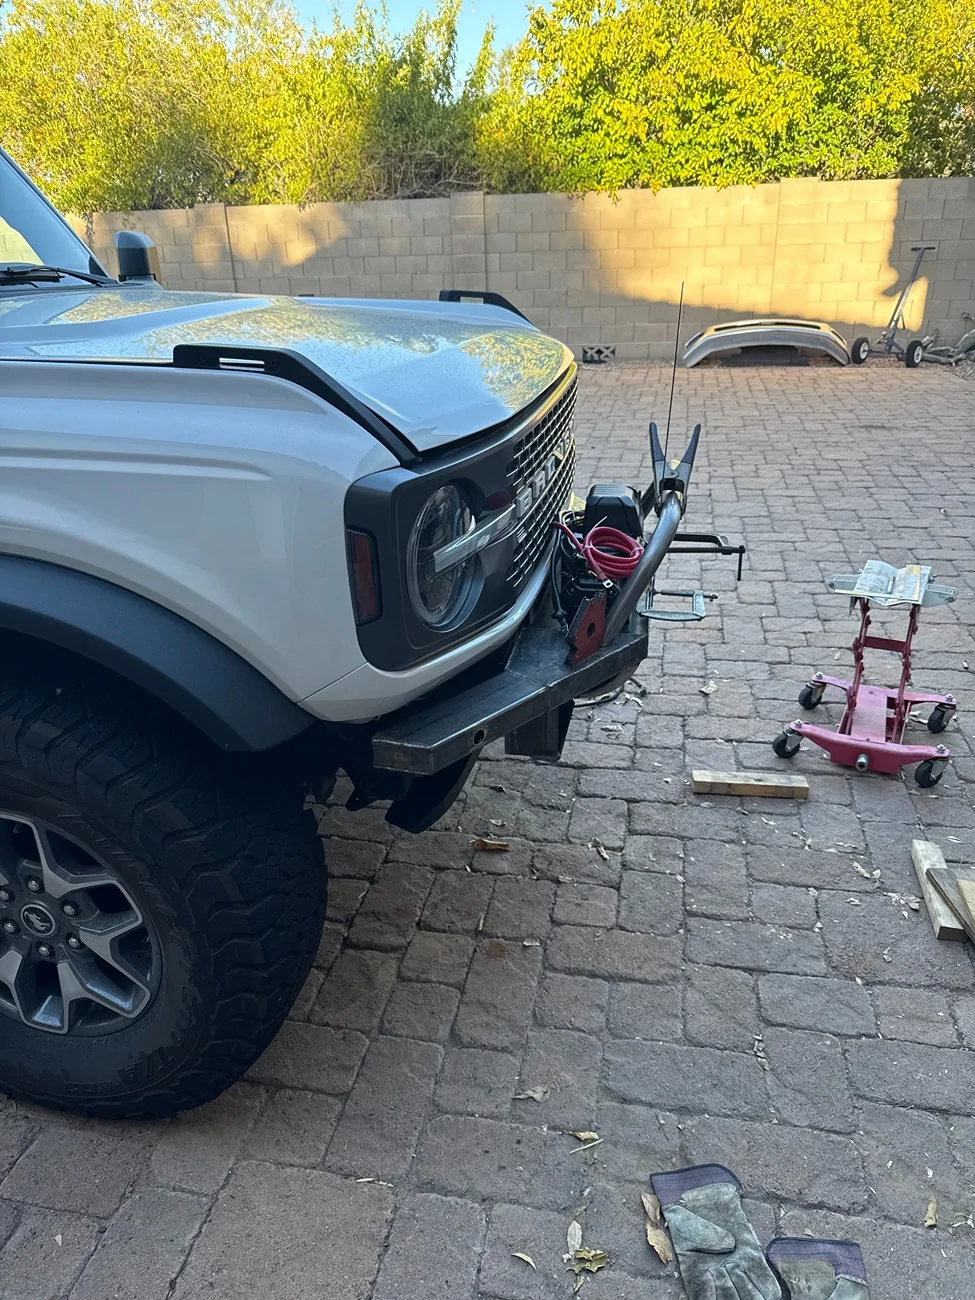
I drilled it for the winch bolts, FOOT DOWN (lesson learned) so that I can remove the winch without removing the bumper. This is again the Harbor Freight winch, but the next size down, 9500# and I just replaced wire rope with synthetic at the get-go.
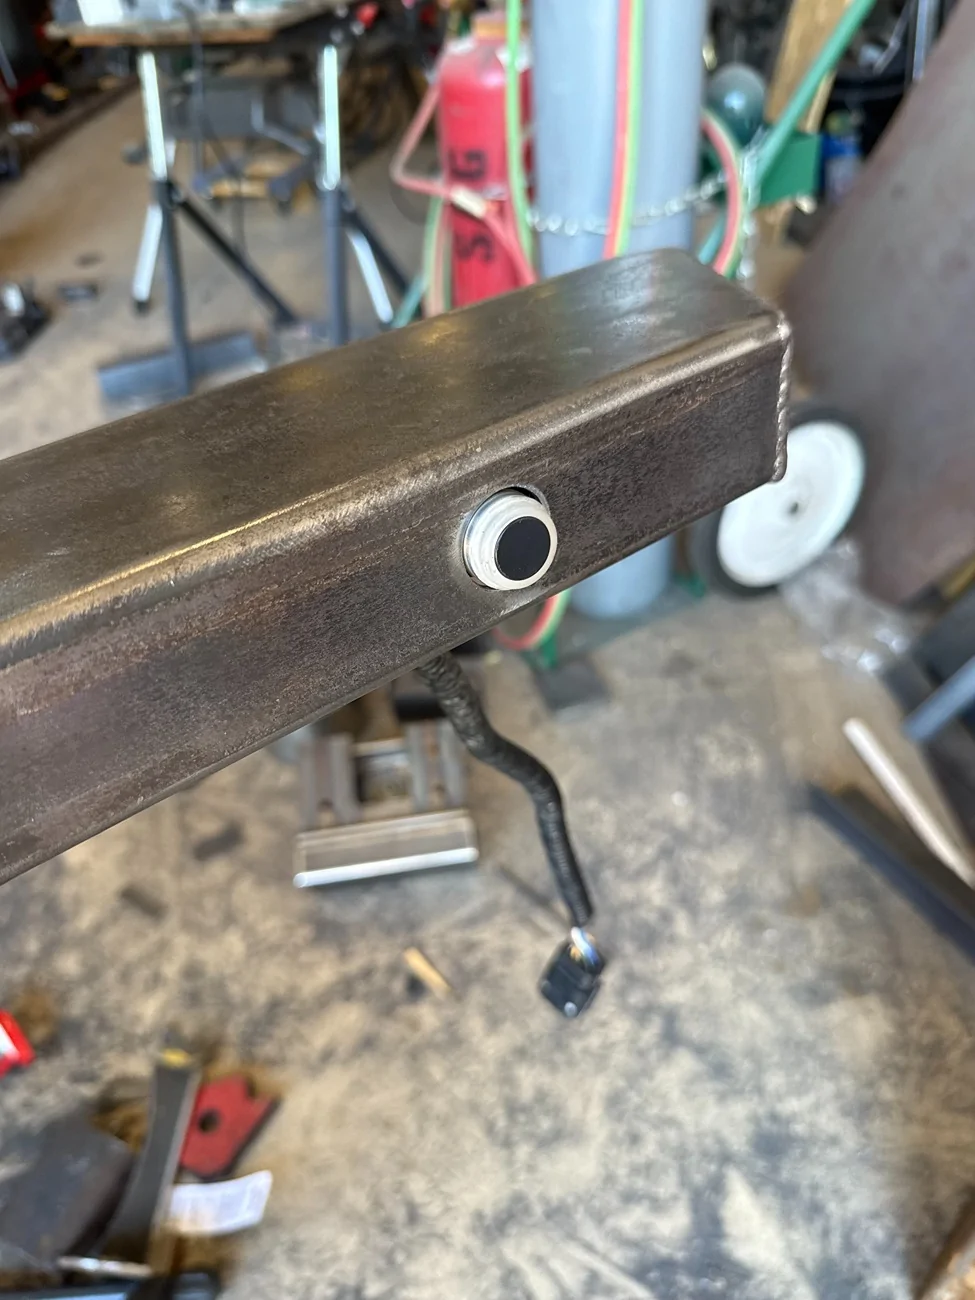
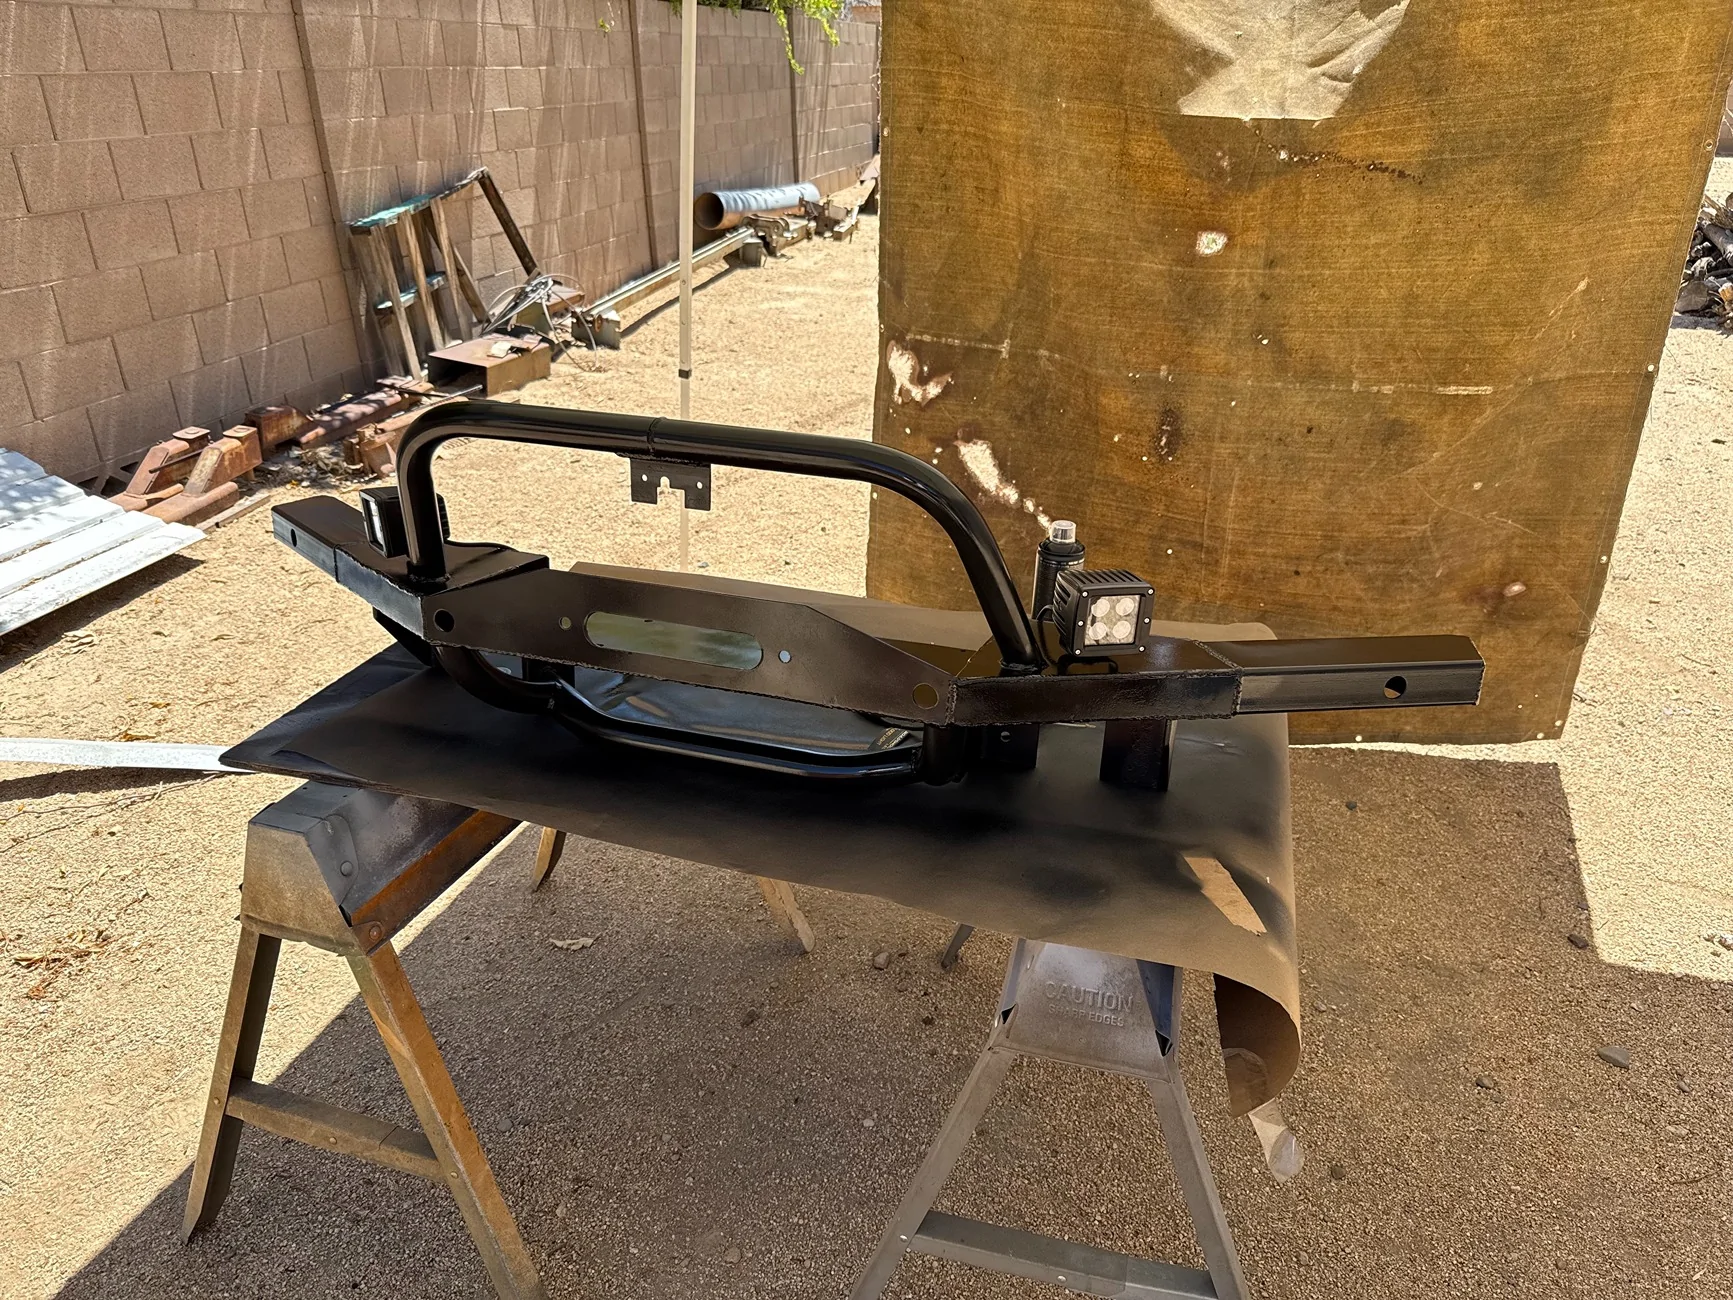
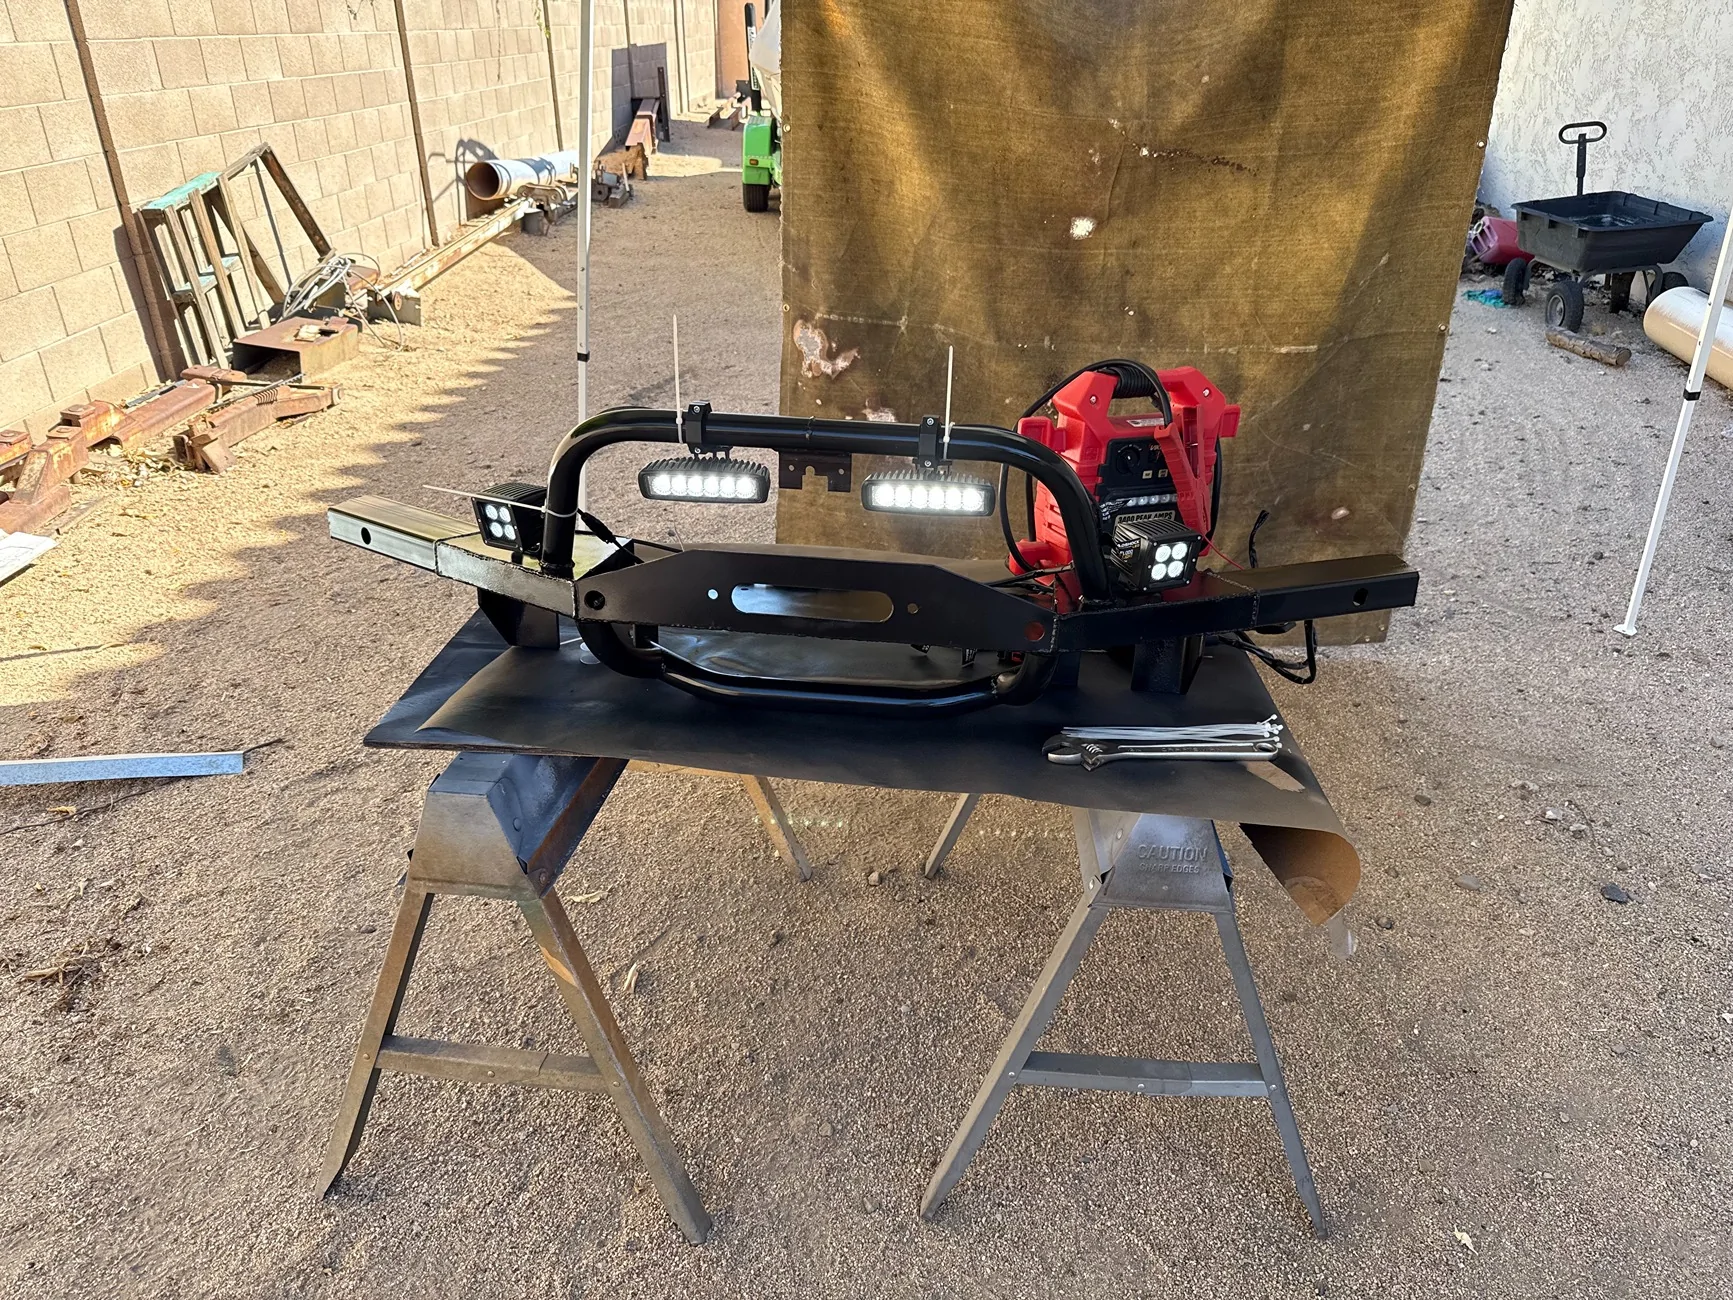
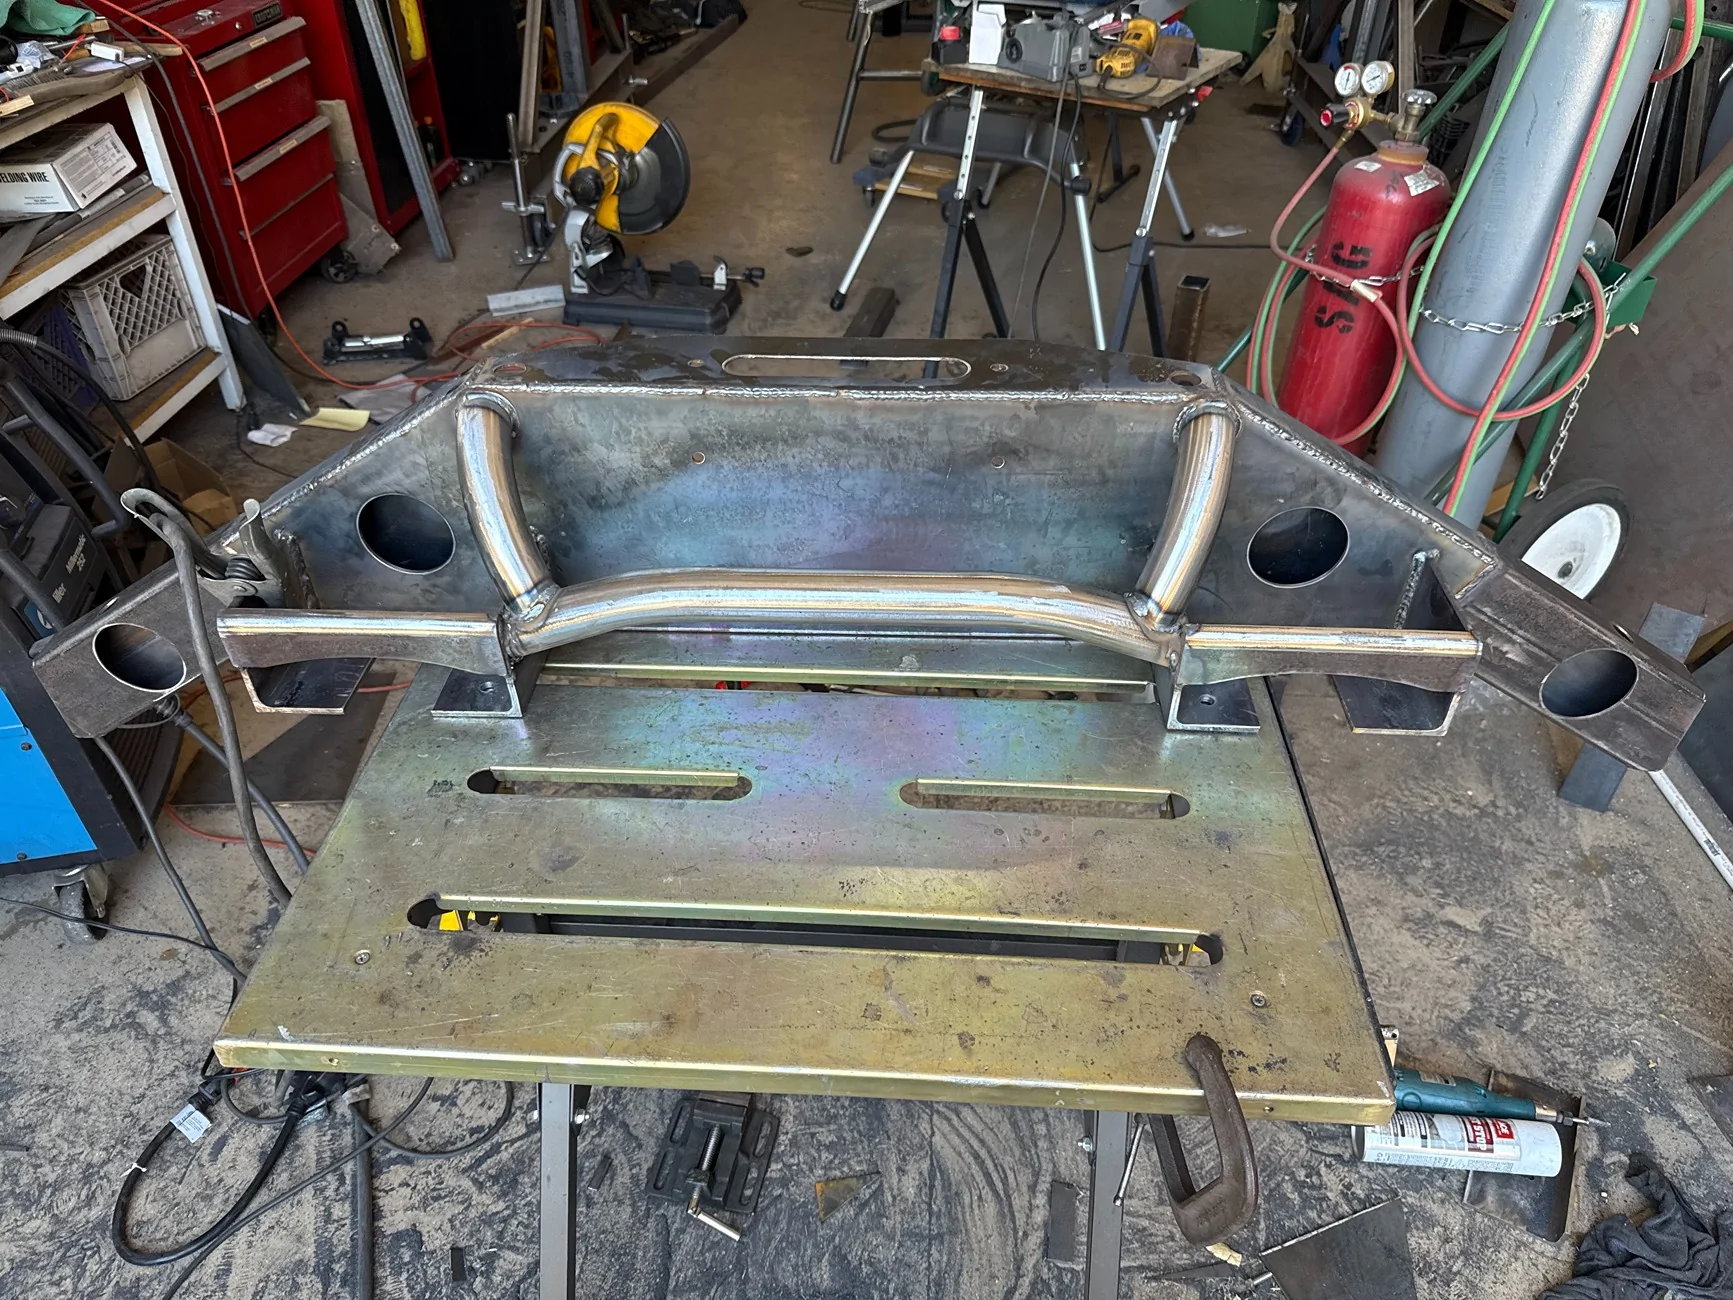
The basic plan here is quarter inch steel to the frame, then a 3/16" base plate welded to that for the winch, boxed into 3D with 1/8" plate, and .125 wall HREW rectangle tube for the bumper, round 1 3/4" and 1 1/2" to bridge and buttress across the center section.
Thus:
I'll break the post there. That's 10 image links. A moderator probably needs to verify that I'm not a troll.
More on this as soon as I see the thread is open for discussion.
This is going to be a heck of a first post to this forum.
I thought I'd share some pics of the central feature modification I've done for my Bronco, a '21 2 door Badlands I picked up recently certified/pre-owned, with about 18.5k miles.
Winch mount bumper builds hold several unique challenges compared to other kinds of projects.
1) First off, it has got to be really strong. Severe forces are exerted on these things. Breakage is major disaster.
2) You want to tuck the winch in as close as you can to the grill, and you want it as close to on-plane with the frame rails as you can muster. It should pull, not torque on the mount.
3) You want the bumper itself out of the way for the tire to make contact on obstacles first, and you want to minimize degrading the approach angle.
4) Next, it should be reasonably light. It's not for bulldozing stumps, but there should be protection, especially below bumper line.
5) There's some nifty tech up front worth preserving, like parking sensors and a seriously useful front facing camera with it's own washer hose, hiding between the "O" and the "N" in the grill.
6) Critically important: For the Bronco in particular, you can't choke the intercooler's air flow.
7) Less specific to bumpers and more of a general principle of designing things, it shouldn't be a puzzle how to assemble, disassemble and service the entire system of parts. In this case, that includes bumper, tow points, winch, lights and wiring.
On a previous bumper build, I did really well on some points but failed egregiously on others...
For reference:
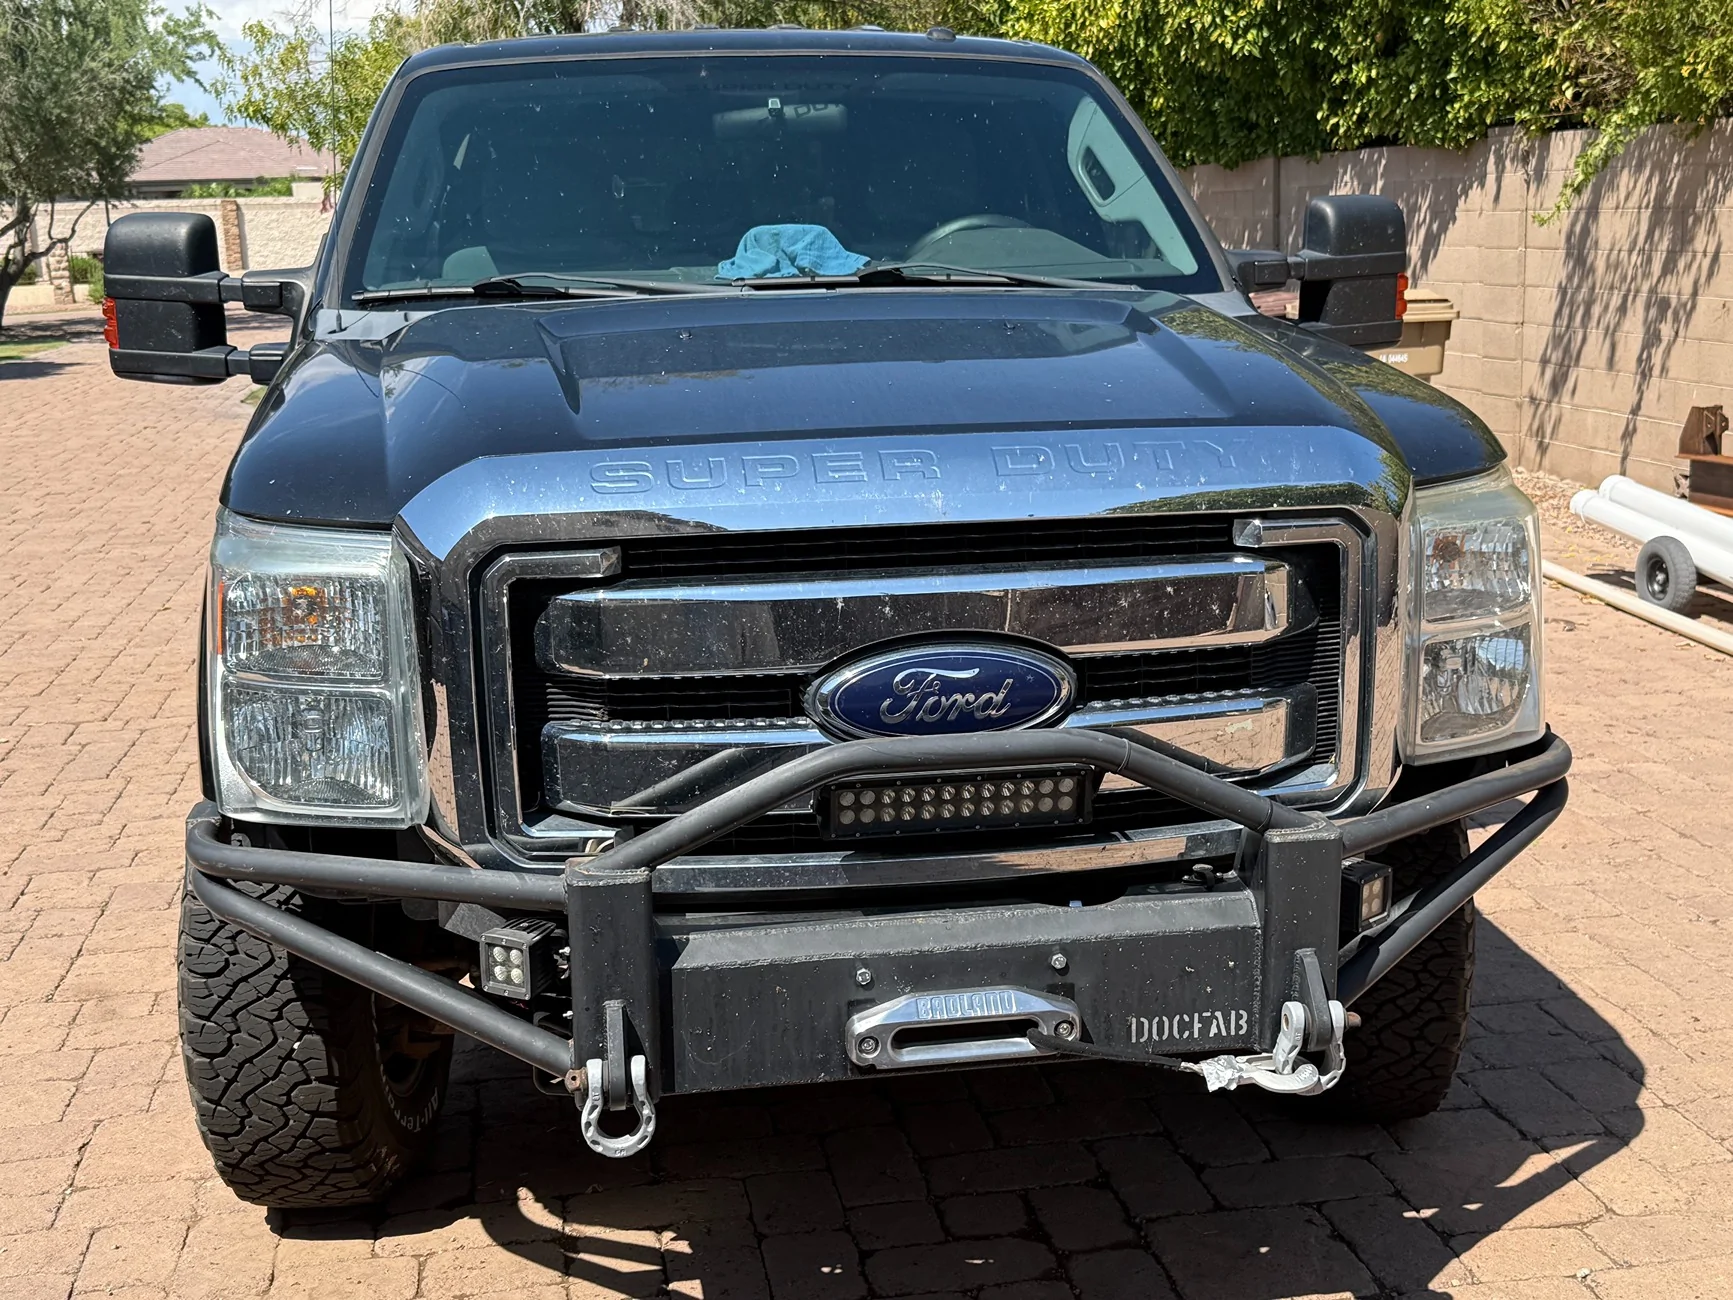
This is the winch mount bumper on my F350. It's got a Harbor Freight 12000 pound winch with synthetic line.
I give it an A++ on "strength".
The central portion is 3/16" plate. The pods on the sides are cut out of 4x6 .250 wall rectangle tube, and contain the mounting points on the frame rails. The frame rails are not as accurate as the bumper so it custom fits and *corrects* the misalignment deficiencies like a well made prosthetic. To get this, I assembled the whole thing with tack welds while on the frame mounts and then unbolted to burn it all in.
I give it an A++ on "tucked in"
The winch itself is mounted "foot forward" and is tucked up till it's almost touching the lower edge of the radiator, and I had to shave down some of the plastic grill and some of the metal from the in-gear/freewheel lever so they'd clear each other. The solenoid pack was installed within the passenger-side pod. The plug for the remote was mounted on an extension wired across to the driver's side. Viewed from the side, this sticks out no more than the factory bumper.
Here it is dismounted, when I was overhauling some corroded cables and replacing the wire rope with synthetic:
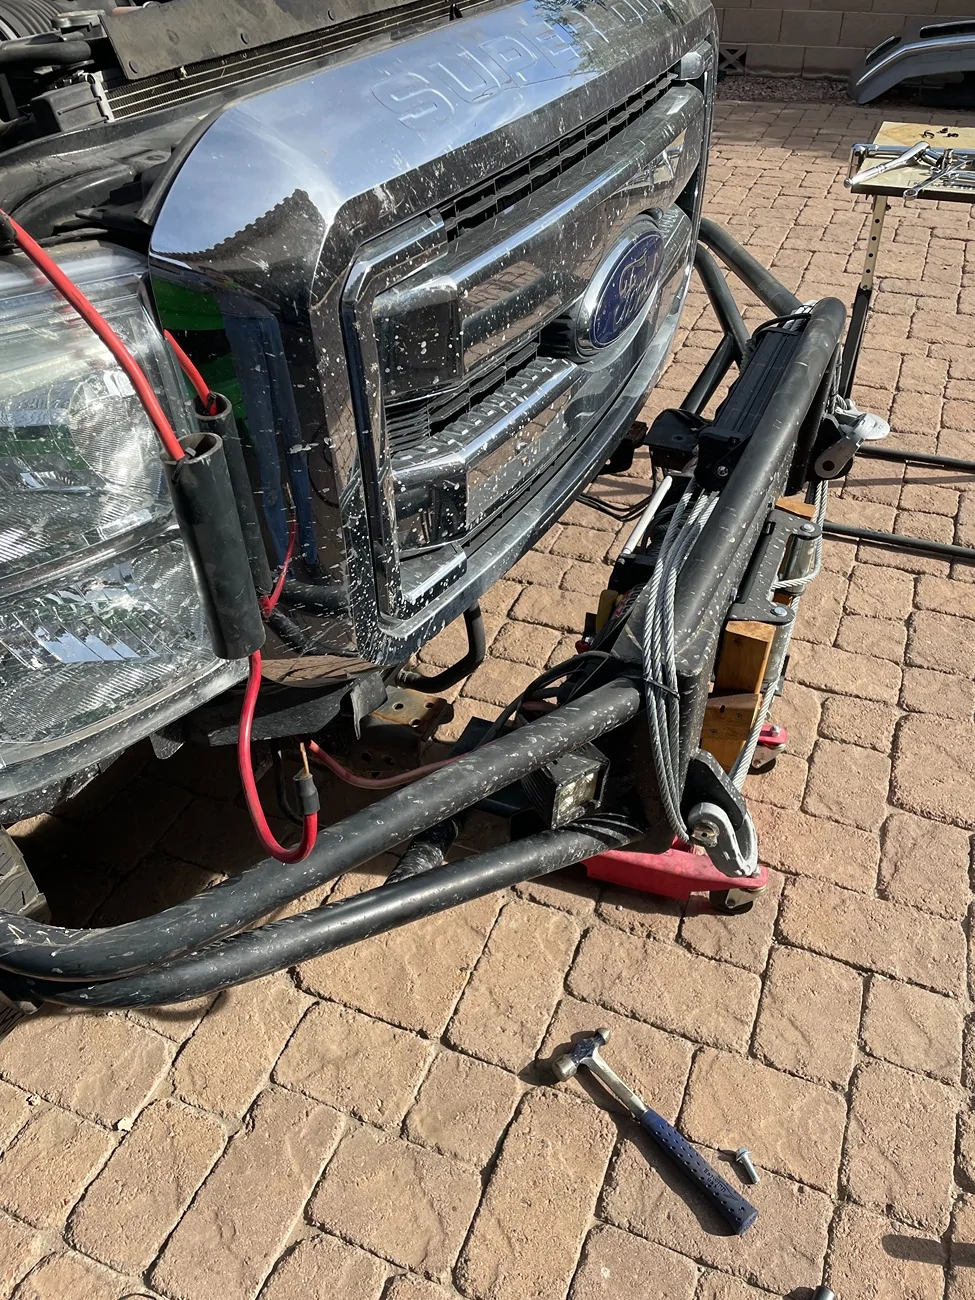
You can see the winch tucked in foot forward, the solenoid pack offset to the passenger's side, and the remote plug off to the driver's side. If you've got sharp eyes, you can also pick out that I've built a lifting adapter out of wood that goes on top of my transmission jack in order to detach and service this beast. That's because I get a D- on "light" and I get an F on "servicability". Everything important is inside. The weight isn't enough to challenge the suspension, but it's way more than I can manage, solo.
So... wanting to demonstrate my ability to learn from mistakes, I set out to make a bumper for the Bronco. Similar to the F350 build, the project started in the scrap piles at local steel vendors. I already had some ideas based on what was on my own racks, but climbing over the chunks and drops really gets me thinking. I settled in on a plan hybridizing some round and rectangular tube sections as well as some plate and some angle. Scrap steel is generally sold by the pound, and goes for about 60-65 cents per. Sections of useful profiles are typically 10-20 pounds, and sometimes more. At scrap price, I don't object to buying things I'll only use part of. I already have a lot on hand, so what I'm really looking for is other bits that come with new ideas about how to proceed.
I started by dismounting the factory modular bumper. This includes a unplugging a wiring harness to the parking sensors coming in on the driver's side. The factory bumper and cast tow points have slotted holes for bolts that go cross ways. The holes on the frame mounted bolting flanges go up/down. With these, you can "correct" the factory bumper to the body even if the welded frame is slightly wonky. My builds don't need that because I can fit to the frame as I go. For reference, I found no misalignment between the passenger and driver side frame mounts on the Bronco.
The frame mount bolting flanges have 3 holes on each side, 2 inboard and 1 outboard from the end of the frame rail. Why not 4? No clue, but it's helpful in tapering the bumper up and away from the ground in front of the tire so I'm not complaining. 3 holes each side is plenty.
The end of the frame sits out proud from the flange surface about a quarter inch. There is weld on this side, so you can't just grind it smooth and make a flat plate bolt up across the front face. The factory cast steel tow point bolts right across this with a cavity on the back.
I actually started one plan to cut out a plate with a window in the middle to accept that frame rail end, and then welded a bridge across that, and then a tow-point on the bridge, but one thing led to another, the weight and complexity started adding up, and I decided this was a plan that was going a direction I didn't like. I started over. I went with sections of 1/4" wall angle iron to create bolting flanges, and left room to re-purpose the factory tow points and sandwich everything together.

The angle iron on top is a temporary piece to align the two flanges together internally and across the gap. Once bolted straight, these snapped off and I replaced with the winch plate.
I drilled it for the winch bolts, FOOT DOWN (lesson learned) so that I can remove the winch without removing the bumper. This is again the Harbor Freight winch, but the next size down, 9500# and I just replaced wire rope with synthetic at the get-go.
The basic plan here is quarter inch steel to the frame, then a 3/16" base plate welded to that for the winch, boxed into 3D with 1/8" plate, and .125 wall HREW rectangle tube for the bumper, round 1 3/4" and 1 1/2" to bridge and buttress across the center section.
Thus:
I'll break the post there. That's 10 image links. A moderator probably needs to verify that I'm not a troll.
More on this as soon as I see the thread is open for discussion.
Sponsored
Last edited: