Sponsored

Armadillo Designs Aluminum Hardtop

Slei

Badlands
Active Member
Joined
Oct 14, 2024
Threads
1
Messages
32
Reaction score
58
Location
California - Bay Area
Vehicle(s)
2023 Ford Bronco, GTI, 1972 Jeep CJ5
Your Bronco Model
Badlands
Clubs
 
Welp, everything is finished. All button up, cam mounted, brake light done, everything else adjusted. Took the wife out in her and she was pleasantly surprised. Being in Jessa with the soft top, she already knew how much noise it made. Now it was nice and quiet. Of course, she had to question the rear molle, but she was impressed by how rugged everything looked. She stated that if someone hit me they would be in trouble, and she was happy that I had a top that would probably stop me from getting seriously injured if I rolled over on a trail. So a thumbs up!

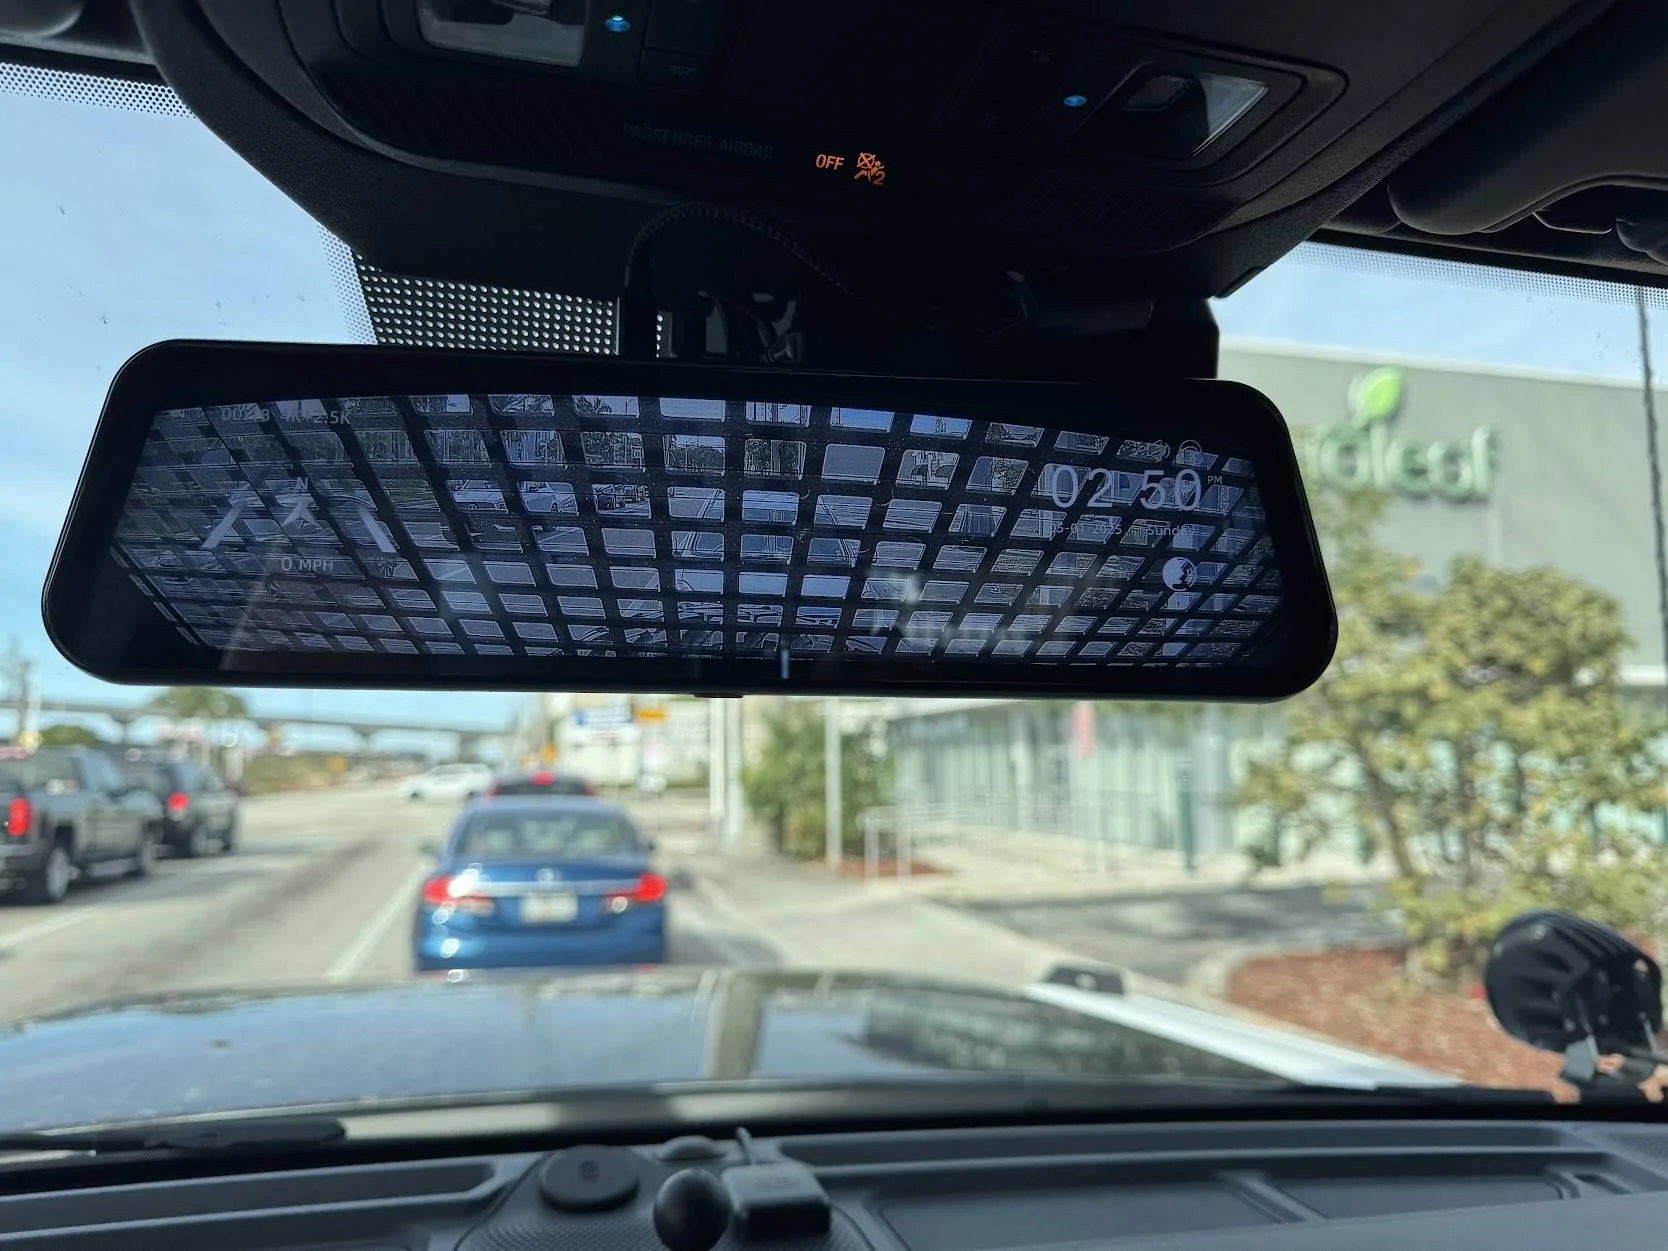
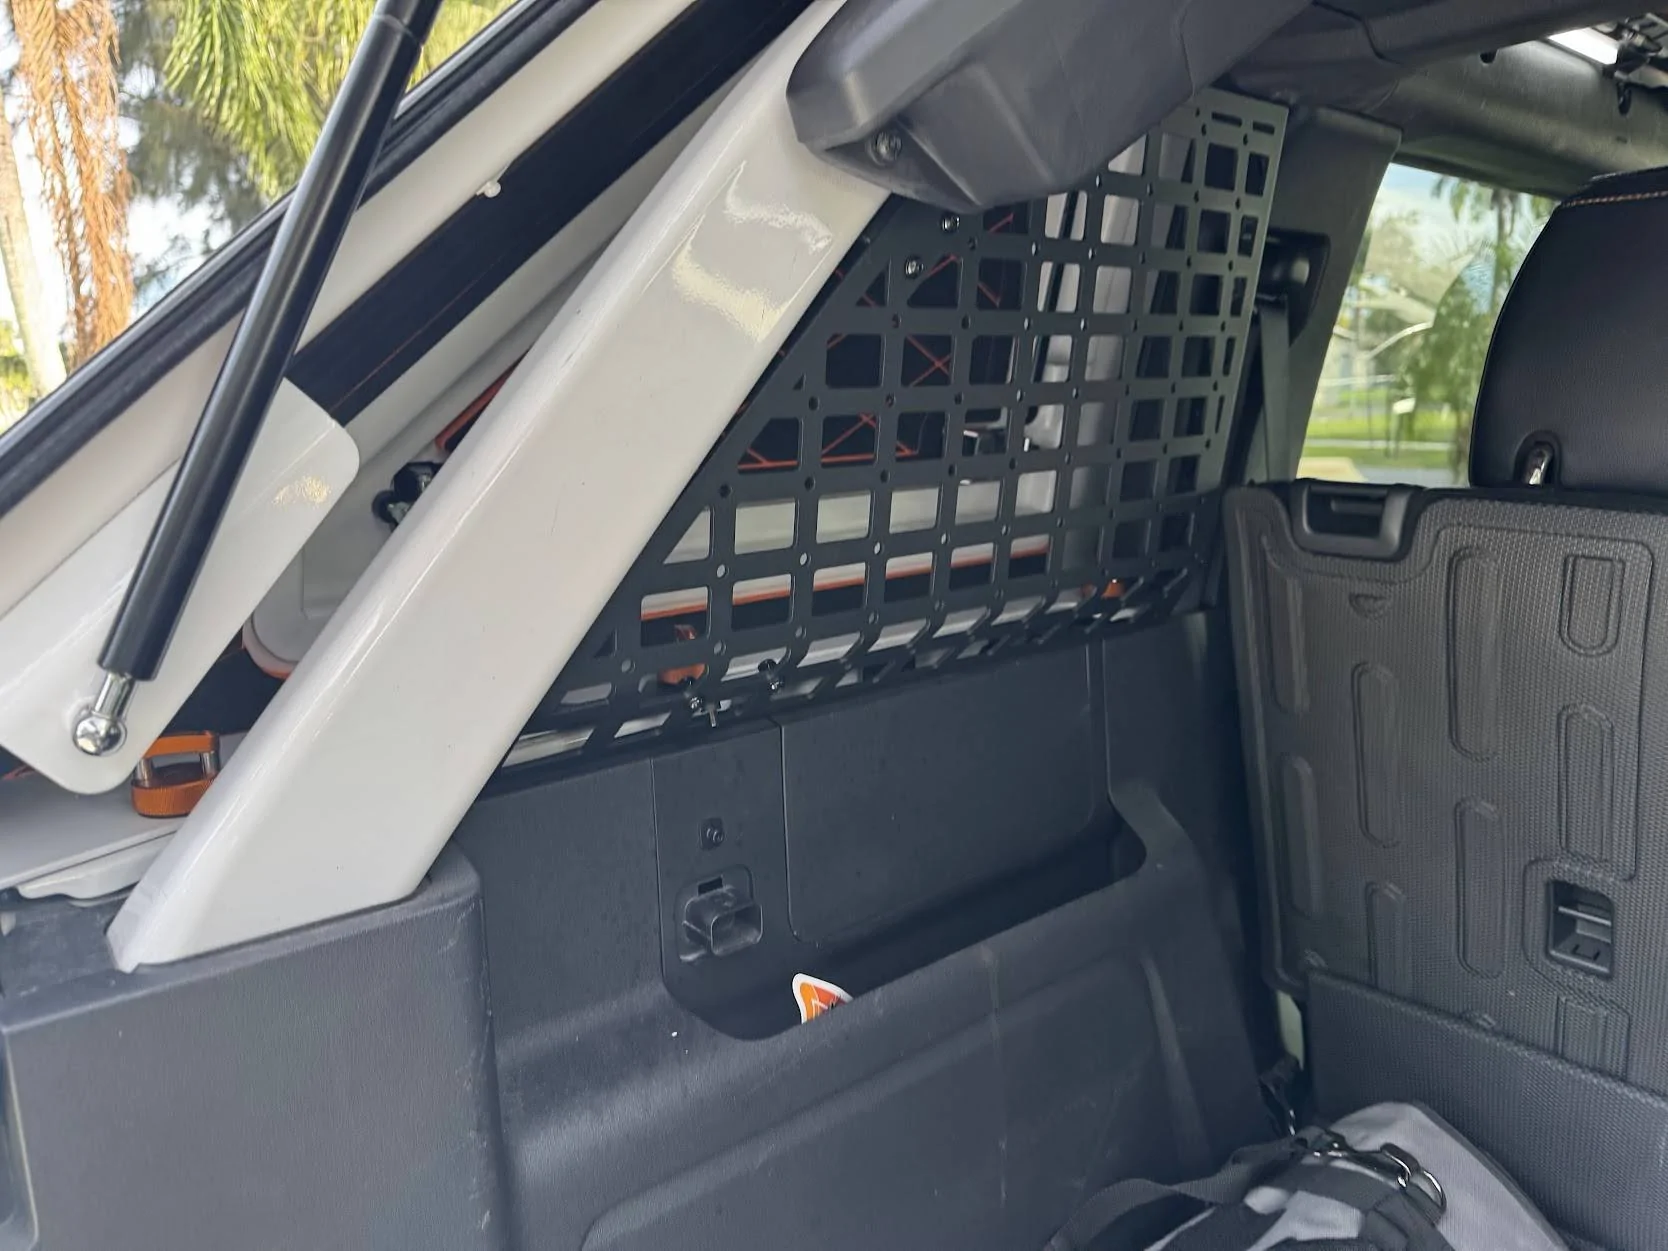
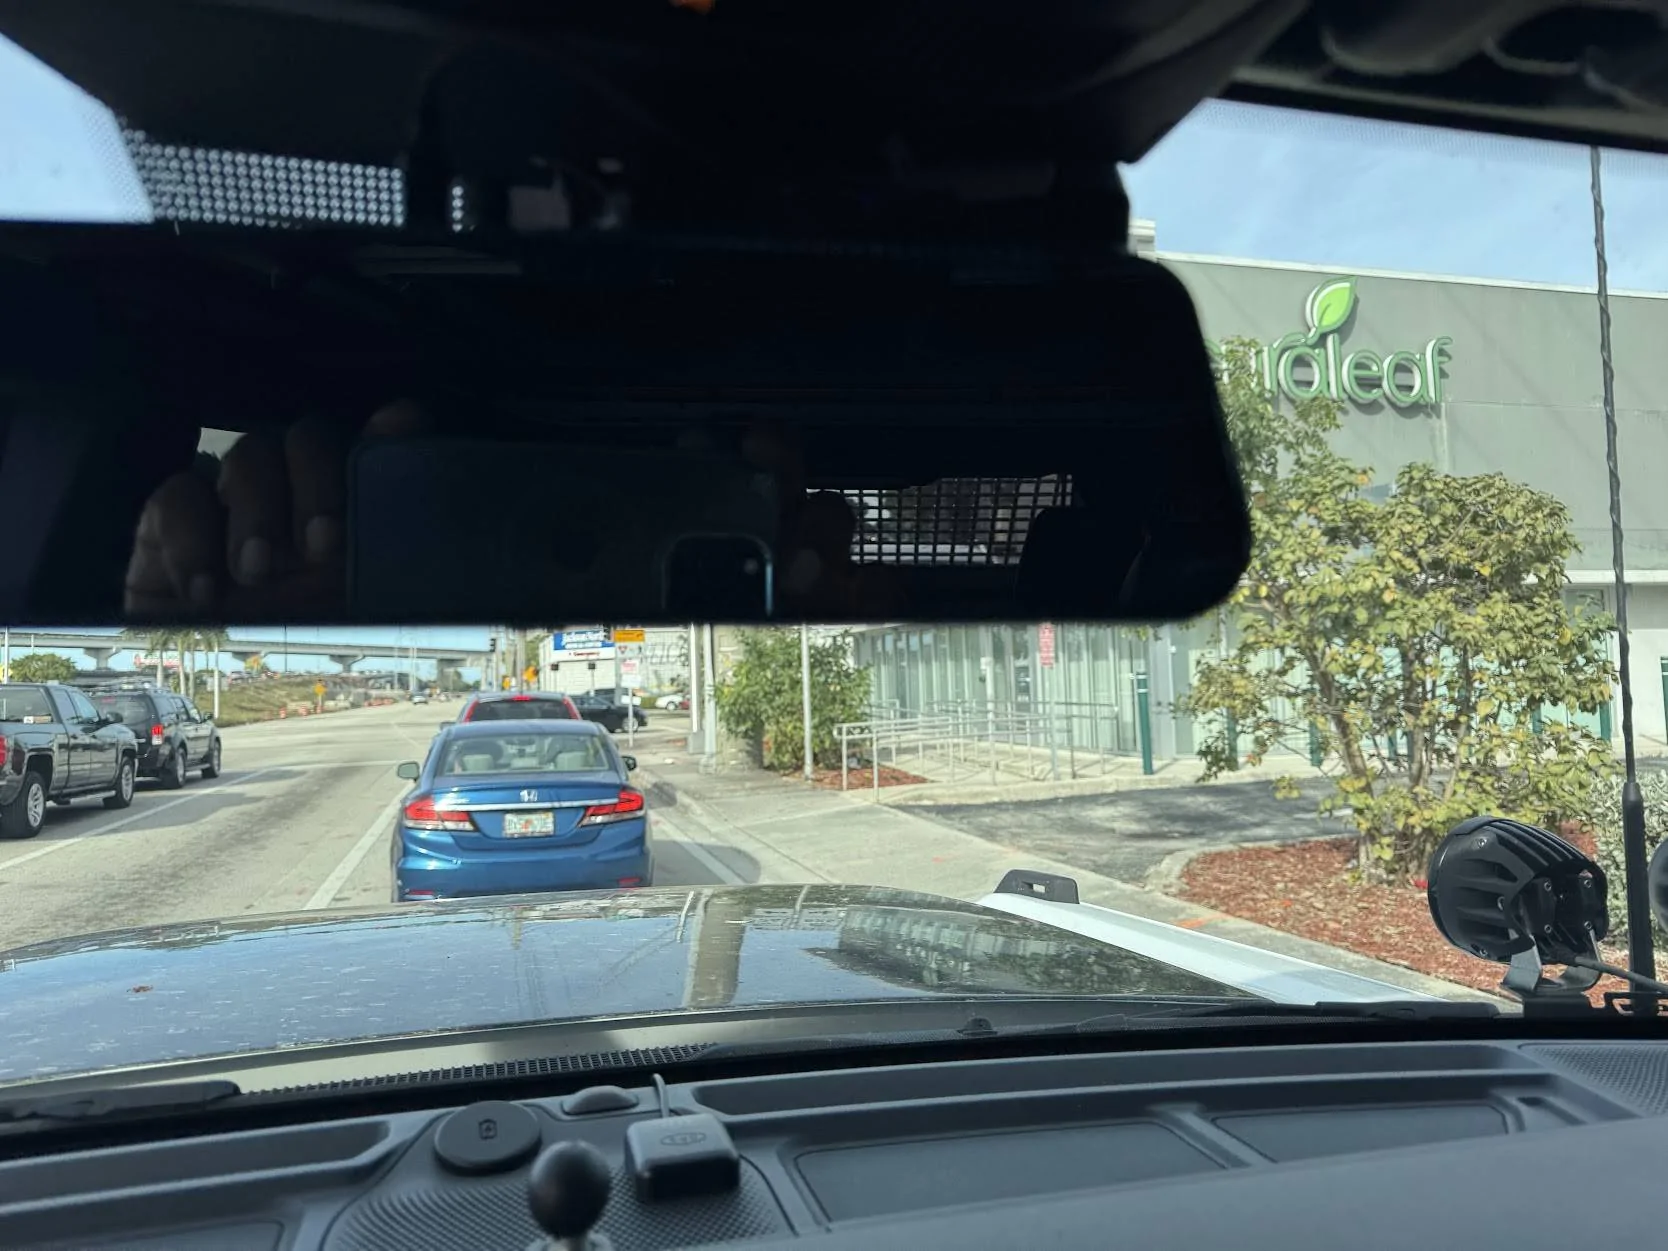
Living this molle life now. The rear cam came out pretty well after it was all said and done. Some pics of how it looks, and my DV8 rear pocket molle. Honestly, the video is clearer than what it looks in the pic, but you can see whith the system off, that is my view. The slant back, plus,my lift cuts the view, but Cam gets everything.

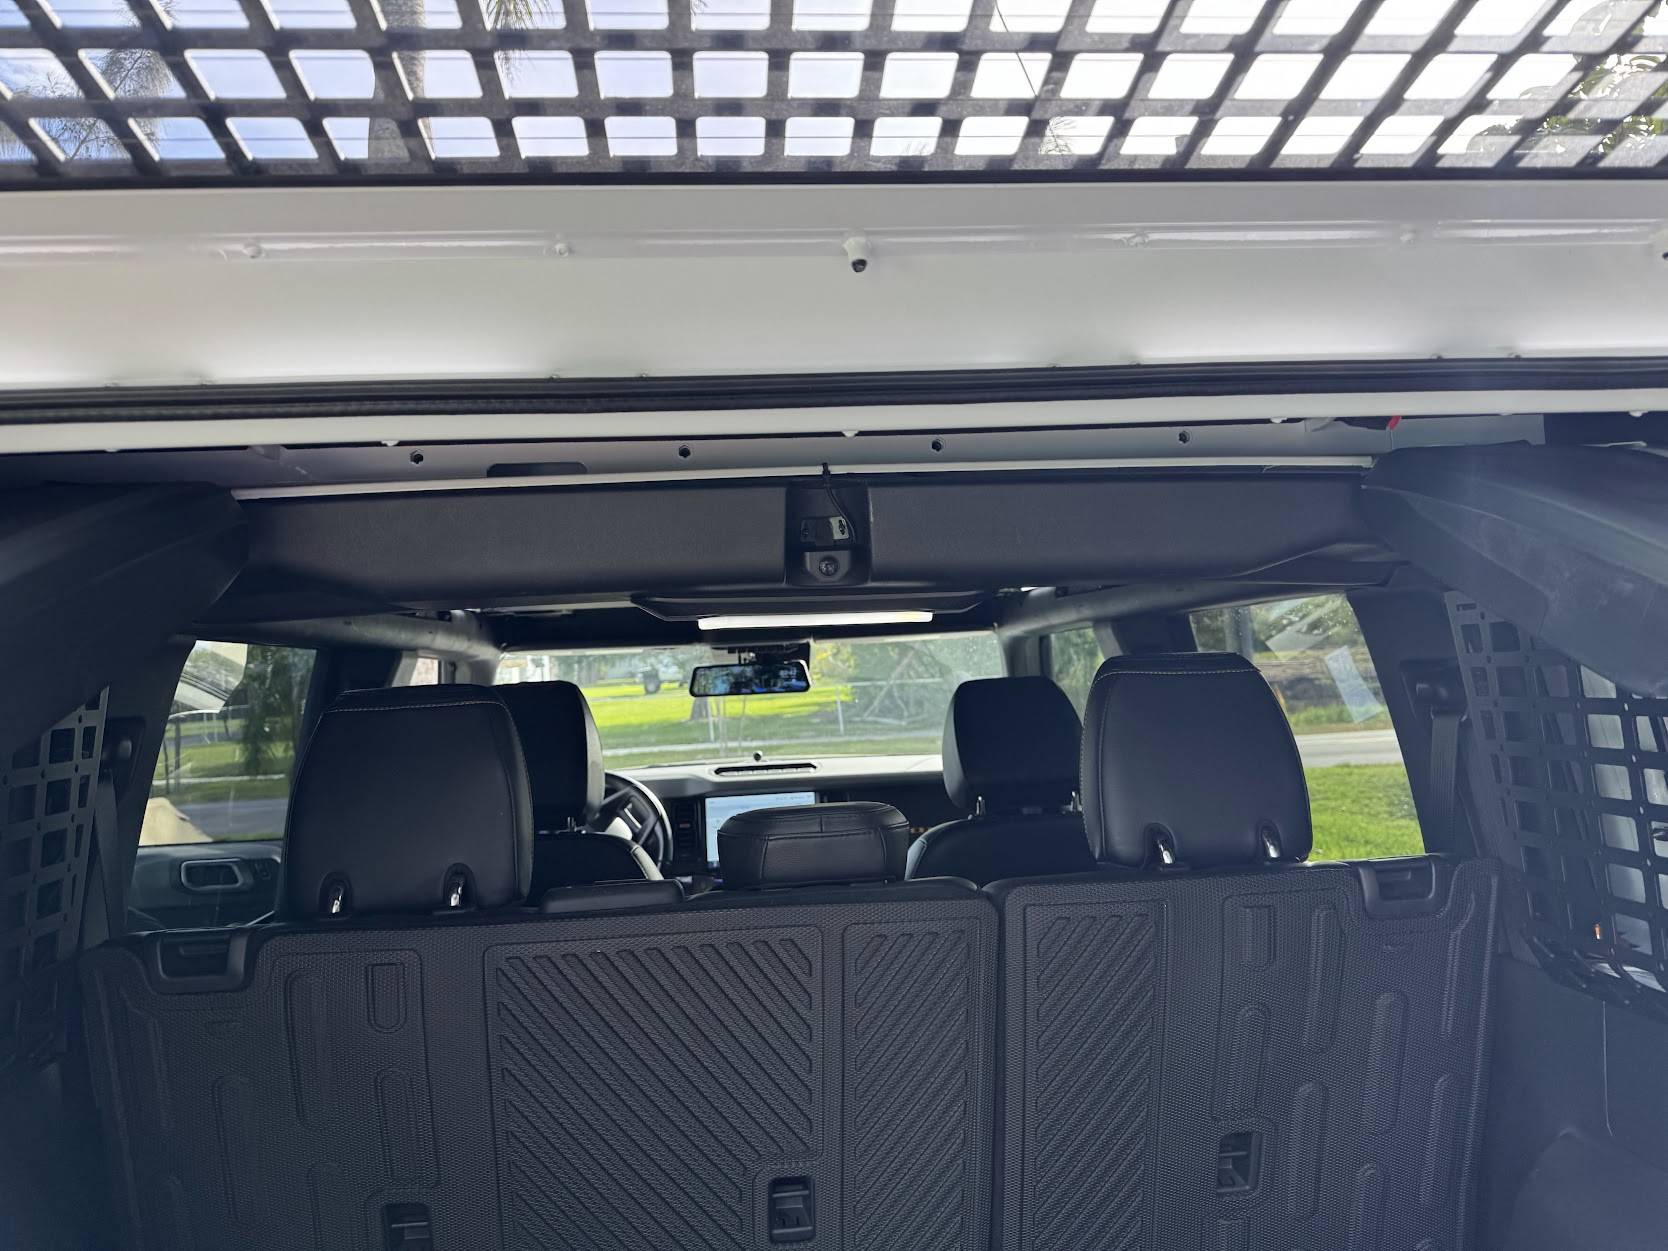
1736110042198-xh.jpg

1736110161473-kl.jpg

1736110193547-g9.jpg

1736110255431-nf.jpg
Thanks for posting. It looks awesome. I also have the wolfbox mirror and on the OE hardtop have it mounted behind the rear glass. I find I need to use the wiper to clear the window quite often. This had me thinking I would make a hooded mount and attach it to the exterior above the molle panel and upgrade the fourth break light to allow for the wire to pass inside. Does it look like you could route the wire through the 4th break light wiring hole? Have not seen a good picture of it yet. Thanks again for posting!
Sponsored


Ninjak

Raptor
Well-Known Member
First Name
David
Joined
Feb 19, 2022
Threads
28
Messages
2,745
Reaction score
4,717
Location
Miami
Vehicle(s)
2024 Bronco Raptor 68 Mustang GTA 2024 Mustang Dark Horse
Your Bronco Model
Raptor
Thanks for posting. It looks awesome. I also have the wolfbox mirror and on the OE hardtop have it mounted behind the rear glass. I find I need to use the wiper to clear the window quite often. This had me thinking I would make a hooded mount and attach it to the exterior above the molle panel and upgrade the fourth break light to allow for the wire to pass inside. Does it look like you could route the wire through the 4th break light wiring hole? Have not seen a good picture of it yet. Thanks again for posting!
Hmm that is not a bad ideal. I know it comes back inside behind the rear lid, I think there would be enough room, I would have to go look.
 

Arokcrwlr

Wildtrak
Well-Known Member
First Name
Kraig
Joined
Jun 2, 2021
Threads
32
Messages
887
Reaction score
1,633
Location
US - Alabama
Vehicle(s)
2014 F150, 2014 Focus, 1973 Bronco
Your Bronco Model
Wildtrak
Clubs
 
Welp, everything is finished. All button up, cam mounted, brake light done, everything else adjusted. Took the wife out in her and she was pleasantly surprised. Being in Jessa with the soft top, she already knew how much noise it made. Now it was nice and quiet. Of course, she had to question the rear molle, but she was impressed by how rugged everything looked. She stated that if someone hit me they would be in trouble, and she was happy that I had a top that would probably stop me from getting seriously injured if I rolled over on a trail. So a thumbs up!

Living this molle life now. The rear cam came out pretty well after it was all said and done. Some pics of how it looks, and my DV8 rear pocket molle. Honestly, the video is clearer than what it looks in the pic, but you can see whith the system off, that is my view. The slant back, plus,my lift cuts the view, but Cam gets everything.
1736110042198-xh.jpg

1736110161473-kl.jpg

1736110193547-g9.jpg
That would annoy the hell out of me! I would mount the camera outside and have a clear view out of the mirror. I love the top, but if I end up ordering one myself, it will be without the rear molle.
 

SierraBronco

Wildtrak
Well-Known Member
Joined
Mar 27, 2024
Threads
41
Messages
5,208
Reaction score
14,064
Location
USA
Vehicle(s)
2022 Wildtrak, 2024 Wildtrak, 2024 Wildtrak
Your Bronco Model
Wildtrak
How much quieter is it?
I don't mind a ponzi scheme if I can get out before it collapses.
So far with ours the wind noise has been eliminated. Really happy. I’d say it’s about…six…quieter. Use whatever metric you’d like.
 

Sponsored

Ninjak

Raptor
Well-Known Member
First Name
David
Joined
Feb 19, 2022
Threads
28
Messages
2,745
Reaction score
4,717
Location
Miami
Vehicle(s)
2024 Bronco Raptor 68 Mustang GTA 2024 Mustang Dark Horse
Your Bronco Model
Raptor
How much quieter is it?
I don't mind a ponzi scheme if I can get out before it collapses.
I can only compare to the soft top, but it much much quieter than it. I hear road noise, I am on 37s...and a little of bit of wind noise from my lightbar if I do not have music on.
 

BroncoBill44

Wildtrak
Well-Known Member
First Name
Bill
Joined
Nov 4, 2021
Threads
10
Messages
422
Reaction score
673
Location
NC
Vehicle(s)
No comment
Your Bronco Model
Wildtrak
How much quieter is it?
I don't mind a ponzi scheme if I can get out before it collapses.
it’s so much quieter that my stock sound system sounds amazing lol.
 

Herbie

Badlands
Well-Known Member
First Name
Alex
Joined
Oct 23, 2020
Threads
33
Messages
3,062
Reaction score
5,908
Location
Cleveland OH
Vehicle(s)
2022 Badlands
Your Bronco Model
Badlands
Clubs
 
That would annoy the hell out of me! I would mount the camera outside and have a clear view out of the mirror. I love the top, but if I end up ordering one myself, it will be without the rear molle.
I have seen more than one person comment that they get bad night glare on the Wolfbox mirror when they are mounted outside. I am mounting inside, but I don't have the molle problem David does. And actually, I think the minor tint on the back OEM window is what prevents getting night glare on the Wolfbox. I'll be able test my theory after I install this weekend.
But this isn't the right thread for that so sorry for posting here folks.
 

crabsquatch

Badlands
Member
First Name
pearce
Joined
Jan 29, 2023
Threads
0
Messages
22
Reaction score
49
Location
dallas
Vehicle(s)
2023 bronco eruption green
Your Bronco Model
Badlands
How much quieter is it?
I don't mind a ponzi scheme if I can get out before it collapses.
I used a decibel meter I got on Amazon (it was like $25 so boulder of salt)

my soft top had an avg of 95db on the highway doing 60-70 and like peaks of 101db if I was near a semi.

with the hardtop I measured about 90db in similar highway conditions.

it now sounds less like I have windows open and more like I have sasquatch tires on making noise
 

Splint3r

Raptor
Well-Known Member
Joined
Oct 24, 2024
Threads
1
Messages
62
Reaction score
104
Location
NY
Vehicle(s)
Bronco
Your Bronco Model
Raptor
Really nice looking rigs @SierraBronco, @Ninjak and @BroncoBill44. Could any or all of you provide a little more texture to the installation process - looks like it went pretty well based on postings. @SierraBronco mentioned positioning (further back) regarding the mounting. How much "customization" is involved? For example, opening of mount holes to obtain desired position, or manual "adjustments" (like the F-clamps we see Fabian using in the install videos) to get it all right. What kind of tension is left on the unit after cranking those clamps? Noticeable creaking while wheeling - like @SierraBronco does? Other signs of stress or shear?

The genius of the OEM top is the ability to move with the flex of the chassis = 4 separate pieces. The Raptor is more capable out of the box = chassis cross brace. The Armadillo top = 1 piece mount, will add some rigidity to the assembly but may not be up to the task long term. I know the Armadillo team knows CAD, but do they know cycle and stress testing? Sure, you can purchase the module for your CAD package, However, there are companies out there with professionals that do this kind of design work all day long. Where they consulted? @TheLawnDart, can you query the team?
 

Sponsored

BroncoBill44

Wildtrak
Well-Known Member
First Name
Bill
Joined
Nov 4, 2021
Threads
10
Messages
422
Reaction score
673
Location
NC
Vehicle(s)
No comment
Your Bronco Model
Wildtrak
Really nice looking rigs @SierraBronco, @Ninjak and @BroncoBill44. Could any or all of you provide a little more texture to the installation process - looks like it went pretty well based on postings. @SierraBronco mentioned positioning (further back) regarding the mounting. How much "customization" is involved? For example, opening of mount holes to obtain desired position, or manual "adjustments" (like the F-clamps we see Fabian using in the install videos) to get it all right. What kind of tension is left on the unit after cranking those clamps? Noticeable creaking while wheeling - like @SierraBronco does? Other signs of stress or shear?

The genius of the OEM top is the ability to move with the flex of the chassis = 4 separate pieces. The Raptor is more capable out of the box = chassis cross brace. The Armadillo top = 1 piece mount, will add some rigidity to the assembly but may not be up to the task long term. I know the Armadillo team knows CAD, but do they know cycle and stress testing? Sure, you can purchase the module for your CAD package, However, there are companies out there with professionals that do this kind of design work all day long. Where they consulted? @TheLawnDart, can you query the team?
Ford Bronco Armadillo Designs Aluminum Hardtop 1736261399488-dg

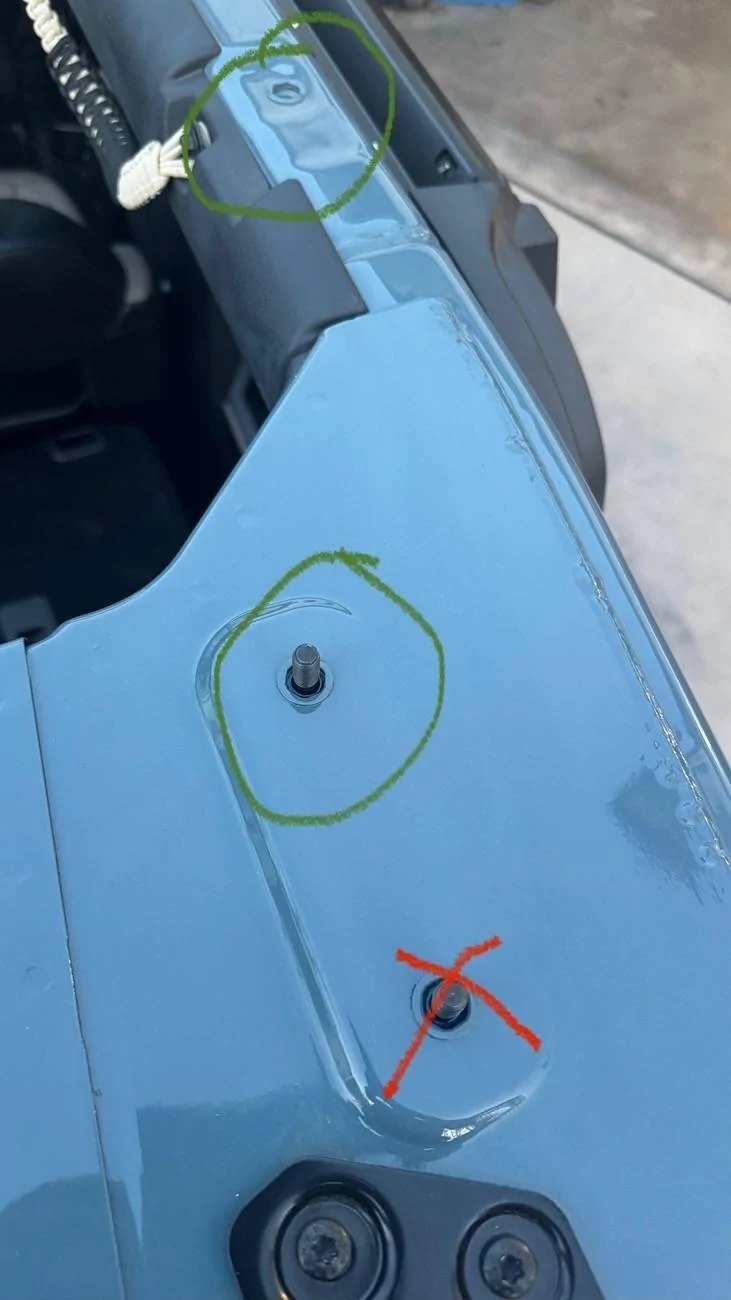
The install was simple. The ONLY confusion I ran into is that there were only 4 bolts versus 6. Fabian responded nearly instantly to let me know that I only needed the 4 (video showed 6). But the area where I have the RED X, no bolts required, so I removed them and put them in the holes where the green circles are in the photo. I had to do NO extra drilling, or widening of holes or any of that. It was as simple as removing the soft top and brackets/bolts. Placing the 4 bolts in place, and getting enough muscle to get the top up into place. Everything step by step in the video is spot on regarding the other bolts and clamps. Break light simple as per the video. The defroster was a little confusing only because there are little install clips on the top for the zip ties to go thru. Once I figured that out, it was plug and play. Zero extra headaches or complications. It just went into place. I have zero rattles or squeaking...

Ford Bronco Armadillo Designs Aluminum Hardtop 1736261030637-6q
 

Ninjak

Raptor
Well-Known Member
First Name
David
Joined
Feb 19, 2022
Threads
28
Messages
2,745
Reaction score
4,717
Location
Miami
Vehicle(s)
2024 Bronco Raptor 68 Mustang GTA 2024 Mustang Dark Horse
Your Bronco Model
Raptor
OK. Now that I have had the top on, adjusted everything, and added my extras let's talk about a few things.

1. Installation
First things first, I did mine in the dark. I had work lights up, and the house outdoor lights on, so we could see. Getting the top off the scaffold was not hard. I will say to unbolt the bottom two bolts with the nuts attached, then have some hold the top, and unbolt the left top. My top did not fall off, but it did move a little. So that's just a precaution.

We positioned the top when it came off to orientate the direction for the Bronco. Had my smallest guy get in, and I and the other guy supported the back, and one more person to help walk it up. The guy inside took the front and we lifted it up over and were ready to set it down. A few things:

A. Get the red tape off before you get all the way forward. (did this)
B. When placing the top, try to get the front in and down, then lower the back onto the studs. It is hard to see the studs from the outside holding so have a spotter.
C. Do not freak out if the front rubber has some exposure. I will line up once the bolts are in.

Once we got the top in the correct position, I did a few things a bit differently. The top sits on but was not fully down due to the seals. The rear forward bolt was in position, but the top seemed to sit up higher on this side. adjust, adjust,, did not seem to change it. May have been the way my frame was? So I used a thinner washer, got the nut on the bolt, cranked it down, let it set while I adjusted other things, came back took the nut off, and everything was fitted. Now I was able to use the black washers they wanted from the kit. The front bolts went in without a hitch, I did the driver outside, then the passenger, and worked my way to the middle. They supply you with Loctite, (nice) though I purchased a bottle for this.

For the rear section, I used the Rockworx I had purchased and bolted down. The panels that go on top, place the rear, then the front. Note, for me, the panels did not just drop into place. Not sure why, but had to move them, and get them in there correctly. Even in the morning, I found the front one was not on correctly. Perhaps it was the light or something, but I was easily able to unlatch and drop it on correctly. My latches were not too bad but I had to adjust most of them once it was all on.

2. Post installation
A few things of note for those who may have some of these accessories.

1. Overhead DV8 molle panel/Cross Bar: You will need to remove the overhead section to get this top on. The two inner front screws for the top will not be accessible with this one. The crossbar...well Fabion had told me I needed to cut a part off the bar, that overlapped into the plastic. (It's like a piece that slots into the frame) I did not need to do this. The top sat down just outside of this, and it did not interfere. So no cutting. The overhead section will be a pain to put back on if you have big hands. I was able to hold the nut in place with a finger whie I got the screw in. (Yes it was a pain, but it got done) So just a heads up on that.

2. DV8 Rear Pocket Molle. No problems, worked fine. Just note that they call for a T50, and it's not. It's a T45 for the seatbelt bolt. The RockWorx works just fine with their molle, and you can still use the strap mounts. (Honestly, I bought these a WHILE ago, and I was going to use them dammit! Plus they look cool.)

3. My impressions.
I am impressed. The ride is much more quieter. The noise I hear now is from my tires. I have a little wind noise from the lightbar, but it is not as loud as it was before. With the top, and my cross-brace, I have zero squeaks or rattles. Before I had them, now there is none. It's solid. I will be going to the trails in Ocala on the 18th~19th of this month so I will see how it does there. The material that was used for the sound deadening is nice. Also, it was put in all over and laid out nicely. The colour options make it stand out. The people who have seen it like the way the orange is just not in the diamond pattern but is in the other parts of the molding all inside the top. The exterior molle panels are also very nice. A lot more rugged than I thought, the rear panel is just not sitting on the glass, it encloses the glass. The gaps are all sealed. So it's like a cover.

4. Last thoughts.
With everything about how this top was conceived and everything that changed, I think it was for the better. Now did it take a long time to come? Yes. Was it delayed? Yes. Did they keep me in the loop? Yes. Was I informed? Yes. Full disclosure, I have Fabions personal number. No I am not his best bud, or hang out buddy, I received it early on in the process so I could be informed of things.
I bought this top when it was still in the very early stages, and I knew things would well, be delayed and not go as plan. I myself am an Engineer, I understand how what's on paper, and mocks ups always do not commit to the physical model. I had faith though that they would come through, I added my opinion when asked of it, and let the process happen.

Will the tops come faster now? I think so. As with all things, they too are starting to refine the process. Now that have had success with installs both inside the shop and shipped to people, I believe the order to finish will become more manageable, and people will get their tops quicker.

This top I would dare say, is the best on the market. The construction, build, material, well it's going to last. Easily will last the life of the vehicle. It will be interesting to see what other things Armadillo Designs comes up with. It is always nice to have a new innovator in the market. It keeps things fresh and new and only helps excel that market for the vehicle.

I wish them all the success in their endeavors, and I hope they continue to have fun doing it. Because why do something you dislike?
 

SierraBronco

Wildtrak
Well-Known Member
Joined
Mar 27, 2024
Threads
41
Messages
5,208
Reaction score
14,064
Location
USA
Vehicle(s)
2022 Wildtrak, 2024 Wildtrak, 2024 Wildtrak
Your Bronco Model
Wildtrak
Really nice looking rigs @SierraBronco, @Ninjak and @BroncoBill44. Could any or all of you provide a little more texture to the installation process - looks like it went pretty well based on postings. @SierraBronco mentioned positioning (further back) regarding the mounting. How much "customization" is involved? For example, opening of mount holes to obtain desired position, or manual "adjustments" (like the F-clamps we see Fabian using in the install videos) to get it all right. What kind of tension is left on the unit after cranking those clamps? Noticeable creaking while wheeling - like @SierraBronco does? Other signs of stress or shear?

The genius of the OEM top is the ability to move with the flex of the chassis = 4 separate pieces. The Raptor is more capable out of the box = chassis cross brace. The Armadillo top = 1 piece mount, will add some rigidity to the assembly but may not be up to the task long term. I know the Armadillo team knows CAD, but do they know cycle and stress testing? Sure, you can purchase the module for your CAD package, However, there are companies out there with professionals that do this kind of design work all day long. Where they consulted? @TheLawnDart, can you query the team?
My guess on the positioning being “further back” was only a thought as to why my hatch isn’t opening with the tailgate like a couple others are reporting. Not sure if there is anything behind this notion or not-I’m simply trying to provide possibly explanations as to why it might be occurring. Don’t pull a 74Weld on me and say “well you said there was oil on the bolts when you put them in and that’s why they’re loosening!” Nooooooooo. I said that because of your poor seal decisions (that I fixed on my own) the gear boxes were all covered in gear oil and I was trying to provide potential reasons for why they might have been loosening. Now we know that isn’t the problem. But I digress 😉

The only customization we did was drilling out the threads on the OEM mounts up in the front corners so that we could reuse them to hold some trim pieces. It was a tight fit on the front passsnger side and a dremel might have made things easier, but I went with the hard way of doing things and used force to get a tight fit. We also left the red strip on the tape until it was almost in place, then an adhesion promotor after rubbing alcohol to maximize the effectiveness of the tape. The top panels did need to be tightened after a day but Armadillo said this will be needed, so no biggie. I’ll plan on checking them frequently for the first little bit, especially after wheeling, and tightening as needed. We’ll be at the winter jamboree and might do a couple green trails to really test it out 😉

Overall I’m very impressed with my initial experience with the top.
 

mangelo

Badlands
Well-Known Member
First Name
Michael
Joined
Dec 18, 2021
Threads
1
Messages
75
Reaction score
77
Location
San Francisco
Vehicle(s)
2021 Badsquatch LUX Softtop 4 Door Carbonized Gray
Your Bronco Model
Badlands
Clubs
 
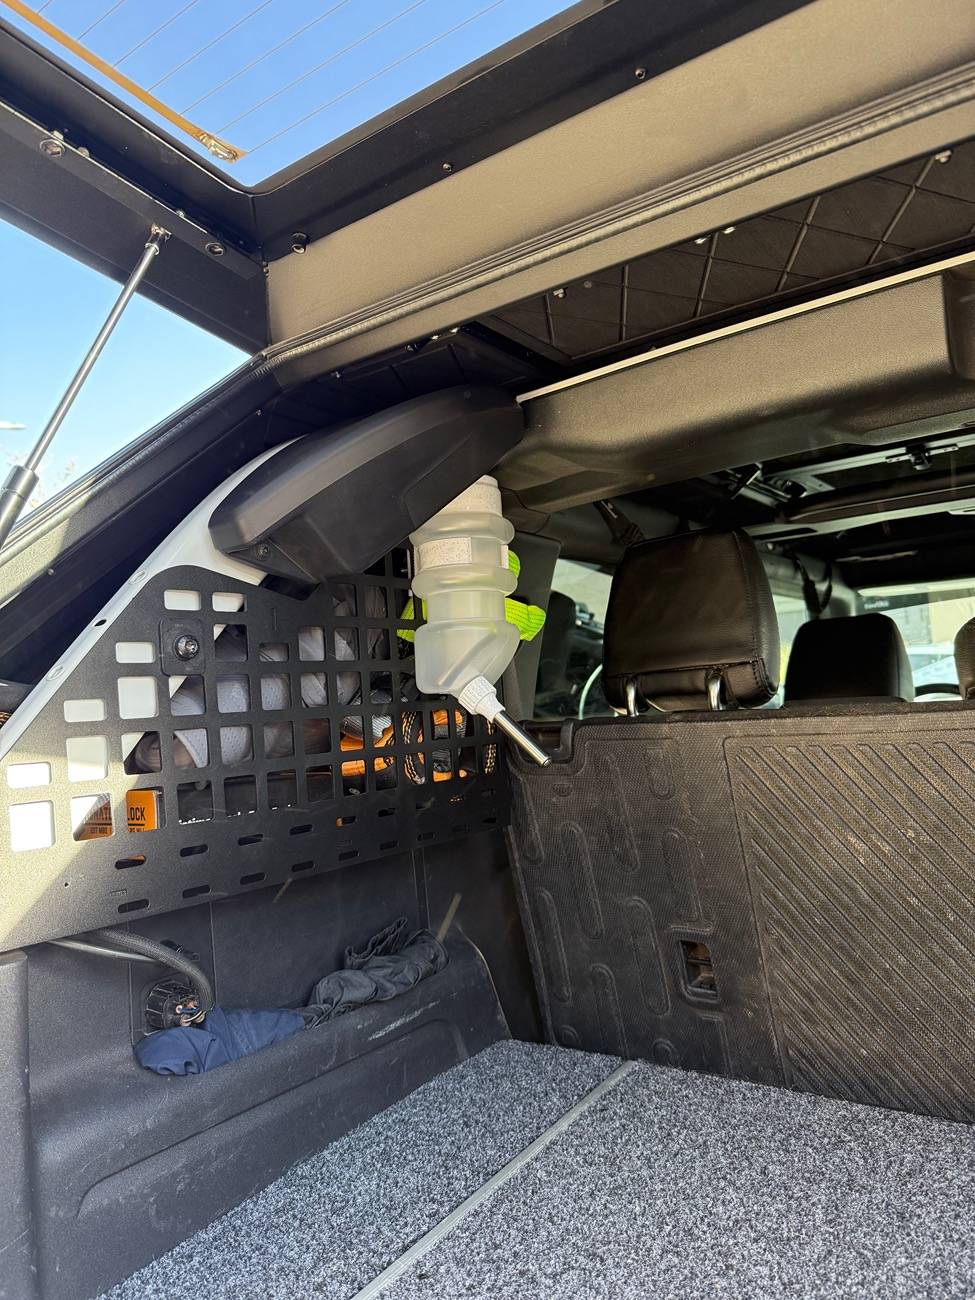
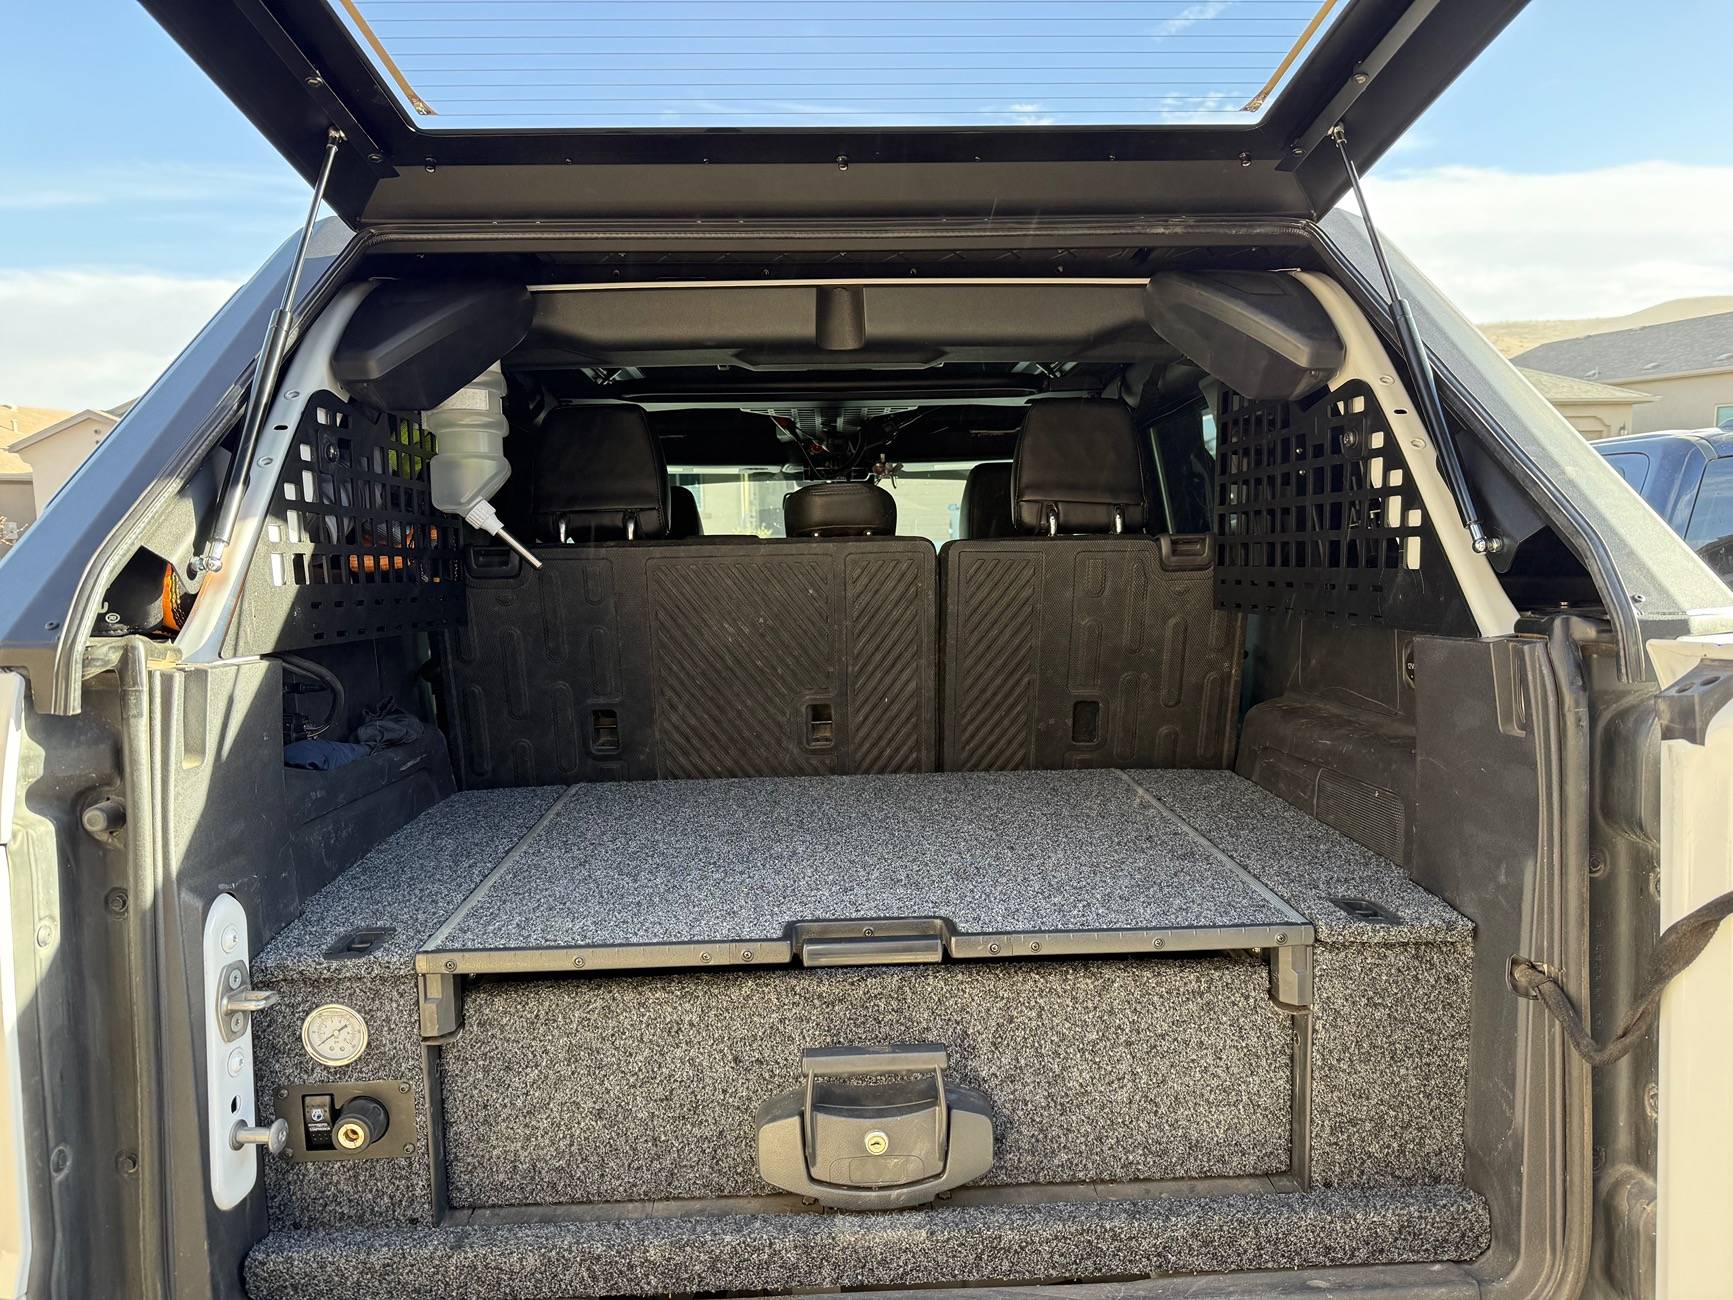
These interior panels really give a lot of useful storage. Between those and our toolbox I’m not worried about the loss of storage going slantback at all.

Bonus points for being able to mount the dog-sized gerbil watering spout in there.

IMG_4842.jpeg


IMG_4843.jpeg
Great interior molle storage tip @SierraBronco and nice lock box, which model is that? Do roof panels still fit in back as designed with that lock box?

One of the BIGGEST armadillo selling points for me is front + back seat open air experience + ability to store all roof panels in back when on the road and pop them back on as needed ;)

CONGRATS to you and your family!
 

SierraBronco

Wildtrak
Well-Known Member
Joined
Mar 27, 2024
Threads
41
Messages
5,208
Reaction score
14,064
Location
USA
Vehicle(s)
2022 Wildtrak, 2024 Wildtrak, 2024 Wildtrak
Your Bronco Model
Wildtrak
Great interior molle storage tip @SierraBronco and nice lock box, which model is that? Do roof panels still fit in back as designed with that lock box?

One of the BIGGEST armadillo selling points for me is front + back seat open air experience + ability to store all roof panels in back when on the road and pop them back on as needed ;)

CONGRATS to you and your family!
That is from ARB and while it’s expensive, it was also a great addition with the bronco specific installation kit. You’re looking at about $2000 for the whole setup. No rattles and it fits nicely with no gaps around the sides. Tons of useful storage while doggo has a nice carpeted area to chillax on. As far as whether the tops still fit or not, I’m not certain but I don’t see why they wouldn’t. With the toolbox you don’t lose any width. Guess we could’ve checked that before installing everything just to be thorough.
Sponsored


Top