

- First Name
- Emma
- Joined
- Oct 24, 2025
- Threads
- 9
- Messages
- 127
- Reaction score
- 219
- Location
- Fayetteville NC
- Website
- fordraptornation.com
- Vehicle(s)
- 2024 Bronco Raptor & 2025 F-150 Raptor
- Your Bronco Model
- Raptor
- Thread starter
- #1
JCR Offroad Overhead MOLLE Panel “Spine” + Starlink Mini Setup Review
TL;DR
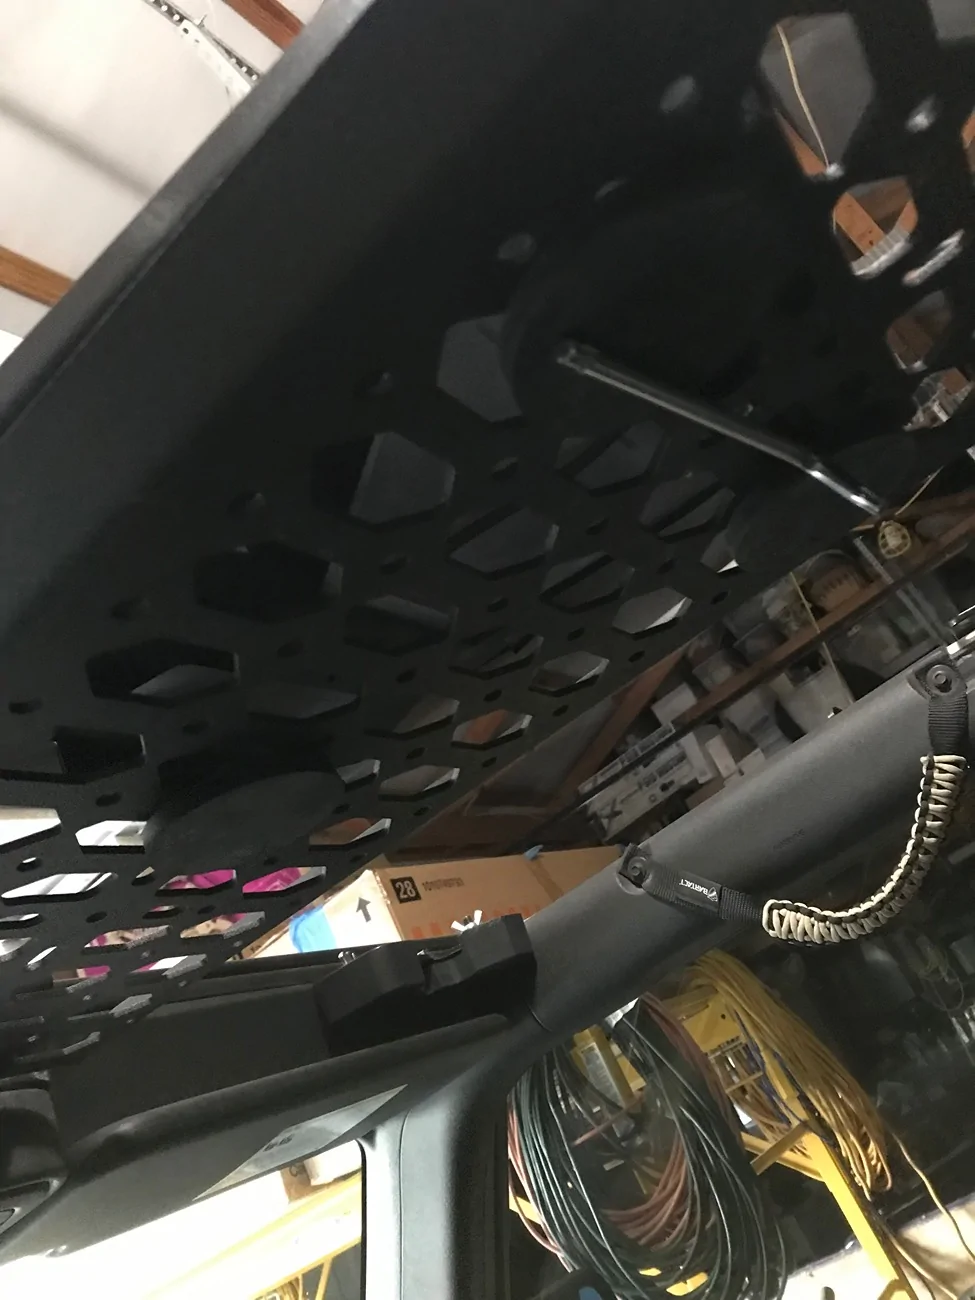
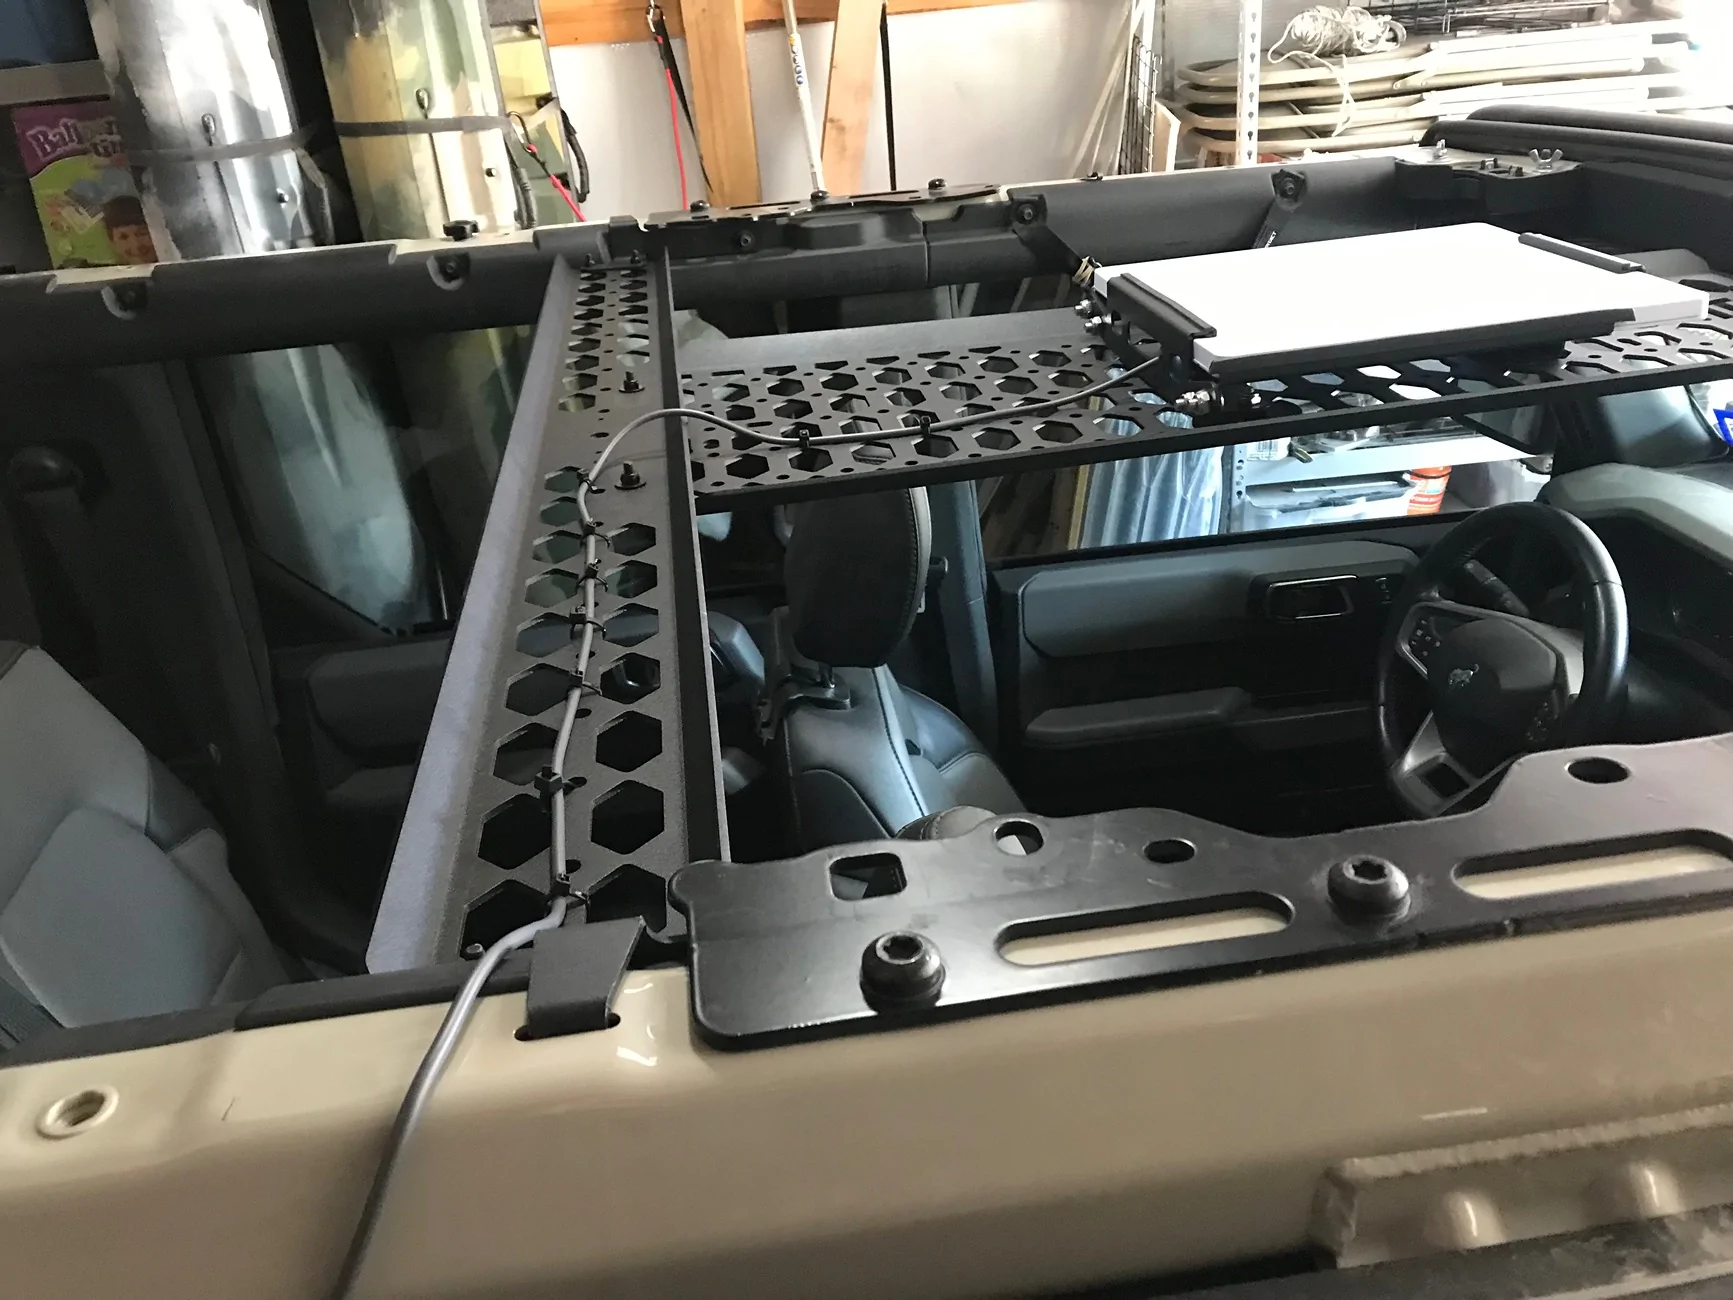
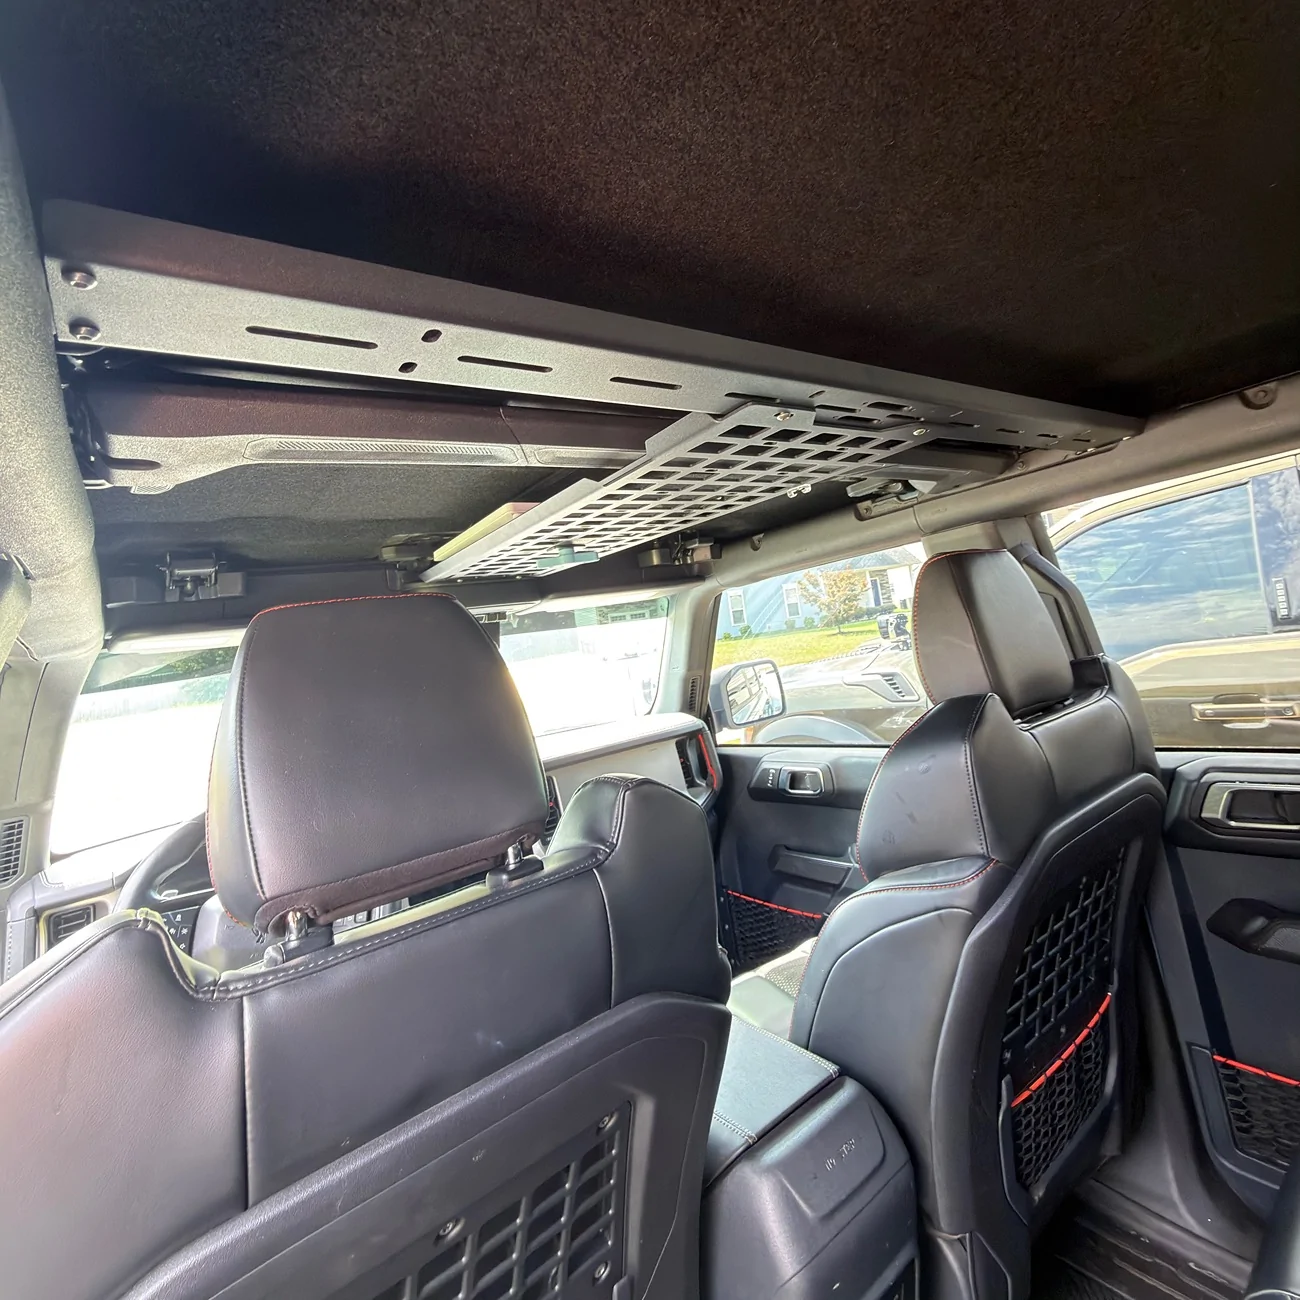
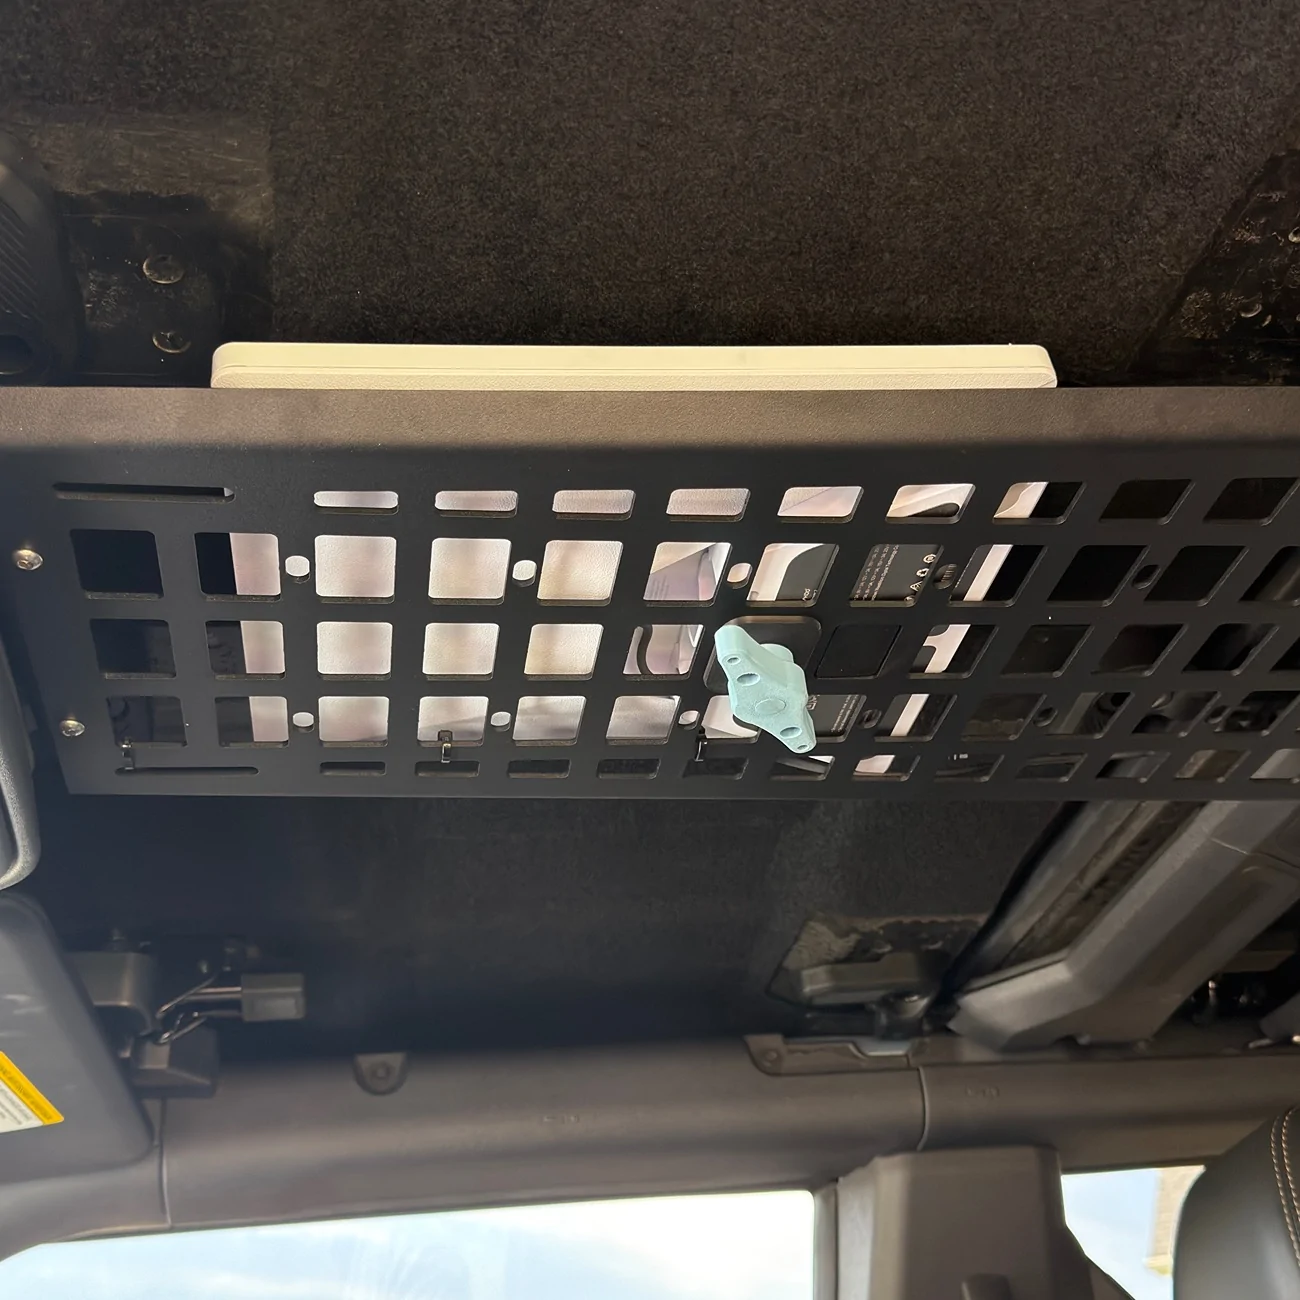
I installed the @JcrOffroad Overhead MOLLE Panel “Spine” in my Bronco Raptor mainly to give me a clean place to mount my Starlink Mini, future radio, and other gear.
In typical overthinking and analyzing fashion, it took me way too long to decide which setup I wanted. There are a ton of different overhead panels, Starlink mounts, roll bar mounts, magnetic mounts, etc., but they all had compromises I didn’t really want to make. If you’ve been going down the same rabbit hole comparing 100 different mounting options like I did, hopefully this helps explain why I went this particular route.
I ultimately went with the JCR Spine + Starlink Mini + Peakdo LinkPower 2 battery setup, and so far it checks basically every box I had.
Why I Chose the JCR Offroad Spine
The Bronco Raptor has an OEM center brace that straddles the cab, and this was probably the biggest deciding factor for me.
A lot of overhead MOLLE panels either:
The factory brace is one of the Raptor specific pieces, and replacing it with something I consider inferior in construction or rigidity just feels like a downgrade for the sake of adding accessories.
The JCR panel does not replace, remove, or modify the OEM Bronco Raptor brace at all.
That immediately put it toward the top of my list.
And Then There’s the Steel...
I am sick and tired of “chinesium” steel.
You all know exactly what I’m talking about. Steel that feels paper thin, flexes when you look at it wrong, and feels like it was powder coated with a crayon.
A huge amount of this stuff is outsourced overseas and sold under different brand names with basically the same construction.
The JCR unit is:
Why I Mounted the Starlink Inside
The Starlink Mini was really the main reason I wanted the Spine in the first place.
There are probably hundreds of different ways to mount one of these things, but every option had its own downside.
Exterior mounting was out for me because:
Mounting it overhead inside the Bronco solved basically all of that.
The dish stays:
Starlink Power Setup
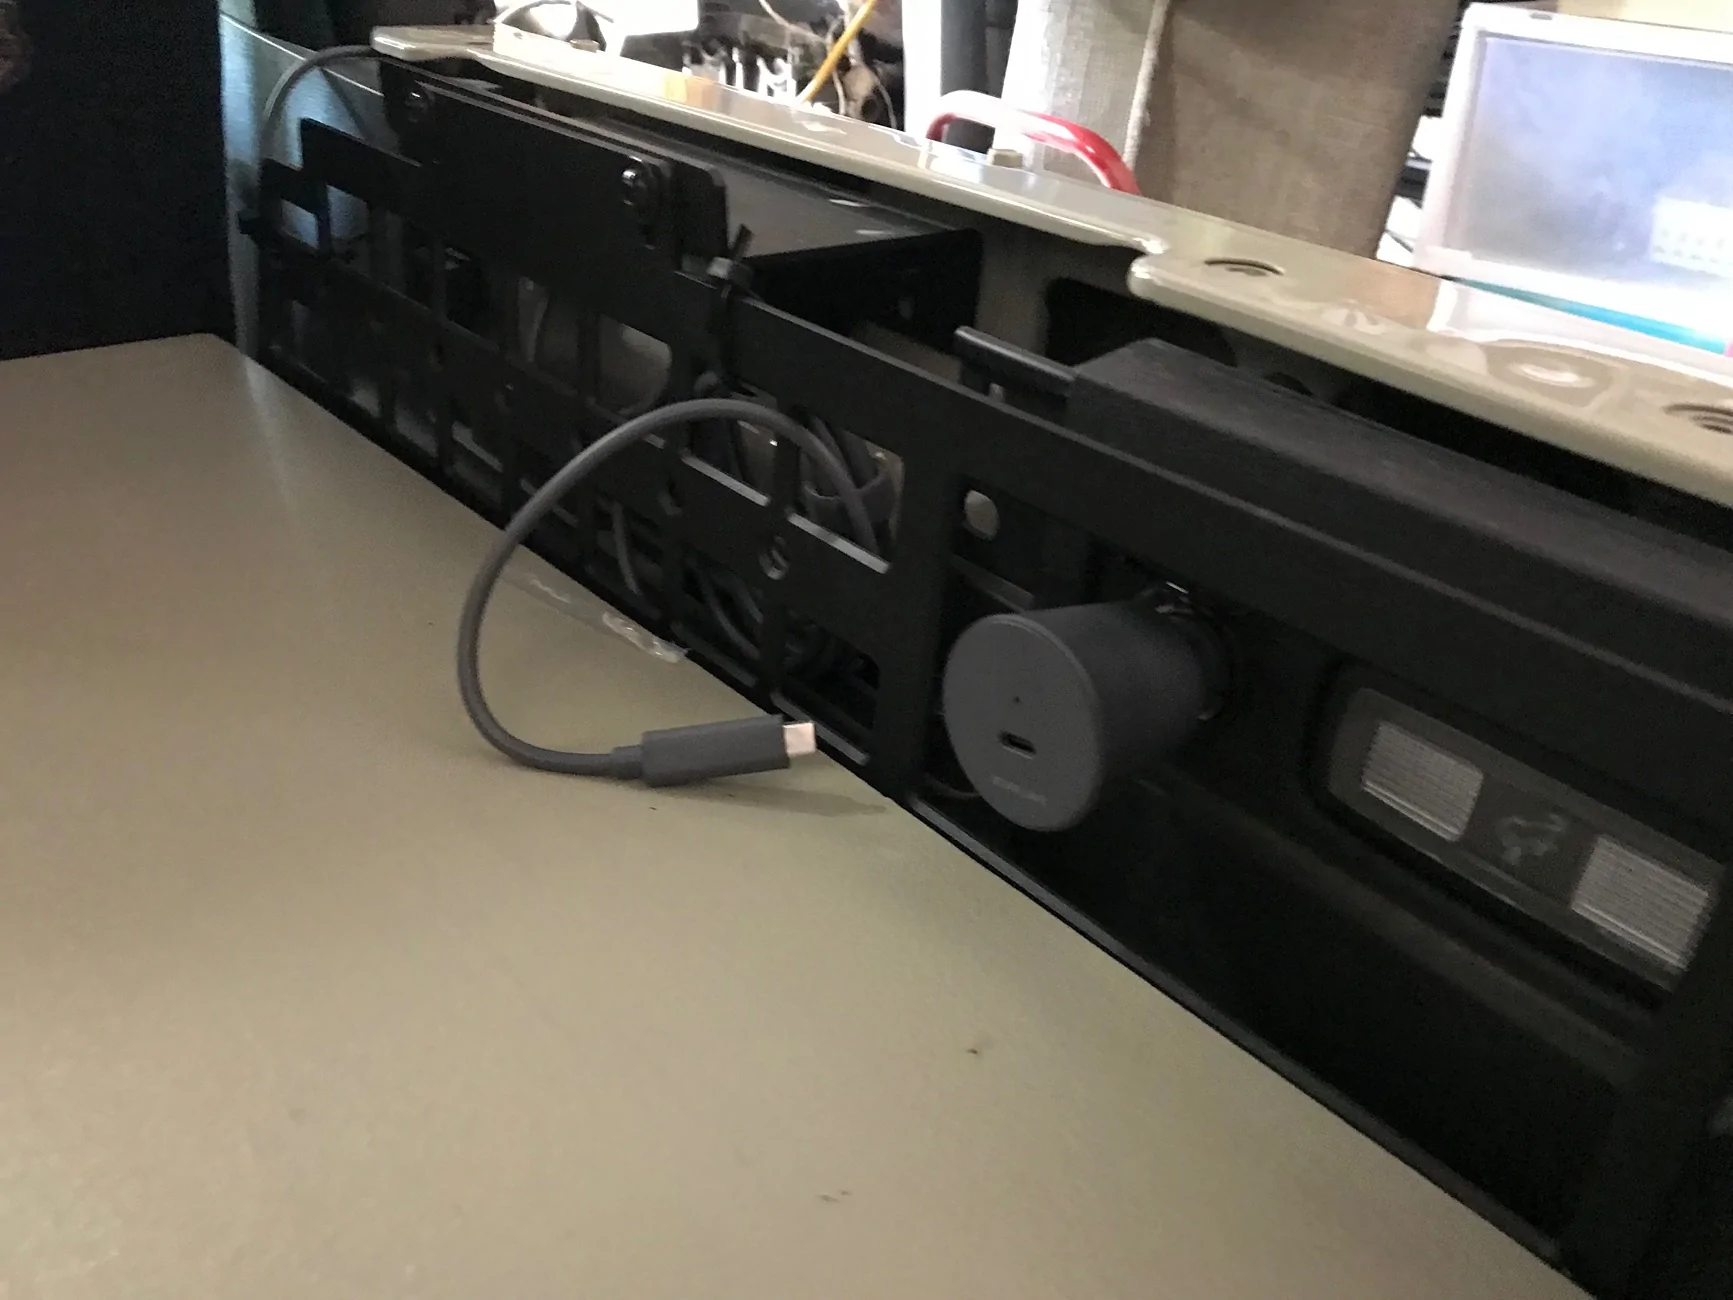
I paired the Starlink Mini with a Peakdo LinkPower 2 battery pack, and the pass through charging capability is honestly what makes the entire system work so well.
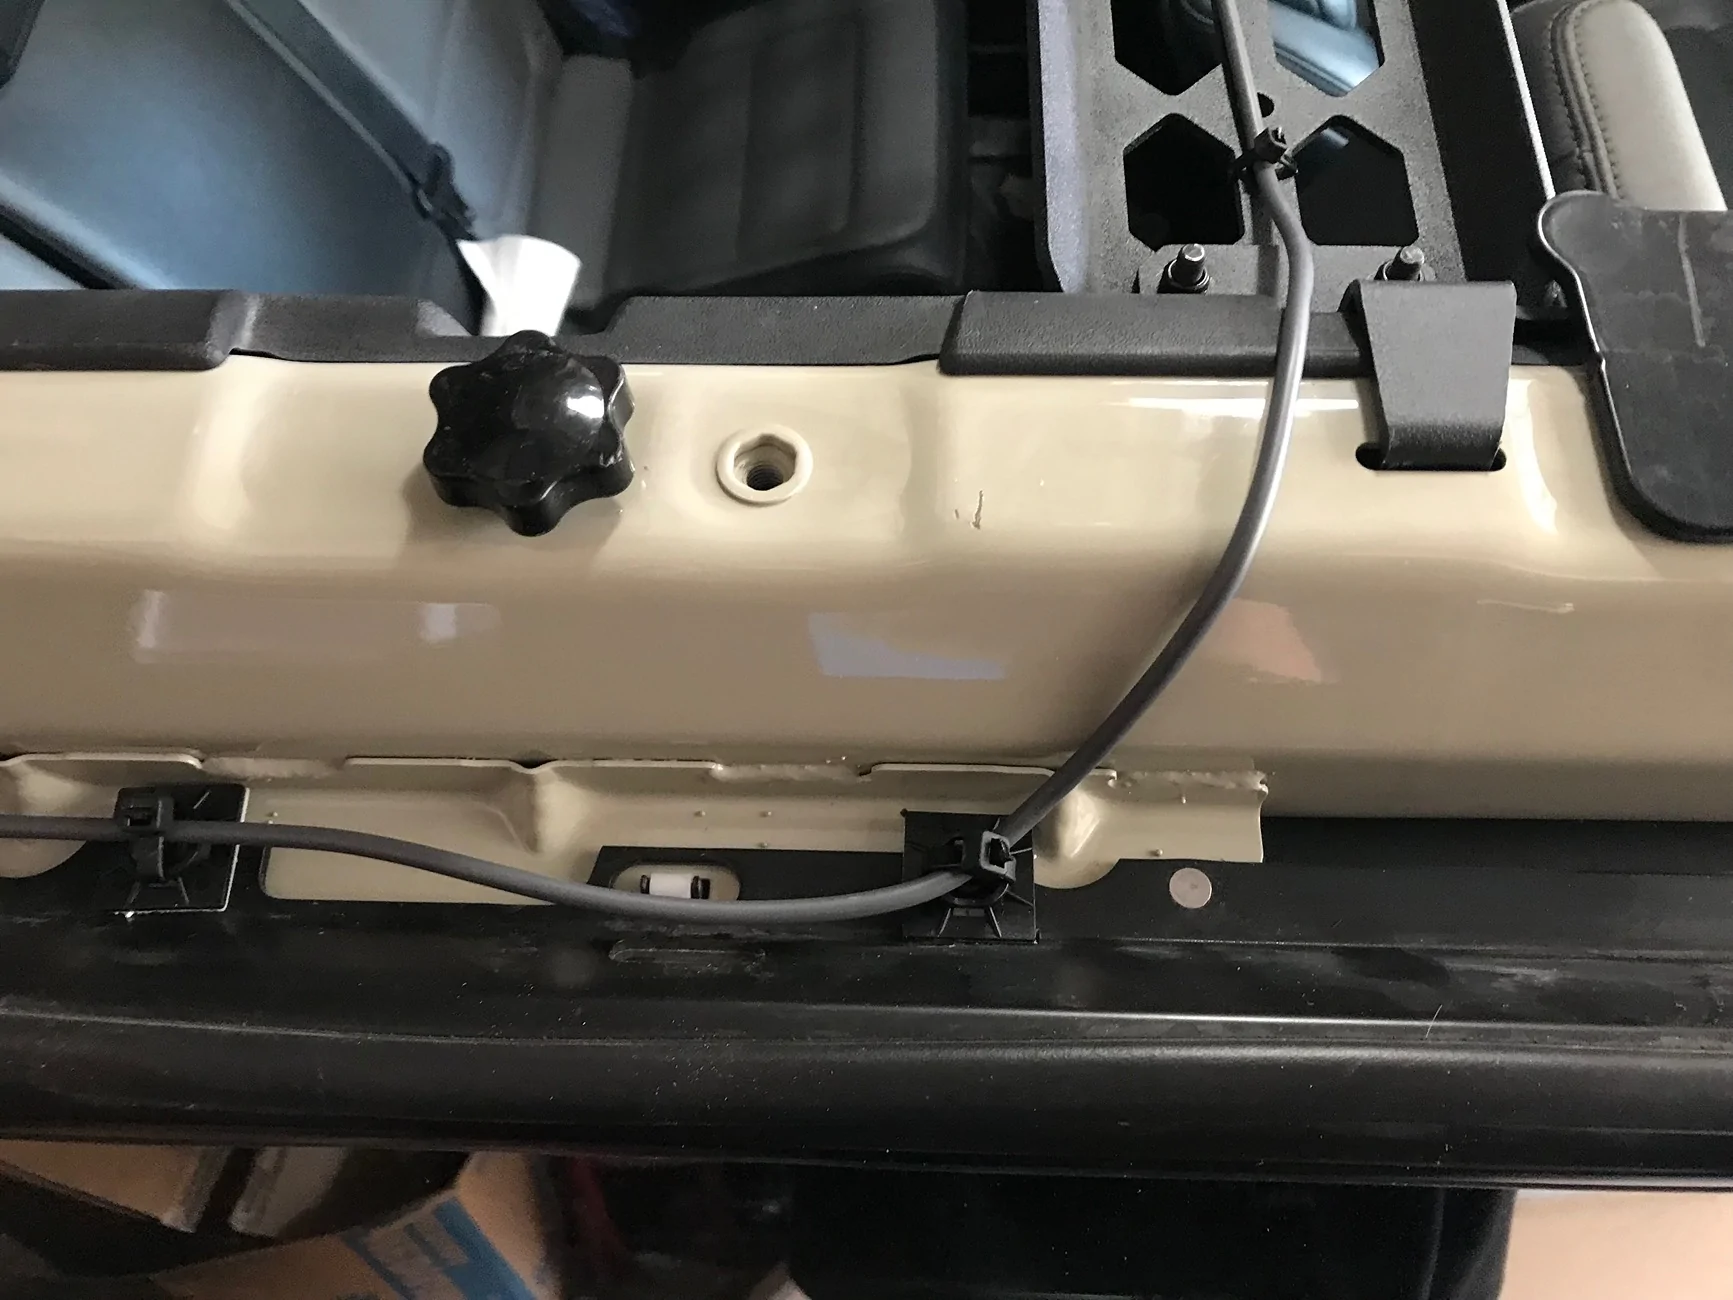
My wiring is simple:
Upfitter #4 → Peakdo LinkPower 2 → Starlink Mini
The Bronco upfitter switches only receive power when the ignition is on, so while traveling I can simply leave Upfitter #4 switched on the entire time.
When the Bronco is running:
That was a huge win.
Making the Starlink Tool-less
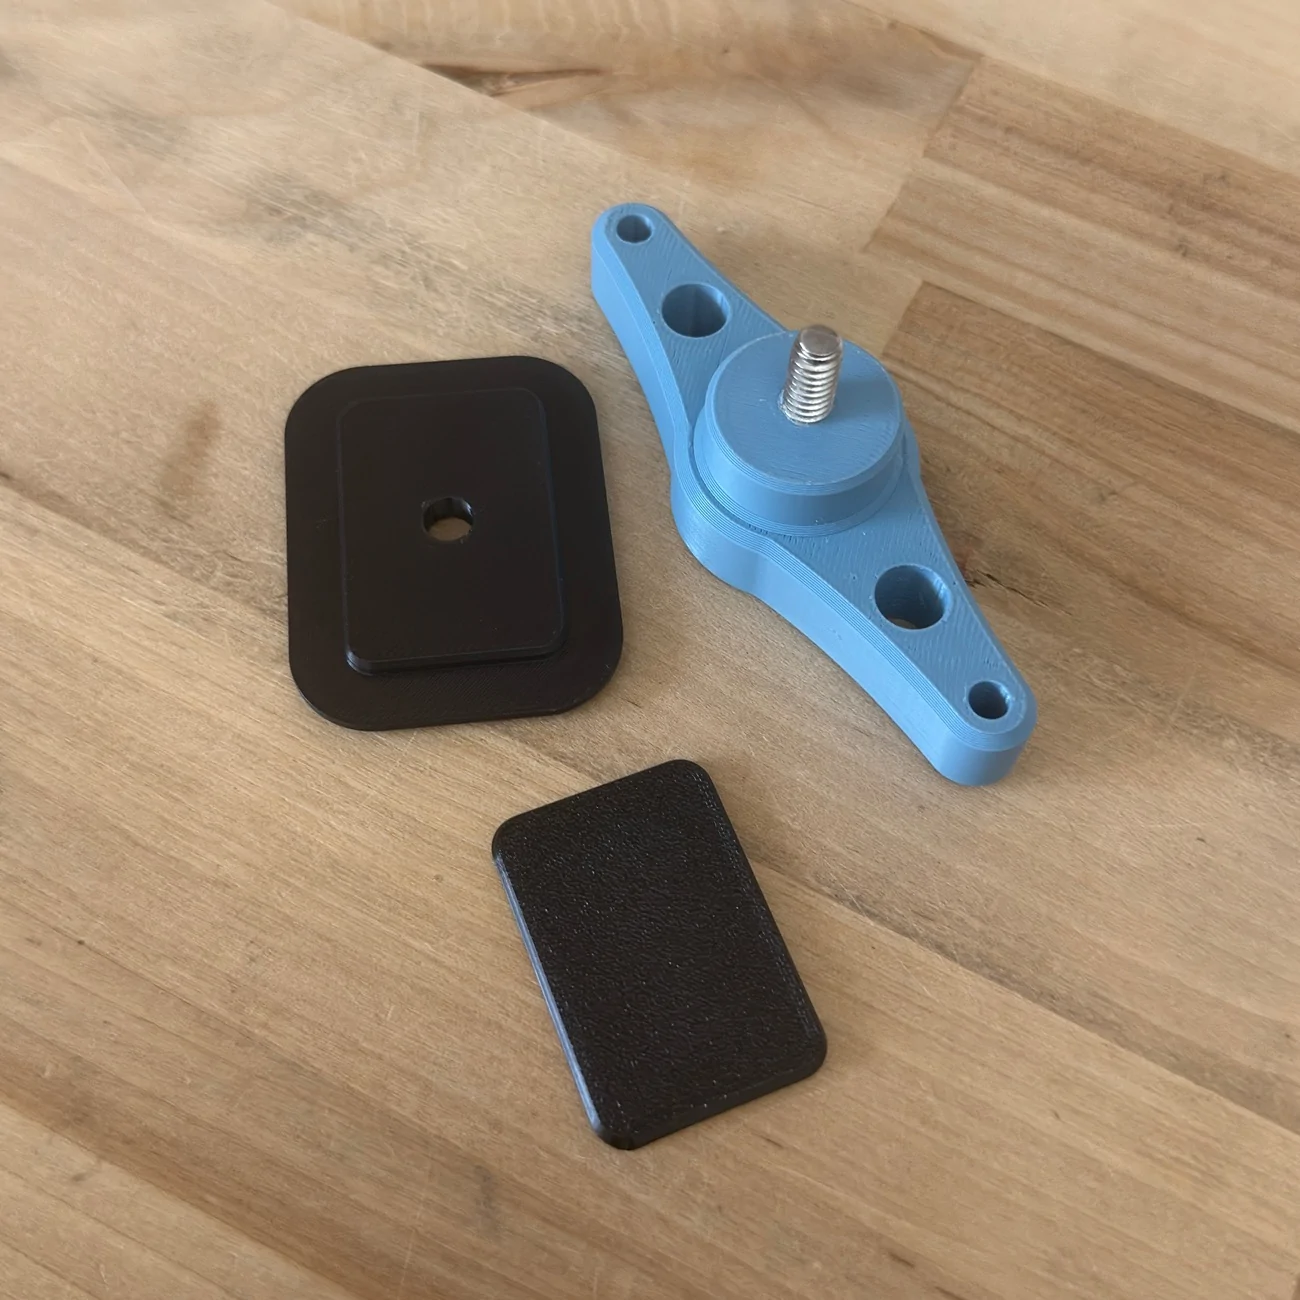
The Peakdo battery has a 1/4 x 20 mounting point, which gave me an easy way to make the entire setup removable without needing tools.
I 3D printed:
Final Thoughts
There are thousands of different combinations of Starlink mounts, overhead panels, roll bar mounts, batteries, and power solutions.
This definitely isn’t the only way to do it.
But for me, the priorities were:

TL;DR
I installed the @JcrOffroad Overhead MOLLE Panel “Spine” in my Bronco Raptor mainly to give me a clean place to mount my Starlink Mini, future radio, and other gear.
In typical overthinking and analyzing fashion, it took me way too long to decide which setup I wanted. There are a ton of different overhead panels, Starlink mounts, roll bar mounts, magnetic mounts, etc., but they all had compromises I didn’t really want to make. If you’ve been going down the same rabbit hole comparing 100 different mounting options like I did, hopefully this helps explain why I went this particular route.
I ultimately went with the JCR Spine + Starlink Mini + Peakdo LinkPower 2 battery setup, and so far it checks basically every box I had.
Why I Chose the JCR Offroad Spine
The Bronco Raptor has an OEM center brace that straddles the cab, and this was probably the biggest deciding factor for me.
A lot of overhead MOLLE panels either:
- Require you to completely remove the factory Bronco Raptor center brace
- Replace it with their own version
- Require some level of modification to the OEM setup
The factory brace is one of the Raptor specific pieces, and replacing it with something I consider inferior in construction or rigidity just feels like a downgrade for the sake of adding accessories.
The JCR panel does not replace, remove, or modify the OEM Bronco Raptor brace at all.
That immediately put it toward the top of my list.
And Then There’s the Steel...
I am sick and tired of “chinesium” steel.
You all know exactly what I’m talking about. Steel that feels paper thin, flexes when you look at it wrong, and feels like it was powder coated with a crayon.
A huge amount of this stuff is outsourced overseas and sold under different brand names with basically the same construction.
The JCR unit is:
- Made in the USA
- Constructed from .125" steel
- Properly formed and rigid
- Finished with a genuinely nice powder coat
Why I Mounted the Starlink Inside
The Starlink Mini was really the main reason I wanted the Spine in the first place.
There are probably hundreds of different ways to mount one of these things, but every option had its own downside.
Exterior mounting was out for me because:
- I would want to remove the dish every night at hotels to prevent theft
- I tried to love the Veritas Vans magnet mount but im just not strong enough to remove it alone
- The Starlink can get extremely hot and power down sitting in direct summer sun
- It leaves the dish exposed to weather, branches, road debris, and everything else
- It eats into rear cargo space
- I need that space for equipment and the pups
- Some mounting systems are basically semi permanent
- A lot of them require tools every time you want to remove the dish
- some make top removal with my top removal system impossible as they are in the way of the top lifter
Mounting it overhead inside the Bronco solved basically all of that.
The dish stays:
- Out of the way
- Protected from theft
- Protected from the elements
- Out of direct sunlight
- Easy to reach
- Easy to remove
Starlink Power Setup
I paired the Starlink Mini with a Peakdo LinkPower 2 battery pack, and the pass through charging capability is honestly what makes the entire system work so well.
My wiring is simple:
Upfitter #4 → Peakdo LinkPower 2 → Starlink Mini
The Bronco upfitter switches only receive power when the ignition is on, so while traveling I can simply leave Upfitter #4 switched on the entire time.
When the Bronco is running:
- The Starlink is powered
- The Peakdo battery is charging
- The battery can simultaneously pass power through to the Starlink
- Vehicle power shuts off automatically
- The Starlink seamlessly continues running from the Peakdo battery
That was a huge win.
Making the Starlink Tool-less
The Peakdo battery has a 1/4 x 20 mounting point, which gave me an easy way to make the entire setup removable without needing tools.
I 3D printed:
- MOLLE locking tabs
- Locating tabs
- A T handle for the 1/4 x 20 mounting bolt
Final Thoughts
There are thousands of different combinations of Starlink mounts, overhead panels, roll bar mounts, batteries, and power solutions.
This definitely isn’t the only way to do it.
But for me, the priorities were:
- Keep the OEM Bronco Raptor center brace
- Use a quality American made steel panel
- Keep the Starlink inside the vehicle
- Preserve rear cargo space
- Protect the dish from theft and weather
- Avoid direct summer sunlight
- Make the entire setup easy to install and remove
- Have internet continue running when the Bronco is shut off
- Avoid draining the vehicle battery
Sponsored