
- Joined
- Dec 31, 2021
- Threads
- 38
- Messages
- 1,555
- Reaction score
- 3,497
- Location
- Western PA
- Vehicle(s)
- '22 BadSquatch, '02 T/A
- Your Bronco Model
- Badlands

Sponsored
Post #18Me trying to find the bottom of post 18

The can opener doesn't do anything for the side lights, those are running on a separate module. It probably wouldn't be any more difficult for 4Dtech to make something similar that plugs inline with the door modules in order to function the same way as their can opener, but you'd only be gaining a single function for all that money and effort. I doubt they'd sell very many if they cost the same.I have a Can Opener on order... (Thank you @Tex) It removes the speed limitations on the cameras and the infotainment and all of the phone access.... I will check once I get it in... I doubt it will work though because it seems to be removing the speed limits on anything running through the center display... Which these lights do not.
I have a Can Opener on order... It removes the speed limitations on the cameras and the infotainment and all of the phone access.... I will check once I get it in... I doubt it will work though because it seems to be removing the speed limits on anything running through the center display... Which these lights do not.
exactly what I was anticipating.....The can opener doesn't do anything for the side lights, those are running on a separate module. It probably wouldn't be any more difficult for 4Dtech to make something similar that plugs inline with the door modules in order to function the same way as their can opener, but you'd only be gaining a single function for all that money and effort. I doubt they'd sell very many if they cost the same.

I have the same idea...nice to be able to use zone lighting, and still have them work.Why not use a diode? Or were you thinking that may still be too risky if it fails?
I used to use them for a switch override for electric fans


Very thorough walk through, love the detail.I also had the same concerns about powering the mirror spots without diodes, so I had already ordered these before seeing the above posts. I knew that it would most likely be just fine without them, but 15A diodes are about fifty cents a piece and not much extra work to add into the circuit.
So use them...don't use them...might not matter. But here is how I went about it. This technique can be used to add diodes elsewhere as well - such as if you want the AUX switch(s) to turn on the puddle lamps with the spots but don't want the puddles and spots to always come on together.
Parts:
Extra wire. I used 18-gauge primary wire. Walmart, hardware stores, amazon...all kinds of places to find primary wire.
https://www.amazon.com/dp/B0BVV3XXDW?ref=ppx_yo2ov_dt_b_fed_asin_title
(These diodes are bulkier than ones I've used for this sort of thing in the past, and overkill for this application, but they work fine. They carry 15A of current, so I figured the extras would be quite versatile for any future projects.)
https://www.amazon.com/dp/B0B382XZPD?ref=ppx_yo2ov_dt_b_fed_asin_title
(These are the mini Posi-Taps, which are a lot easier to fit into tight spaces. I used 18 gauge primary wire, so the size of these worked perfectly for the factory wire sizes and the added wire that I used.)
https://www.harborfreight.com/10-pack-18-22-gauge-watertight-heat-shrink-butt-connectors-66595.html
https://www.harborfreight.com/42-piece-marine-heat-shrink-tubing-67598.html
https://a.co/d/gv9yAWh
Good cheap heat gun, with attachments, if you don't already have one. I've been using this one for 15 years and it's been great.
https://a.co/d/1EzZDjB
Tesa tape. There are other varieties but this is the one I used.
https://a.co/d/cF2J85q
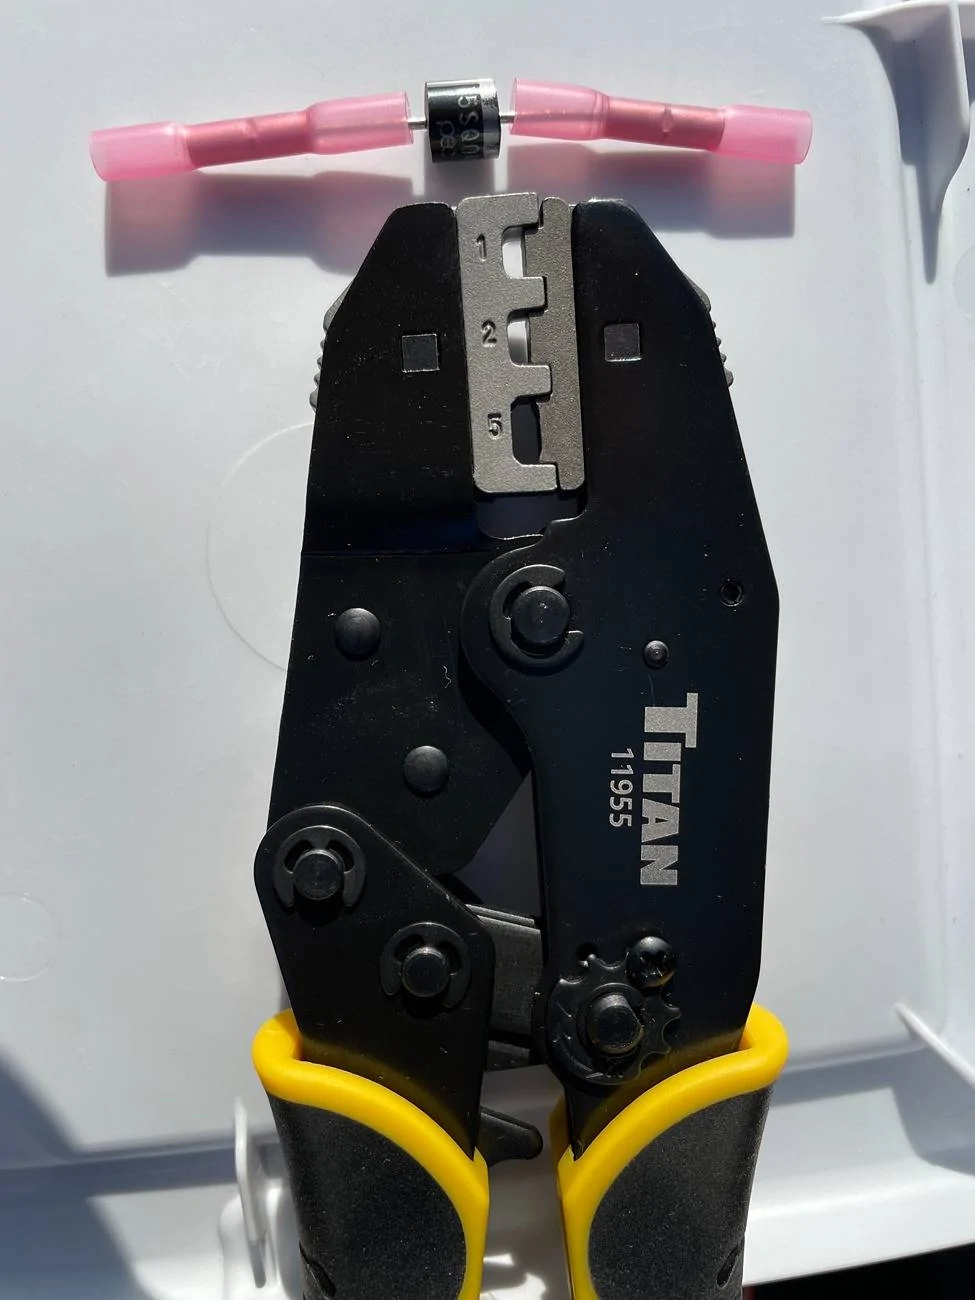
Not the heat-shrink terminal crimper I used but the one I would buy if I didn't already have one.
I used a heat-shrink specific ratcheting crimper to connect some butt connectors to the diodes. You can use bullet connectors, or spade connectors, if you want to be able to plug the diodes into different circuits or to be able to swap the direction around on the fly...but these are what I had laying around and didn't think I'd be re-using these diodes.

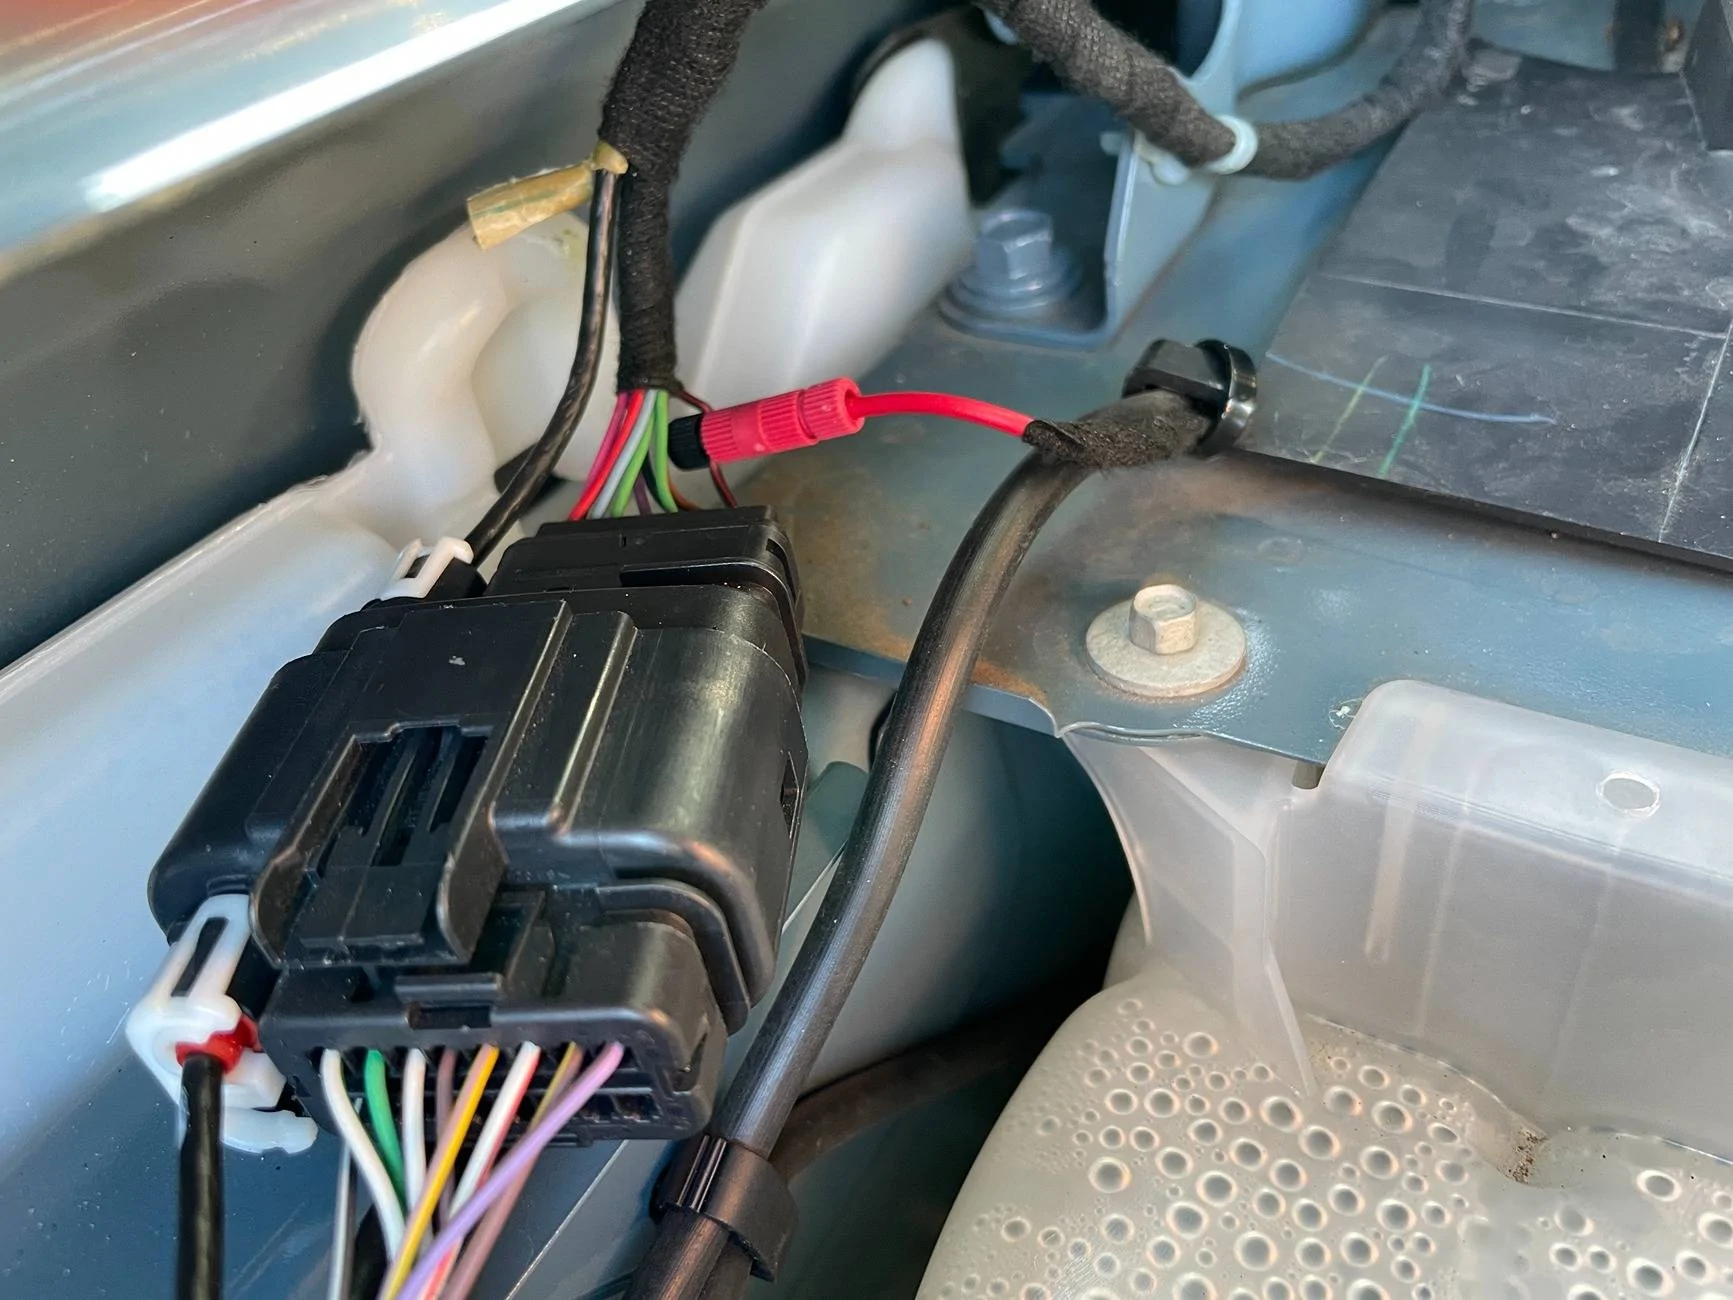
I wrapped a few feet of primary wire with Tesa tape, used a Posi-Tap to run from the passenger side mirror spot wire over to the driver's side...and carried on from near the AUX wires after that....
I removed the clips that hold this trim in and shoved the wire up under the trim. Using a non-marring prybar made it a lot easier.

Passenger side connected:
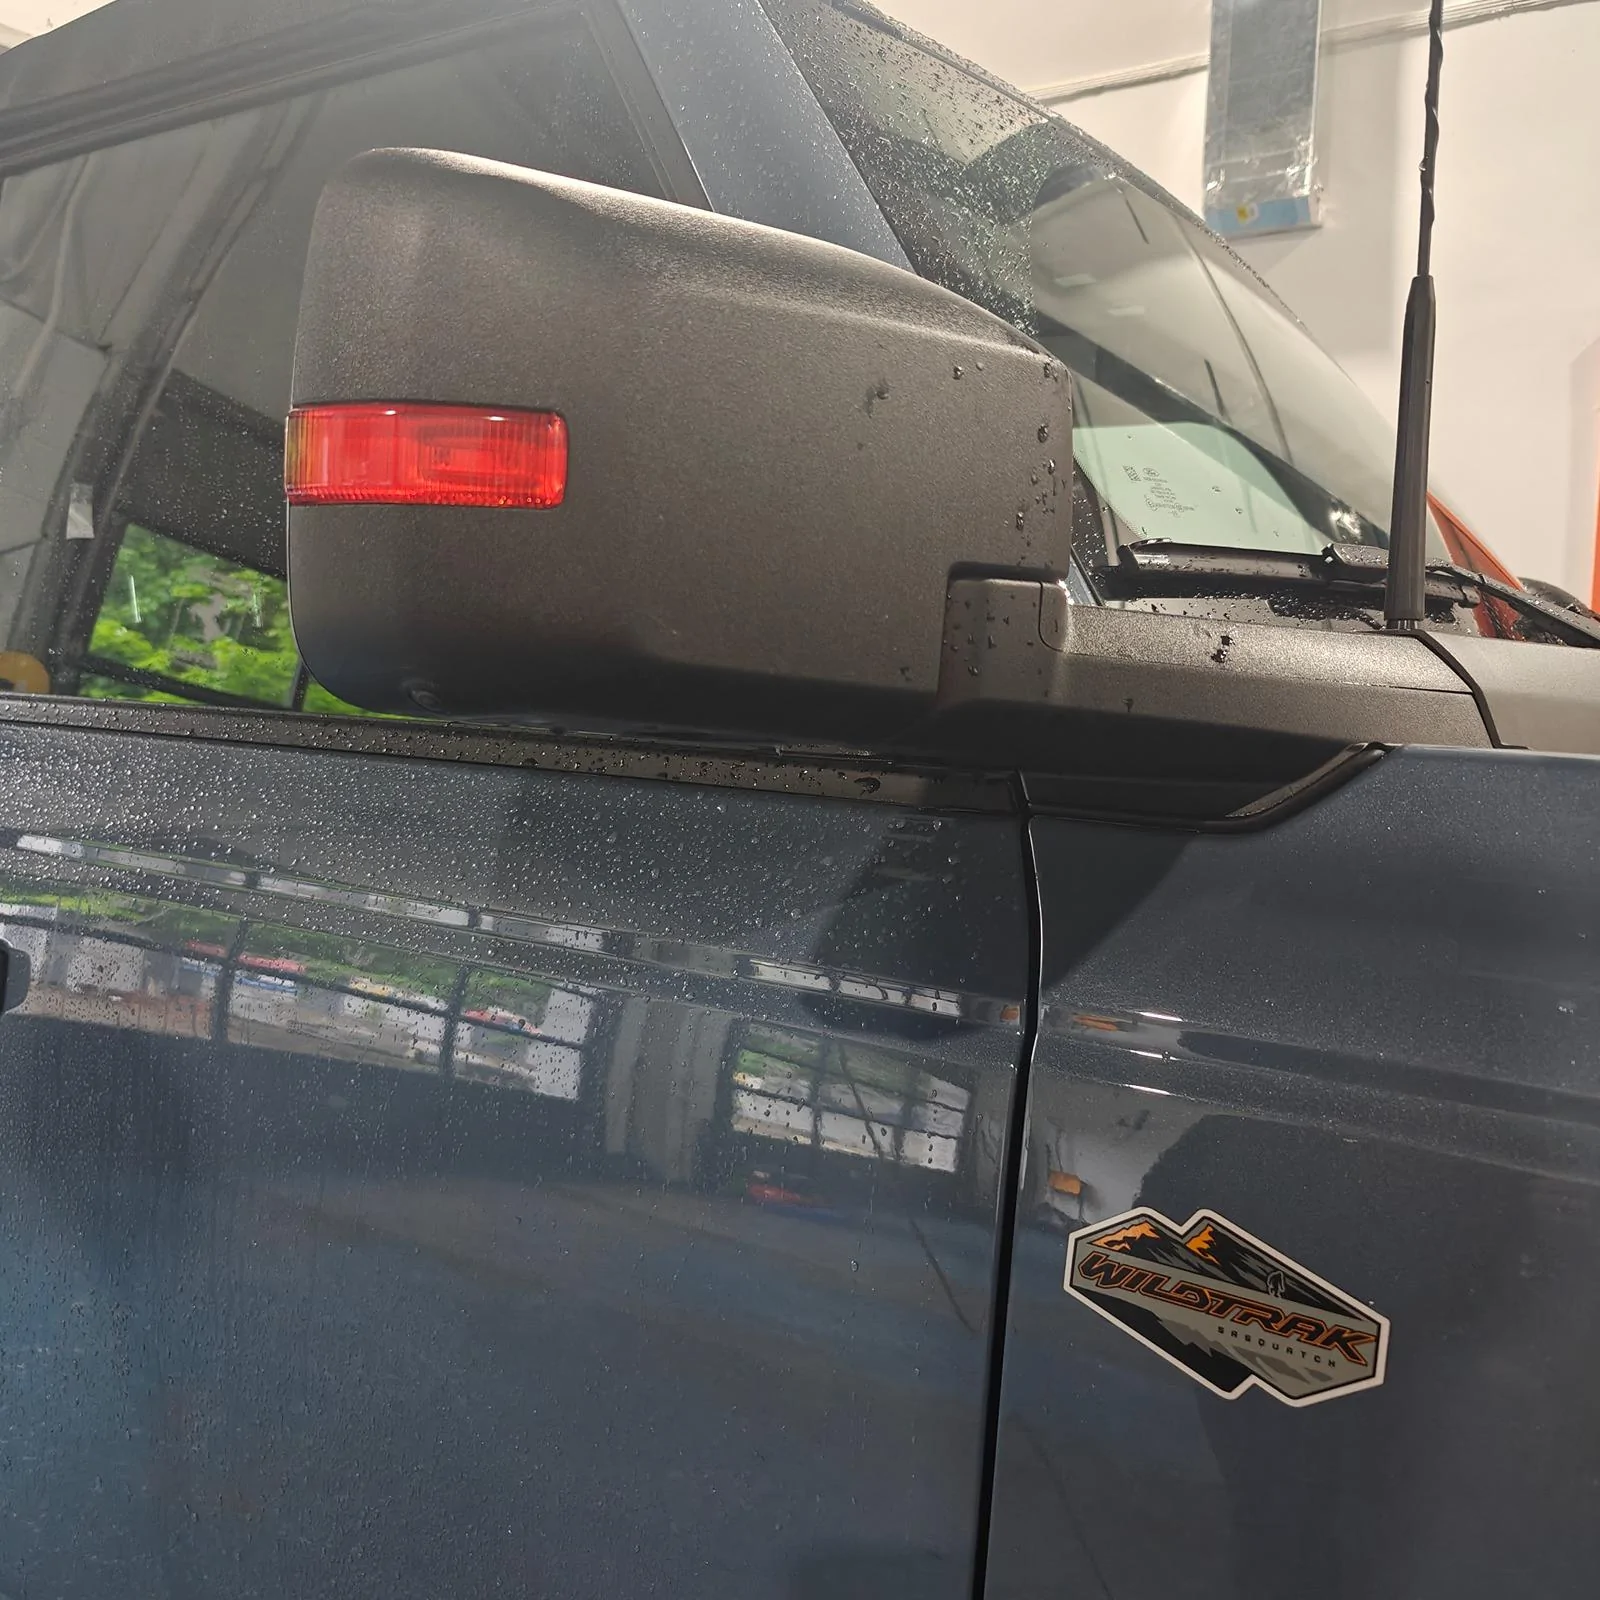
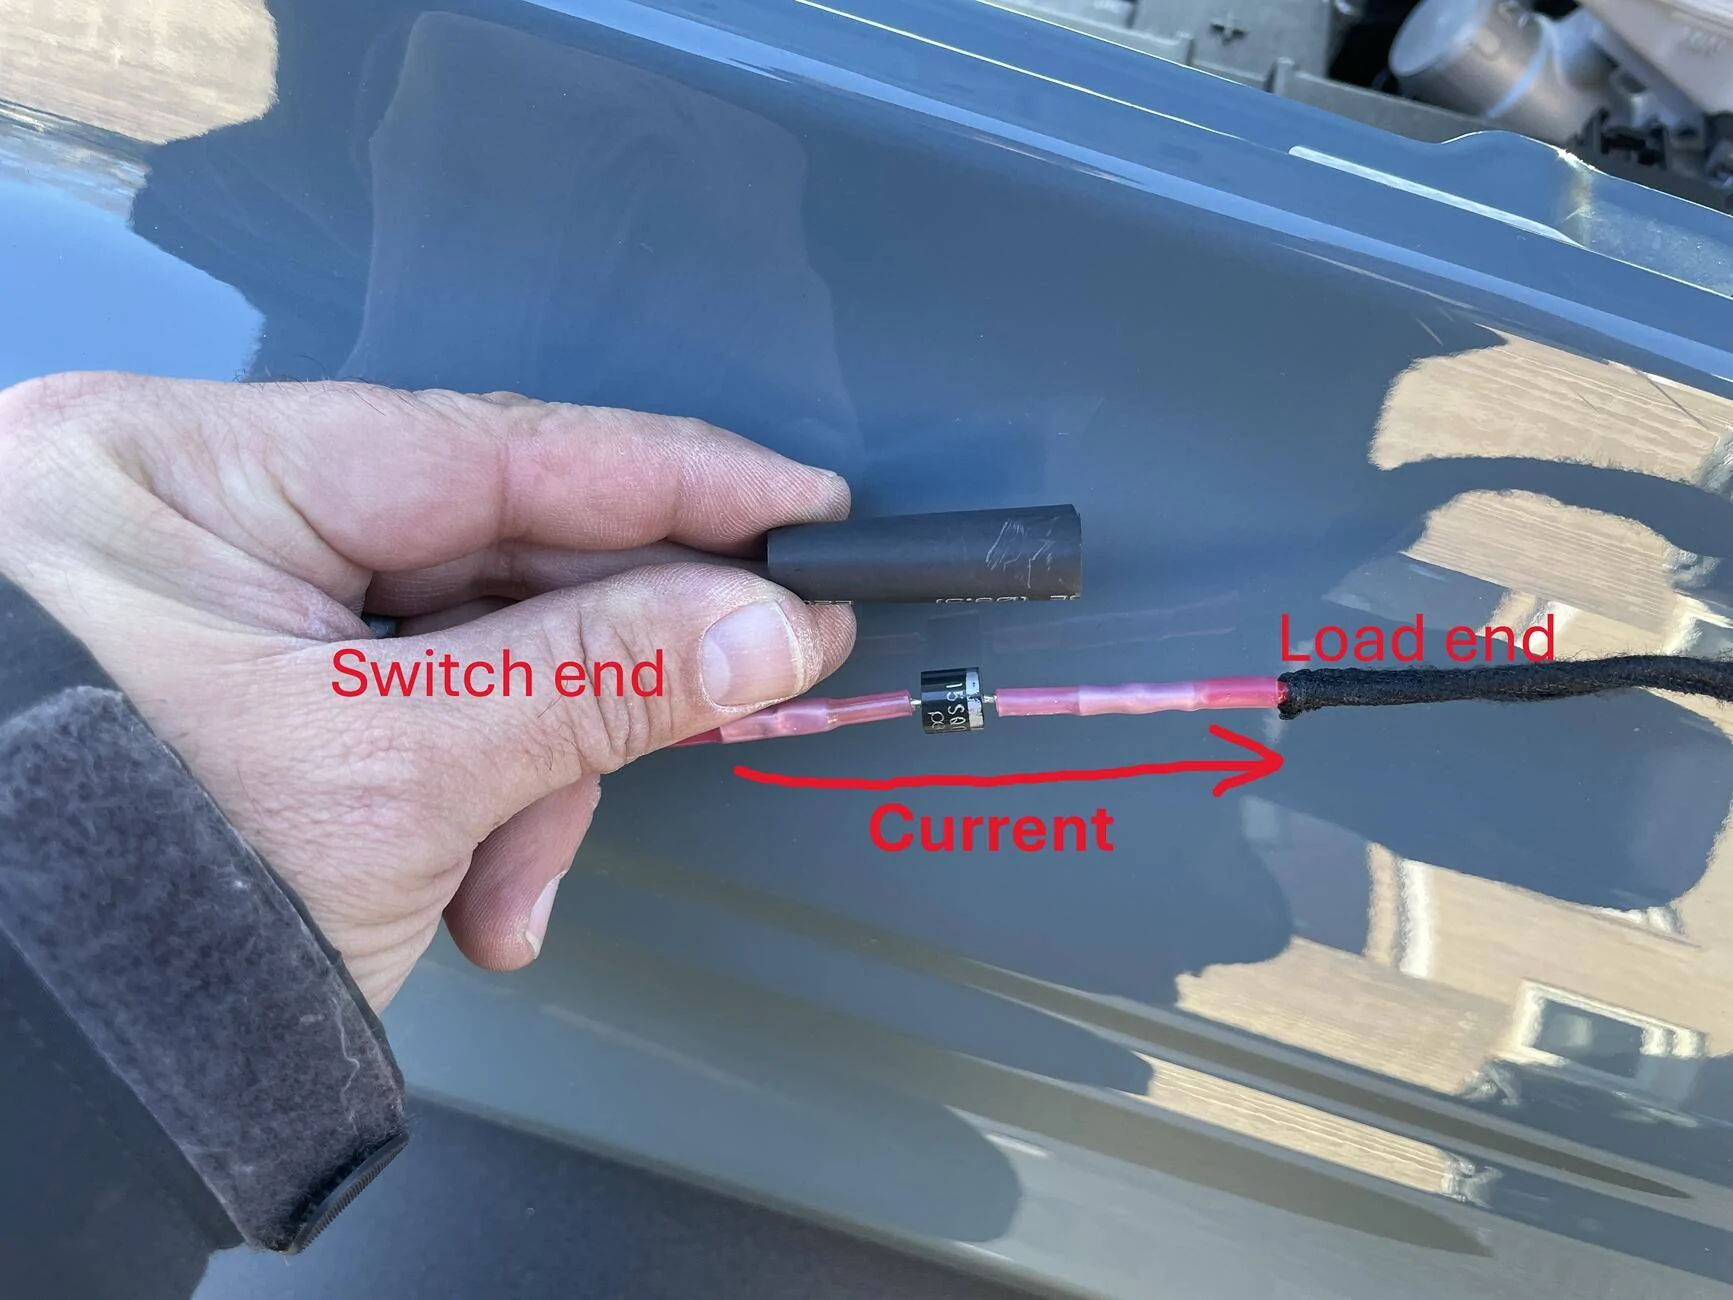
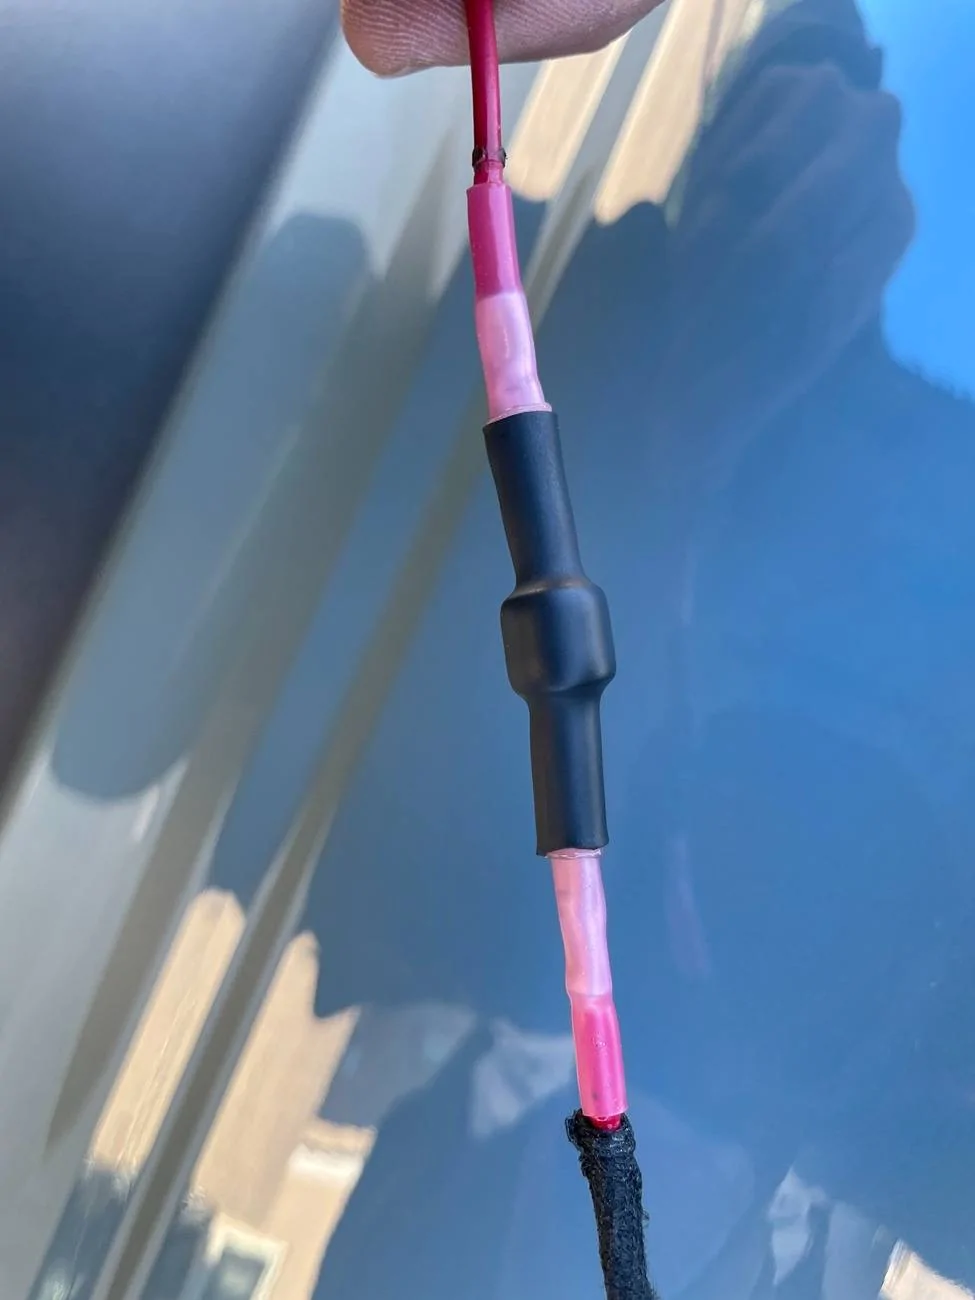
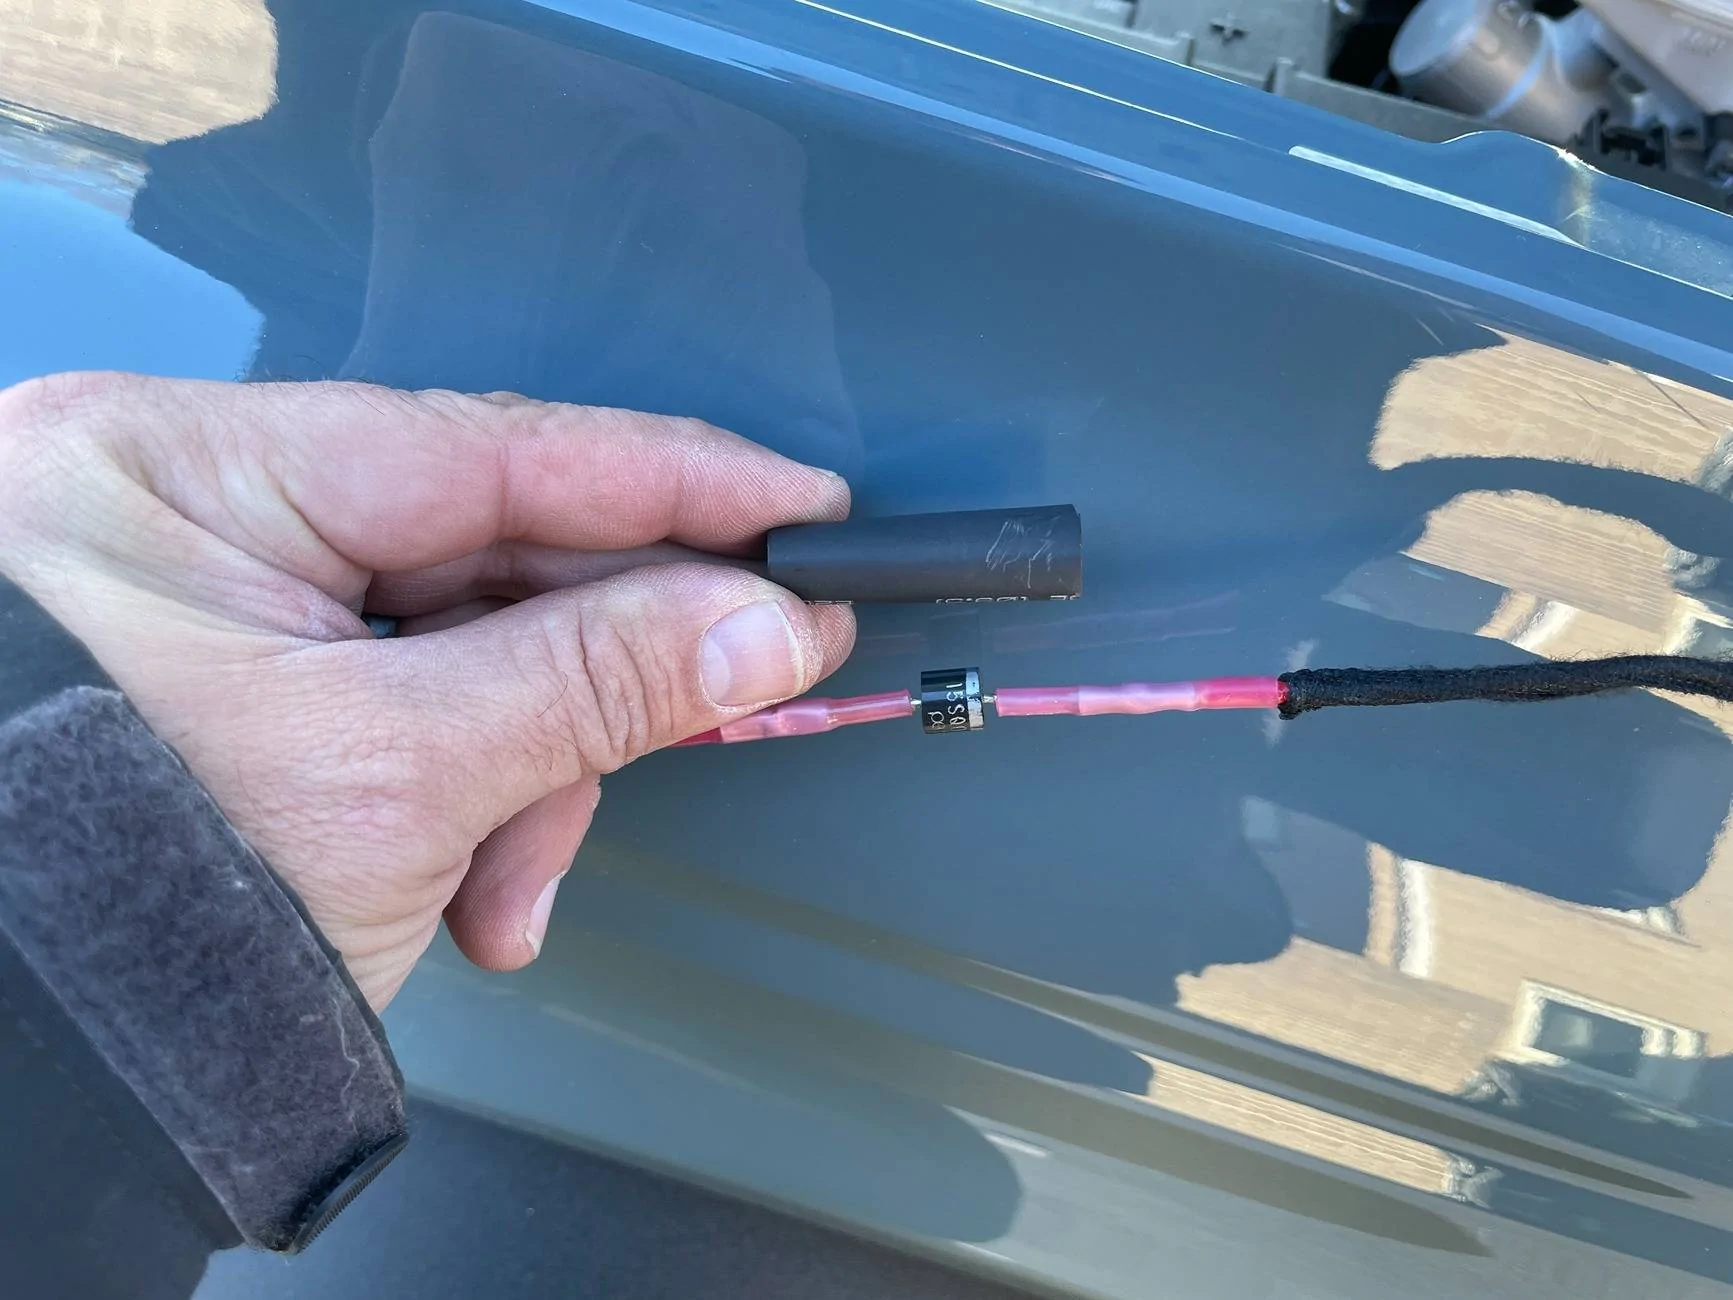
On the driver's side, once I had my new wire protected, run and terminated with the diode, I added marine heat shrink tubing over the whole shebang. What isn't clear in this photo is that I had about eight or ten inches of primary wire on the other end of the diode. Also, the marked end of the diode is the "blocking" end. So picture that end as the end that won't allow current into the diode. The non-marked end will allow current in and through the diode.
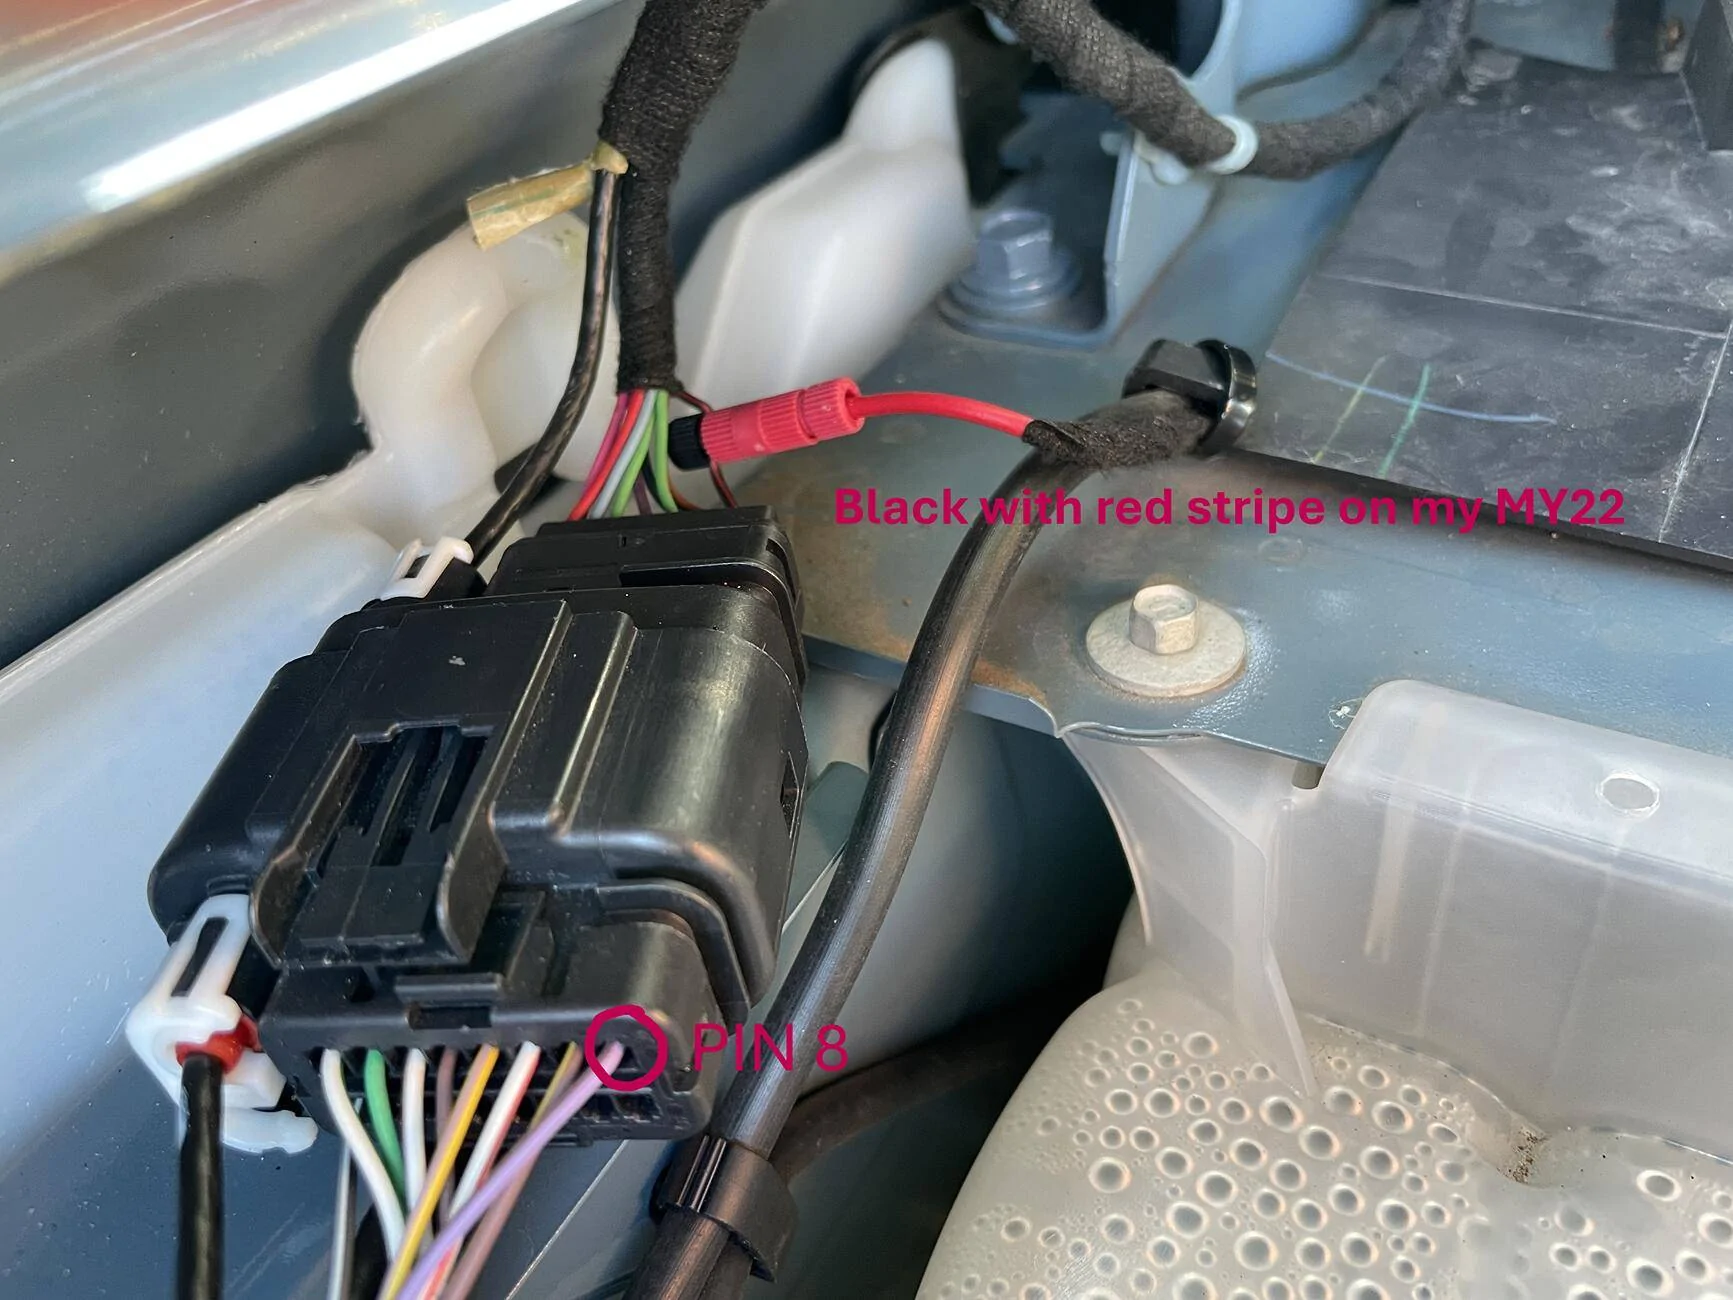
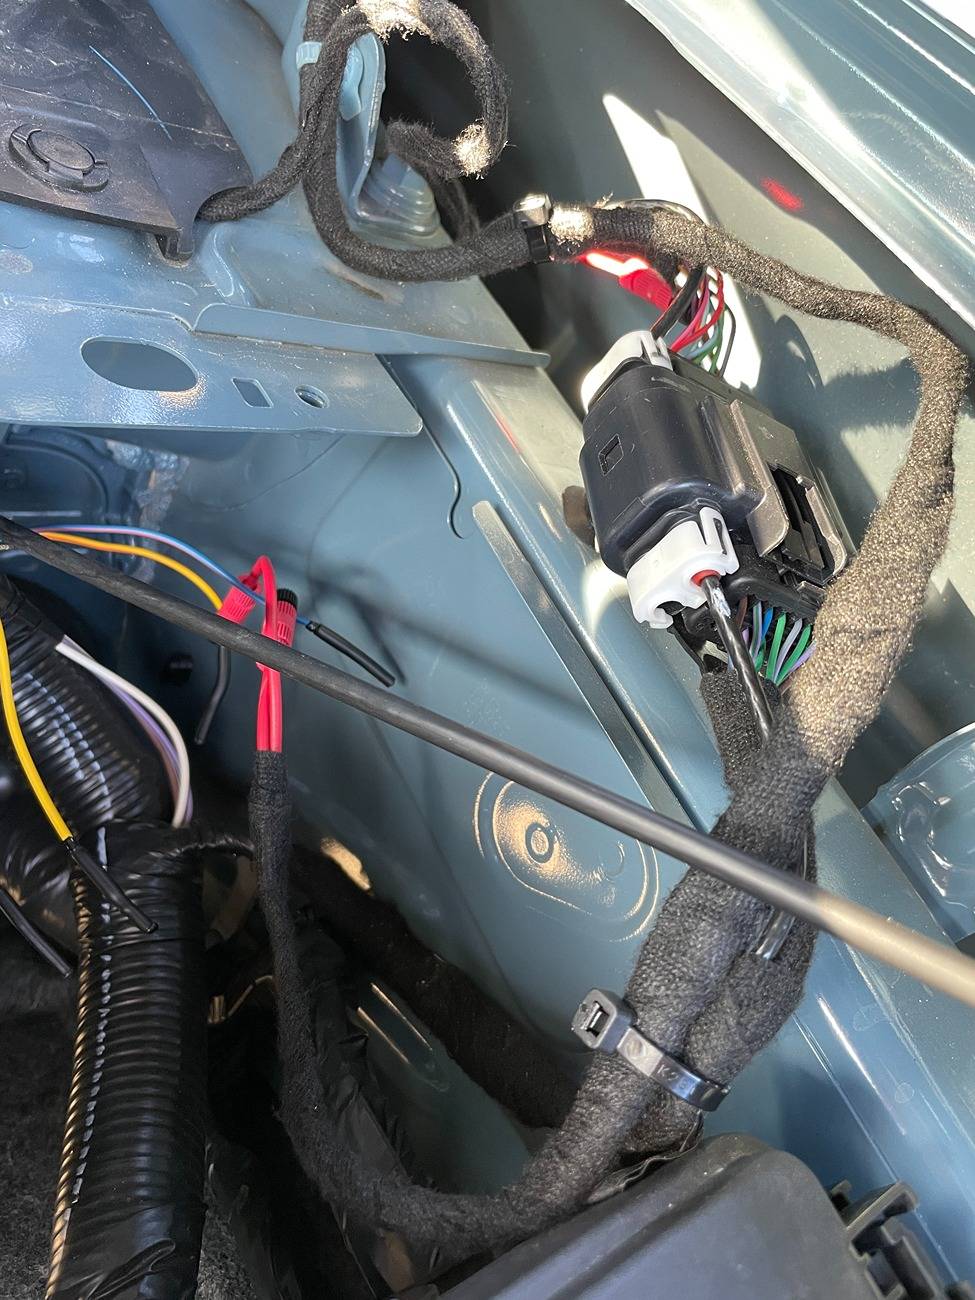
For the driver's side, same PIN 8 and black with red stripe wire (on my MY22. Others may vary.)
Here you can see that side connected and the connections to the AUX wires. I used AUX 5 and 6. For connecting to the AUX wires, the Posi-Taps could be swapped for Posi-Locks, more heat-shrink terminals, or all kinds of good options but I went with the extra Posi-Taps that came in my package because they do the least amount of damage to the AUX wires in case I decide to change things up later.
Then I added more Tesa tape and some cable ties to tidy things up a bit more before closing the hood.

Just got my diodes and going to do this project soon. Did you come up with anything new when you moved your diodes, assuming you have already?1/1/25 edit: I’m changing my mind about this circuit-I’m going to move the diodes (or add more maybe) to protect the PDM and DDM (door modules that supply spots) instead of trying to protect the stupid AUX switches. The door modules are supplying the spots with FETs, so diodes outta be used to protect their potentially sensitive electronics whereas the aux switches are just triggering dumb relays. I will work on this next week and update my post accordingly. Sorry, I’m rusty these days.
__________
Original post:
I also had the same concerns about powering the mirror spots without diodes, so I had already ordered these before seeing the above posts. I knew that it would most likely be just fine without them, but 15A diodes are about fifty cents a piece and not much extra work to add into the circuit.
So use them...don't use them...might not matter. But here is how I went about it. This technique can be used to add diodes elsewhere as well - such as if you want the AUX switch(s) to turn on the puddle lamps with the spots but don't want the puddles and spots to always come on together.
Parts:
Extra wire. I used 18-gauge primary wire. Walmart, hardware stores, amazon...all kinds of places to find primary wire.
https://www.amazon.com/dp/B0BVV3XXDW?ref=ppx_yo2ov_dt_b_fed_asin_title
(These diodes are bulkier than ones I've used for this sort of thing in the past, and overkill for this application, but they work fine. They carry 15A of current, so I figured the extras would be quite versatile for any future projects.)
https://www.amazon.com/dp/B0B382XZPD?ref=ppx_yo2ov_dt_b_fed_asin_title
(These are the mini Posi-Taps, which are a lot easier to fit into tight spaces. I used 18 gauge primary wire, so the size of these worked perfectly for the factory wire sizes and the added wire that I used.)
https://www.harborfreight.com/10-pack-18-22-gauge-watertight-heat-shrink-butt-connectors-66595.html
https://www.harborfreight.com/42-piece-marine-heat-shrink-tubing-67598.html
https://a.co/d/gv9yAWh
Good cheap heat gun, with attachments, if you don't already have one. I've been using this one for 15 years and it's been great.
https://a.co/d/1EzZDjB
Tesa tape. There are other varieties but this is the one I used.
https://a.co/d/cF2J85q
Not the heat-shrink terminal crimper I used but the one I would buy if I didn't already have one.
I used a heat-shrink specific ratcheting crimper to connect some butt connectors to the diodes. You can use bullet connectors, or spade connectors, if you want to be able to plug the diodes into different circuits or to be able to swap the direction around on the fly...but these are what I had laying around and didn't think I'd be re-using these diodes.
I wrapped a few feet of primary wire with Tesa tape, used a Posi-Tap to run from the passenger side mirror spot wire over to the driver's side...and carried on from near the AUX wires after that....
I removed the clips that hold this trim in and shoved the wire up under the trim. Using a non-marring prybar made it a lot easier.
Passenger side connected:
On the driver's side, once I had my new wire protected, run and terminated with the diode, I added marine heat shrink tubing over the whole shebang. What isn't clear in this photo is that I had about eight or ten inches of primary wire on the other end of the diode. Also, the marked end of the diode is the "blocking" end. So picture that end as the end that won't allow current into the diode. The non-marked end will allow current in and through the diode.
For the driver's side, same PIN 8 and black with red stripe wire (on my MY22. Others may vary.)
Here you can see that side connected and the connections to the AUX wires. I used AUX 5 and 6. For connecting to the AUX wires, the Posi-Taps could be swapped for Posi-Locks, more heat-shrink terminals, or all kinds of good options but I went with the extra Posi-Taps that came in my package because they do the least amount of damage to the AUX wires in case I decide to change things up later.
Then I added more Tesa tape and some cable ties to tidy things up a bit more before closing the hood.

It’s done, works great - all on one Aux switch and I added the amber overlays to run DRL. A few new DDM and PDM DTC codes in FORSCAN, but nothing operational is out of whack otherwise. This is an incredibly easy and useful upgrade. Thanks to all who went there.Good question! I have not changed anything yet.
Here’s my plan: I want to find the driver’s door module and the passenger door module under the dash. I think that if there is enough room to add a diode inline with the output of each module, that would be ideal. They’d be out of the weather and out of sight.
My delays are that life has been lifing, and my truck has been at the dealership for quite a while waiting for a new manual transmission.
This will be a priority when I get it back. Hopefully this week sometime


