
- First Name
- Chad
- Joined
- Dec 15, 2024
- Threads
- 5
- Messages
- 23
- Reaction score
- 41
- Website
- chadheiser.com
- Vehicle(s)
- Volvo VNL 670
- Your Bronco Model
- Badlands
- Thread starter
- #1
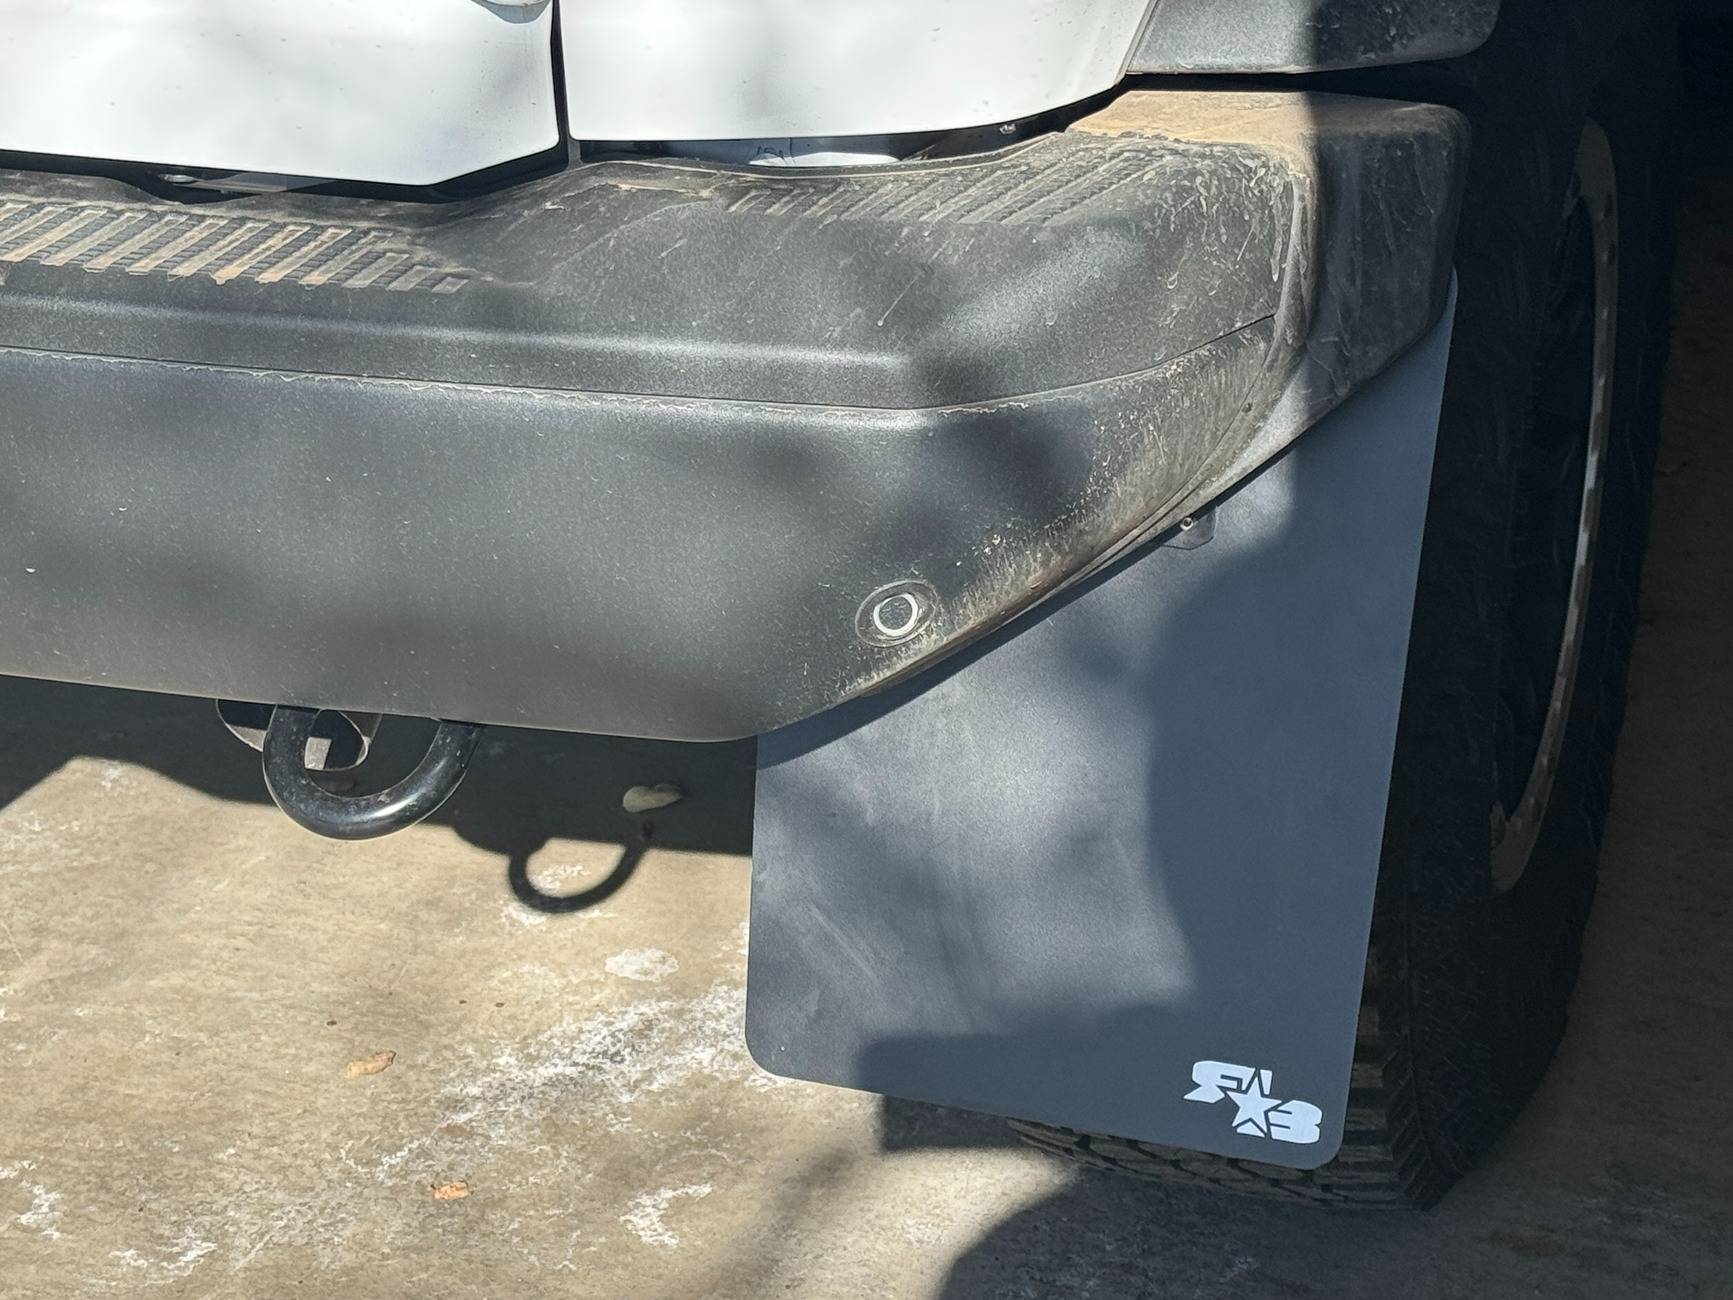
I ordered a set of RokBlokz removeable mud flaps and installed them over the weekend. I wanted a set of mud flaps to keep the spray off the doors and door handles, but didn't want something that would interfere with more aggressive off road driving. In other words I didn't want something a rock could rip off on the trail. The best solution I could find was RokBlokz. I have RokBlokz on my RZR Turbo S and they are great. They are very flexible and durable and I have beaten them up on the RZR for nearly six years without an issue, so I figured they would serve me well on the Bronco also. The unique thing about the RokBlokz Bronco mud flaps is they can be installed permanently or with quick removeable thumb screws. I chose to use the quick removeable thumb screws for my installation, but the kit comes with both mounting options. Here are pictures of them installed from various angles on all four corners.

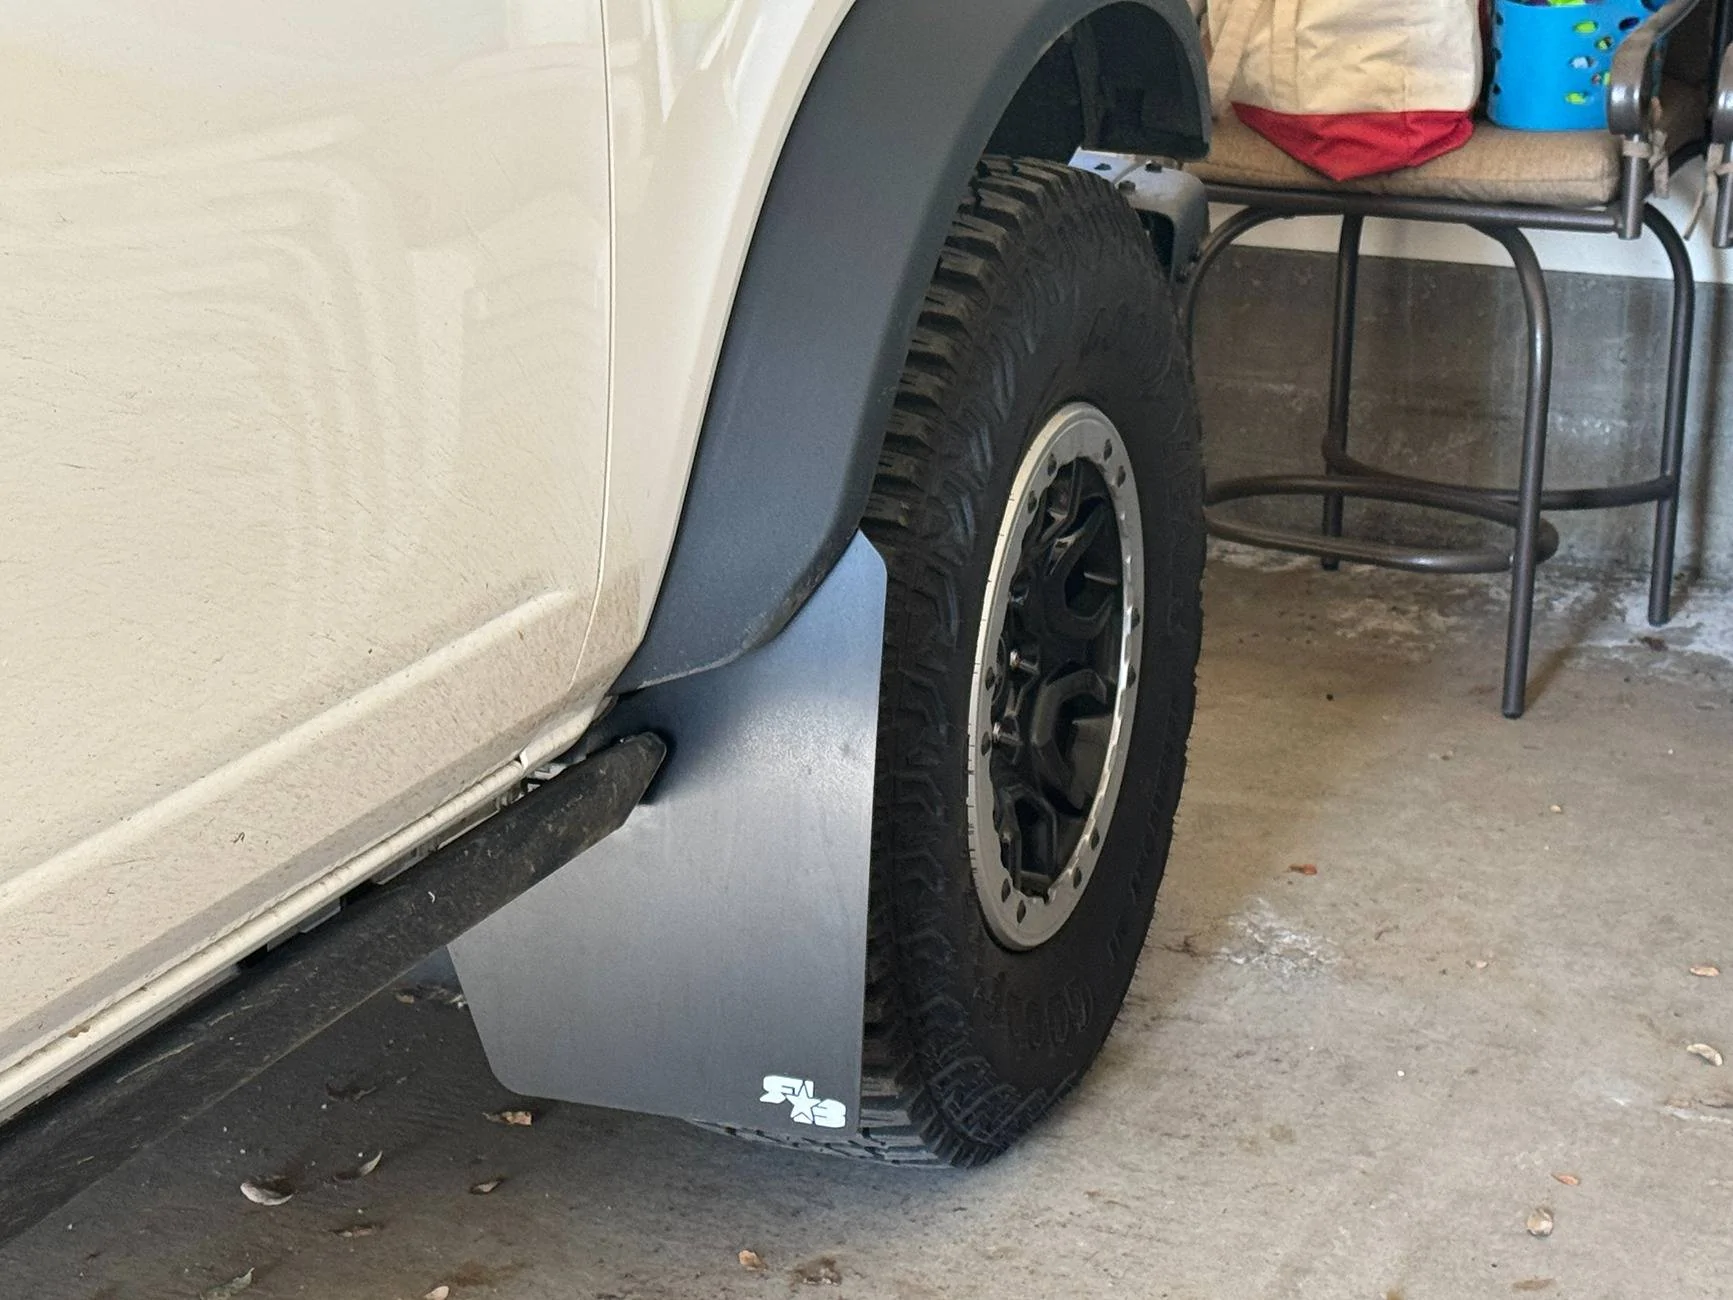
I went with the XL Long version of the flaps to get the best coverage. I also went with with white logo color to match my white Bronco. The front flaps come with a mount that bolts to the factory intrusion bar and the rear flaps come with a mount that bolts to the under side of the rear body mount. It took longer to assemble the mud flaps than it did to actually mount them to the Bronco. I didn't take any pictures of putting them together, but the process was easy (just a little time consuming because of the number of screws involved). RokBlokz has a good video covering the assembly and installation process here.
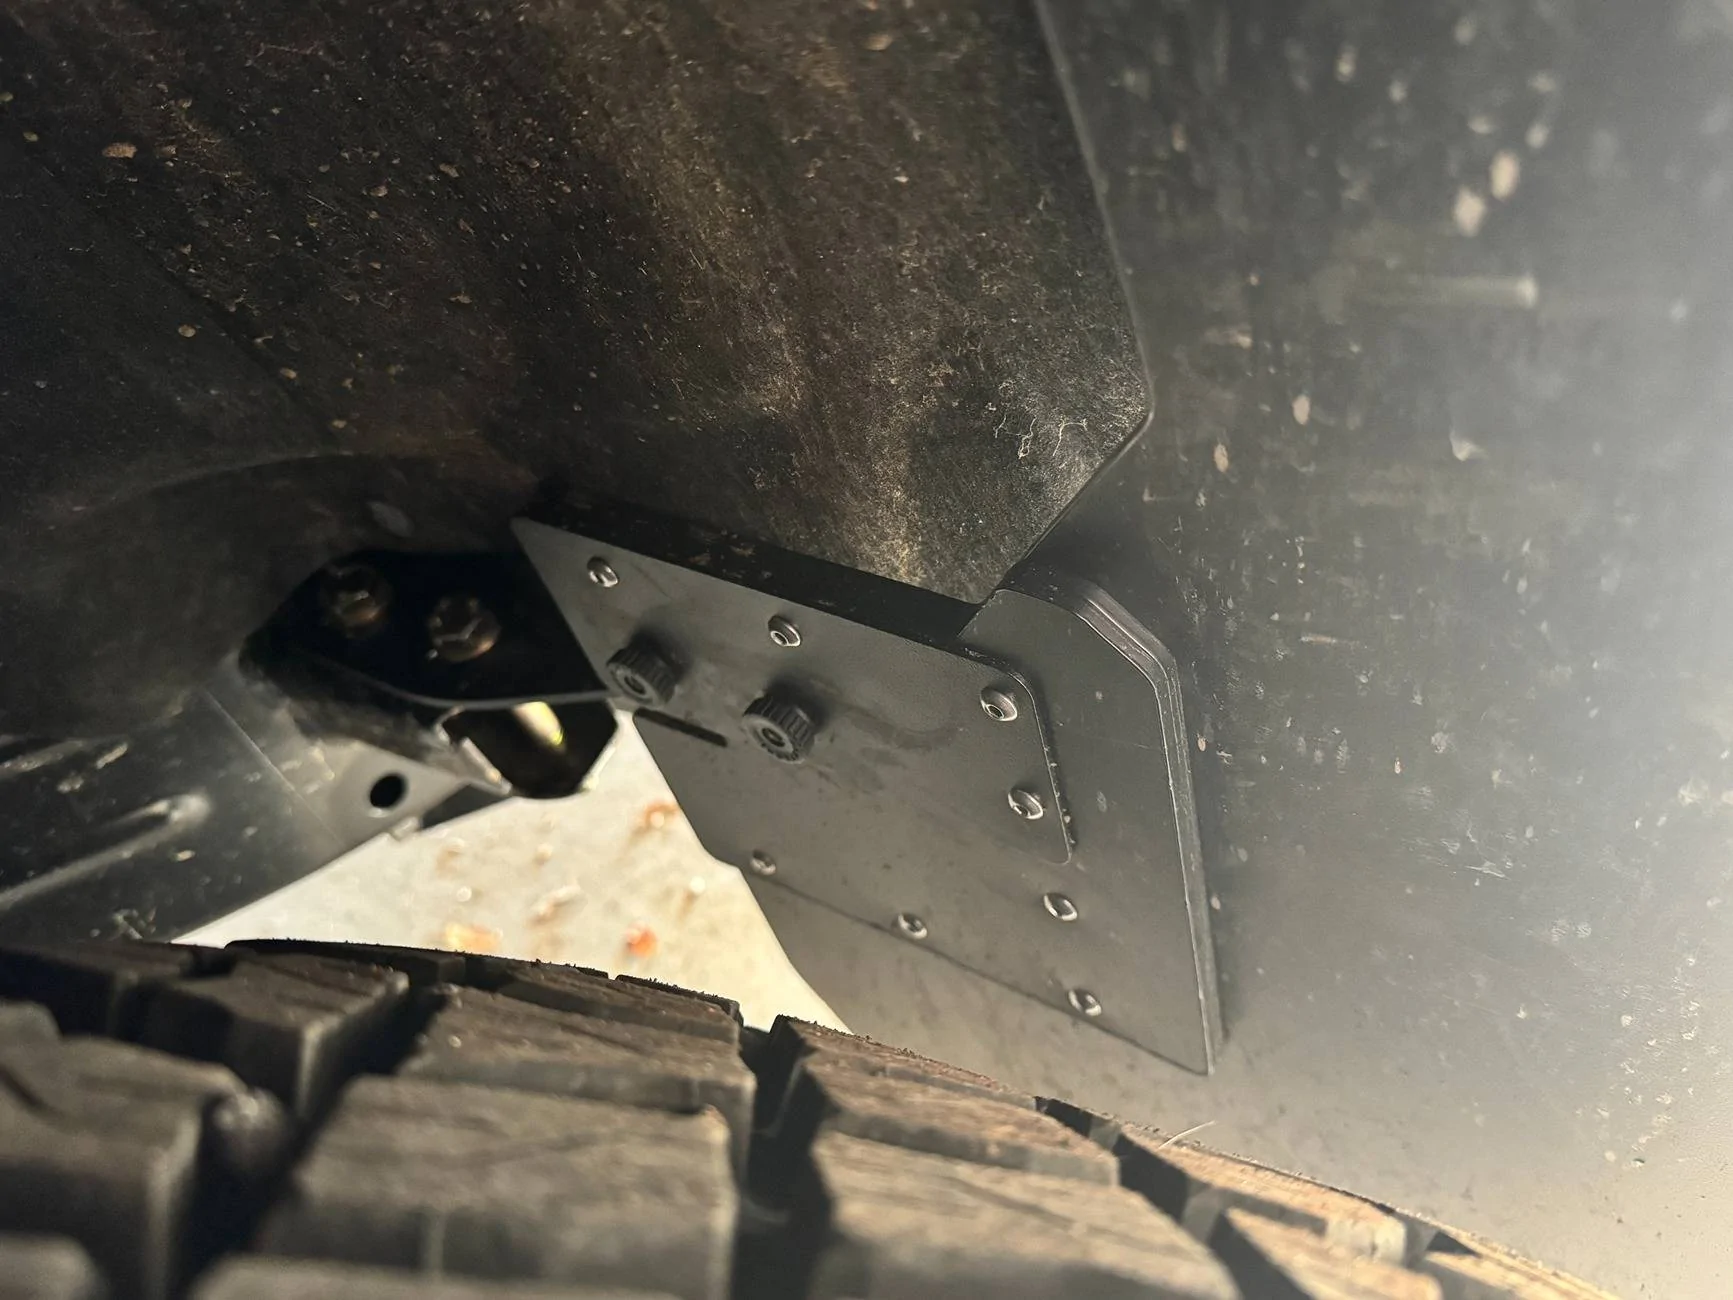
Here is the front bracket. You can see how the bracket is bolted to the intrusion bar mount (with included bolts for Sasquatch package Broncos that don't actually have the bars). You can also see the two thumb screws that hold the mud flaps to the bracket. Just unscrew those two thumb screws and pull the mud flap off when you don't want them in place or are worried about a rock grabbing them and ripping them off.
Here is the rear mud flap mount. You can't really see the mount because the mud flap is sandwiching it. Again, you can see the thumb screws for quick removal. Unfortunately for me, RokBlokz sent the wrong screws to put the mud flaps together. They provide two different lengths of screws and they gave me too many of the short screws and not enough of the longer screws so I had to make a quick run to the hardware store to get some more longer screws to finish the assembly process. Unfortunately the hardware store didn't have the exact length screw I needed. They had plenty of the short screws (which I didn't need), but the closest they had to the longer screws were about an 1/8th of an inch longer than I needed. This is why you can see some screw thread sticking through the nuts in this picture. The exposed threads are shallower than the thumb screws and won't catch on anything, but I don't like them sticking through like that. Hopefully RokBlokz will be sending me some correct length screws to fix this. (I emailed them about the issue, but being the weekend, I haven't gotten a response yet.)
There were no modification required to install the mudflaps, but I did end up trimming the under side of the rear bumper plastic corners. This wasn't needed, but it made installing and removing the rear mud flaps a lot easier. The rear bumper plastic pieces fold over and under the bumper. I trimmed the piece that folds under the bumper back about an inch to allow the mud flap easy access to the mount to the bracket without pushing against the plastic bumper piece. You cannot see the trimmed area of the bumper unless you crawl under it and look up from the bottom, so it is not noticeable at all. If you watch the installation video, at the end of the video when he is installing the rear mud flaps on the rear brackets, you can see the trouble he is having getting the mud flap on the bracket. You can also see the back side of the bumper with the plastic pieces that are wrapped up and under the bumper. Trimming just a bit of that plastic makes putting the rear flaps on pretty effortless.


I went with the XL Long version of the flaps to get the best coverage. I also went with with white logo color to match my white Bronco. The front flaps come with a mount that bolts to the factory intrusion bar and the rear flaps come with a mount that bolts to the under side of the rear body mount. It took longer to assemble the mud flaps than it did to actually mount them to the Bronco. I didn't take any pictures of putting them together, but the process was easy (just a little time consuming because of the number of screws involved). RokBlokz has a good video covering the assembly and installation process here.
Here is the front bracket. You can see how the bracket is bolted to the intrusion bar mount (with included bolts for Sasquatch package Broncos that don't actually have the bars). You can also see the two thumb screws that hold the mud flaps to the bracket. Just unscrew those two thumb screws and pull the mud flap off when you don't want them in place or are worried about a rock grabbing them and ripping them off.
Here is the rear mud flap mount. You can't really see the mount because the mud flap is sandwiching it. Again, you can see the thumb screws for quick removal. Unfortunately for me, RokBlokz sent the wrong screws to put the mud flaps together. They provide two different lengths of screws and they gave me too many of the short screws and not enough of the longer screws so I had to make a quick run to the hardware store to get some more longer screws to finish the assembly process. Unfortunately the hardware store didn't have the exact length screw I needed. They had plenty of the short screws (which I didn't need), but the closest they had to the longer screws were about an 1/8th of an inch longer than I needed. This is why you can see some screw thread sticking through the nuts in this picture. The exposed threads are shallower than the thumb screws and won't catch on anything, but I don't like them sticking through like that. Hopefully RokBlokz will be sending me some correct length screws to fix this. (I emailed them about the issue, but being the weekend, I haven't gotten a response yet.)

There were no modification required to install the mudflaps, but I did end up trimming the under side of the rear bumper plastic corners. This wasn't needed, but it made installing and removing the rear mud flaps a lot easier. The rear bumper plastic pieces fold over and under the bumper. I trimmed the piece that folds under the bumper back about an inch to allow the mud flap easy access to the mount to the bracket without pushing against the plastic bumper piece. You cannot see the trimmed area of the bumper unless you crawl under it and look up from the bottom, so it is not noticeable at all. If you watch the installation video, at the end of the video when he is installing the rear mud flaps on the rear brackets, you can see the trouble he is having getting the mud flap on the bracket. You can also see the back side of the bumper with the plastic pieces that are wrapped up and under the bumper. Trimming just a bit of that plastic makes putting the rear flaps on pretty effortless.
Sponsored
Last edited:


