Sponsored

Readylift 1.25" Level Kit Specs

EMBronco

Base
Well-Known Member
First Name
Tyler
Joined
Oct 11, 2021
Threads
10
Messages
247
Reaction score
735
Location
Eagle Mountain, UT
Vehicle(s)
F250
Your Bronco Model
Base
Clubs
 
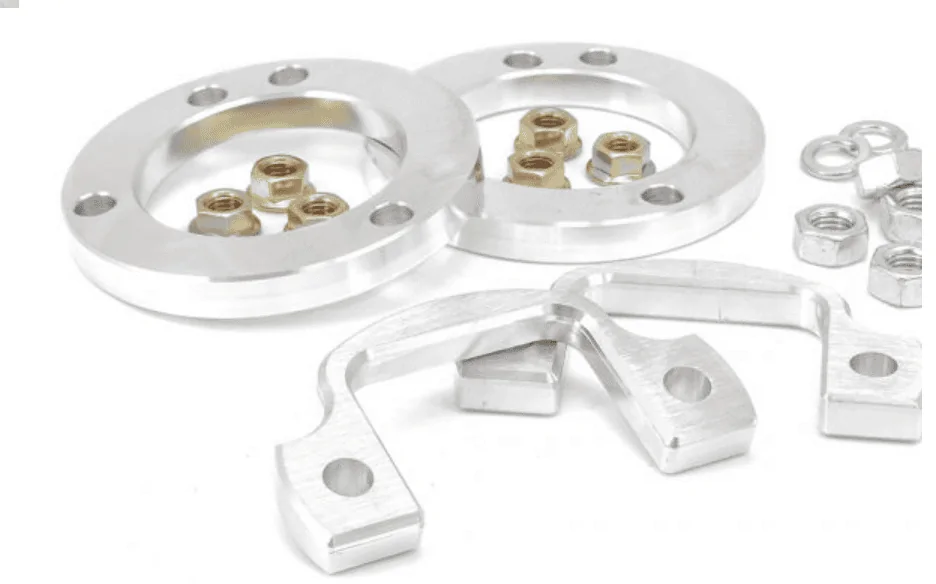
Does anyone happen to know the thickness of the top and bottom spacer for the Readylift 1.25" level kit. I already know that it is not going to add up to 1.25" as it needs to be much less than this due to the ratio of spacer to actual lift on an independent front suspension.

I was wanting to order this for my Base Sasquatch that should arrive next month. However, I watched a video where they were uninstalling the kit because it raised the front more like 1.5-1.75 inches. They replaced it with the Rough Country 1" level kit and it dropped it more than .5" from where it was with the Readylift.

Also if anyone knows the thickness of other brand (rough country, zone, etc) 1" spacers that would be great for comparison. Might also be able to mix and match spacers to get the desired height.
Sponsored


huck2080

Black Diamond
Well-Known Member
First Name
Kirk
Joined
Jul 18, 2020
Threads
0
Messages
62
Reaction score
49
Location
virginia
Vehicle(s)
2019 f150
Your Bronco Model
Black Diamond
I haven't seen that video anywhere .. but am very interested as thats the level I had planned
 
OP
OP
EMBronco

EMBronco

Base
Well-Known Member
First Name
Tyler
Joined
Oct 11, 2021
Threads
10
Messages
247
Reaction score
735
Location
Eagle Mountain, UT
Vehicle(s)
F250
Your Bronco Model
Base
Clubs
 
I did find a thread that had the specs for the Rough Country 1" level kit. It said the bottom spacer is 1/4" thick and the top spacers are 3/16" thick each.
 

Lurker B6G

Outer Banks
Well-Known Member
First Name
Murph
Joined
Nov 10, 2021
Threads
4
Messages
154
Reaction score
329
Location
Cleveland, OH
Vehicle(s)
Ford Explorer Timberline
Your Bronco Model
Outer Banks
I did find a thread that had the specs for the Rough Country 1" level kit. It said the bottom spacer is 1/4" thick and the top spacers are 3/16" thick each.
I posted those specs. I have measured out the parts in RC's 1 inch level, 2 inch lift, and 3.5 inch lift kits.

The RC 1 inch level is (1/4+3/16+3/16)*1.47 = 0.92 inches of front end lift.

For the four door this amount (0.92 inches) seems to bring them dead level. But in my opinion it is a little too much for the 2 doors. I plan to mix and match also, there are many different options using the RC spacer kit. And keep in mind the round ones should work in the back also (at 1:1), allowing up to 0.4 inches of up in the back (i.e. two kits could yield 0.92 front and 0.38 back for less leveling, but slightly more lift).

Just by looking, the Readylift 1.25 inch level is most likely either:
(3/8+3/8)*1.47 = 1.10 inches of front end lift.
(1/2+1/2)*1.47 = 1.47 inches of front end lift.

Ford Bronco Readylift 1.25" Level Kit Specs 1645032443434


I would have guessed 3/8" each, except for what was said about the net height gain. I still would bet on 3/8" simply because I don't think there is an extra 1/2" of stud at the top and bottom, but I could be wrong.

By the way - these are some seriously expensive washers!
 

Sponsored
OP
OP
EMBronco

EMBronco

Base
Well-Known Member
First Name
Tyler
Joined
Oct 11, 2021
Threads
10
Messages
247
Reaction score
735
Location
Eagle Mountain, UT
Vehicle(s)
F250
Your Bronco Model
Base
Clubs
 
I posted those specs. I have measured out the parts in RC's 1 inch level, 2 inch lift, and 3.5 inch lift kits.

The RC 1 inch level is (1/4+3/16+3/16)*1.47 = 0.92 inches of front end lift.

For the four door this amount (0.92 inches) seems to bring them dead level. But in my opinion it is a little too much for the 2 doors. I plan to mix and match also, there are many different options using the RC spacer kit. And keep in mind the round ones should work in the back also (at 1:1), allowing up to 0.4 inches of up in the back (i.e. two kits could yield 0.92 front and 0.38 back for less leveling, but slightly more lift).

Just by looking, the Readylift 1.25 inch level is most likely either:
(3/8+3/8)*1.47 = 1.10 inches of front end lift.
(1/2+1/2)*1.47 = 1.47 inches of front end lift.

1645032443434.png


I would have guessed 3/8" each, except for what was said about the net height gain. I still would bet on 3/8" simply because I don't think there is an extra 1/2" of stud at the top and bottom, but I could be wrong.

By the way - these are some seriously expensive washers!
I also thought about doing what you mention - using a spacer on the rear to still keep a little rake. I think my ideal on the sasquatch would be to go up in the front 1.25-1.5" and the rear .5-.75".

The RPG spring perch collars lift it a little more than this, but they don't necessarily look like a DIY job.
 

Lurker B6G

Outer Banks
Well-Known Member
First Name
Murph
Joined
Nov 10, 2021
Threads
4
Messages
154
Reaction score
329
Location
Cleveland, OH
Vehicle(s)
Ford Explorer Timberline
Your Bronco Model
Outer Banks
I also thought about doing what you mention - using a spacer on the rear to still keep a little rake. I think my ideal on the sasquatch would be to go up in the front 1.25-1.5" and the rear .5-.75".

The RPG spring perch collars lift it a little more than this, but they don't necessarily look like a DIY job.
You and I are thinking along the same lines. I also have a sasquatch on order.

However, in my opinion, the front can not take too much spacer lift. I figure that it can take about 0.75-1.00 inch of spacer lift safely. If you look at the kits that are approved for the sasquatch, they are either just spring preload (perch or spacer), or are a combination of small lift and preload. But, preload is not great for the Bilstein shocks, because they are position sensitive, and are designed to operate at a certain range. There are small perches in the Zone 3 inch kit (rear set) that could be used on a combination "mini lift" (i.e. 3/4 spacer + 3/4 spring preload for 1.5 total), but as soon as you introduce the preload, you will be pulling apart the coilover assembly. I digress.

Using spacers in the back is perfectly fine (up to a point). However, unlike the front, there is no lower spacer to add, and there is no muliplier for the back (1:1). So, you can only add the spacers to the top. And, once you go longer than the factory studs, you will be adding a "60 degree turn spacer". Meaning that you will need to turn the coilover hat to use them on the Bilsteins (the turn spacers have offset mounts - not just a bolt through washer). Note that the standard shocks do not require turning the hats using a turn spacer. So, you really can only washer spacer lift the back end about 0.4 inches.

That is why I put up the example of 0.92 front and 0.38 rear lift. This is about as far as you can spacer lift the Bilsteins without the need to pull them apart - from what I can tell...
 

Brock9281

Outer Banks
Well-Known Member
First Name
Rob
Joined
Oct 26, 2021
Threads
68
Messages
618
Reaction score
323
Location
Atlanta
Vehicle(s)
F150
Your Bronco Model
Outer Banks
Has anyone added to theirs to show?
 

dgorsett

Big Bend
Well-Known Member
Joined
Apr 3, 2019
Threads
25
Messages
5,009
Reaction score
10,002
Location
colorado
Vehicle(s)
F250, Mustang, Explorer
Your Bronco Model
Big Bend
You and I are thinking along the same lines. I also have a sasquatch on order.

However, in my opinion, the front can not take too much spacer lift. I figure that it can take about 0.75-1.00 inch of spacer lift safely. If you look at the kits that are approved for the sasquatch, they are either just spring preload (perch or spacer), or are a combination of small lift and preload. But, preload is not great for the Bilstein shocks, because they are position sensitive, and are designed to operate at a certain range. There are small perches in the Zone 3 inch kit (rear set) that could be used on a combination "mini lift" (i.e. 3/4 spacer + 3/4 spring preload for 1.5 total), but as soon as you introduce the preload, you will be pulling apart the coilover assembly. I digress.

Using spacers in the back is perfectly fine (up to a point). However, unlike the front, there is no lower spacer to add, and there is no muliplier for the back (1:1). So, you can only add the spacers to the top. And, once you go longer than the factory studs, you will be adding a "60 degree turn spacer". Meaning that you will need to turn the coilover hat to use them on the Bilsteins (the turn spacers have offset mounts - not just a bolt through washer). Note that the standard shocks do not require turning the hats using a turn spacer. So, you really can only washer spacer lift the back end about 0.4 inches.

That is why I put up the example of 0.92 front and 0.38 rear lift. This is about as far as you can spacer lift the Bilsteins without the need to pull them apart - from what I can tell...
It sounds like you study this and thanks for the well thought analysis.

Question: Speaking of rotating the hats to get them to properly align with a bigger spacer lift: Couldn't you just switch sides with the whole coilover, left to right and right to left to achieve the proper stud alignment?
 

DoYouBronco

Wildtrak
Well-Known Member
Lux Sponsor (Level 2)
First Name
Tyson
Joined
Feb 5, 2022
Threads
8
Messages
326
Reaction score
787
Location
El Paso
Website
hpbuilt.shop
Vehicle(s)
Gen2 Raptor Midtravel / TowRunner F250
Your Bronco Model
Wildtrak
please consider that the coil springs can take a few days/weeks to settle back to normal position. Maybe some of these kits are stating lift heights before or after this "break in" period?

what's the consensus on how much rake the 2 doors vs 4 doors are plagued with?
to me the rake looks emphasized on the 2 doors because of its shorter wheel base...
 

Sponsored

dgorsett

Big Bend
Well-Known Member
Joined
Apr 3, 2019
Threads
25
Messages
5,009
Reaction score
10,002
Location
colorado
Vehicle(s)
F250, Mustang, Explorer
Your Bronco Model
Big Bend
I measured my 2d bb non SAS. 1/2" high in the rear with about 100 lbs of recovery gear in the back. So, a level won't help I'd need a lift, thinking 1.5 to 2 would be just right
 

Lurker B6G

Outer Banks
Well-Known Member
First Name
Murph
Joined
Nov 10, 2021
Threads
4
Messages
154
Reaction score
329
Location
Cleveland, OH
Vehicle(s)
Ford Explorer Timberline
Your Bronco Model
Outer Banks
It sounds like you study this and thanks for the well thought analysis.

Question: Speaking of rotating the hats to get them to properly align with a bigger spacer lift: Couldn't you just switch sides with the whole coilover, left to right and right to left to achieve the proper stud alignment?
I had this exact same thought. I basically dismissed it because "if it were that easy, everyone would be doing it". I can think of only two issues:

1) in the front, the bottom of the coilover has a "cross-bar" that is tilted. From what I can tell, it can't just be tilted the other way, so it would not mate with the lower arm if switched side to side.

2) the spring orientation may be critical. I have seen an installation manual that shows the final spring orientation, but I didn't study it to see if the left was just the right rotated 180 degrees.
 

Lurker B6G

Outer Banks
Well-Known Member
First Name
Murph
Joined
Nov 10, 2021
Threads
4
Messages
154
Reaction score
329
Location
Cleveland, OH
Vehicle(s)
Ford Explorer Timberline
Your Bronco Model
Outer Banks
I measured my 2d bb non SAS. 1/2" high in the rear with about 100 lbs of recovery gear in the back. So, a level won't help I'd need a lift, thinking 1.5 to 2 would be just right
You are a good candidate for the 2 inch lifts - but you will want to buy a 1 inch level set too:

Buy either RC or Zone 2 inch lift. These give you four spacers that are about 1.5" high. Since the front has a ratio of about 1.5:1 they will push the front up about 2.25". But they only push the back up 1.5 inches. So you add the upper shims from RC 1" level, or the upper shim from the Zone 1' level to the back (they slide right over the factory bolts) to add 3/8" lift to the back, for a total of 1.9" in the back. This preserves most of the current rake.

I was going to do exactly this to move to 35's, but ended up changing my order to SAS under my wife's orders.
 

dgorsett

Big Bend
Well-Known Member
Joined
Apr 3, 2019
Threads
25
Messages
5,009
Reaction score
10,002
Location
colorado
Vehicle(s)
F250, Mustang, Explorer
Your Bronco Model
Big Bend
You are a good candidate for the 2 inch lifts - but you will want to buy a 1 inch level set too:

Buy either RC or Zone 2 inch lift. These give you four spacers that are about 1.5" high. Since the front has a ratio of about 1.5:1 they will push the front up about 2.25". But they only push the back up 1.5 inches. So you add the upper shims from RC 1" level, or the upper shim from the Zone 1' level to the back (they slide right over the factory bolts) to add 3/8" lift to the back, for a total of 1.9" in the back. This preserves most of the current rake.

I was going to do exactly this to move to 35's, but ended up changing my order to SAS under my wife's orders.
What do they say about great minds thinking alike. I've run a similar scenario through my mind, mixing and matching, if I do a spacer I will probably cobble together something like this.

However, I'm holding out hope for the Ford Performance coilover set up hoping it is reasonably priced. Some of the stuff for Ranger and F150 isn't bad through CJ Pony Parts
 
OP
OP
EMBronco

EMBronco

Base
Well-Known Member
First Name
Tyler
Joined
Oct 11, 2021
Threads
10
Messages
247
Reaction score
735
Location
Eagle Mountain, UT
Vehicle(s)
F250
Your Bronco Model
Base
Clubs
 
I reached out to most of the leveling kit manufactures (excluding Rough Country) via email to see if they would tell me the specs of their leveling kits - specifically the thicknesses of the spacers. Most either responded that they didn't know, or that they don't give that info out.

I called Readylift and spoke to someone that was supposed to offer technical assistance for lift installs. He stated that their 1.25" level kit had a top spacer that was 3/4" thick and the bottom spacer was 1" thick. I told him this was not possible and he assured me the measurement were correct. So basically that was no help.

The one company that was really helpful was Fabtech. There 1.5" level kit spacer is .875" thick. They said that after install (and springs settling back in) that it would provide ~1.5" of lift in the front. If installed in the rear, it would provide ~1" of lift.
Sponsored


Top