
Sponsored

Ford Performance C-Brace install with hardtop

BlueBetty

Badlands
Active Member
First Name
Jason Lee
Joined
Jun 14, 2026
Threads
1
Messages
30
Reaction score
18
Location
Studio City, CA
Vehicle(s)
Bronco
Your Bronco Model
Badlands
You want the B&C brace kit. Significantly reduces the massive body on frame torsional flex preacrically eliminating all creaks and rattles....very solid. lime one poster stated transforms from deiving like a dumpster to driving a $60K vehicle.

Should be standard equip and worth every penny.
Mine (B&C) kit is on order. Can't wait to get it installed (and get rid of most of those annoying creeks/crack/cricks.
Sponsored


BlueBetty

Badlands
Active Member
First Name
Jason Lee
Joined
Jun 14, 2026
Threads
1
Messages
30
Reaction score
18
Location
Studio City, CA
Vehicle(s)
Bronco
Your Bronco Model
Badlands
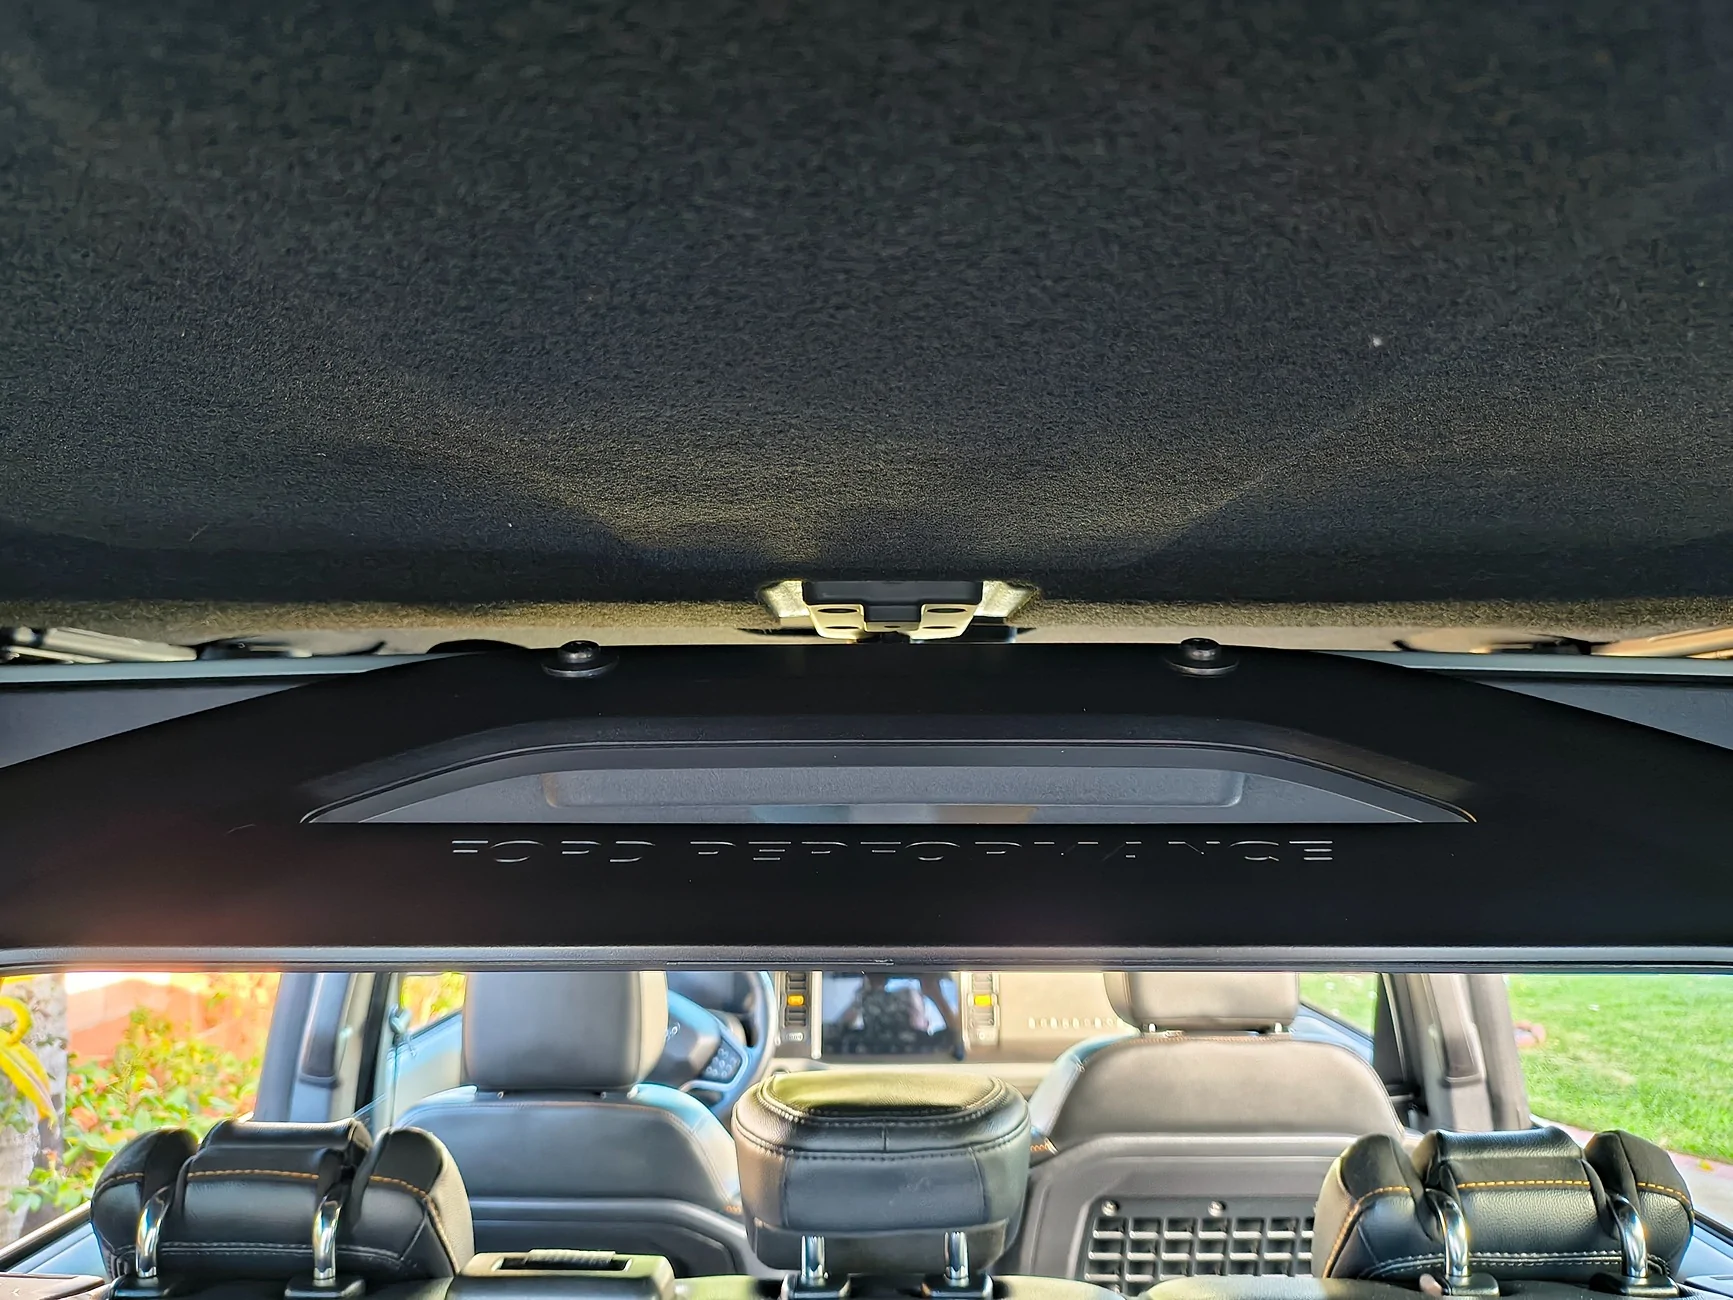
No videos existed of anyone installing the C-Brace with the hardtop on...at least, I couldn't find one. Got one with the JOLLY25 coupon code.

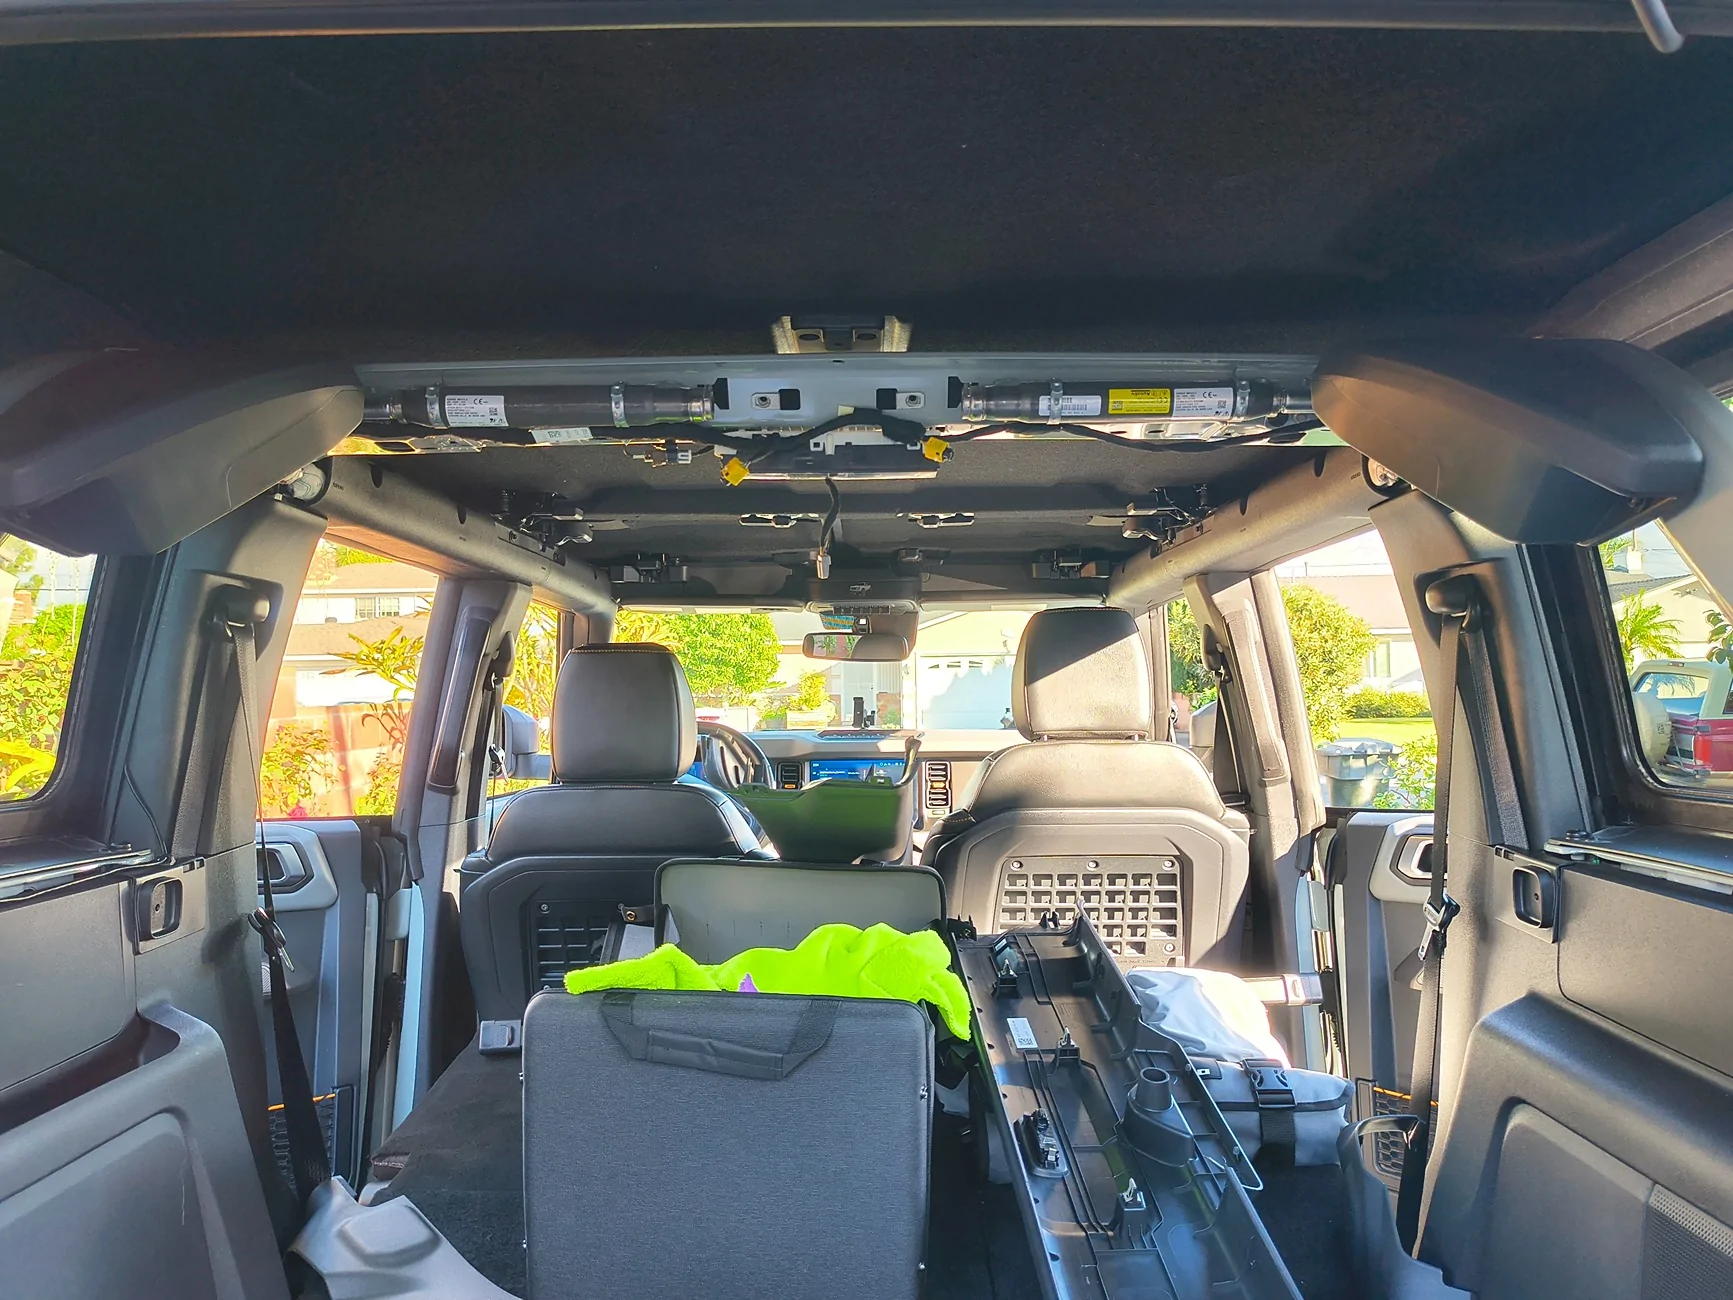
It is very easy to install as it turns out. The overhead panels are pretty forgiving and unsnap easily.

IMG_20260101_145436173_HDR.webp


There's an online PDF with good instructions...just Google it.

IMG_20260101_152136604_HDR.webp


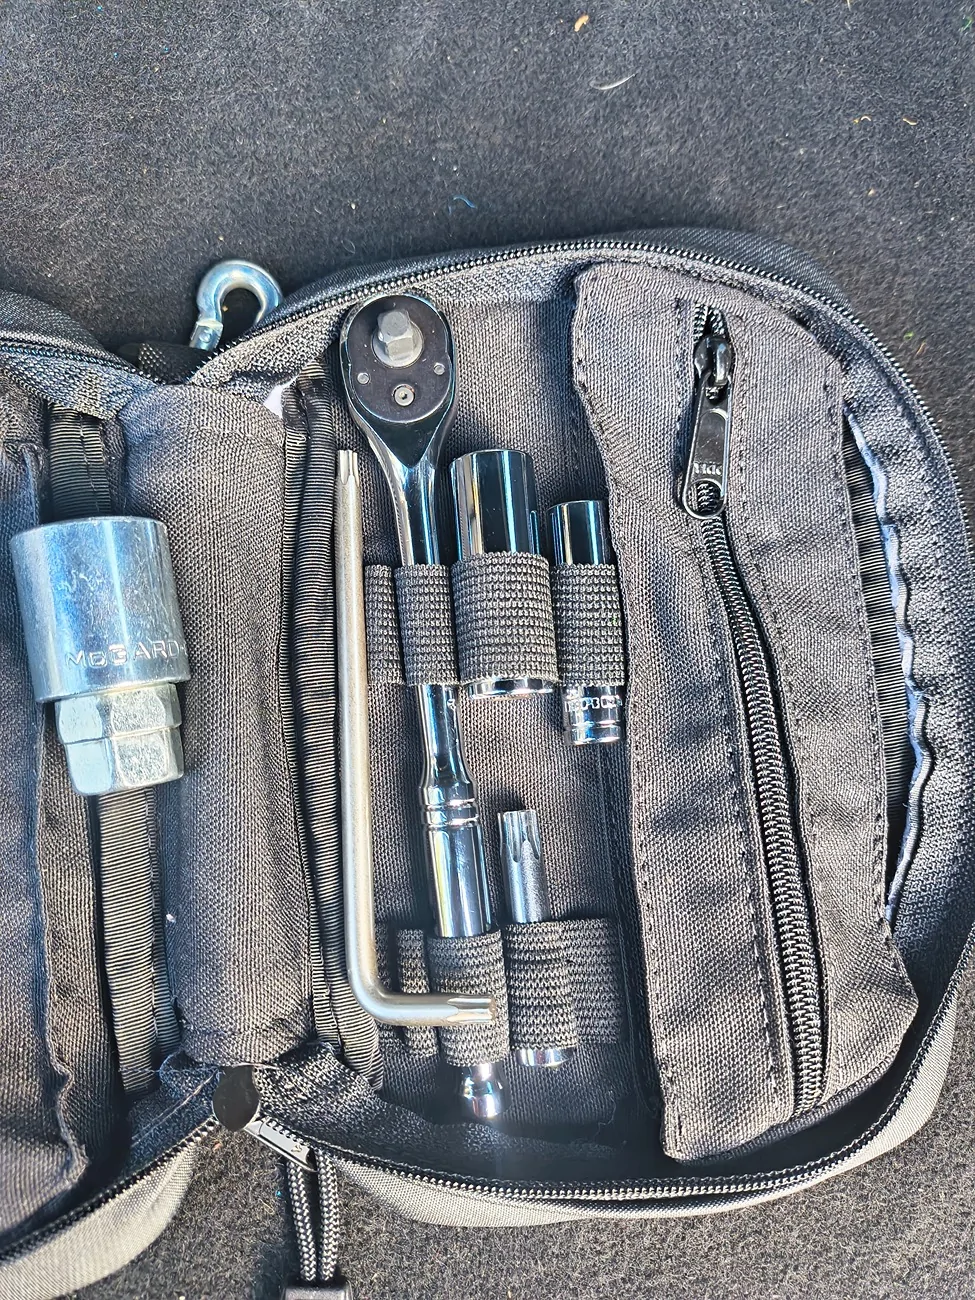
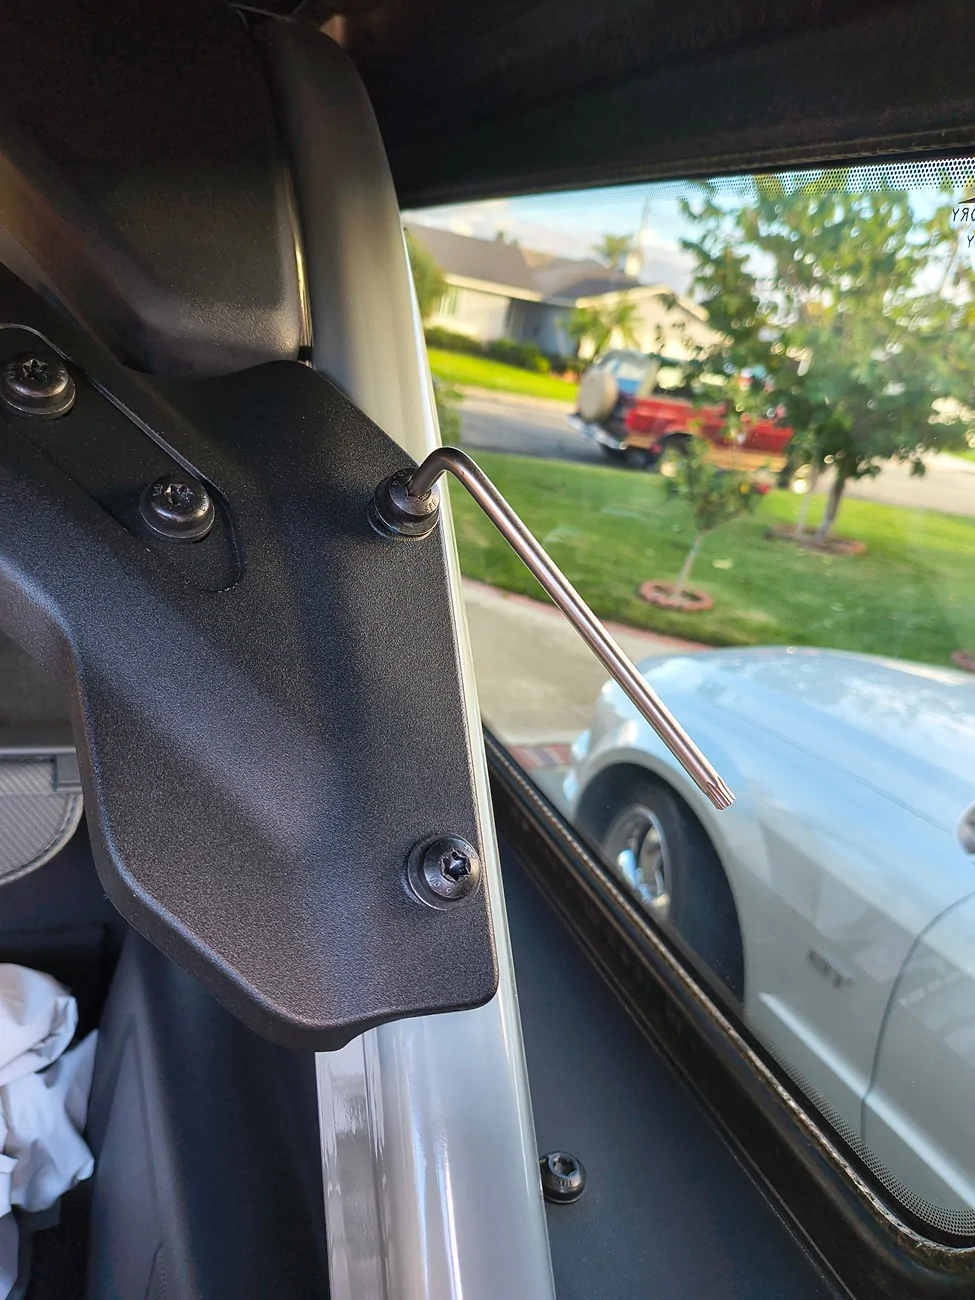
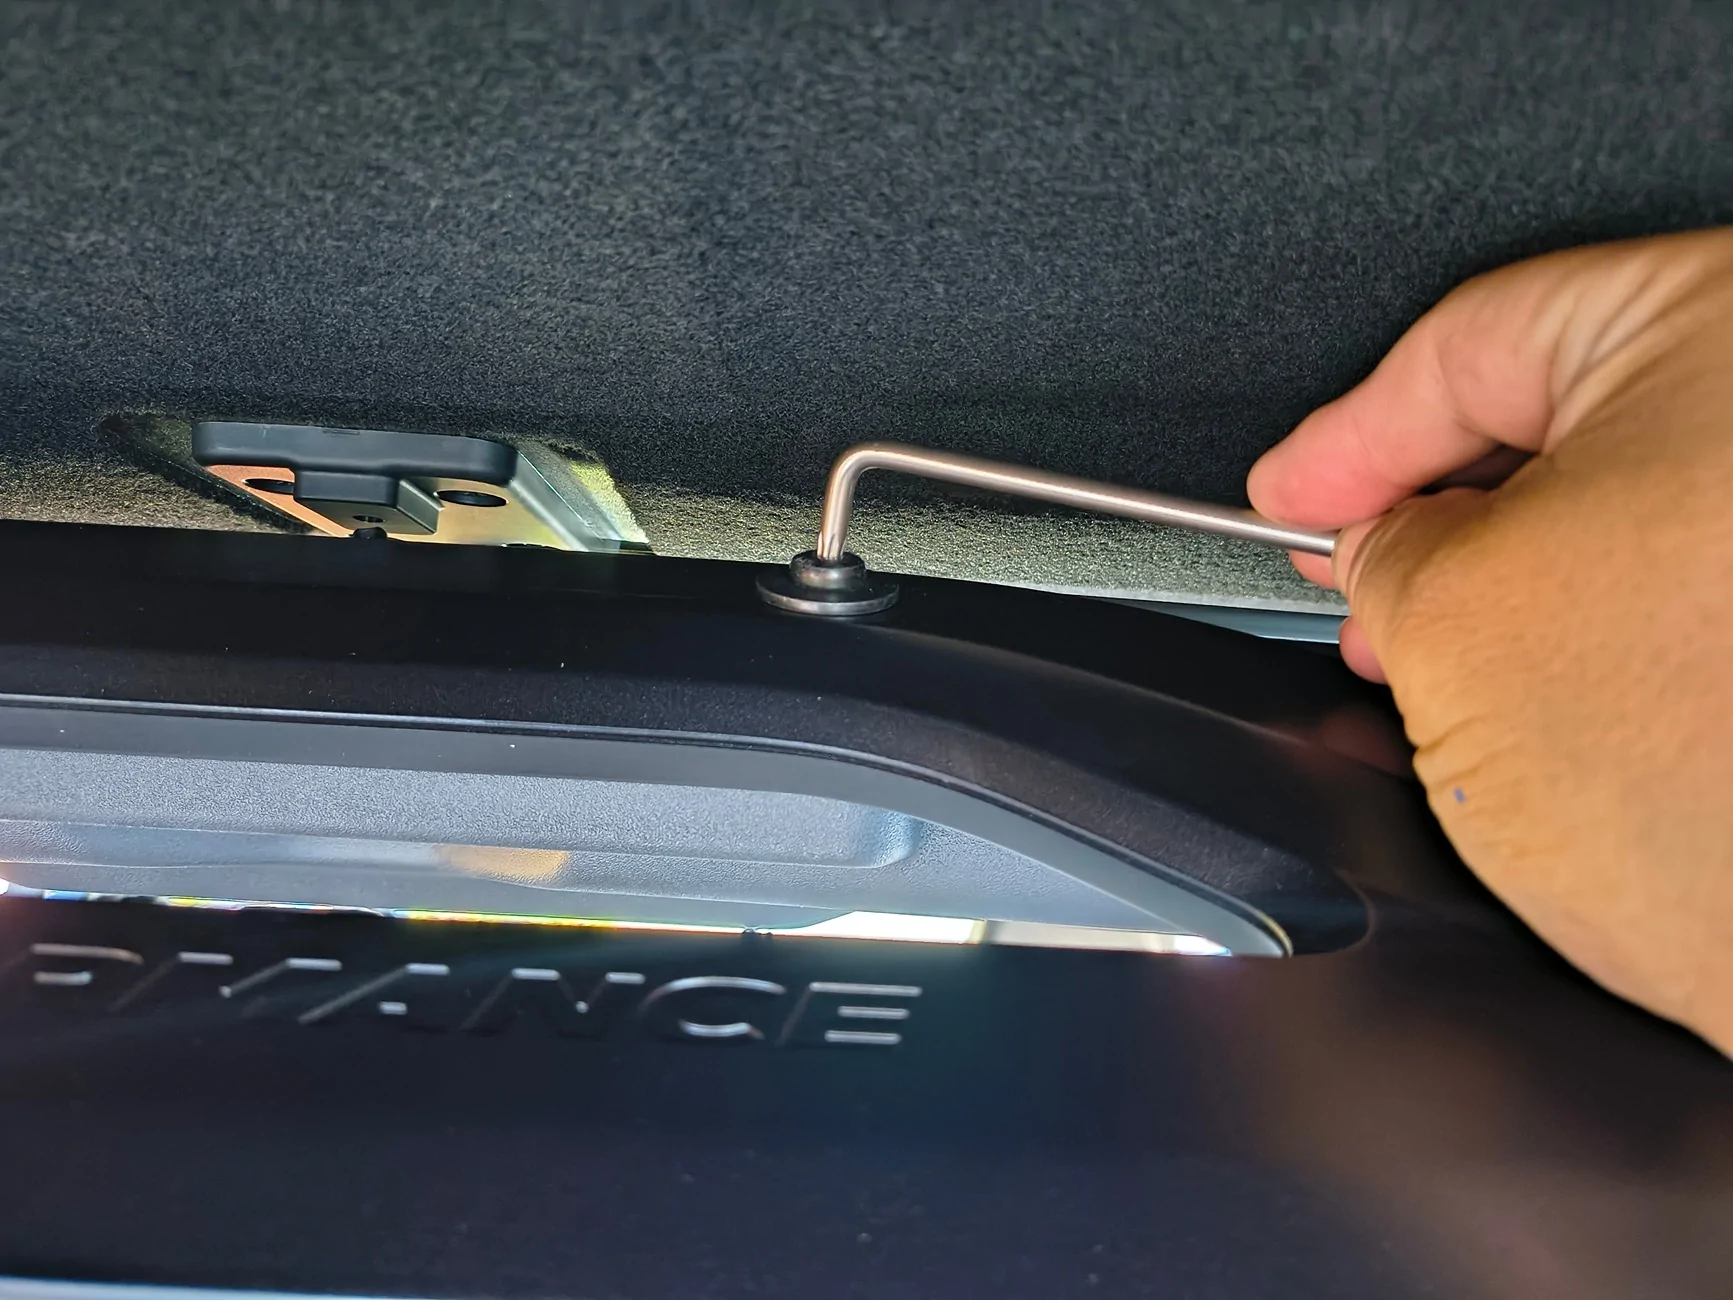
Your door tool kit has an "L" Torx that makes this install a snap.

IMG_20260101_152347165_HDR.webp

IMG_20260101_152412307_HDR.webp

IMG_20260101_152905655_HDR.webp
Mine is arriving soon. And I just put my Roof and doors back on (got too hot in Studio City!) - Do I need to re-remove roof (rear cap) to do this?
 
OP
OP
Robs94Bronco

Robs94Bronco

Badlands
Well-Known Member
First Name
Rob
Joined
Dec 10, 2025
Threads
28
Messages
237
Reaction score
375
Location
Orange County
Vehicle(s)
2023 Bronco Badlands Sasquatch 2.7L, 1994 Bronco Eddie Bauer 5.8L
Your Bronco Model
Badlands
Clubs
 
Mine is arriving soon. And I just put my Roof and doors back on (got too hot in Studio City!) - Do I need to re-remove roof (rear cap) to do this?
I show the install with the top on.... But since you're getting the B-brace, you may need to remove the the two front tiles.
 

BlueBetty

Badlands
Active Member
First Name
Jason Lee
Joined
Jun 14, 2026
Threads
1
Messages
30
Reaction score
18
Location
Studio City, CA
Vehicle(s)
Bronco
Your Bronco Model
Badlands
Yeah, I saw that in you photo (rear cap WAS on) but didn't know if it was a PITA b/c of that? And/or if you ended up removing the rear cap after all to finish the job. Thanks.
 

MDH

Big Bend
Well-Known Member
First Name
Mark
Joined
Mar 6, 2024
Threads
30
Messages
213
Reaction score
85
Location
Southern California
Vehicle(s)
2017 mazda6
Your Bronco Model
Big Bend
Yeah, I saw that in you photo (rear cap WAS on) but didn't know if it was a PITA b/c of that? And/or if you ended up removing the rear cap after all to finish the job. Thanks.
You don’t need to remove the rear cap. But as I recall, you do need a fairly flush (thin) ratcheting wrench and bit for a couple of the top bolts because there isn’t a lot of room.
 

Sponsored
OP
OP
Robs94Bronco

Robs94Bronco

Badlands
Well-Known Member
First Name
Rob
Joined
Dec 10, 2025
Threads
28
Messages
237
Reaction score
375
Location
Orange County
Vehicle(s)
2023 Bronco Badlands Sasquatch 2.7L, 1994 Bronco Eddie Bauer 5.8L
Your Bronco Model
Badlands
Clubs
 
Yeah, I saw that in you photo (rear cap WAS on) but didn't know if it was a PITA b/c of that? And/or if you ended up removing the rear cap after all to finish the job. Thanks.
Installed 100% with top on. Number one advice is to thread all bolts by hand...start all of them 1/4 of the way in then once that's done hand tighten as far as you can go. (I had to chase two of the inserts with a tap). I finished the top bolts with the L in the door kit.
 
  • Like
Reactions: MDH

MDH

Big Bend
Well-Known Member
First Name
Mark
Joined
Mar 6, 2024
Threads
30
Messages
213
Reaction score
85
Location
Southern California
Vehicle(s)
2017 mazda6
Your Bronco Model
Big Bend
Installed 100% with top on. Number one advice is to thread all bolts by hand...start all of them 1/4 of the way in then once that's done hand tighten as far as you can go. (I had to chase two of the inserts with a tap). I finished the top bolts with the L in the door kit.

This is the right way to do it. Using the L shaped torx wrench from the door kit. I did it a different way which worked but was harder, and only after the fact did I realize that little L wrench would’ve been perfect.
Sponsored


Top