
Sponsored

[How-To] Subwoofer Upgrade - Replacing/Upgrading the Factory Sub

Brian_B

Big Bend
Well-Known Member
First Name
Brian
Joined
Sep 14, 2023
Threads
62
Messages
8,513
Reaction score
15,099
Location
Central CA
Vehicle(s)
'23 BB 4dr 7MT, '22 BSport OBX, '87 B-II XL
Your Bronco Model
Big Bend
Clubs
 
I currently have the 6.75 kicker in there now. Was going to take a dremel to it and try and get an 8 inch in there. The kicker shallow 8 apparently works, but getting the right cutout diameter is getting difficult to find. That kicker 8 is one of the smallest I’ve seen. The focal p20 fse is very similar and very slightly more cut out diameter. How snug is that kicker 8 after modifying the enclosure for it to fit
Not a bad fit - I used the Kicker 48CWRT82

I would use a dremel to open the hole out - I tried a jigsaw but it was a bit too rough and the plastic a bit too brittle, it chipped off in a few spots. Not bad enough that it compromised the mount, thankfully. I just used the cardboard from the box the sub shipped in as a template.

You want the speaker set forward on the enclosure - not centered exactly on the original hole - if you have it too far rear-ward, there is a lip that it could catch on and not sit flush.

The cutting is not hard, the plastic isn't thick. Putting in the new screw mounts (with speed nuts) was harder than cutting the hole, as there are some internal gussets/braces that you have to grnd down a bit to get speed nuts in there. If you don't want to use speed nuts, well, you don't have to, but the plastic is really thin and there isn't much for a screw to bite on. Again, not hard, a dremel makes quick and easy work of it.

Once it drops in, the enclosure looks like it was supposed to have an 8" in it from the first place.
Sponsored

 

Sluggz

Badlands
Well-Known Member
First Name
Th
Joined
Jul 2, 2024
Threads
9
Messages
82
Reaction score
20
Location
Nc
Vehicle(s)
Bronco badlands
Your Bronco Model
Badlands
Not a bad fit - I used the Kicker 48CWRT82

I would use a dremel to open the hole out - I tried a jigsaw but it was a bit too rough and the plastic a bit too brittle, it chipped off in a few spots. Not bad enough that it compromised the mount, thankfully. I just used the cardboard from the box the sub shipped in as a template.

You want the speaker set forward on the enclosure - not centered exactly on the original hole - if you have it too far rear-ward, there is a lip that it could catch on and not sit flush.

The cutting is not hard, the plastic isn't thick. Putting in the new screw mounts (with speed nuts) was harder than cutting the hole, as there are some internal gussets/braces that you have to grnd down a bit to get speed nuts in there. If you don't want to use speed nuts, well, you don't have to, but the plastic is really thin and there isn't much for a screw to bite on. Again, not hard, a dremel makes quick and easy work of it.

Once it drops in, the enclosure looks like it was supposed to have an 8" in it from the first place.
This maybe a stupid question but do you drill a hole to fit the speed nuts in? I am a little confused how you mount them
 

Brian_B

Big Bend
Well-Known Member
First Name
Brian
Joined
Sep 14, 2023
Threads
62
Messages
8,513
Reaction score
15,099
Location
Central CA
Vehicle(s)
'23 BB 4dr 7MT, '22 BSport OBX, '87 B-II XL
Your Bronco Model
Big Bend
Clubs
 
This maybe a stupid question but do you drill a hole to fit the speed nuts in? I am a little confused how you mount them
I think the kickers actually come with a handful of speed nuts with screws if I'm not mistaken. They are common at any hardware store if not.

Basically, you get the sub set like you want (if you care about the logo or whatever being right side up). Either mark the screw holes, or drill them with a bit a couple sizes smaller than your screws.

Then pull the speaker back out. Where your marks/holes are, you slide the speednut clips in. There are some spots where a gusset/bracket will be in the way on the backside and you just need to grind/file it flat enough for the clip to slip in.

Then I put a small bead of silicone or RTV on the backside of the sub where it mates with the enclosure - some speakers will come with a foam gasket to use - I don't think the kickers did though. Put the sub back in the hole and screw it in - making sure the screws engage with the speed nuts.

The speed nuts give the screws something to hold onto without stripping the really thin plastic out. The silicone partially helps to hold it in place, partially to help prevent rattles/buzzing, and partially helps to establish a seal (especially important if you are sealing the enclosure)

Ford Bronco [How-To] Subwoofer Upgrade - Replacing/Upgrading the Factory Sub 1722712065371-ra
 

Sluggz

Badlands
Well-Known Member
First Name
Th
Joined
Jul 2, 2024
Threads
9
Messages
82
Reaction score
20
Location
Nc
Vehicle(s)
Bronco badlands
Your Bronco Model
Badlands
I think the kickers actually come with a handful of speed nuts with screws if I'm not mistaken. They are common at any hardware store if not.

Basically, you get the sub set like you want (if you care about the logo or whatever being right side up). Either mark the screw holes, or drill them with a bit a couple sizes smaller than your screws.

Then pull the speaker back out. Where your marks/holes are, you slide the speednut clips in. There are some spots where a gusset/bracket will be in the way on the backside and you just need to grind/file it flat enough for the clip to slip in.

Then I put a small bead of silicone or RTV on the backside of the sub where it mates with the enclosure - some speakers will come with a foam gasket to use - I don't think the kickers did though. Put the sub back in the hole and screw it in - making sure the screws engage with the speed nuts.

The speed nuts give the screws something to hold onto without stripping the really thin plastic out. The silicone partially helps to hold it in place, partially to help prevent rattles/buzzing, and partially helps to establish a seal (especially important if you are sealing the enclosure)

1722712065371-ra.jpg
Oh ok that makes more sense. Thanks man
 

AzGrayHeritage

Heritage
Well-Known Member
First Name
Keevan
Joined
Jul 10, 2024
Threads
9
Messages
212
Reaction score
210
Location
Georgia
Vehicle(s)
Azure Gray Heritage 24
Your Bronco Model
Heritage
This maybe a stupid question but do you drill a hole to fit the speed nuts in? I am a little confused how you mount them
Can you post a pic of the finished product. I am struggling with using an 8 or doing the Stinger solution. How do you like the performance of the 8?
 

Sponsored

Sluggz

Badlands
Well-Known Member
First Name
Th
Joined
Jul 2, 2024
Threads
9
Messages
82
Reaction score
20
Location
Nc
Vehicle(s)
Bronco badlands
Your Bronco Model
Badlands
Can you post a pic of the finished product. I am struggling with using an 8 or doing the Stinger solution. How do you like the performance of the 8?
What part are you struggling with? I believe the 8 would be good for most people. It provides great response and the musway mws822 is a very musical sub. I am struggling with rattling in that sub area though. I might upgrade to the 12 inch tw3 from jl and a tailgate mount. I kinda want the ability to have massive bass when I want to, and I don’t think I will ever be able to solve the rattle from where the sub is at now
 

CartierChiro

Base
Well-Known Member
First Name
Xavier
Joined
Aug 11, 2022
Threads
5
Messages
72
Reaction score
35
Location
Watts, California
Vehicle(s)
2016 Kia Forte, '96 Impala, '64 Impala
Your Bronco Model
Base
Clubs
 
What part are you struggling with? I believe the 8 would be good for most people. It provides great response and the musway mws822 is a very musical sub. I am struggling with rattling in that sub area though. I might upgrade to the 12 inch tw3 from jl and a tailgate mount. I kinda want the ability to have massive bass when I want to, and I don’t think I will ever be able to solve the rattle from where the sub is at now
To be clear where you able to fit an 8” musway mws822 sub in the OEM. Sub enclosure?
 

Sluggz

Badlands
Well-Known Member
First Name
Th
Joined
Jul 2, 2024
Threads
9
Messages
82
Reaction score
20
Location
Nc
Vehicle(s)
Bronco badlands
Your Bronco Model
Badlands
To be clear where you able to fit an 8” musway mws822 sub in the OEM. Sub enclosure?
I probably could use a dremel and open it up enough too, but I opted for the geashade 8 inch enclosure. Still had to expand the hole but wasn’t much and was prettty easy
 

CartierChiro

Base
Well-Known Member
First Name
Xavier
Joined
Aug 11, 2022
Threads
5
Messages
72
Reaction score
35
Location
Watts, California
Vehicle(s)
2016 Kia Forte, '96 Impala, '64 Impala
Your Bronco Model
Base
Clubs
 
I probably could use a dremel and open it up enough too, but I opted for the geashade 8 inch enclosure. Still had to expand the hole but wasn’t much and was prettty easy
im interested in getting that sub so if you part ways with it soon id be willing to take it off of your hands.
 

Sluggz

Badlands
Well-Known Member
First Name
Th
Joined
Jul 2, 2024
Threads
9
Messages
82
Reaction score
20
Location
Nc
Vehicle(s)
Bronco badlands
Your Bronco Model
Badlands
im interested in getting that sub so if you part ways with it soon id be willing to take it off of your hands.
It’s a great sub, and it hits hard. Way more musical than the kicker. It won’t shake the block though, and I think I’m looking for something that can do that every now and then. I’ll definately let you know when I upgrade. I need a little break from upgrading the audio in my car though so it’ll be a month or 2
 

Sponsored

Gorgar84

Outer Banks
Member
First Name
Michael
Joined
Jan 17, 2023
Threads
4
Messages
17
Reaction score
5
Location
WV
Vehicle(s)
2023
Your Bronco Model
Outer Banks
I am working on putting the 8" kicker and 5001 in my 23 B&O. On the factory amp there are three plugs that feed the amp. Does anyone make a pigtail adapter to not have to cut the factory harness? I assume all the wires needed are in these plugs.
Thanks
 
OP
OP
RagnarKon

RagnarKon

Badlands
Well-Known Member
First Name
Bryan
Joined
Aug 5, 2021
Threads
41
Messages
5,464
Reaction score
14,513
Location
New England
Vehicle(s)
Ford Bronco, Escape, Focus
Your Bronco Model
Badlands
Clubs
 
I am working on putting the 8" kicker and 5001 in my 23 B&O. On the factory amp there are three plugs that feed the amp. Does anyone make a pigtail adapter to not have to cut the factory harness? I assume all the wires needed are in these plugs.
Thanks
You’ll want the “High-Level Input Harness” kit—currently Kit 13 (though the kit numbers change).

https://plugnplaykits.com/products/2021-and-up-bronco-bronco-sport-with-b-o-premium-sound

And then of course you’ll have to figure out where to mount the 500.1, and you’ll have to run power for the 500.1 as well.
 

Gorgar84

Outer Banks
Member
First Name
Michael
Joined
Jan 17, 2023
Threads
4
Messages
17
Reaction score
5
Location
WV
Vehicle(s)
2023
Your Bronco Model
Outer Banks
I finally found it, thank you
 

Gorgar84

Outer Banks
Member
First Name
Michael
Joined
Jan 17, 2023
Threads
4
Messages
17
Reaction score
5
Location
WV
Vehicle(s)
2023
Your Bronco Model
Outer Banks
Anyone with a B&O system tell me where they got power for the remote wire?
TYIA
 

swamp2

Raptor
Well-Known Member
Joined
Dec 19, 2022
Threads
156
Messages
4,124
Reaction score
4,252
Location
San Diego
Vehicle(s)
911 Carrera S / 4Runner TRD Pro
Your Bronco Model
Raptor
Some overlap with the OP and other posts but wanted to add my details on the mechanical approach I took here for the KK 500.1 and Kicker 8" sub.
  1. Don't cut the larger mounting hole concentric with the factory hole. Offsetting it so the new driver clears the front protrusions in the enclosure prevents any required cutting/removing of these main body protrusions and repairing/plugging them later. I cut with a side cutting drywall bit in a dremel with the drywall router type base on the dremel tool.
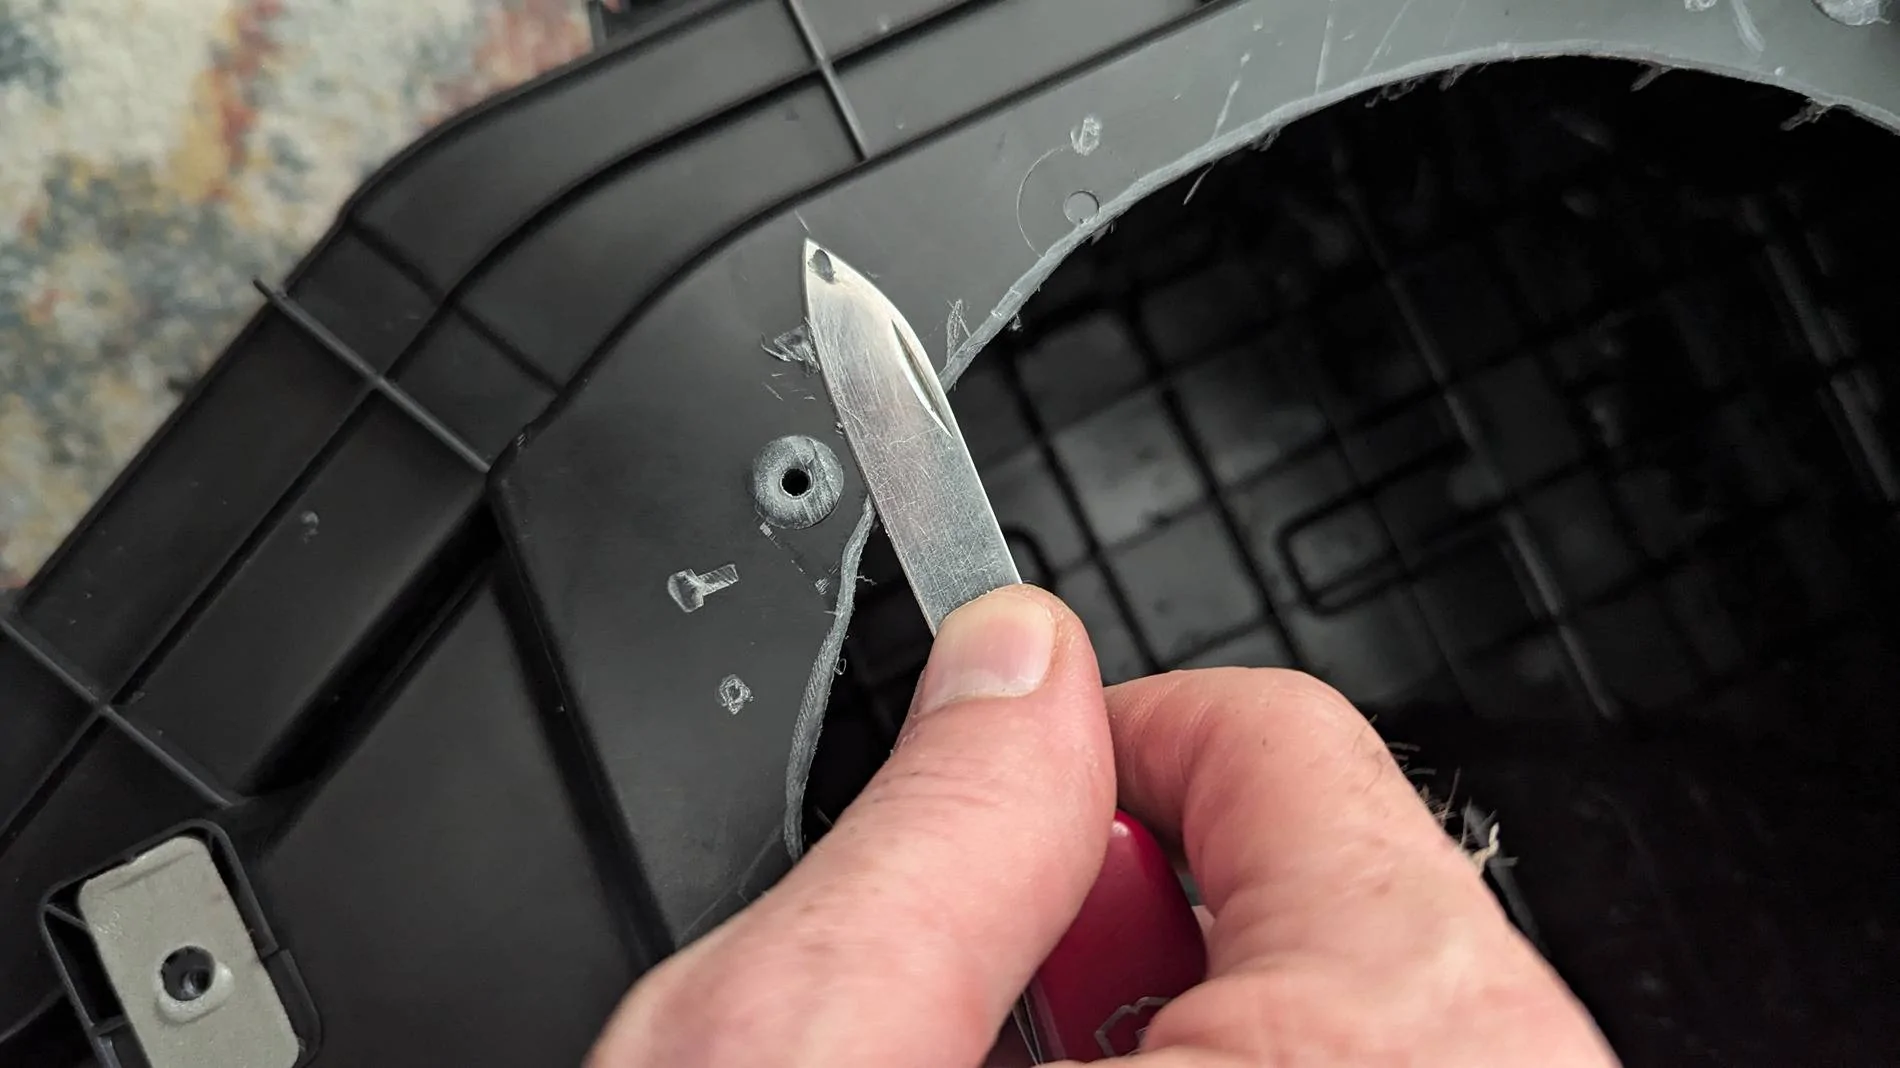
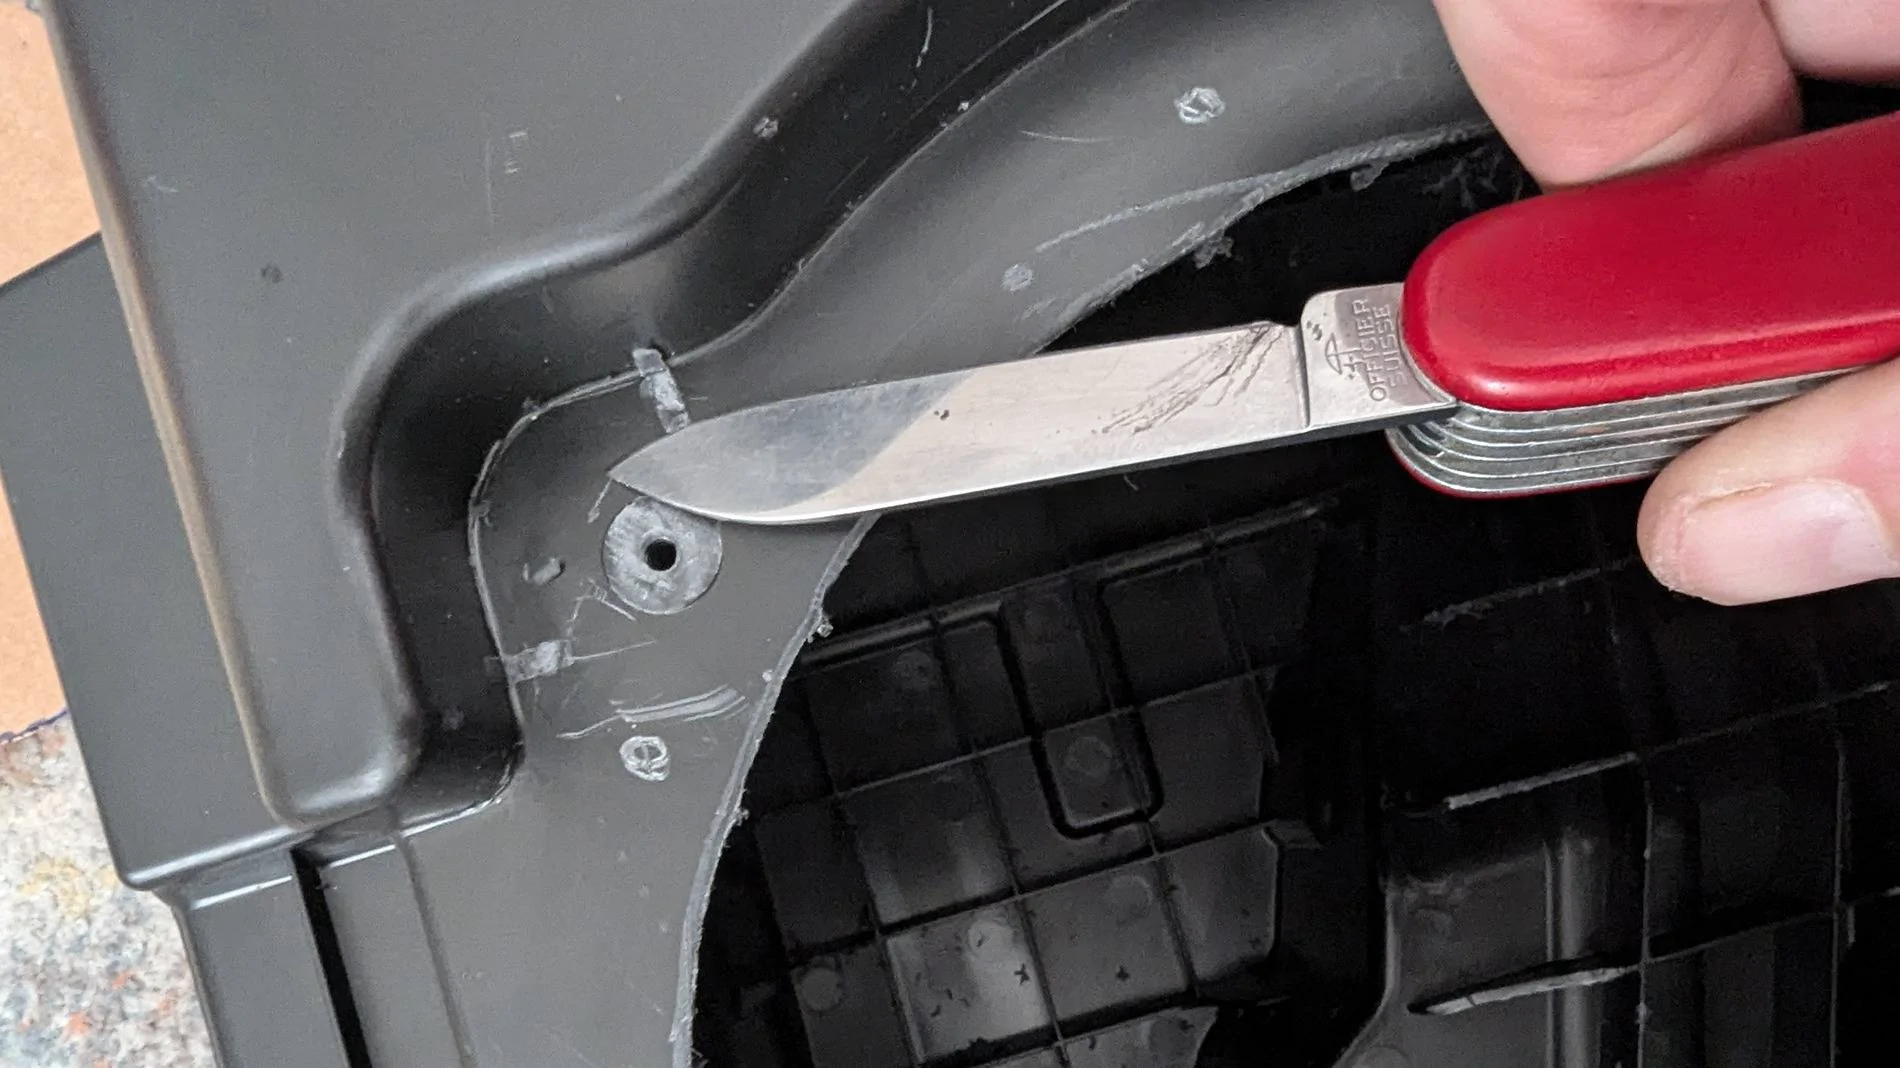
  2. Shave off the small protrusions from the factory screw holes and various tabs/stiffeners that prevent a totally flat mounting of the new sub.
    PXL_20240913_223958549.jpg
    PXL_20240913_224338926.jpg
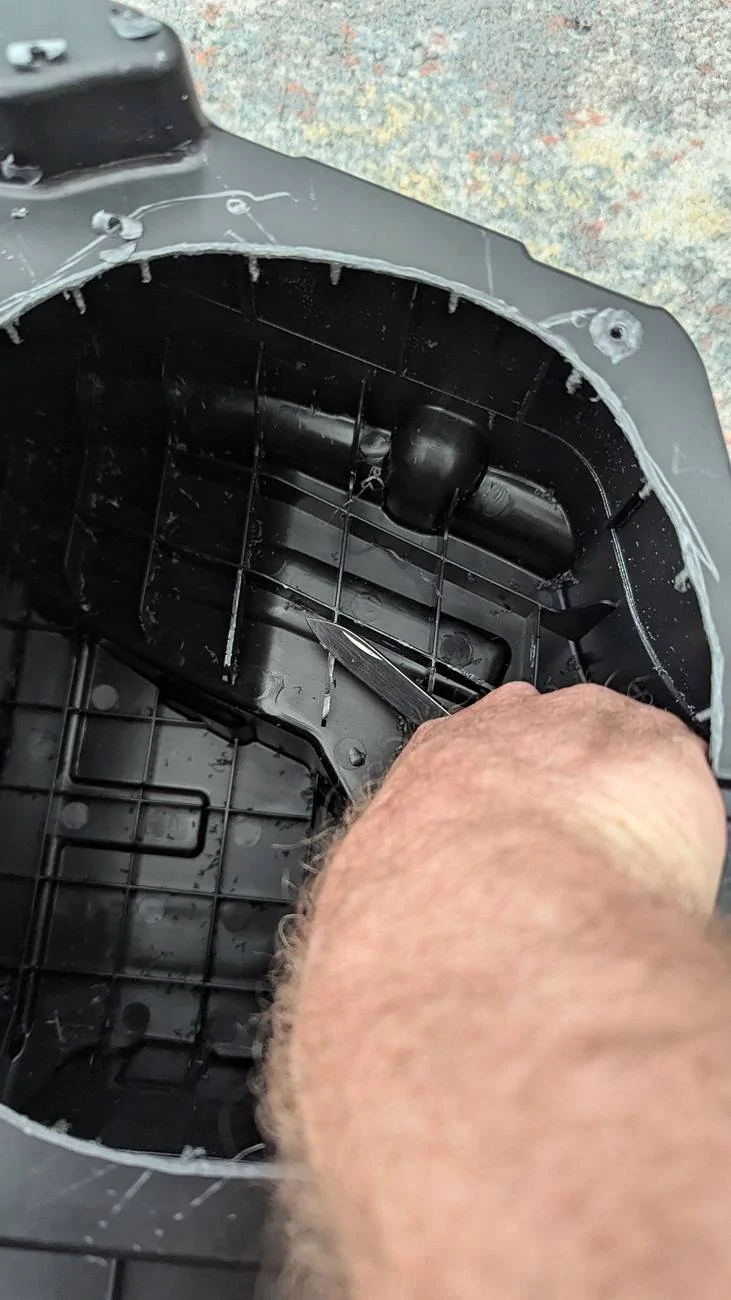
  3. The standard depth 8" sub (48CWR84) is just a hair too deep. Easily remedied by taking a sharp knife or box cutter to a couple of the ribs on the back wall.
    PXL_20240913_224014161.jpg
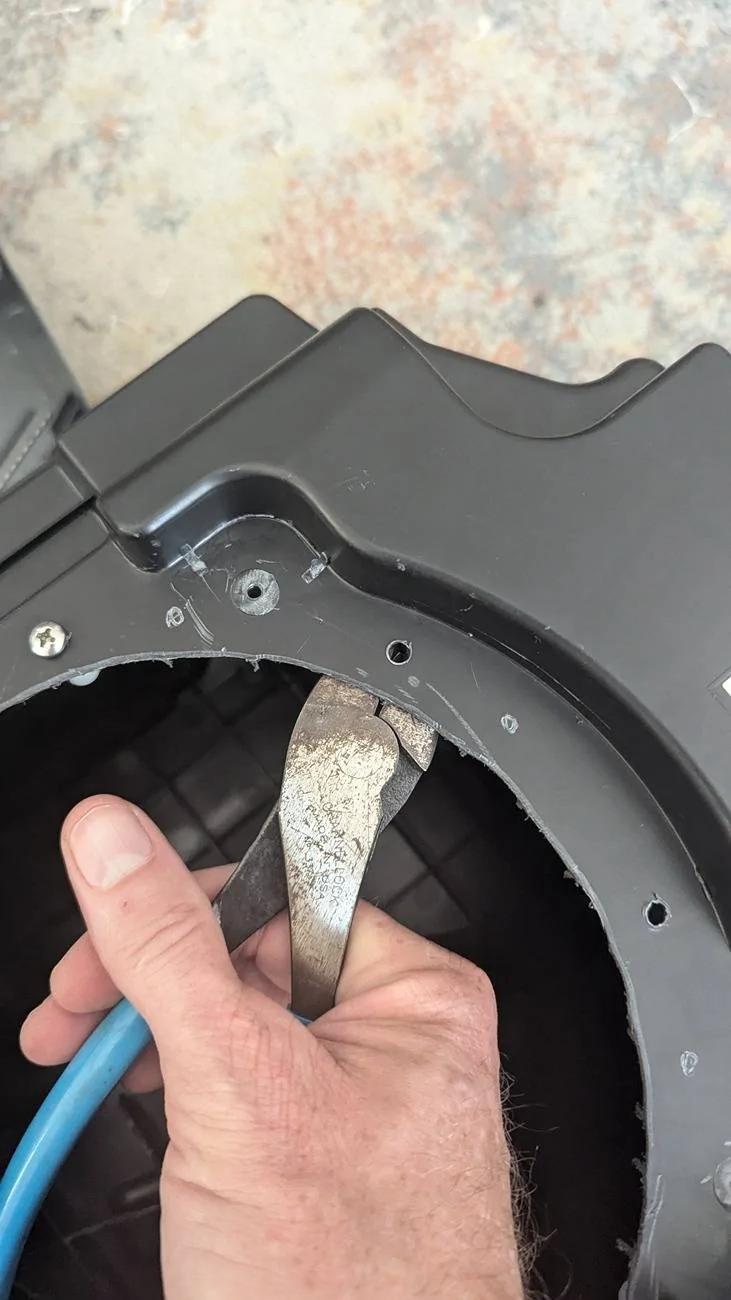
  4. Trim any interfering ribs away from your new mounting holes with wire cutters.
    PXL_20240914_183710878.jpg
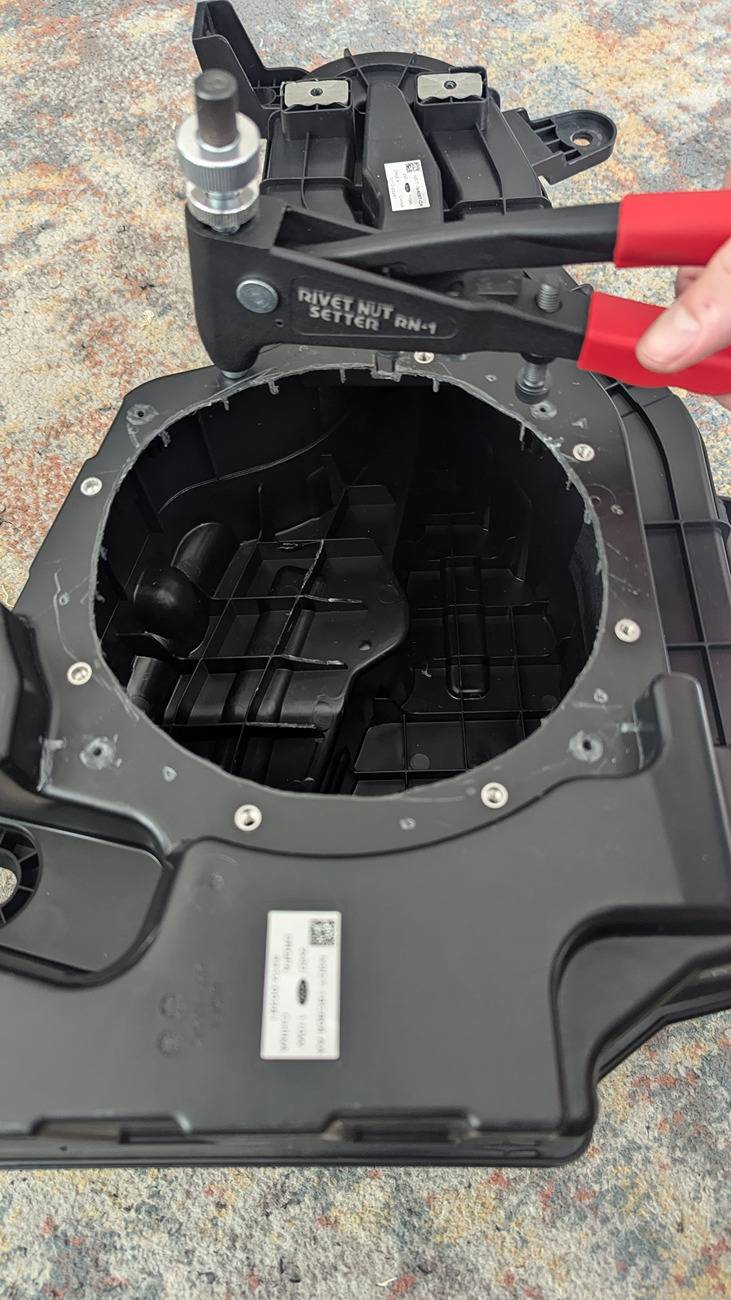
  5. The plastic case is very epoxy "resistant" so I used #8 aluminum rivnuts for mounting.
    PXL_20240914_215139206.jpg

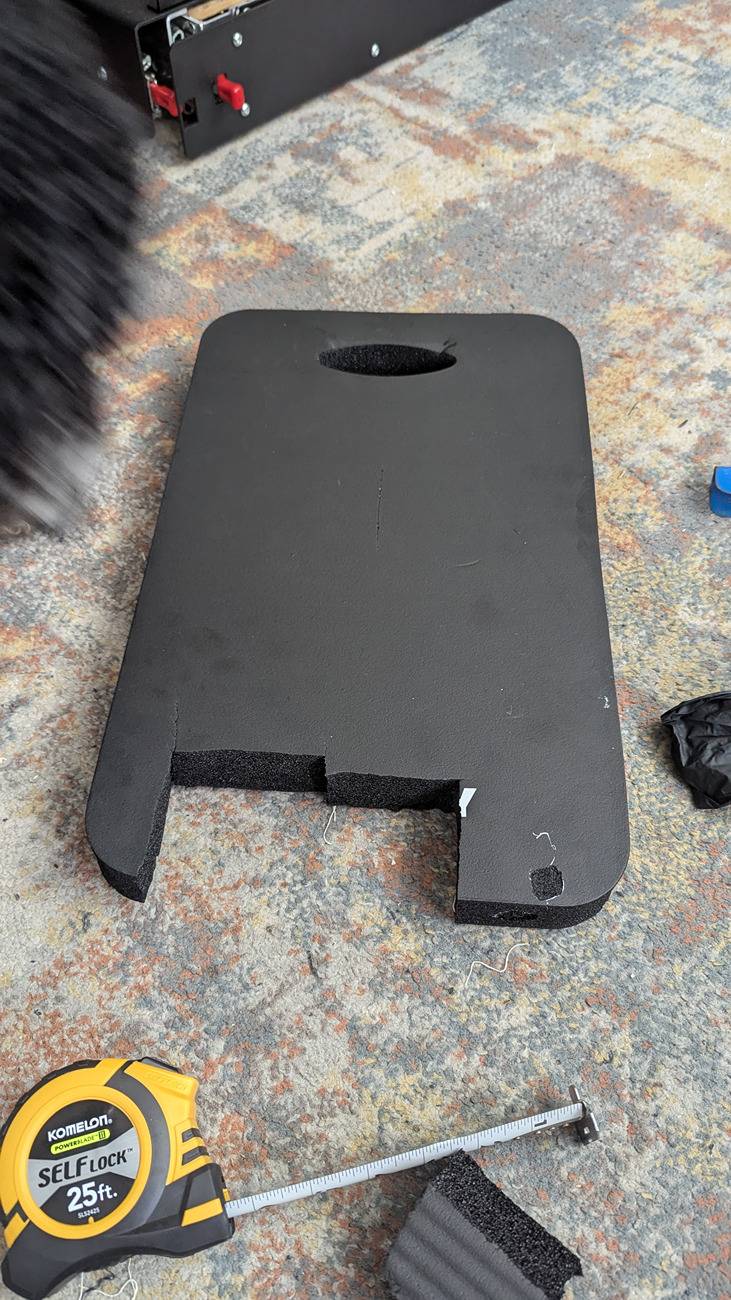
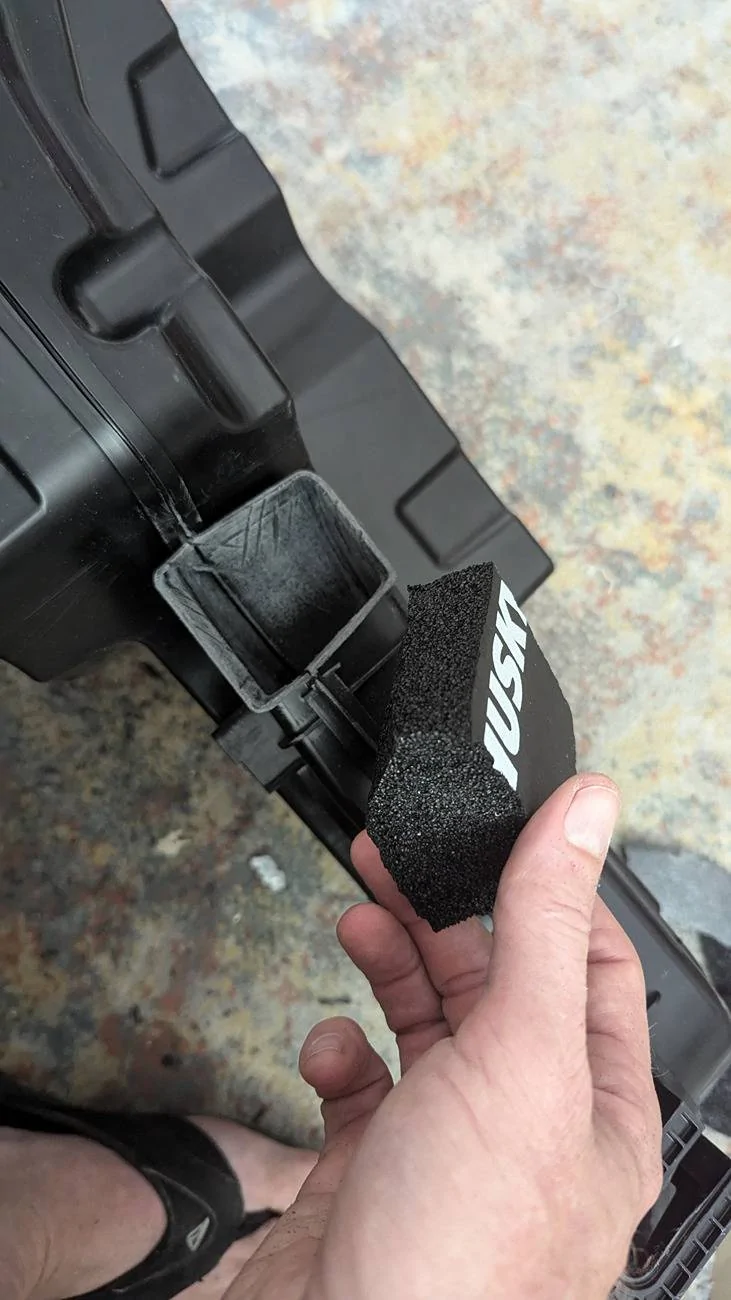
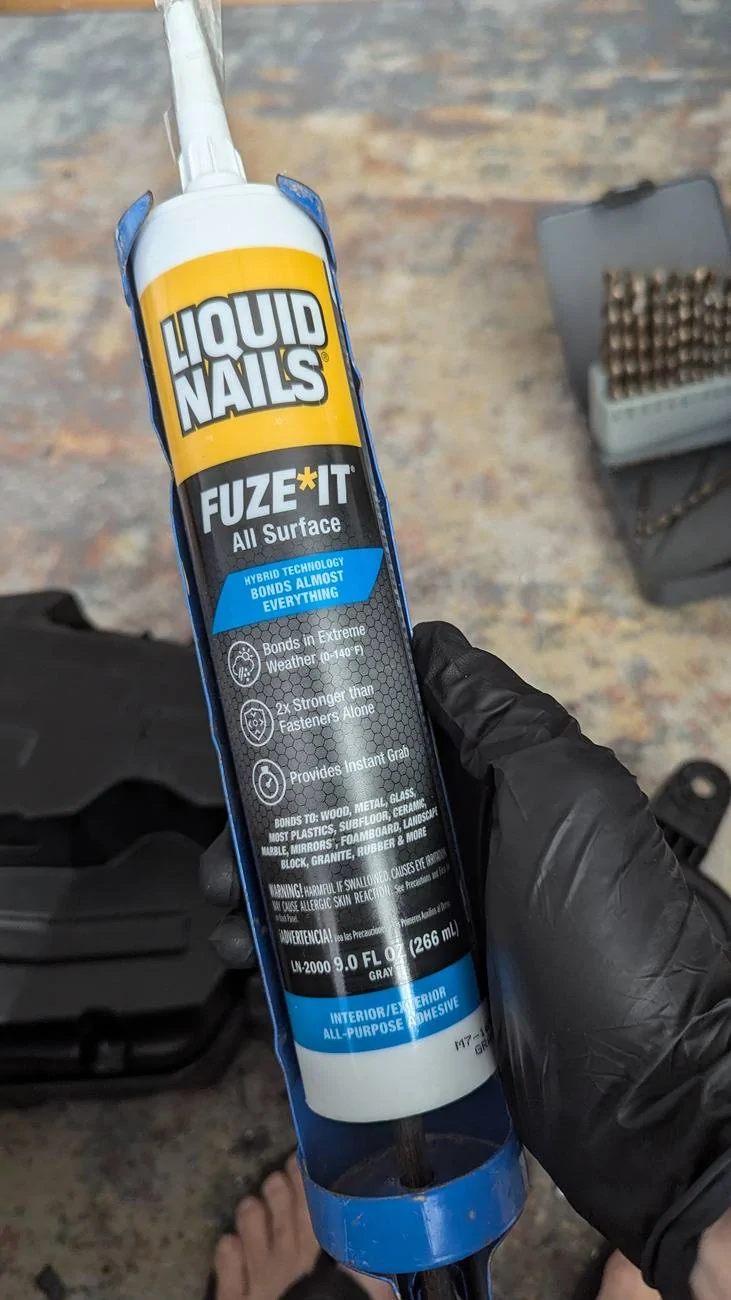
  6. I sealed the port (and stuffed the enclosure with poly fill). I used a Husky brand closed cell foam knee pad from Home Depot and Liquid Nails Fuze It. Fuze It is supposed to adhere to just about any substrate. Due to the poor adhesion of a dedicated plastic epoxy, I actually tested the adhesion of Fuze It to both the foam (stronger than the foam) and to the enclosure (decent, no where near a well bonded epoxy, but good enough for sealing). I cut and oversize piece of foam, sanded the inside of the terminus of the port with 60 grit and scared it with a dremel cut off wheel, cleaned everything with IPA, slathered up the foam with Fuze It and held it in place with clear packaging tape while the Fuze It cured. Worked great.
    PXL_20240915_202908520.jpg
    PXL_20240915_202356705.jpg
    PXL_20240915_202924551.jpg
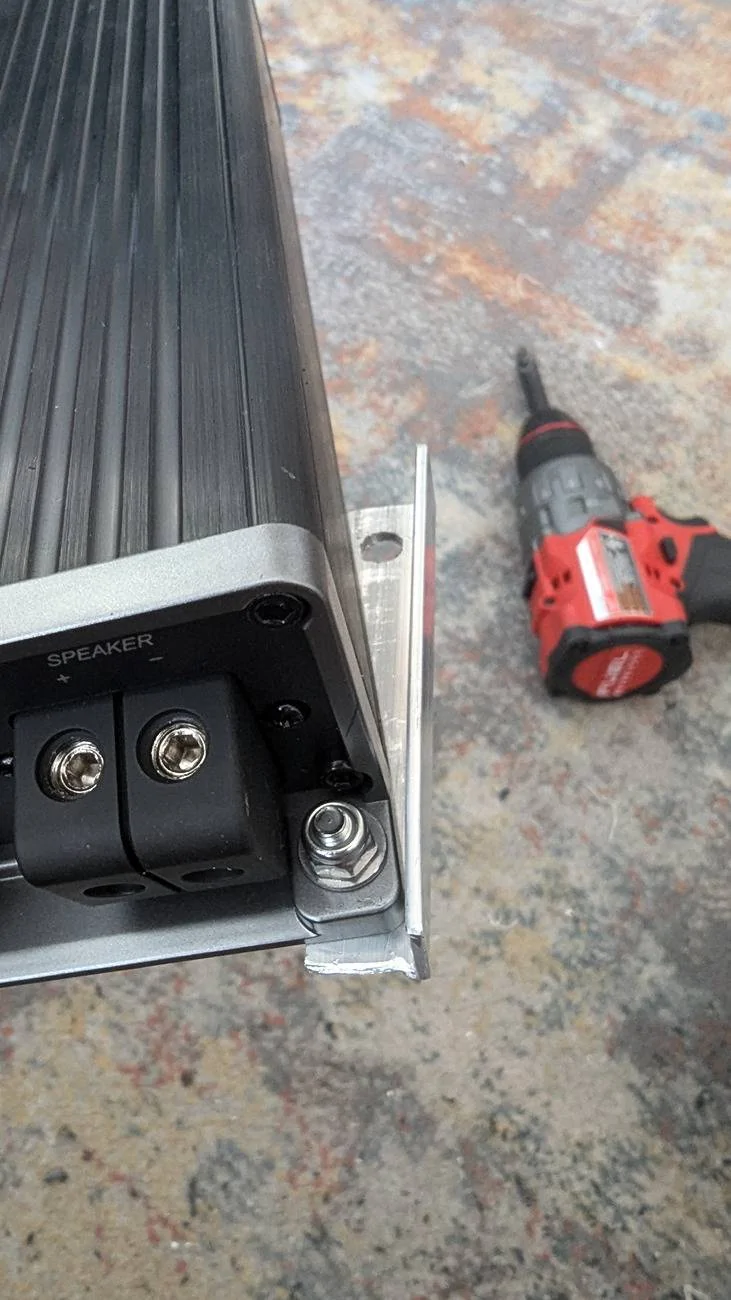
  7. Don't struggle making custom plastic mounting plates for the amp and then struggle more trying to get perfect alignment and clearing the large plastic cover panel (or denting the cover panel badly as some did...). Mount the amp using:
    1. Standard upper left enclosure mounting hole, through the existing upper left amp base plate hole. Have the power side of the amp face the woofer itself. Cables will be tight but will fit without undue kinks/stress.
    2. Standard lower left enclosure mounting hole and simply drill a new hole in the amp base/mounting plate to line up.
    3. An offset aluminum L beam (hobby or good hardware store) and the existing enclosure upper right mounting hole.
      PXL_20240914_195348192.jpg
    4. A custom fastener "stack", based on a threaded rod, through the existing lower right amplifier mounting hole through a drilled hole, all the way through the enclosure near the plugged port. From near side toward outside of the truck the fastener stack is: #8 nylock nut, #8 washer, 3.75" long #8 threaded rod, #8 fender washer (much larger OD than a standard washer), 2nd #8 nylock nut. I'll try to post a picture to better explain this.
    5. P.S. Don't try to get away with just 3 mounting points for the amp. I tried only #1-#3 above and she rattled good, hence I added the threaded rod solution in #4.
  8. Wiring colors courtesy of @6inthefamily here.
    1. White with orange stripe = upfitter switch (dont use, tape off)
    2. Yellow with red stripe = power (dont use, tape off, ran new 8 guage power wire)
    3. Violet with green stripe = speaker positive
    4. Green with white stripe = speaker negative
    5. Black with green stripe = ground (don't use)
    6. Yellow with violet stripe = remote turn on
  9. The speaker positive on the vehicle harness should be wired to both the L AND R amplifier positive inputs, similarly for the negatives.
She really moves some air and provides much more feel to the bass as compared to stock. I was definitely cursing trying to use my snap ring pliers trick to get the huge 8 Ga cable through the firewall grommet, but it was definitely worth it.
Sponsored


Top