- Thread starter
- #1
First I test the lights to see the draw of amps. in the first 4 pictures you can see the load of the rough county light and the auxbeam as singles. Now I know what I'm dealing with I can use the best Fuse and size wire for the task. ALWAYS over size your wire some and keep you fuses just over the amp load of your circuit , for each of these lights , being that I'm running all positives and negatives back to a distribution box , I used a 5 amp fuse for each light. I chose 14 gauge wire which is way overkill but better safe than sorry. The other reason to use heavier wire is just in case you need to re purpose that circuit for something else that draws more , then you do not have to run new wire , just redirect what you already have. 14 gauge wire is capable of handling 10 amps less than 10 feet , most of my runs are in between 6 to 10 feet. I do have a foot or two coiled up , it could be shorter. The hottest lights I have are about 4 to 5 amps draw each which would be my 4 inch Nilights and the Auxbeam amber fog lights on the bull bar. Now here is another reason to run each light as a dedicated circuit. It allows you to use small diameter wire. If I was to say wire all 4 positives together on the fog lights on the bull bar and all negatives together and only have two wires going to my Auxbeam switch panel. That would be about 18.5 amps draw. Which would put me WAY over what 14 gauge can handle and ironically enough , the lights themselves only have about 16 or 18 gauge from the factory. It would be a huge fire risk. SO HEED THIS WARNING , run dedicated circuits to each light , the manufacturers expect that or else they would use a much heavier gauge wire from the factory on each light harness. Anyhow here is the lights and the amp draw on them in the bumper.

Next photo will show the start of the wiring , I first lay out the distance I roughly will need , then I use these solder connectors to get a solid connection. I trim back about a quarter inch on both sides then I push in from each side and I push the wire together so the strands kind of intertwine with each other and I center it over the solder area. Then I heat with a two stage heat gun , first I do the ends to seal the wire in place on the lowest heat setting , then for a few seconds I put it over the solder area and turn the heat to the second stage which almost immediately melts the solder. After a few seconds, I then shut it off and let the joint cool down.
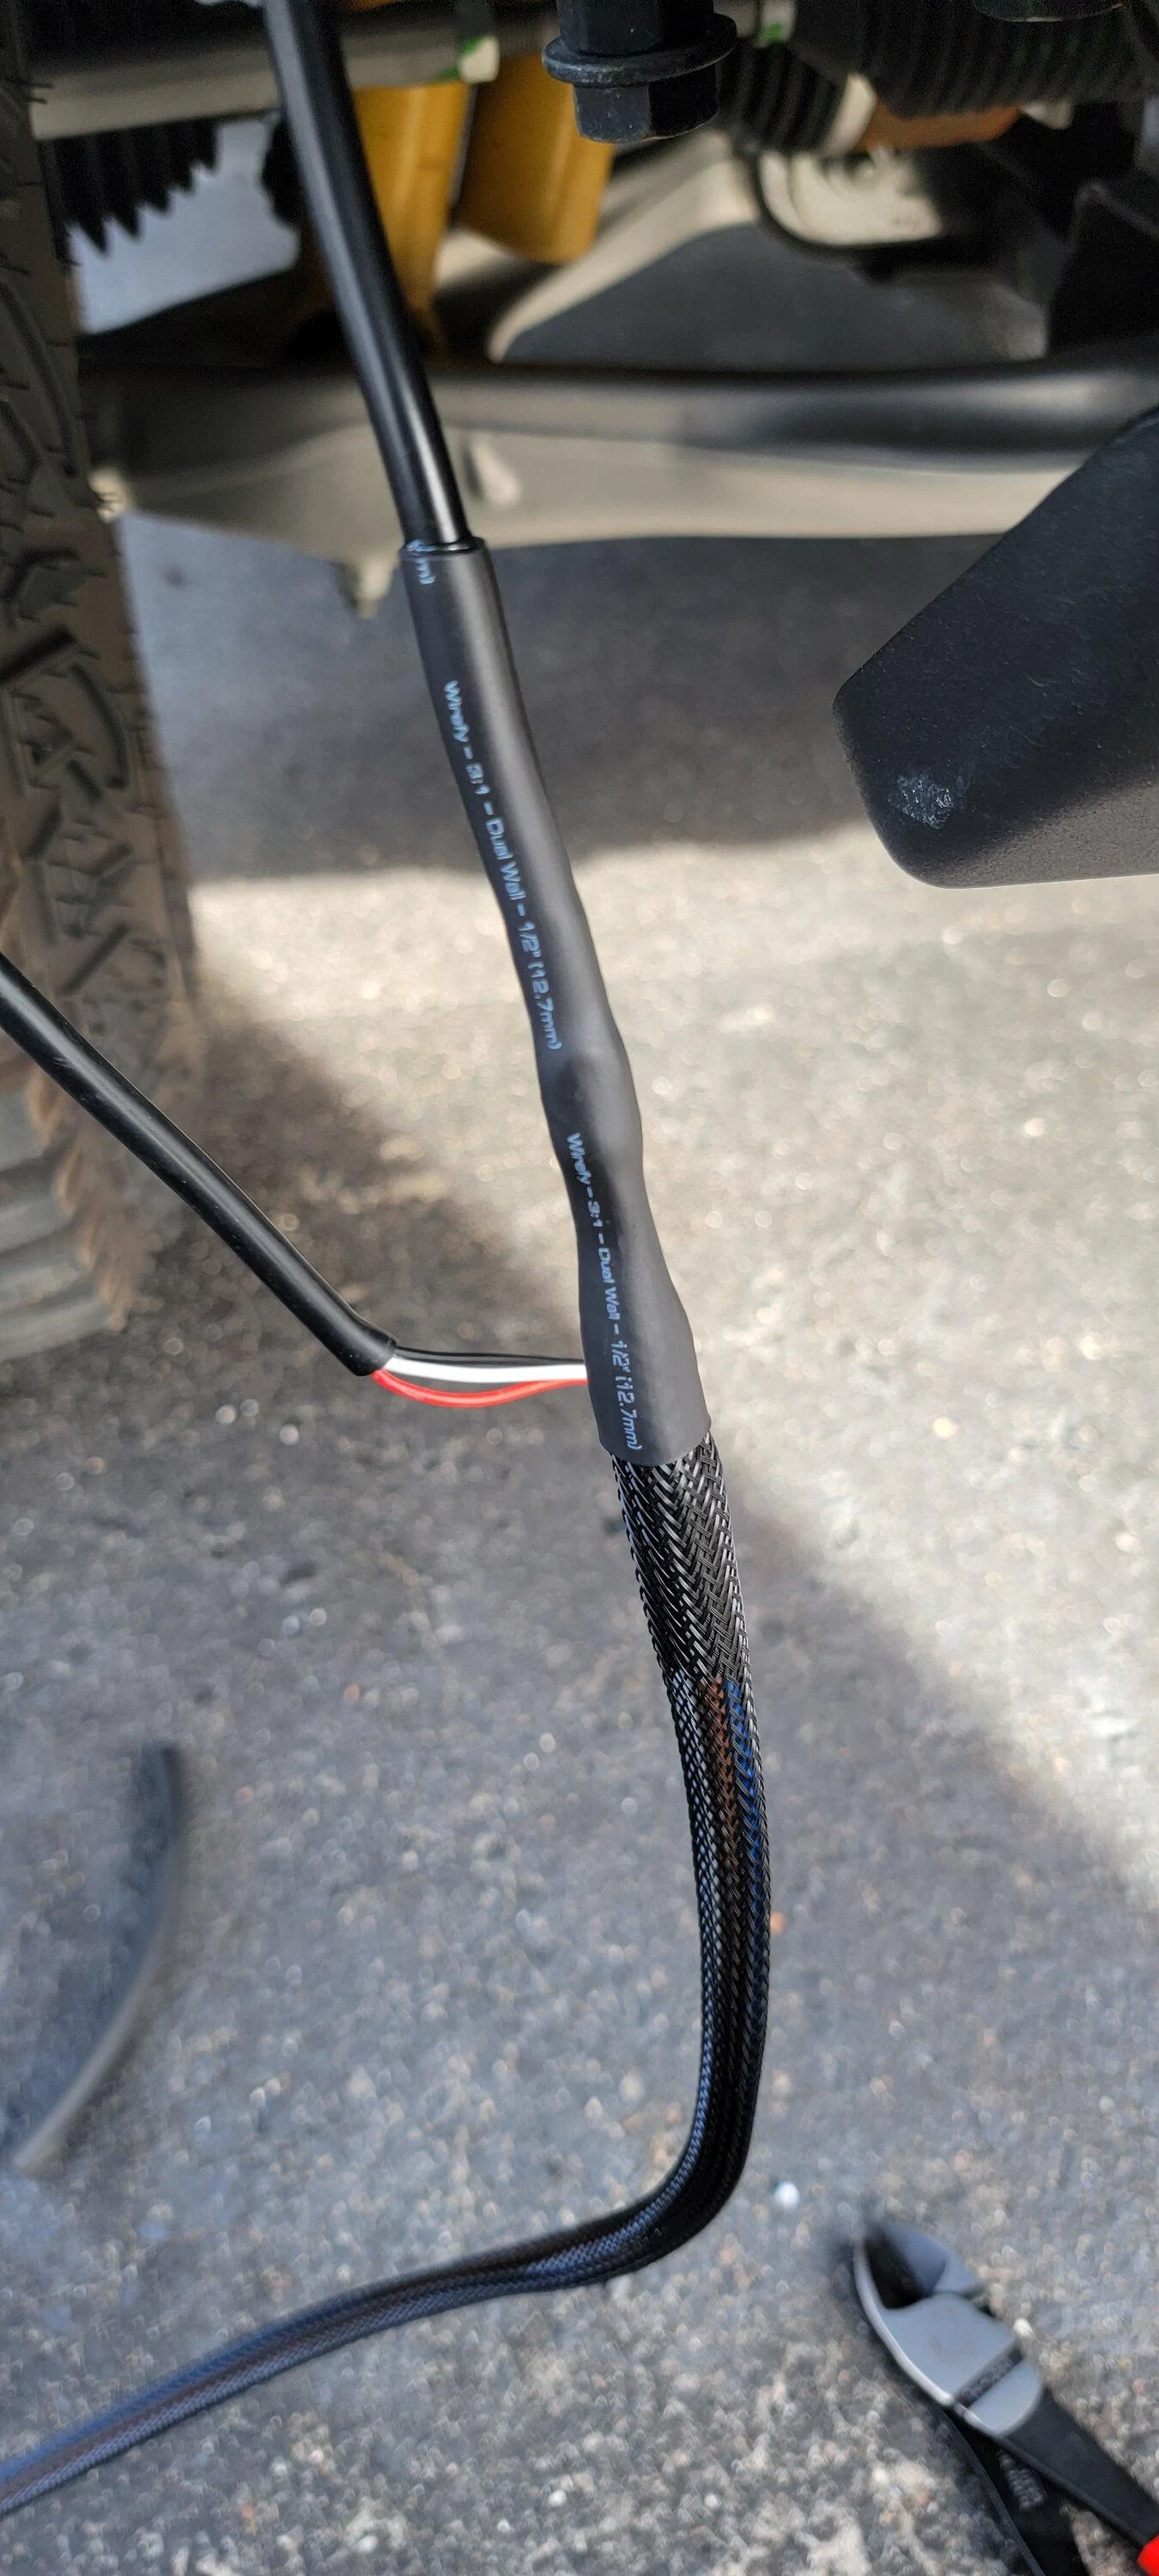
The next pic shows where I have already use individual heat sealing heat shrink over each solder connector and I have slide down the larger piece and covered over the three butt connectors and shrunk the larger piece over the both the factory wire and the butt connectors. I know that the colors of the wires are not matching what the factory did , yes there is color codes for wire in automotive but I had extra wire left over so I chose colors that I would know what it is , in this case , brown is ground , blue is hot , and the white is the trigger wire for the modes on the Auxbeam light , as I said in another post , these lights are unusual in that a fast touch to a positive connection with the white wire , switches the modes. So I went with that. I've ran out of red and black wire for this job lol. Size is what's important , that's what she said .................
The next pic is of the wire mesh in black I used , because this is a more exterior application and I want to hide the wires as much as possible so I used this over the blue in the engine bay. This stuff is pretty cool to slinky it on like an inch worm , once you do it once , its actually soothing lol
Next picture is after I ran an even larger piece of heat shrink over the mesh and up to the joint and sealed the mesh on to the factory harness and the mesh itself.
Next picture is the entire coil ready to run without termination of the ends , rinse and repeat 7 more times...to all the other lights.
And the next pic is the 7 more times ..................lot of work...........

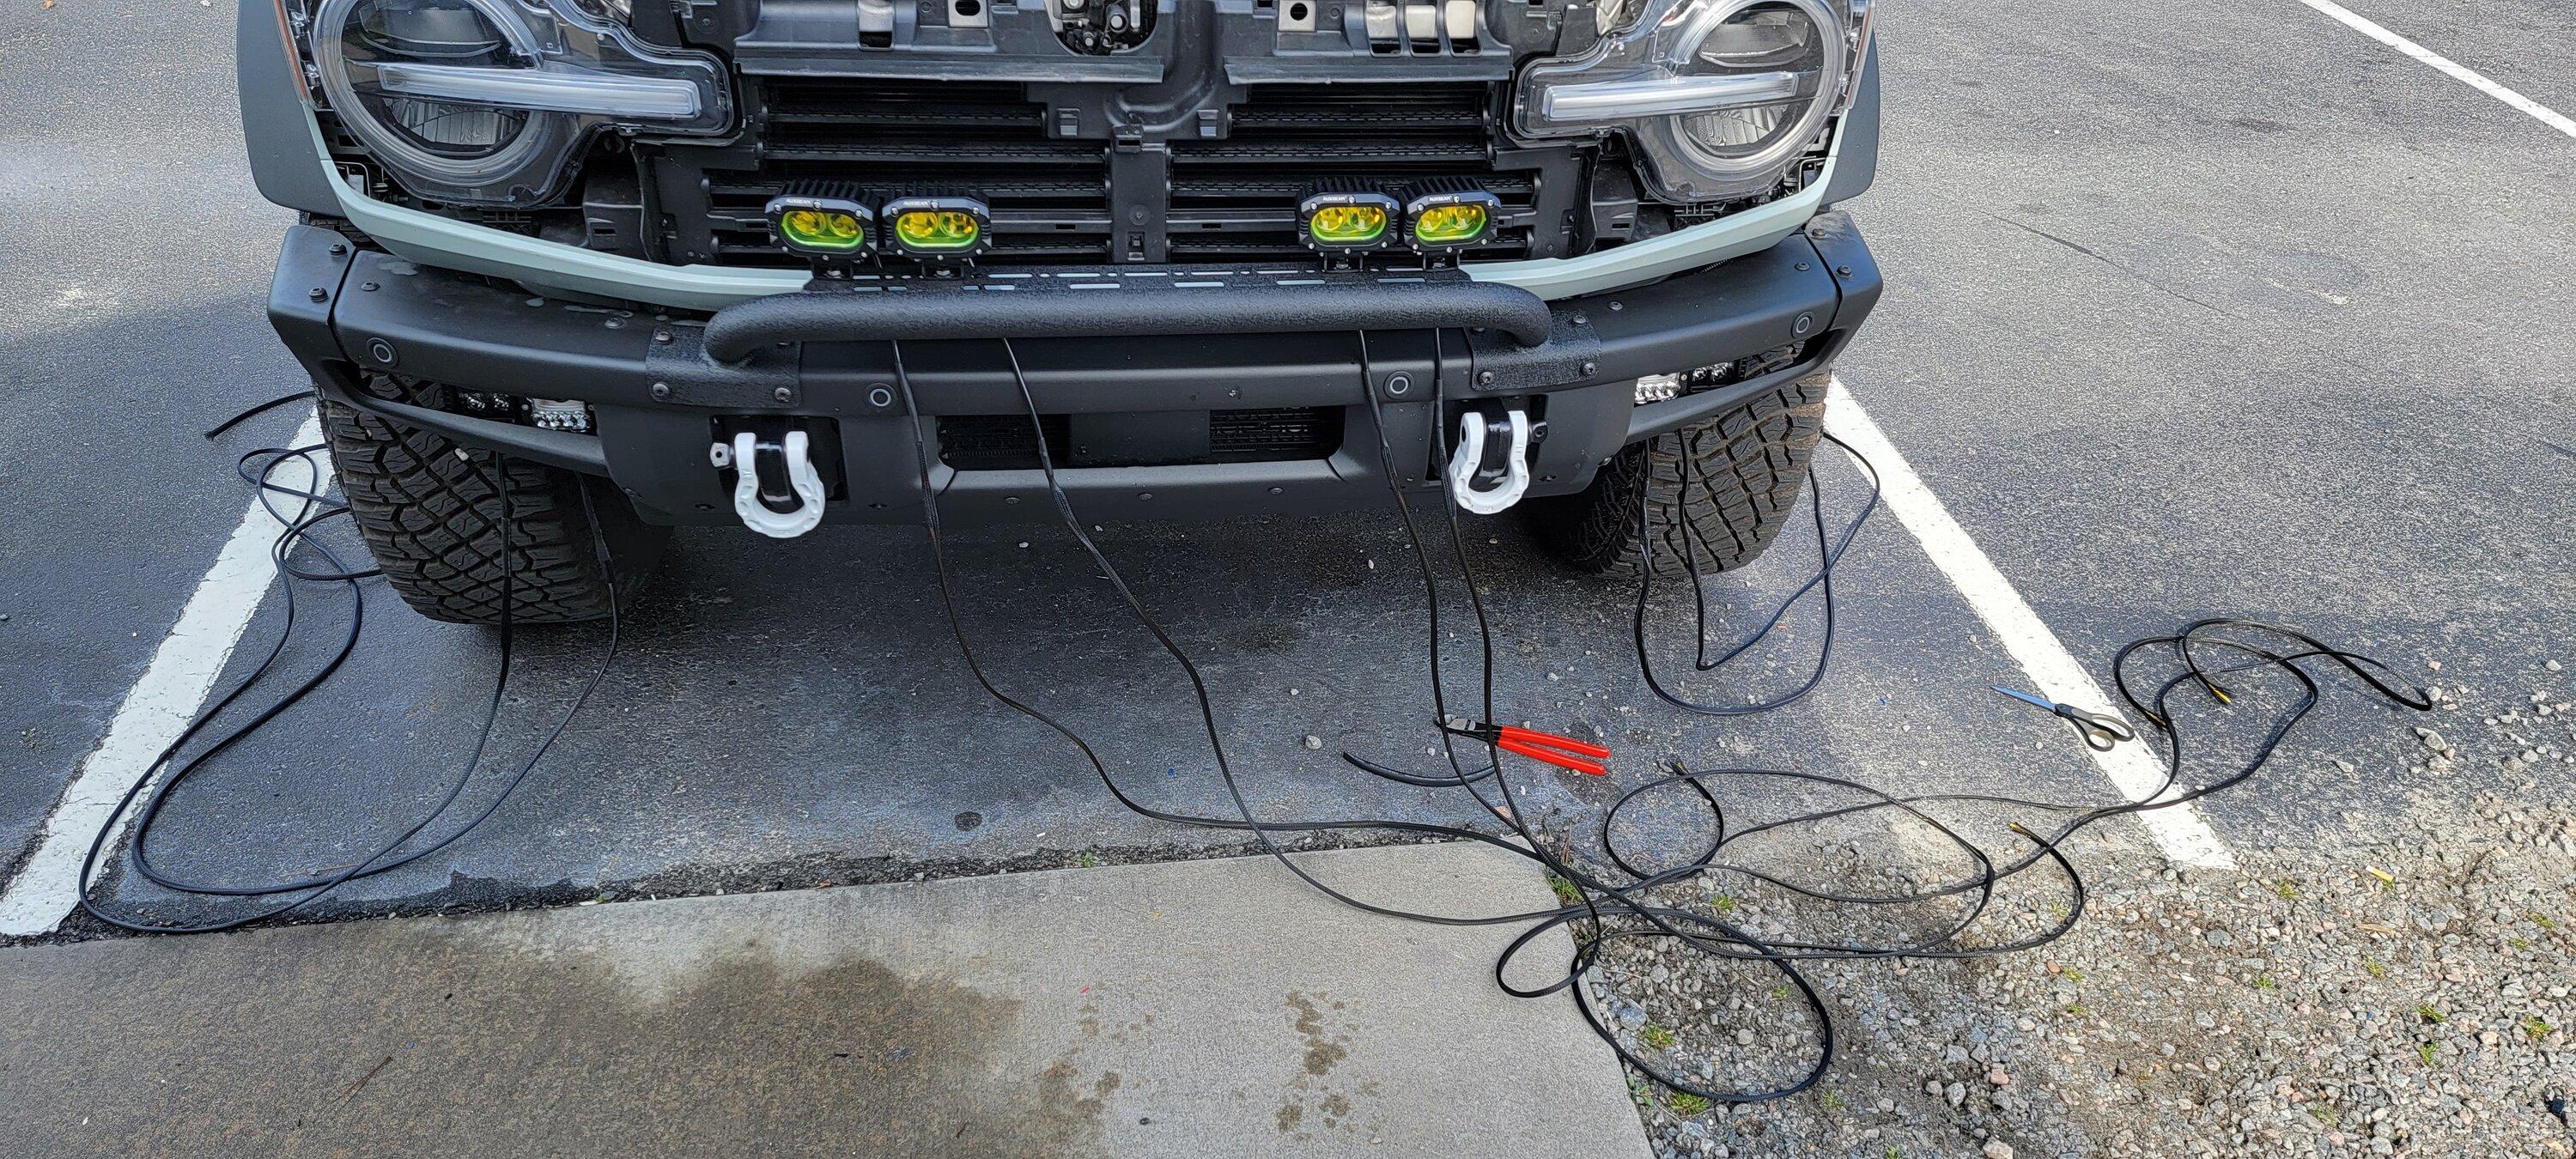
Next pic is the end result after running with no grill in place , triple checking visibility and using zip ties to match the bull bar as it curves down so you do not see wire mesh from straight on. Also making sure the wires are not ran near anything hot or moving and zip tying on the inside to keep them away from all of that type of stuff. Also making sure to leave a little slop in the wiring to account for torsion twist so nothing gets stressed when I'm into the throttle. Not too much slop just a little.
Next pic is with grill in place and Oracle letters , the overall look I was going for is a look that is clean , minimal , no real big 9 inch lights just simple and to split the Fog/Spots up on two circuits , upper and lower. Also to make use of yellow or amber light below the hood for dust or fog or rain. The bull bar is a cheaper Chinese company but for 120 bucks , it works , its not the matching powder coat finish I would like to have but the other company is Zroadz and well they want 300 for the low profile one they have. Way I figure it , worst case scenario , I remove it and have it power coated in a matt white with the same finish and it will still be cheaper than Zroadz version. I wanted the letters to be visible over the lights. Also the zroadz bar only has six holes for mounting , this has 10 holes and slots. I have a infinite number of positionings. The reason for the 2 x 2 configuration is because I have 2 x situation all over the whole bronco. 2 lights in bumper left , 2 right , 2 bull bar left , 2 bull bar right , 2 a pillar left , 2 a pillar right............you get the idea. Also , I have to more pole holder mounts for the center I'm putting in so I can carry 4 poles on the front. I needed them in the center to not obscure my driving vision. Pics on that tomorrow. The Low profile bumper is here...........
Auxfree Low Profile Bumper for Modular Ford Bumper
Next pic is going to look like a nightmare but its each light fused at the distribution block , with the correct fuses and the blocks themselves are on two thirty amp circuits from the Auxbeam module , the main lead in wire is 12 gauge from those 30 amp circuits. All ends terminated with ring connectors and heat shrink sealed. I bundled the excess wire from the runs up , I may go back and make everything shorter and tidier but for right now I'm damn tired. This is with the covers off. Second pic is with the covers on.
Thank you everyone for watching and reading my post , I know they are long but I'm trying to help anyone who has wiring issues and I've seen many post about issues wiring so maybe this will help. More to come...................


Next photo will show the start of the wiring , I first lay out the distance I roughly will need , then I use these solder connectors to get a solid connection. I trim back about a quarter inch on both sides then I push in from each side and I push the wire together so the strands kind of intertwine with each other and I center it over the solder area. Then I heat with a two stage heat gun , first I do the ends to seal the wire in place on the lowest heat setting , then for a few seconds I put it over the solder area and turn the heat to the second stage which almost immediately melts the solder. After a few seconds, I then shut it off and let the joint cool down.

The next pic shows where I have already use individual heat sealing heat shrink over each solder connector and I have slide down the larger piece and covered over the three butt connectors and shrunk the larger piece over the both the factory wire and the butt connectors. I know that the colors of the wires are not matching what the factory did , yes there is color codes for wire in automotive but I had extra wire left over so I chose colors that I would know what it is , in this case , brown is ground , blue is hot , and the white is the trigger wire for the modes on the Auxbeam light , as I said in another post , these lights are unusual in that a fast touch to a positive connection with the white wire , switches the modes. So I went with that. I've ran out of red and black wire for this job lol. Size is what's important , that's what she said .................

The next pic is of the wire mesh in black I used , because this is a more exterior application and I want to hide the wires as much as possible so I used this over the blue in the engine bay. This stuff is pretty cool to slinky it on like an inch worm , once you do it once , its actually soothing lol

Next picture is after I ran an even larger piece of heat shrink over the mesh and up to the joint and sealed the mesh on to the factory harness and the mesh itself.
Next picture is the entire coil ready to run without termination of the ends , rinse and repeat 7 more times...to all the other lights.

And the next pic is the 7 more times ..................lot of work...........
Next pic is the end result after running with no grill in place , triple checking visibility and using zip ties to match the bull bar as it curves down so you do not see wire mesh from straight on. Also making sure the wires are not ran near anything hot or moving and zip tying on the inside to keep them away from all of that type of stuff. Also making sure to leave a little slop in the wiring to account for torsion twist so nothing gets stressed when I'm into the throttle. Not too much slop just a little.

Next pic is with grill in place and Oracle letters , the overall look I was going for is a look that is clean , minimal , no real big 9 inch lights just simple and to split the Fog/Spots up on two circuits , upper and lower. Also to make use of yellow or amber light below the hood for dust or fog or rain. The bull bar is a cheaper Chinese company but for 120 bucks , it works , its not the matching powder coat finish I would like to have but the other company is Zroadz and well they want 300 for the low profile one they have. Way I figure it , worst case scenario , I remove it and have it power coated in a matt white with the same finish and it will still be cheaper than Zroadz version. I wanted the letters to be visible over the lights. Also the zroadz bar only has six holes for mounting , this has 10 holes and slots. I have a infinite number of positionings. The reason for the 2 x 2 configuration is because I have 2 x situation all over the whole bronco. 2 lights in bumper left , 2 right , 2 bull bar left , 2 bull bar right , 2 a pillar left , 2 a pillar right............you get the idea. Also , I have to more pole holder mounts for the center I'm putting in so I can carry 4 poles on the front. I needed them in the center to not obscure my driving vision. Pics on that tomorrow. The Low profile bumper is here...........
Auxfree Low Profile Bumper for Modular Ford Bumper

Next pic is going to look like a nightmare but its each light fused at the distribution block , with the correct fuses and the blocks themselves are on two thirty amp circuits from the Auxbeam module , the main lead in wire is 12 gauge from those 30 amp circuits. All ends terminated with ring connectors and heat shrink sealed. I bundled the excess wire from the runs up , I may go back and make everything shorter and tidier but for right now I'm damn tired. This is with the covers off. Second pic is with the covers on.


Thank you everyone for watching and reading my post , I know they are long but I'm trying to help anyone who has wiring issues and I've seen many post about issues wiring so maybe this will help. More to come...................
Sponsored


")