
- First Name
- Bryan
- Joined
- Jul 25, 2020
- Threads
- 53
- Messages
- 795
- Reaction score
- 925
- Location
- Charlotte, NC
- Website
- www.youtube.com
- Vehicle(s)
- 1981 CJ5, 2015 BMW M4, 2023 Mach E GT PE
- Your Bronco Model
- Badlands
- Thread starter
- #1
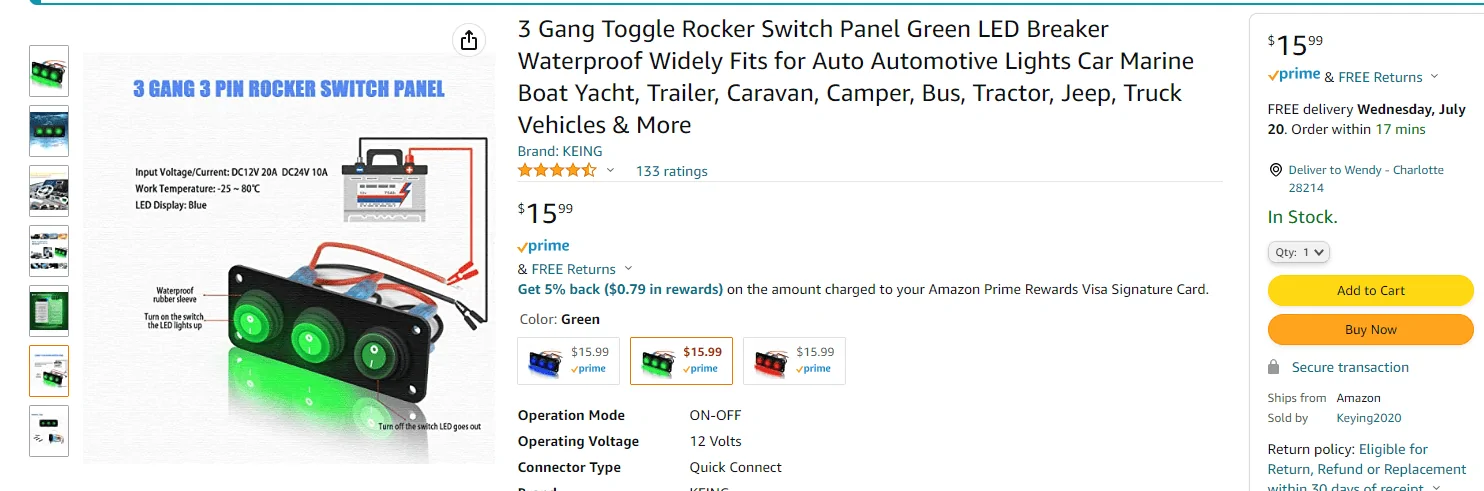
So not sure if I should post this under electrical or the exterior step up bar page but since this is mostly about the switch, I will post here as anyone could use this location for switches for any item.
First of all, I had a hard time figuring out how to replace the switches that came with the Rockslide Engineering Step up bars. I wish you could use the factory upfitter switches for this but they are not compatible. I tried to get some high quality custom switches but I couldn't figure out the electrical connections to make it work. Then I ordered Rockslide Engineering's Door Delete Kit, which allows you to still control the step up bars manually when doors are removed (if you don't have this kit the steps will remain deployed when doors are off unless you turn the main power off). Anyway, the Door Delete Kit added two more switches that they recommend mounting down by the seats. I never liked that idea so started to look for a simple switch panel to mount in the dash that could use the factory switches from Rockslide. I came up with the below:
https://www.amazon.com/dp/B097438SJ7?ref=ppx_yo2ov_dt_b_product_details&th=1

What is nice about this switch panel is that it comes with 3 decent push button switches that light up (can get red, blue, or green). The rectangular panel is actually metal and has a finish very similar to the black plastic Bronco panel. I discovered that the green switches were camptailbe with the two plain jane (non light up) door delete switches. Thus, I decided to use two of the green switches for the left and right power steps manual control and then swap the same size main power switch from Rockslide (which looks similar on the outside to these but red).
I knew it would be tight but I wanted these of out of the way but still very accessible. The spot between the light switch and parking brake actuator would be perfect. However, if anyone has looked back behind this panel area, it is not the smoothest and the housing for the parking brake is partially intrudes in this location. Redgardles, I did some delicate surgery to fit it in there. I wouldn't recommend this for the faint of heart and especially if you are leasing. But I am in this purchase for the long haul and to be honest, if I ever had to sell this and someone didn't like that I cut into the dash, replacing this one panel wouldn't be the end of the world.
Shot below is me lining it up/planning. The idea was to center this below the light switch panel (with SickerFab's Cyber Orange border).

This is what it looks like on the back of the panel. Top side is down in this pic (as it would look if you opened it down to get to the fuse box). The red line is the approximate location of the rectangular switch box will be on the other side. I lined up two of the 20mm openings on either side of the parking brake screw.

Similar to above but after I drilled the three 20mm holes. Headlight switch is now at the top. Had to use a dremel tool to help cut around the location where the upper parking brake housing screws into the back. I later added some JB Weld Epoxy Glue where I had to cut out some of the plastic. This will help re-strengthen any weak points. It is very tight there but not impossible.

Finish project. The upper pic makes it look like its drops lower to the right but that is due to the camera angle. I made sure each end is equal distance below the headlight switch. The Red button illuminates the entire time the power steps are turned on. This is how Rockslide designed it. I am ok with that but I can see how others are not. The illuminated green switches actually light up green when I manually override the power steps and deploy them or they deploy automatically when I open the door. Nice to have those lights to show what they are doing since you cant see them well from driver seat.


Anyway, hope this may help someone.
First of all, I had a hard time figuring out how to replace the switches that came with the Rockslide Engineering Step up bars. I wish you could use the factory upfitter switches for this but they are not compatible. I tried to get some high quality custom switches but I couldn't figure out the electrical connections to make it work. Then I ordered Rockslide Engineering's Door Delete Kit, which allows you to still control the step up bars manually when doors are removed (if you don't have this kit the steps will remain deployed when doors are off unless you turn the main power off). Anyway, the Door Delete Kit added two more switches that they recommend mounting down by the seats. I never liked that idea so started to look for a simple switch panel to mount in the dash that could use the factory switches from Rockslide. I came up with the below:
https://www.amazon.com/dp/B097438SJ7?ref=ppx_yo2ov_dt_b_product_details&th=1
What is nice about this switch panel is that it comes with 3 decent push button switches that light up (can get red, blue, or green). The rectangular panel is actually metal and has a finish very similar to the black plastic Bronco panel. I discovered that the green switches were camptailbe with the two plain jane (non light up) door delete switches. Thus, I decided to use two of the green switches for the left and right power steps manual control and then swap the same size main power switch from Rockslide (which looks similar on the outside to these but red).
I knew it would be tight but I wanted these of out of the way but still very accessible. The spot between the light switch and parking brake actuator would be perfect. However, if anyone has looked back behind this panel area, it is not the smoothest and the housing for the parking brake is partially intrudes in this location. Redgardles, I did some delicate surgery to fit it in there. I wouldn't recommend this for the faint of heart and especially if you are leasing. But I am in this purchase for the long haul and to be honest, if I ever had to sell this and someone didn't like that I cut into the dash, replacing this one panel wouldn't be the end of the world.
Shot below is me lining it up/planning. The idea was to center this below the light switch panel (with SickerFab's Cyber Orange border).

This is what it looks like on the back of the panel. Top side is down in this pic (as it would look if you opened it down to get to the fuse box). The red line is the approximate location of the rectangular switch box will be on the other side. I lined up two of the 20mm openings on either side of the parking brake screw.

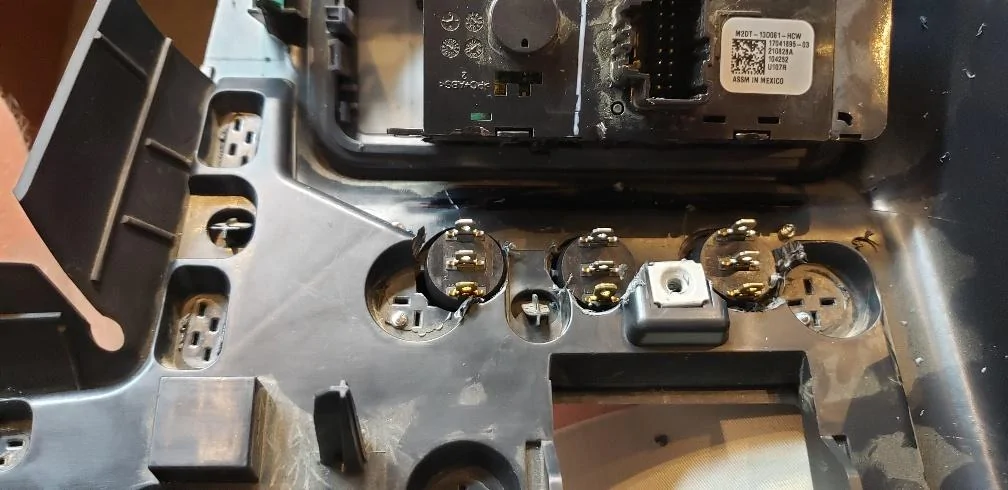
Similar to above but after I drilled the three 20mm holes. Headlight switch is now at the top. Had to use a dremel tool to help cut around the location where the upper parking brake housing screws into the back. I later added some JB Weld Epoxy Glue where I had to cut out some of the plastic. This will help re-strengthen any weak points. It is very tight there but not impossible.
Finish project. The upper pic makes it look like its drops lower to the right but that is due to the camera angle. I made sure each end is equal distance below the headlight switch. The Red button illuminates the entire time the power steps are turned on. This is how Rockslide designed it. I am ok with that but I can see how others are not. The illuminated green switches actually light up green when I manually override the power steps and deploy them or they deploy automatically when I open the door. Nice to have those lights to show what they are doing since you cant see them well from driver seat.

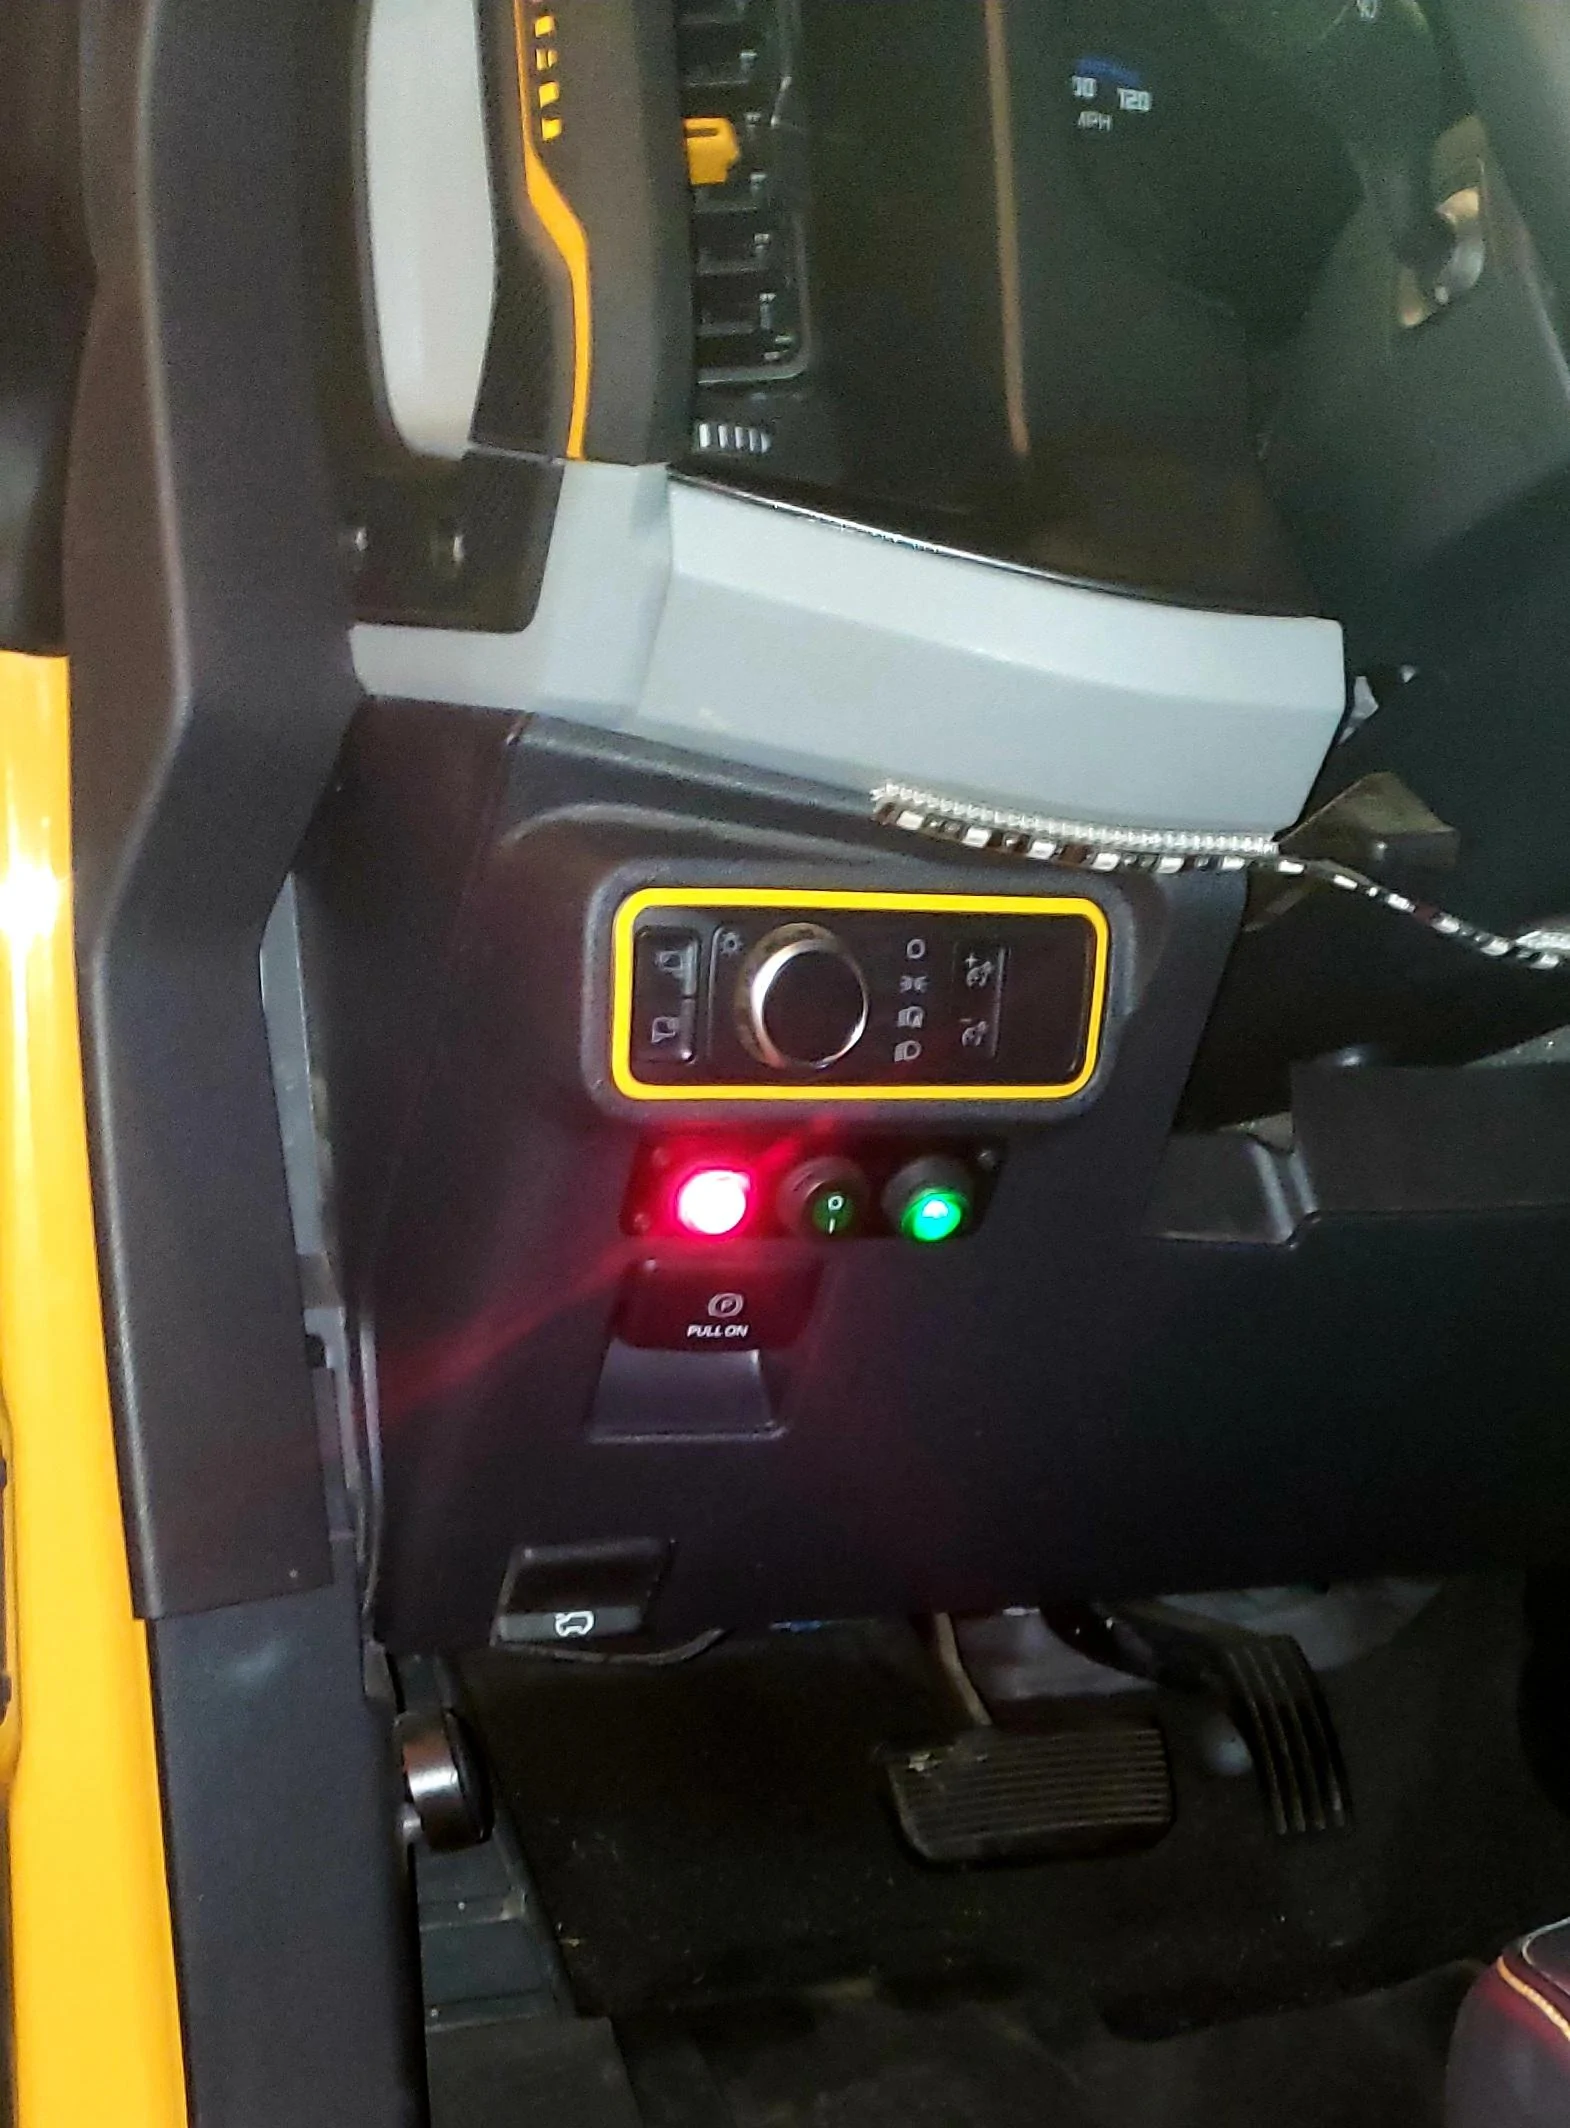
Anyway, hope this may help someone.
Sponsored