- First Name
- Hoyt
- Joined
- Dec 29, 2025
- Threads
- 2
- Messages
- 43
- Reaction score
- 96
- Location
- Chesapeake, VA
- Vehicle(s)
- 2025 Bronco Raptor
- Your Bronco Model
- Raptor
- Thread starter
- #1
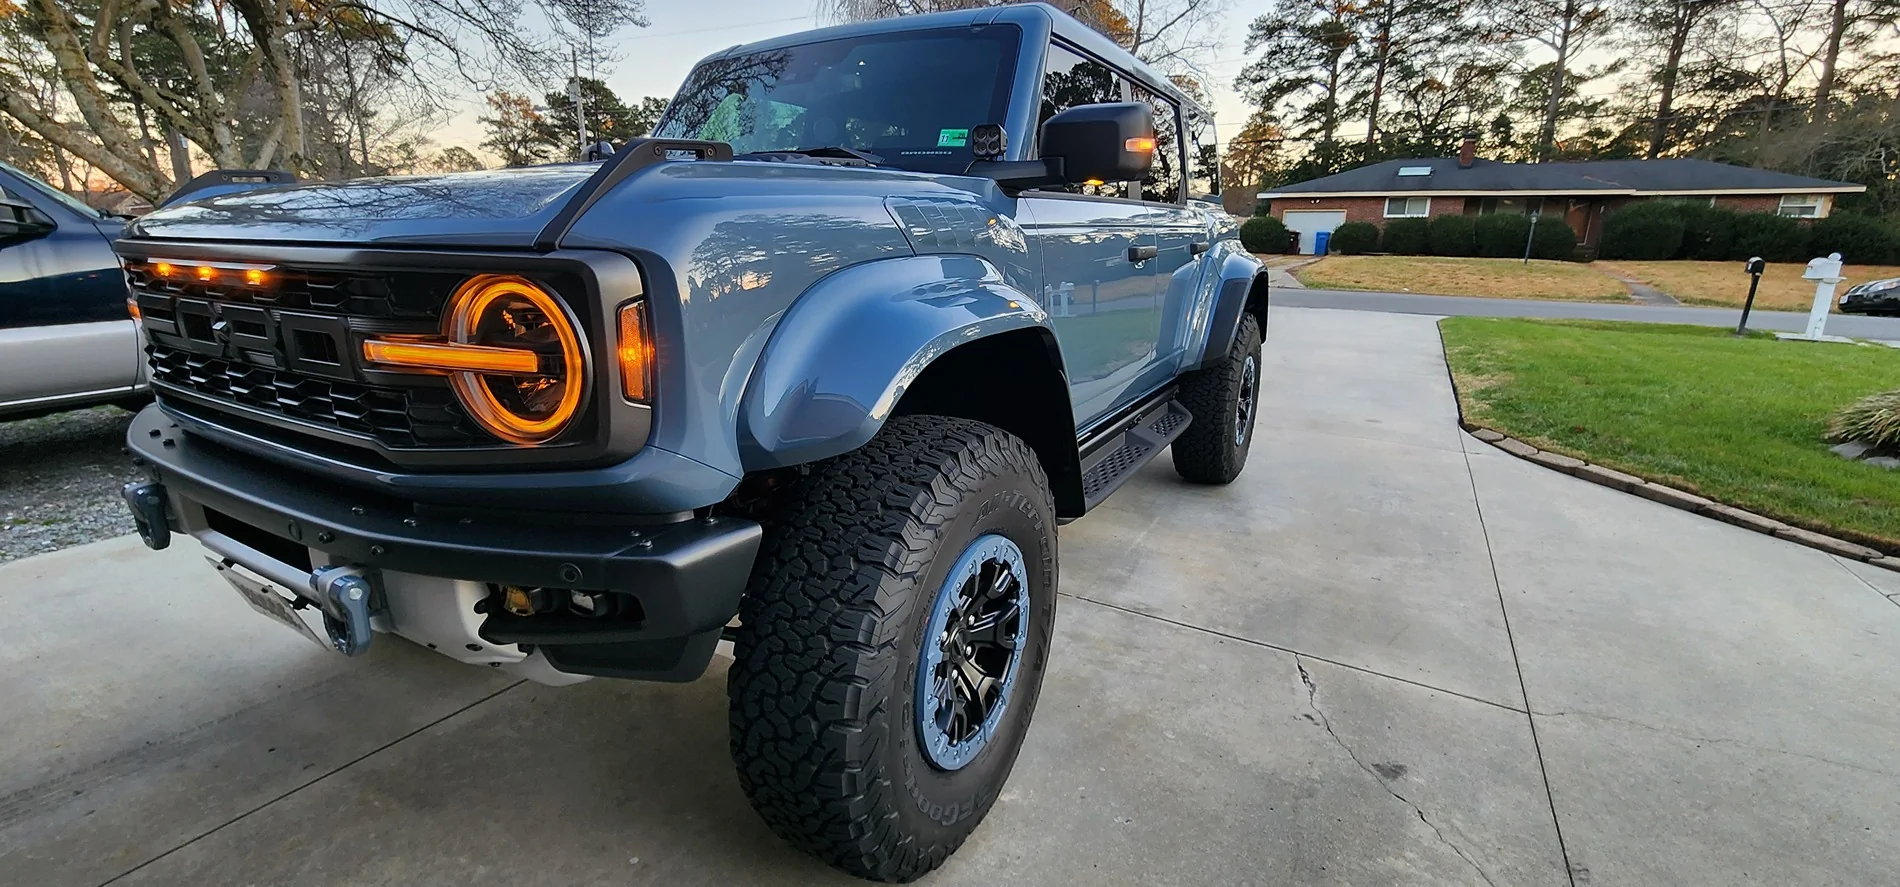
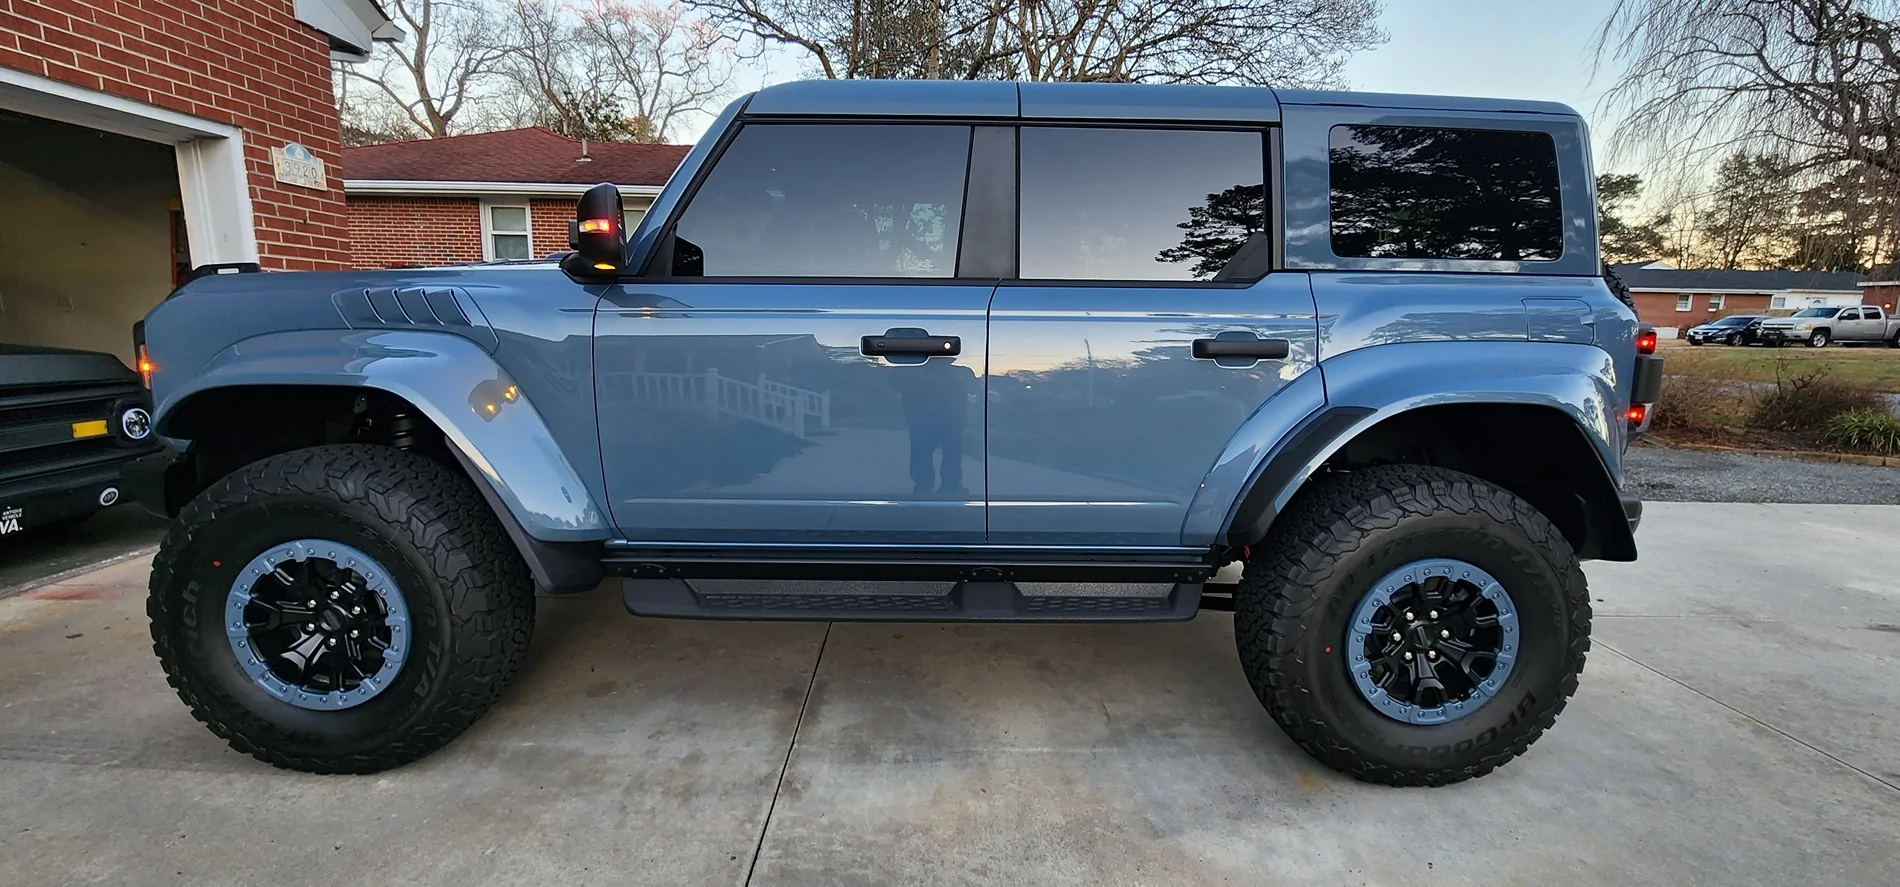
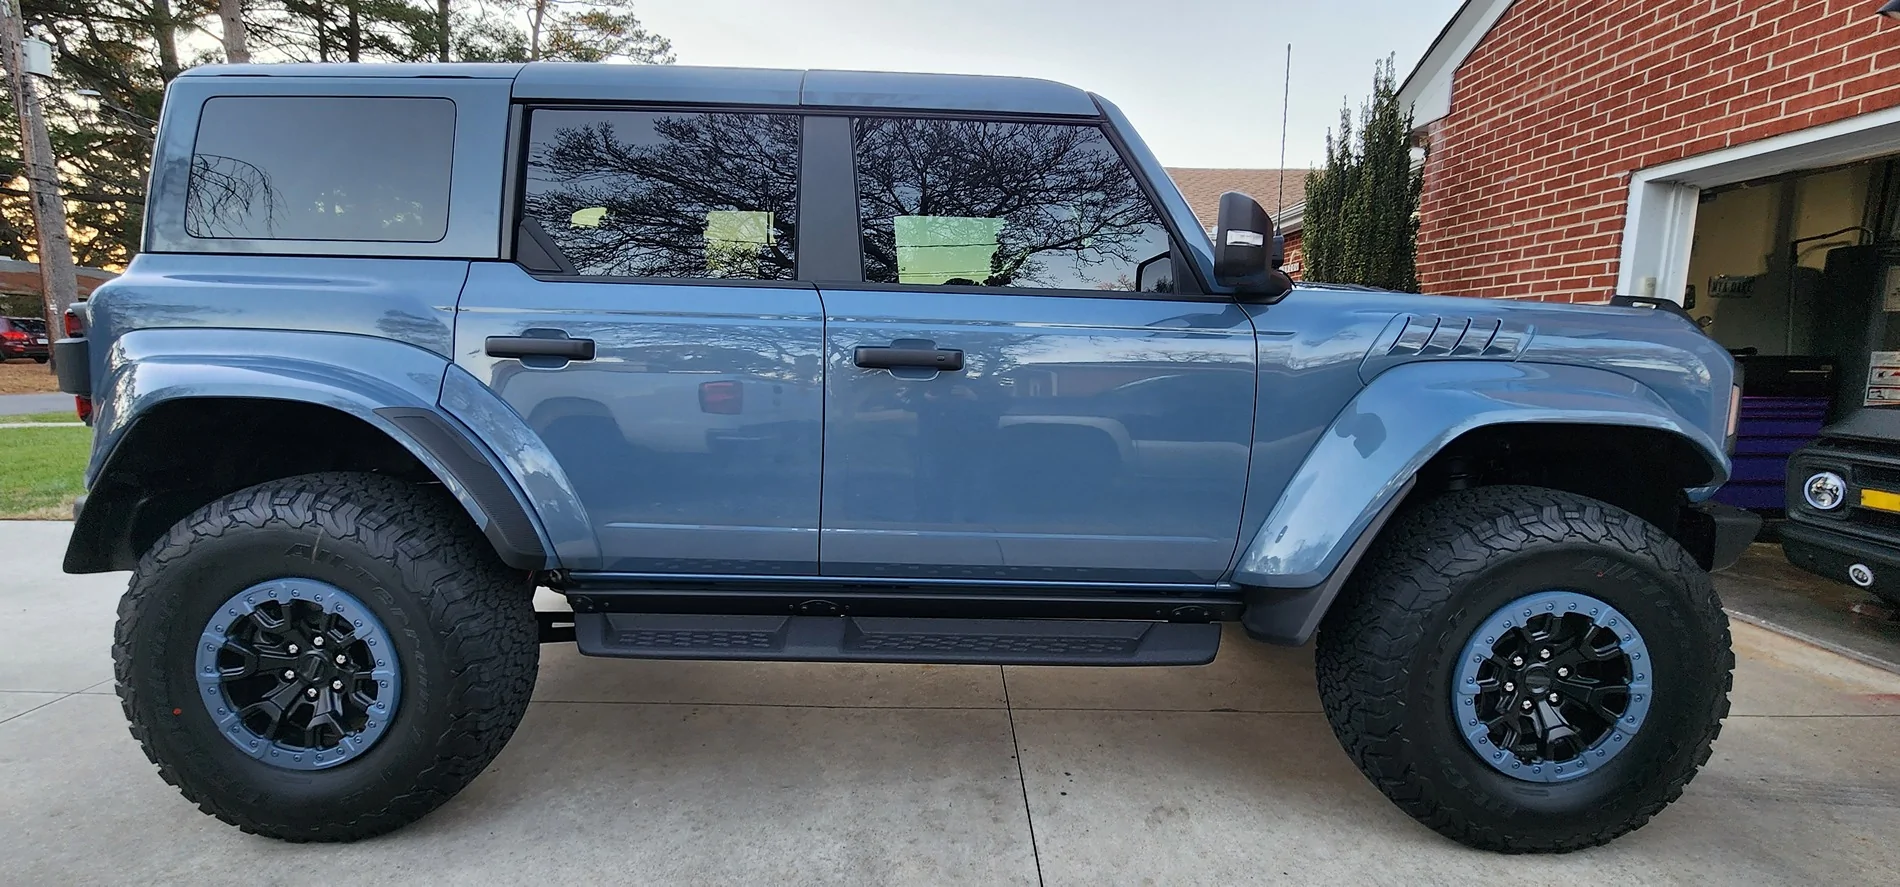
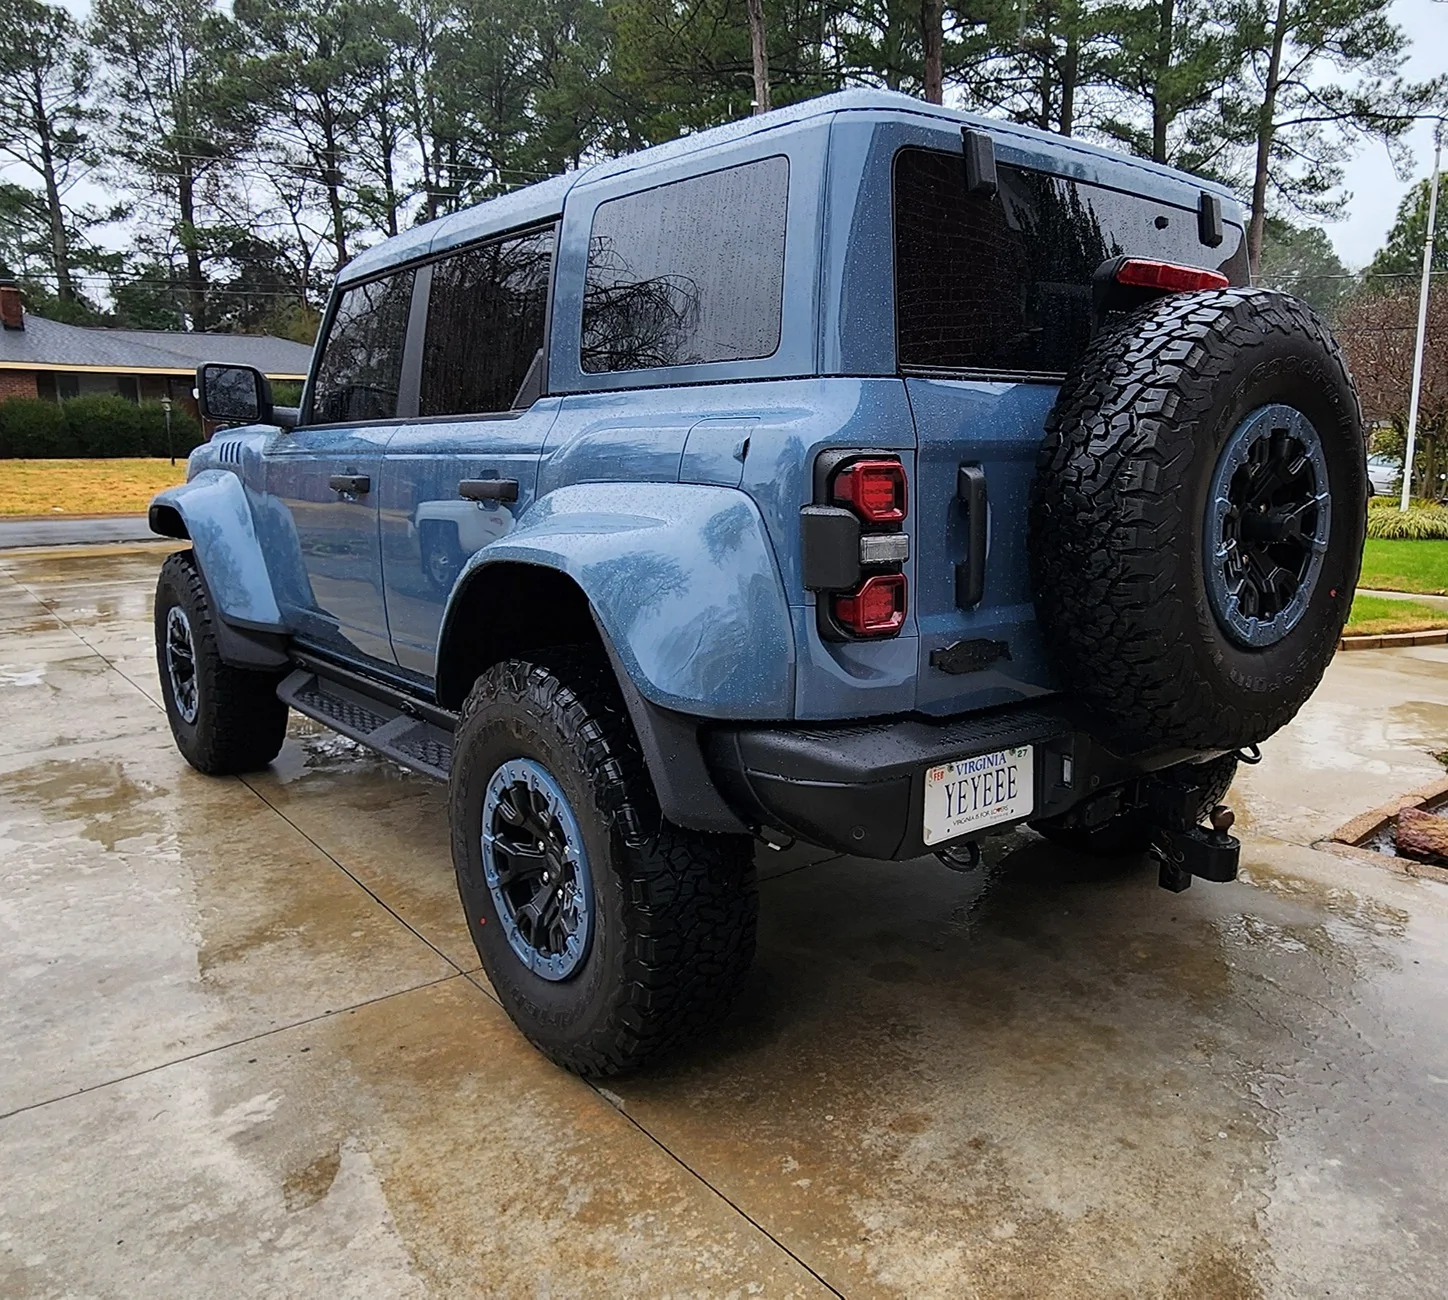
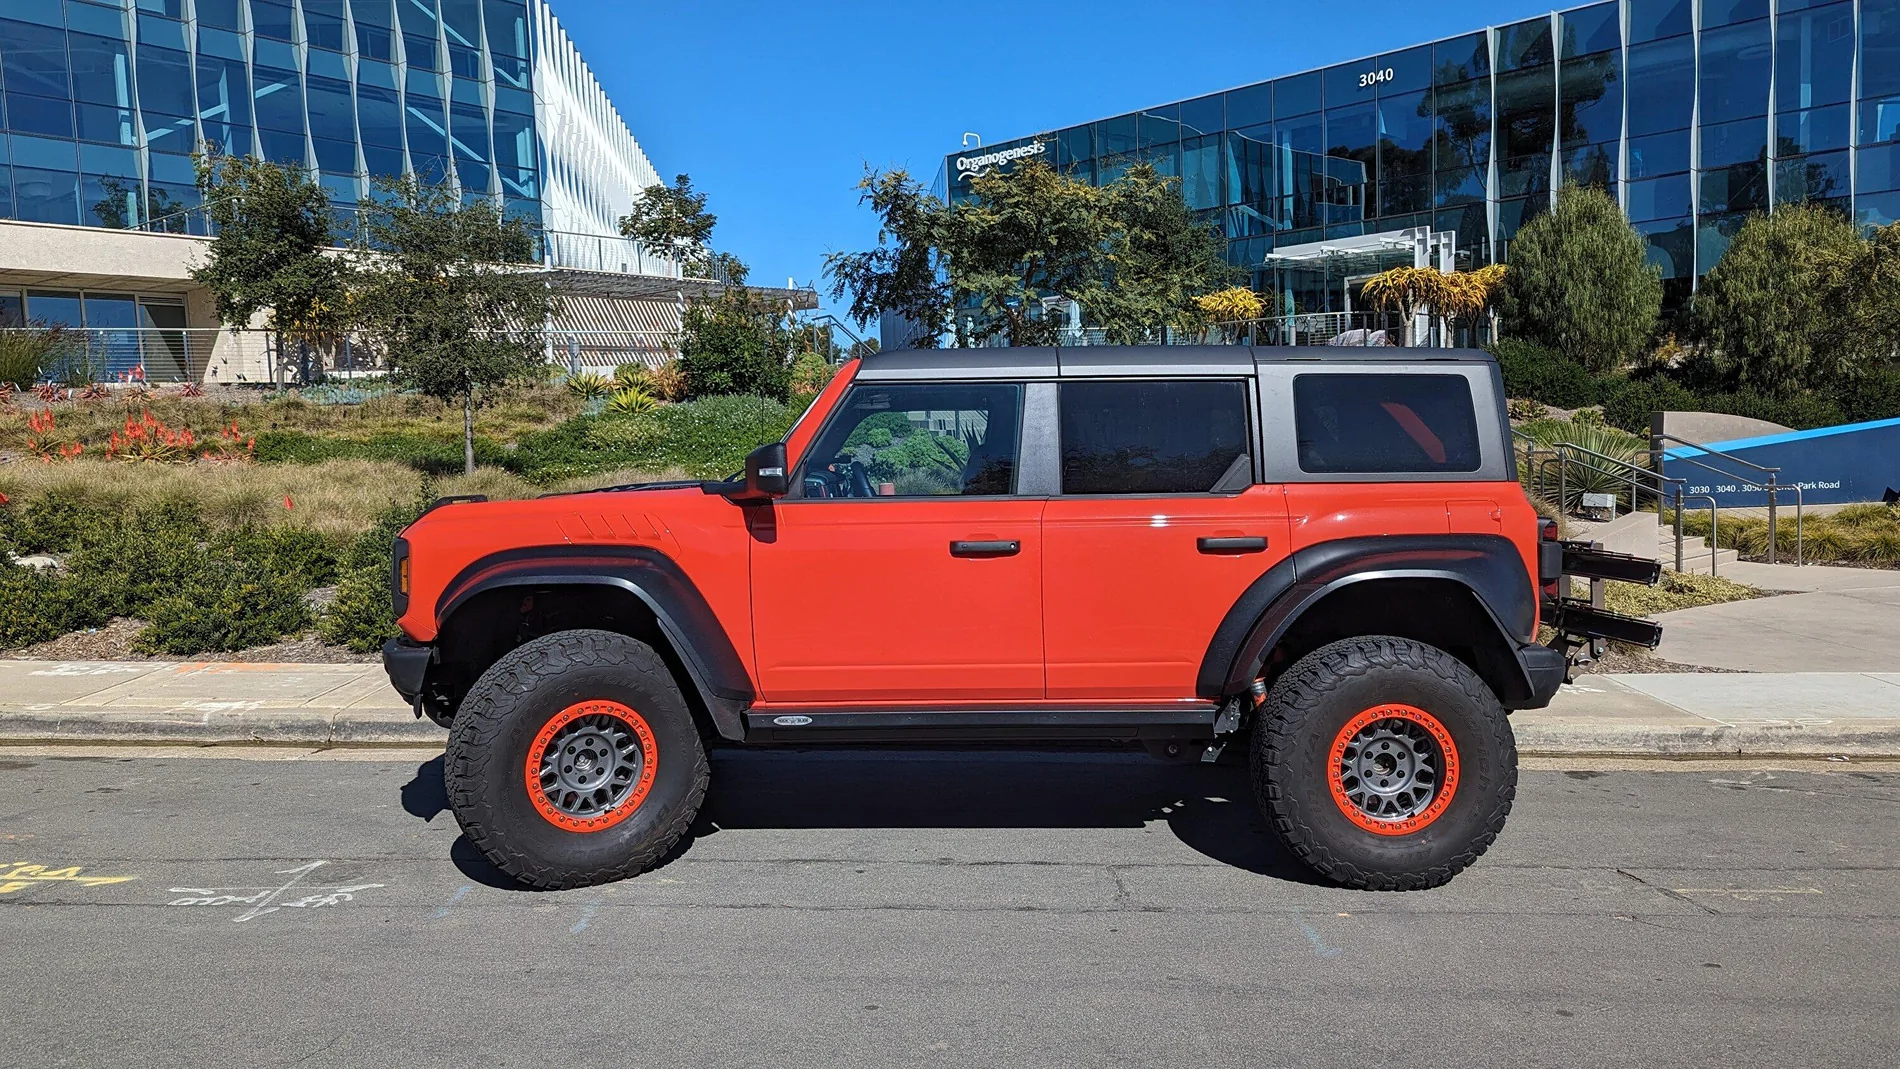
So we bought a Azure Grey Metallic Braptor for my wife before Christmas, and we love the truck for her. With subtle changes i had in mind she will love it more. One visual thing that drove me nuts was the carbon grey beauty rings. So my good little redneck husband diy self decided to fix it. We love the look of the wheel(needs spacers, but that's another day) just didn't like the rings. So I searched forum, and yes people have done it, but no tutorials. So I figured I'd share the process with yall incase anyone else wanted to tackle it. Now I'm no professional painter, but I've been diy on cars and trucks all my life. So I can easily handle this. So here's a pictorial for yall if ya wanna do this yourself. Let's start with the finished look....

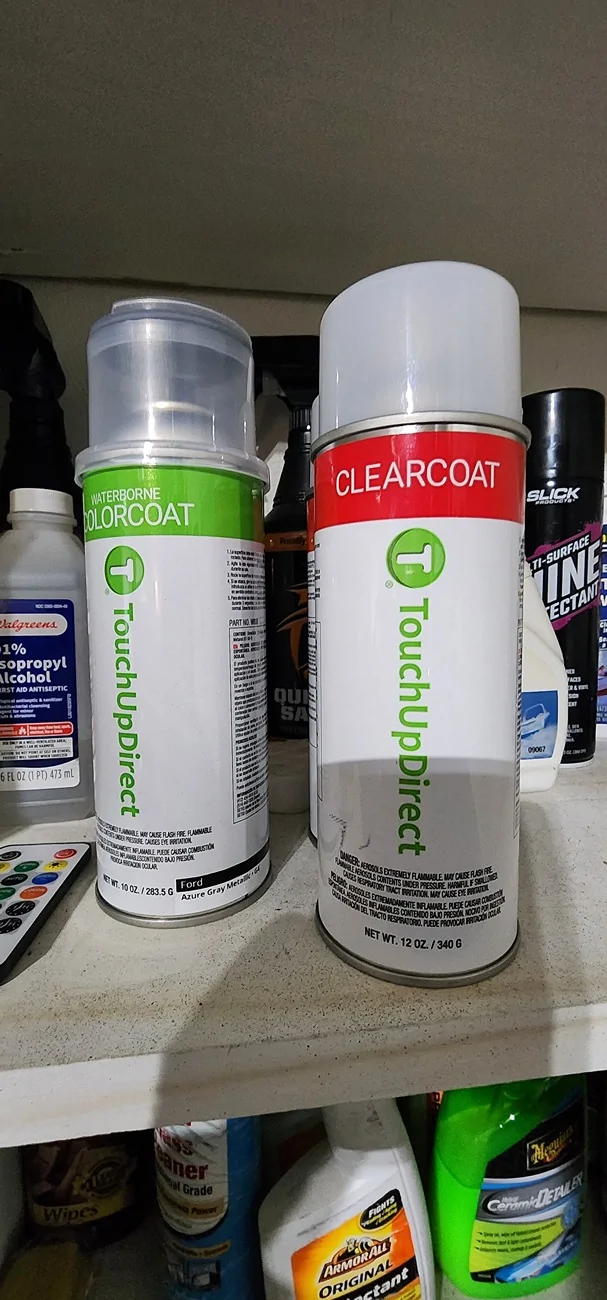
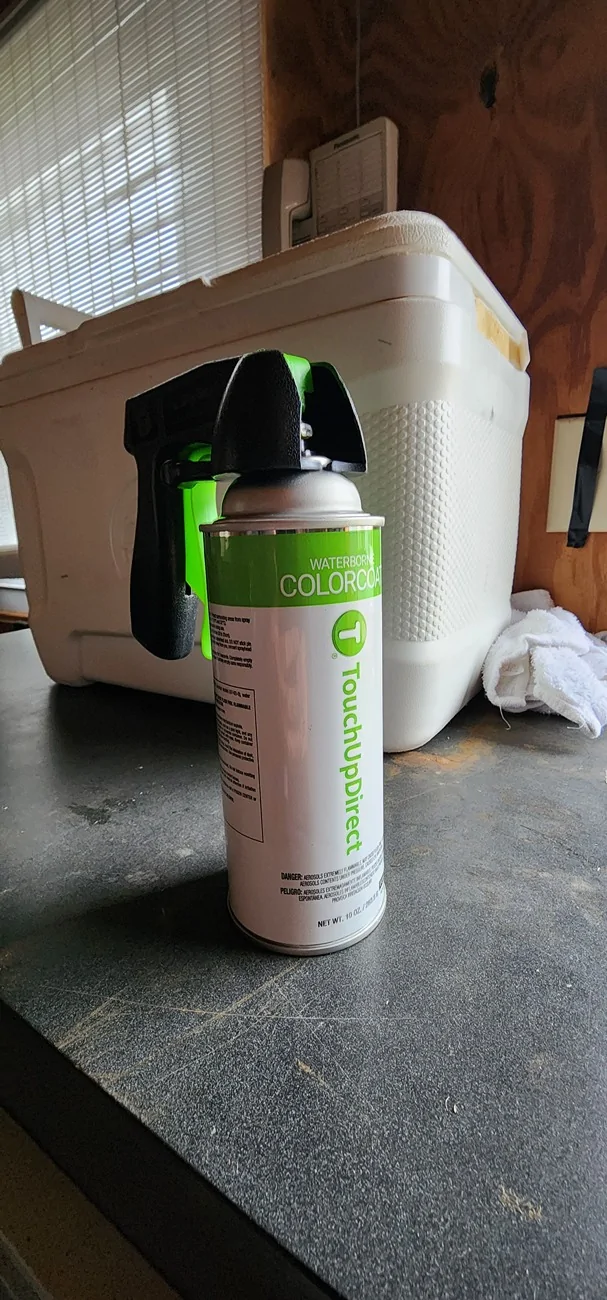
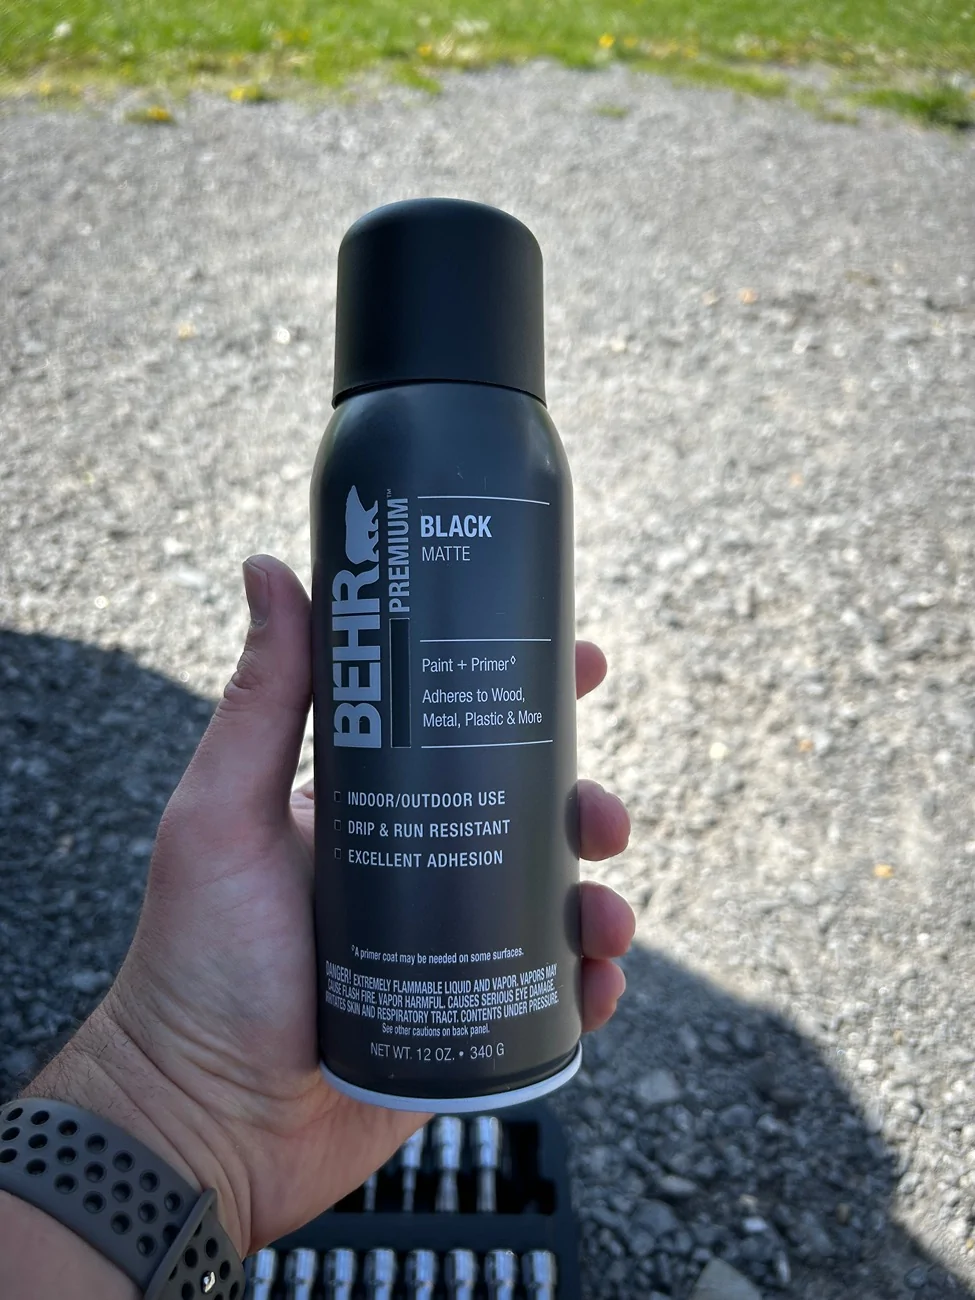
So to start this project first get yourself some paint. I ordered from touch up direct. Did 2 cans color, 2 cans clear, and their can trigger sprayer. $150 shipped to the house...

Next obviously you'll need to remove rings from wheels. Don't worry you can still drive without them (although your wife will talk smack about her wheels being ugly now)....
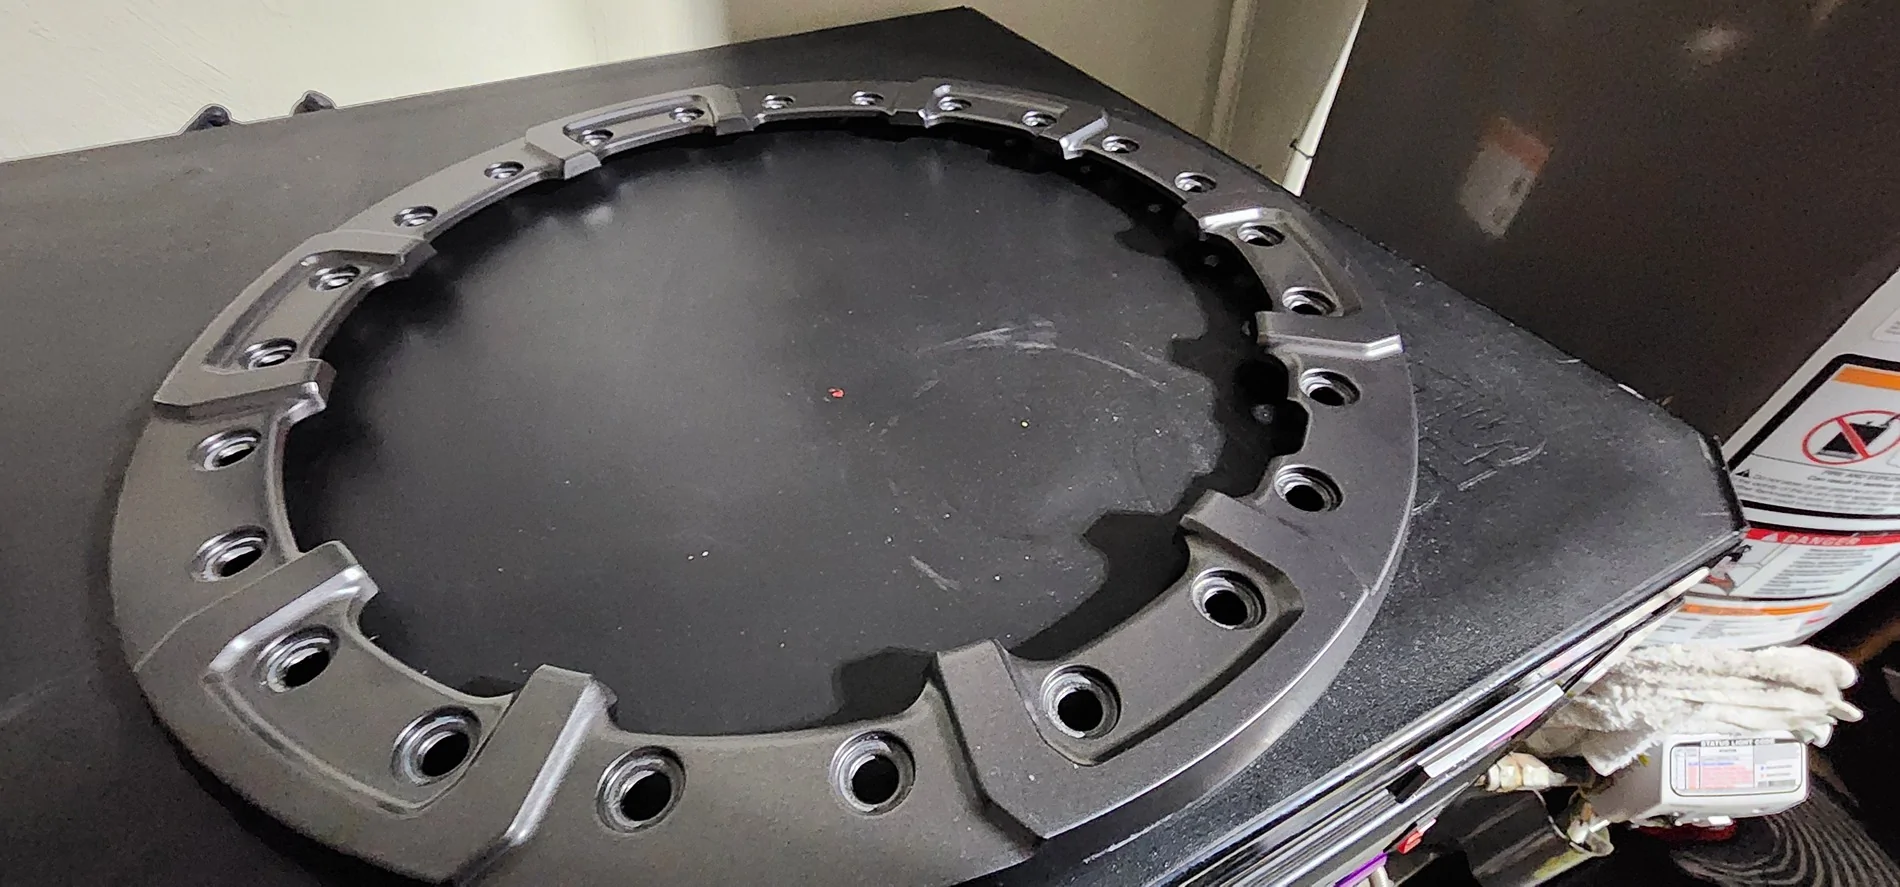
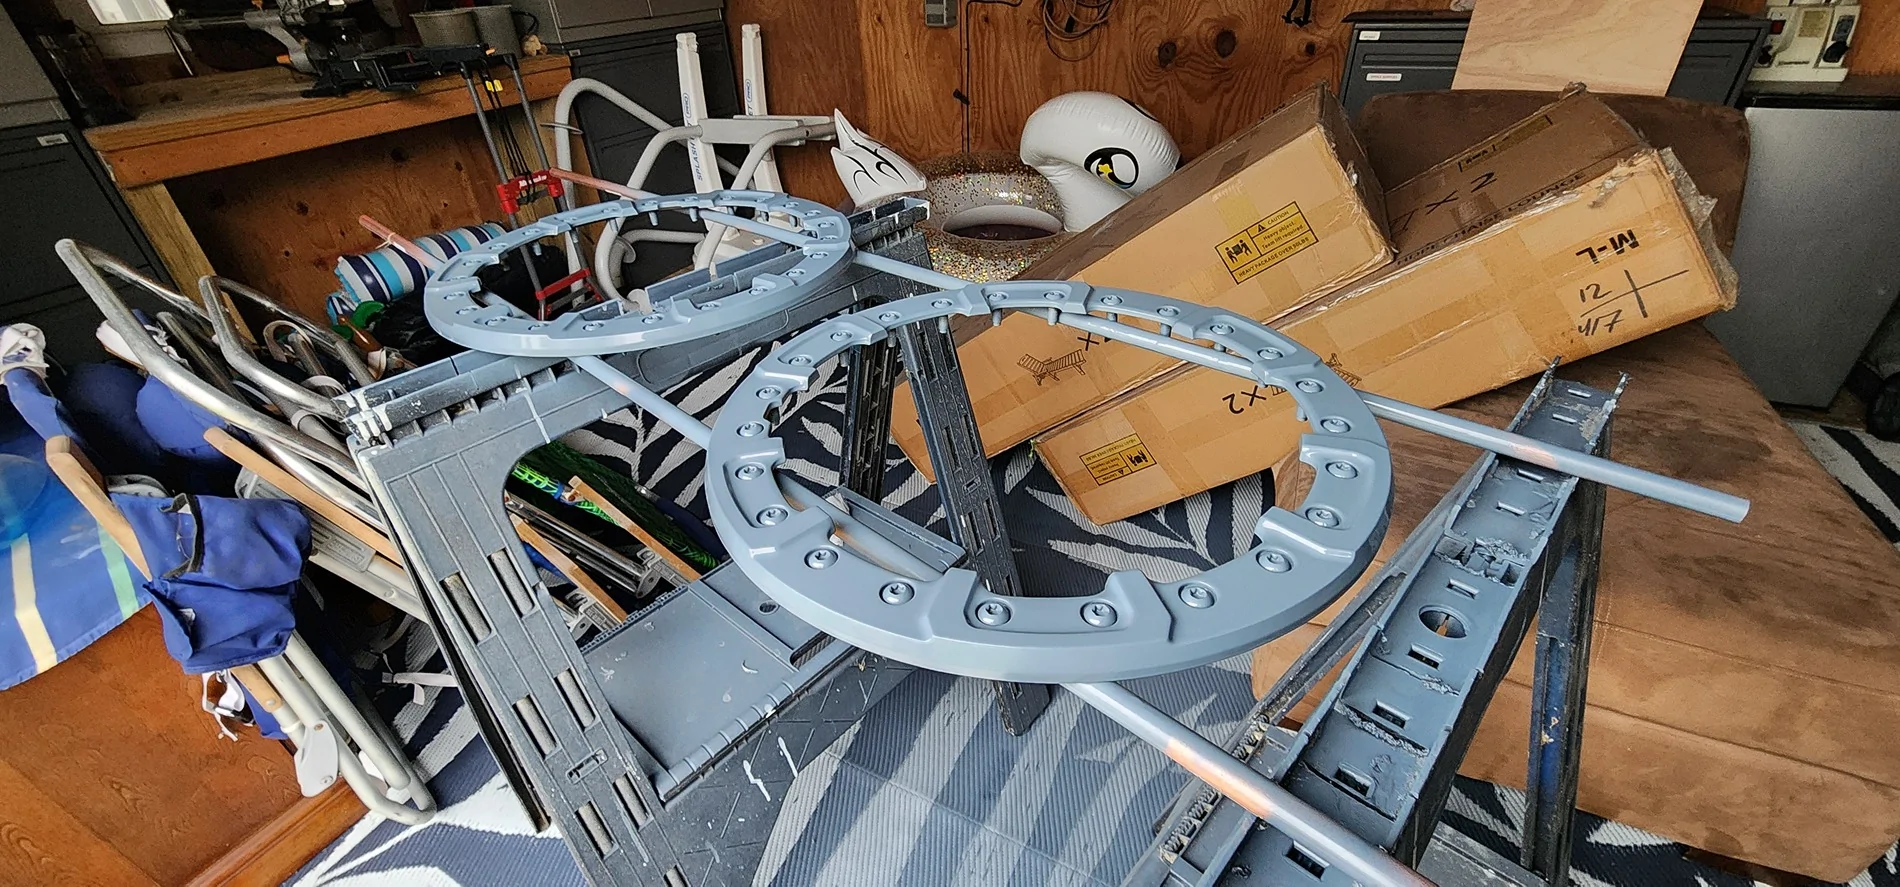
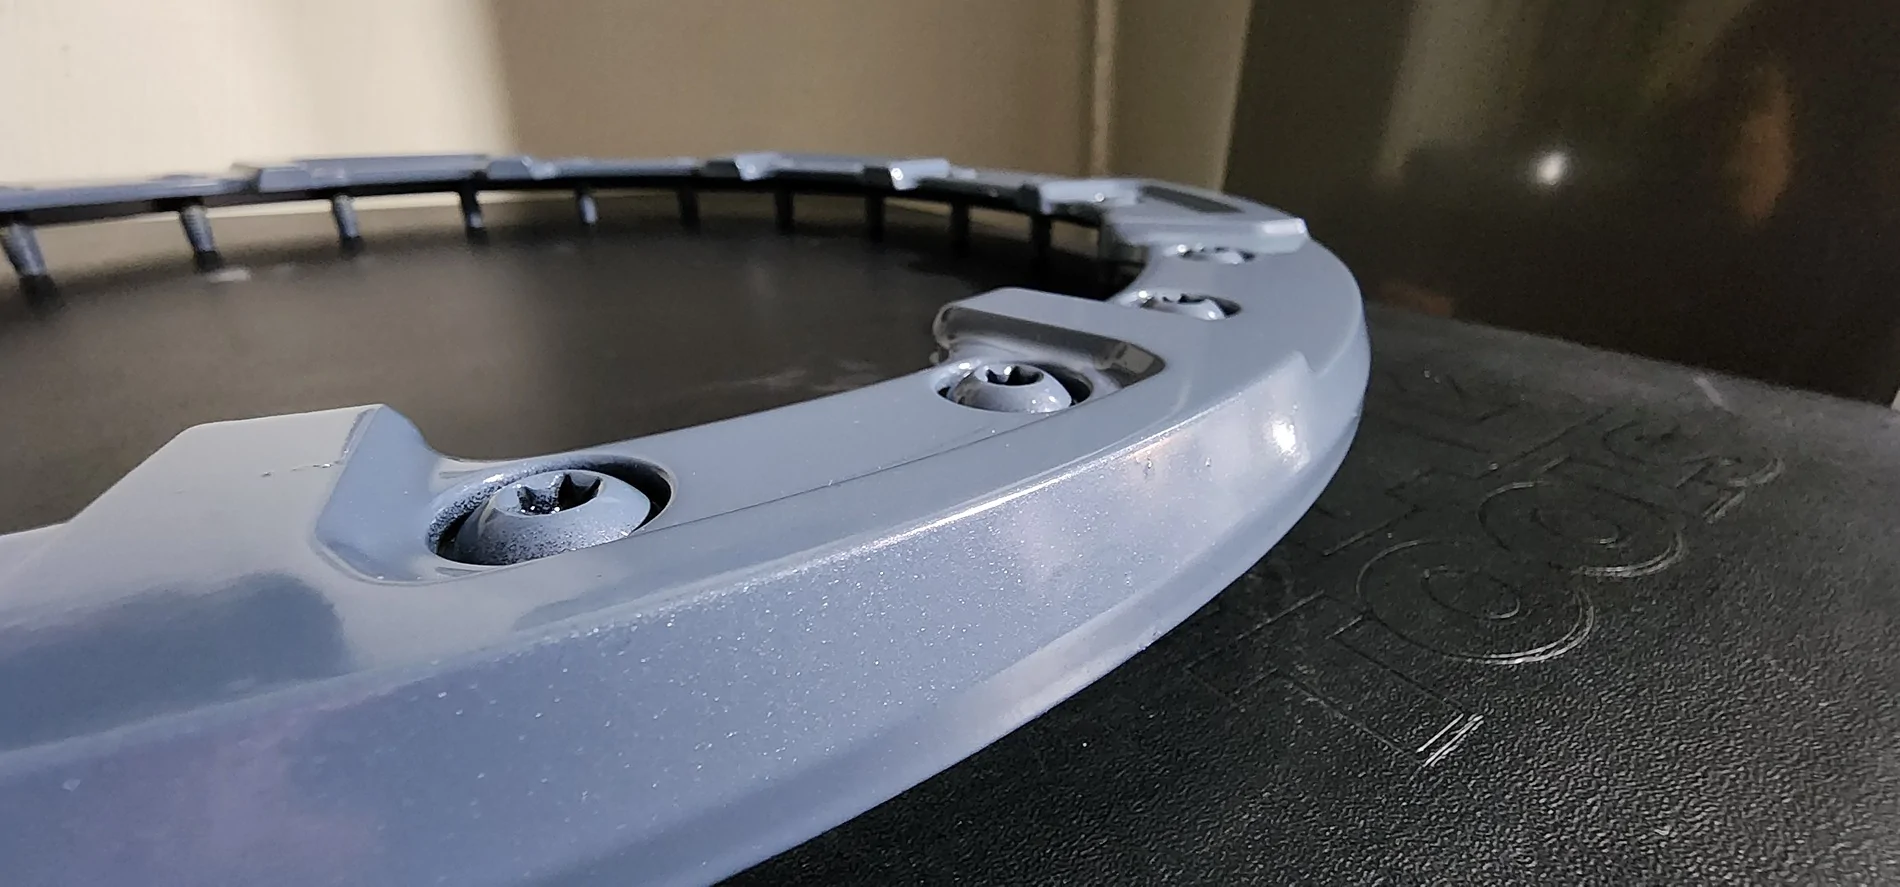
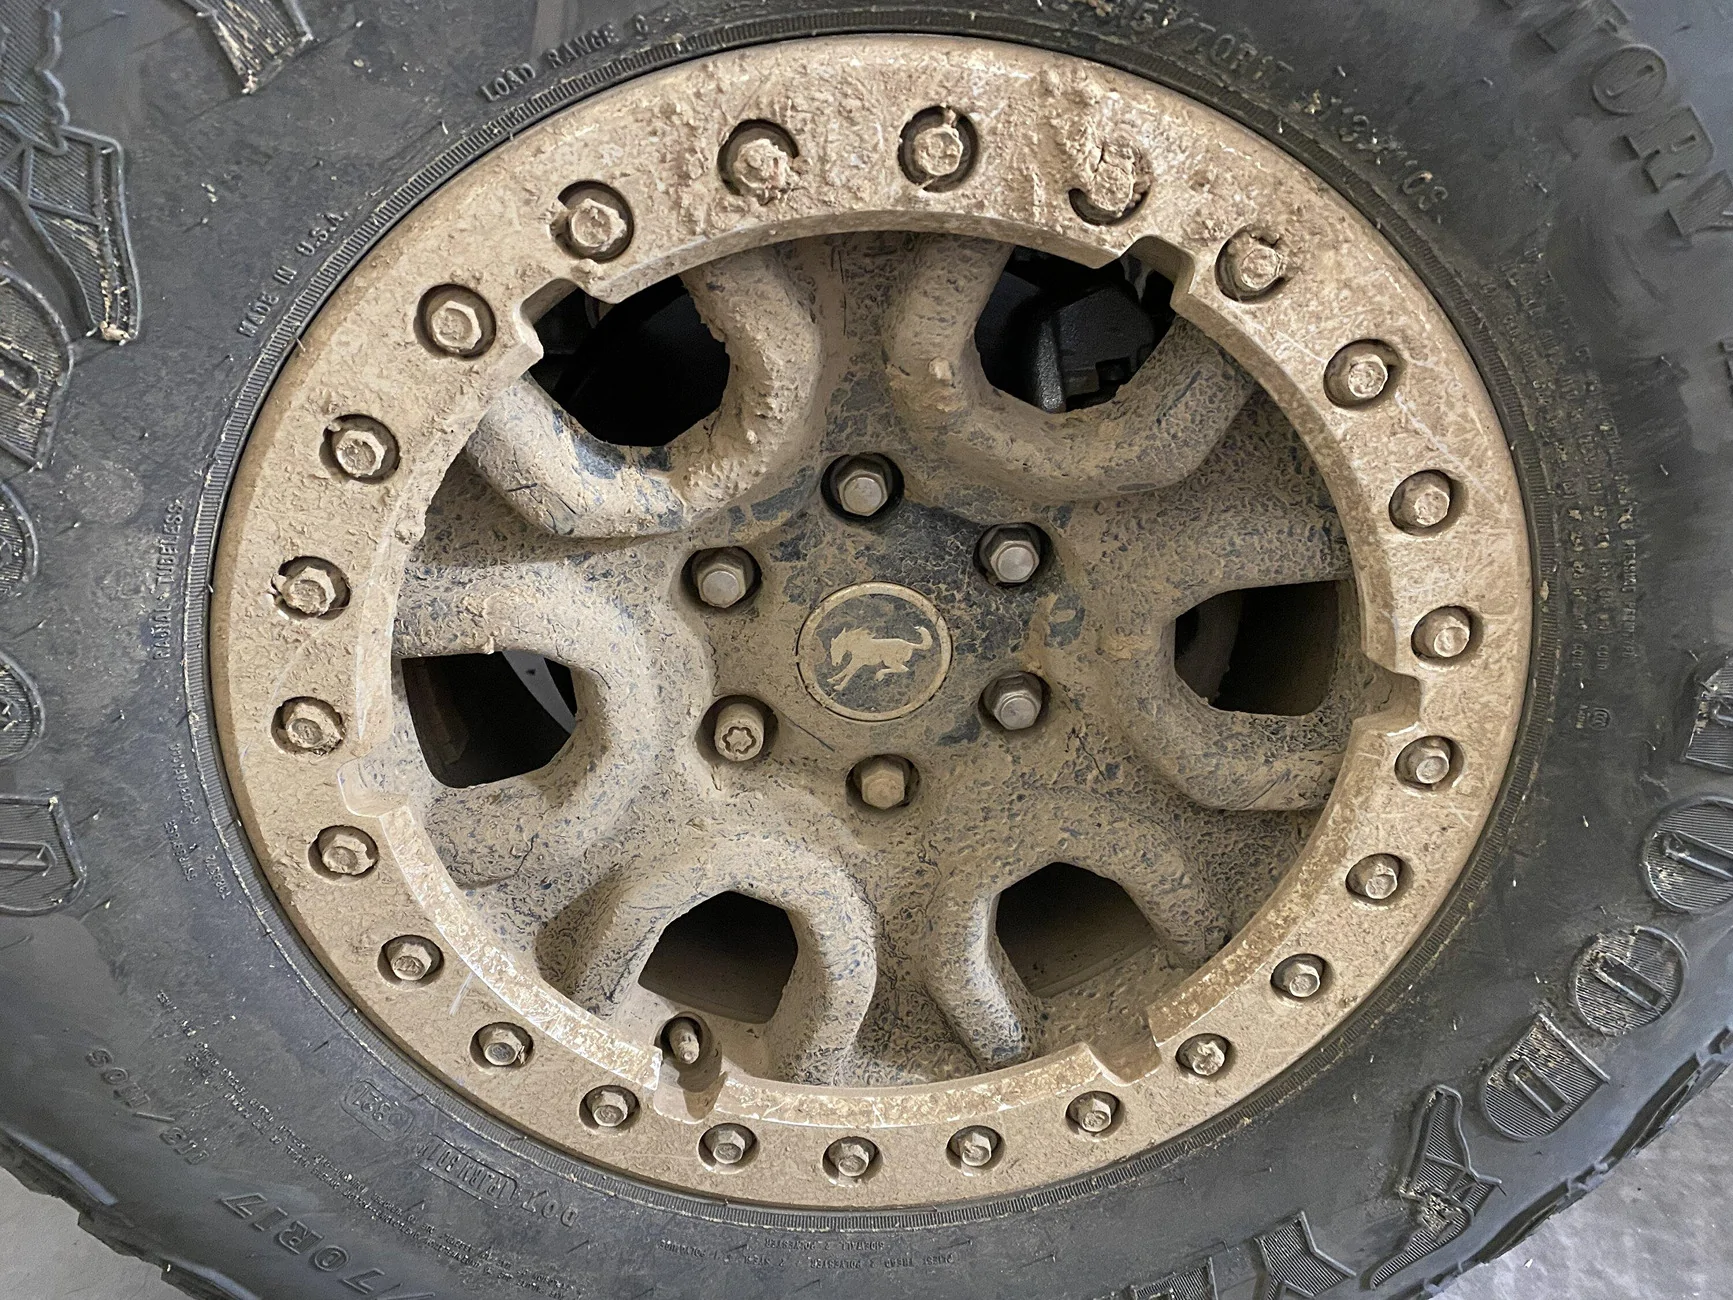
You'll need a T45 torx bit, and a ratchet with extension(if you don't know what these are, or how to use them... you should probably go to pro to get this whole job done). An impact can also be used(im lazy). Just remove all bolts saving top one for last so the ring doesn't fall on ground. Now that you have them off find yourself a flat work surface. Here's your stock rings......
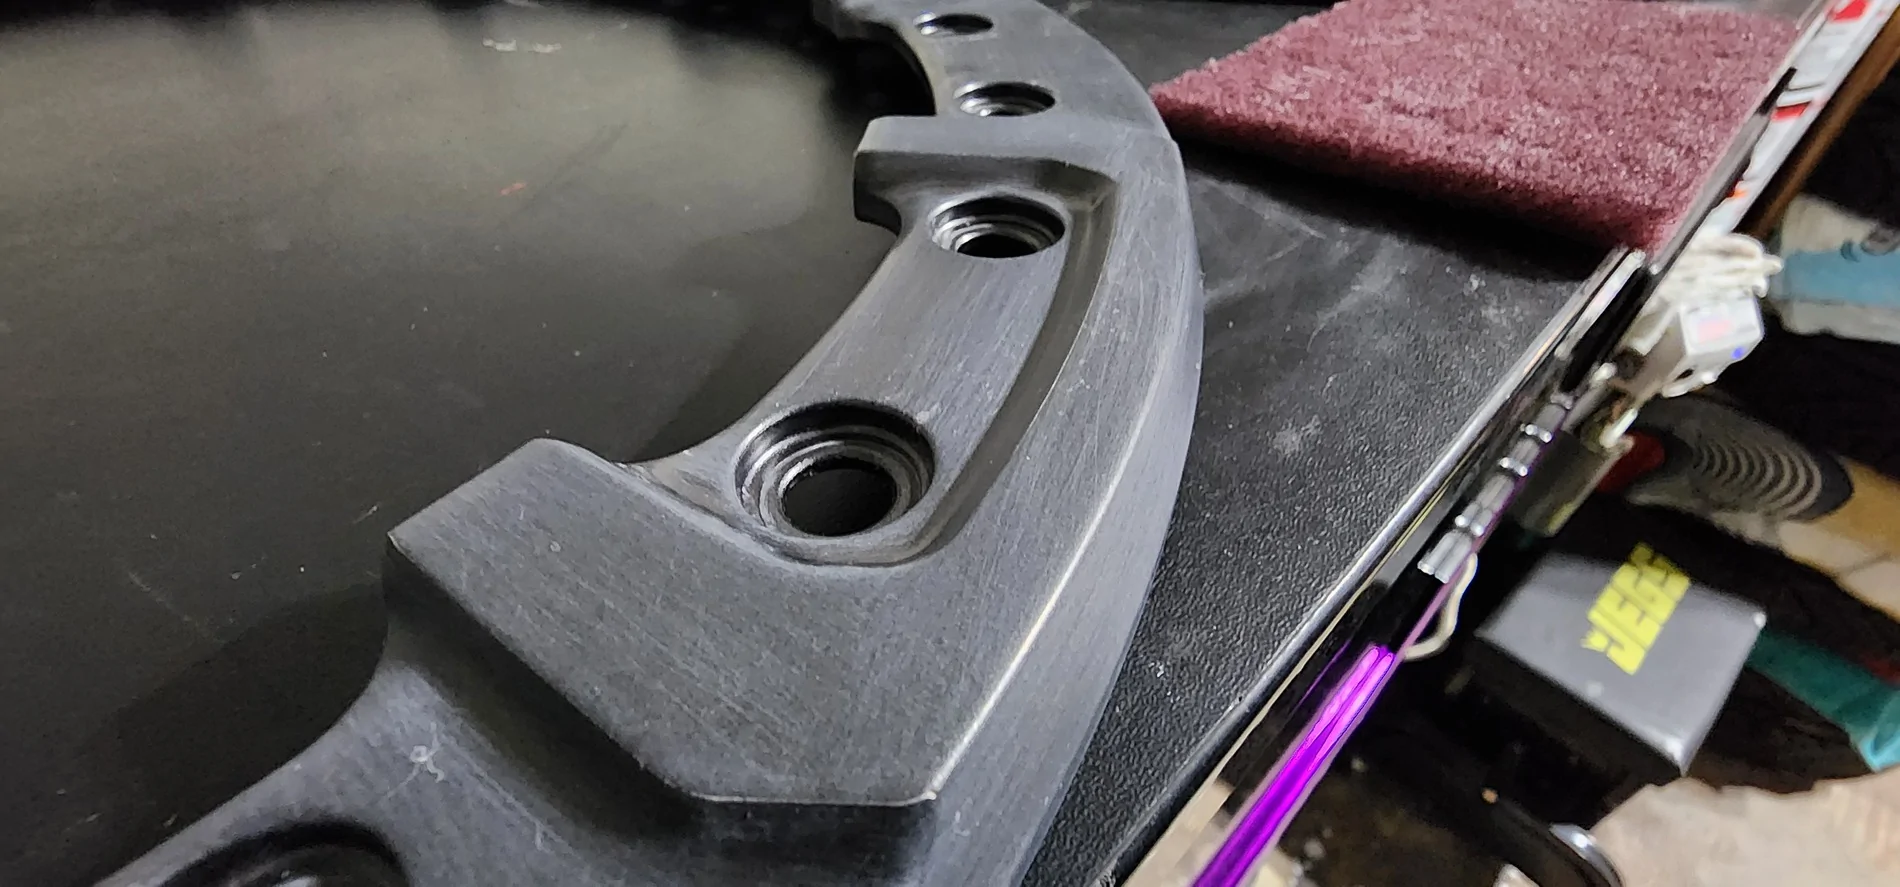
Now for the super fun part that your hands will hate you for later, but it's worth it. Get yourself some red scotch bright pads. I used 4. Available at your local hardware store....
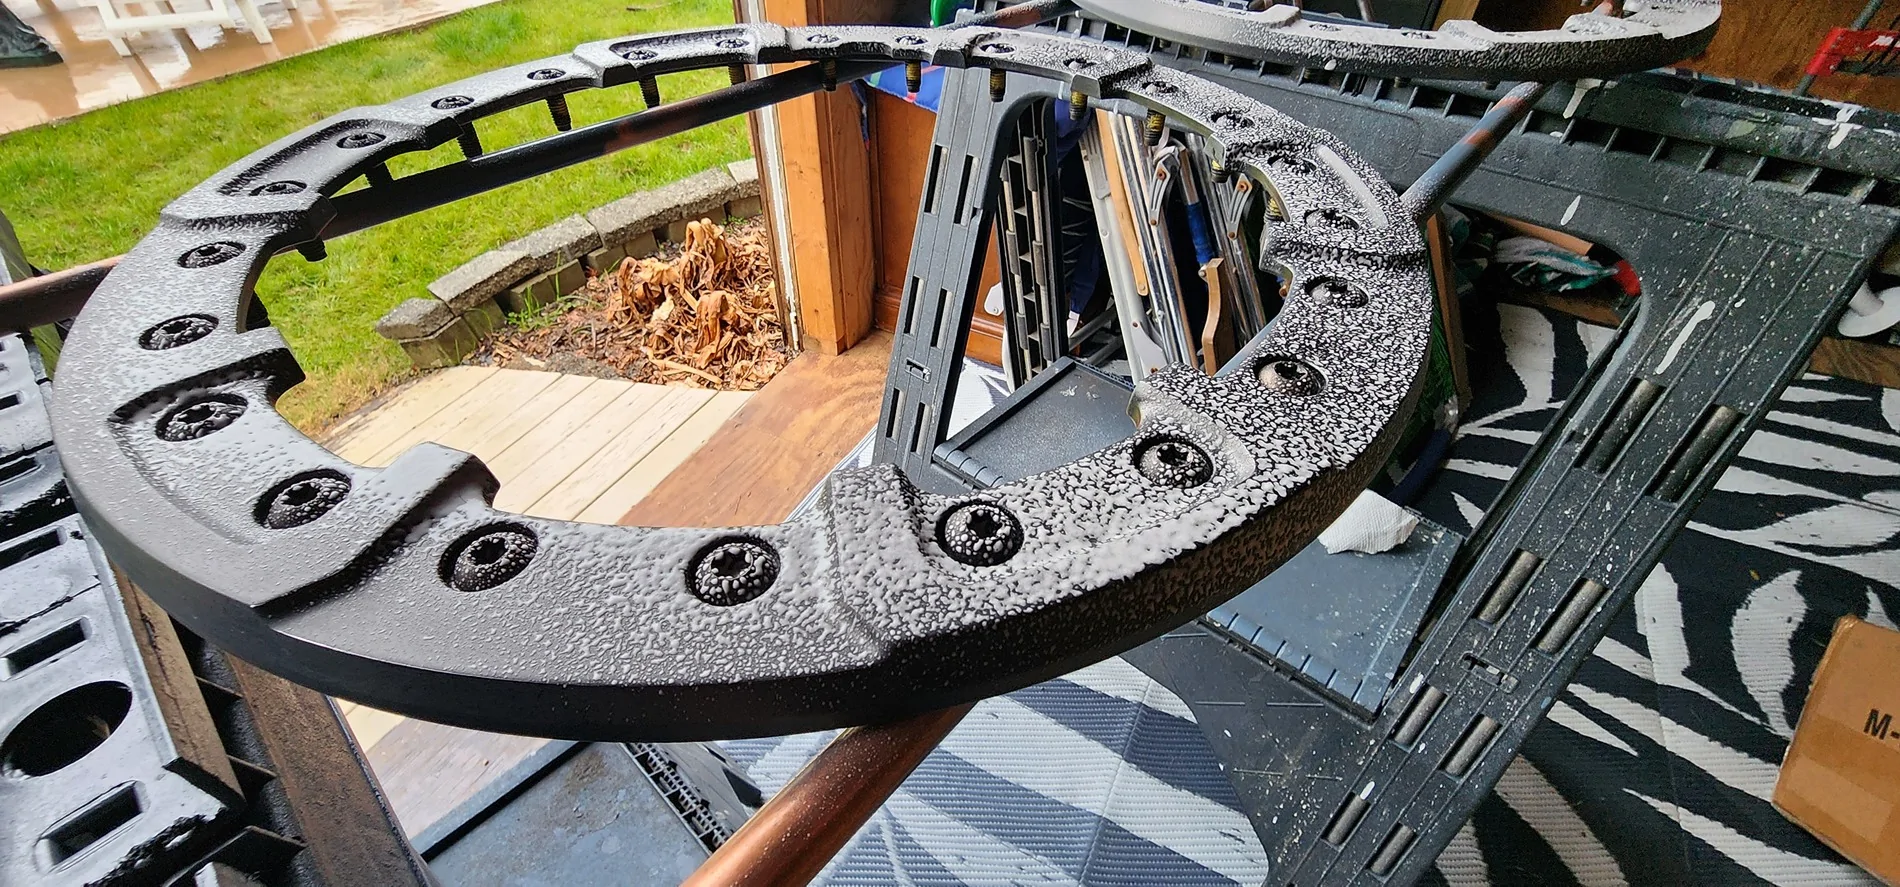
Start sanding. Don't forget the nooks they are important. Once your done it should look like this....
Now get yourself a wet rag and clean up your dust on rings and flat surface. Again don't forget the nooks they are important. Then dry them. On to the next step.... find yourself a place to paint. I made a make shift stand with copper pipe ($20 at home depot), and some saw horses.
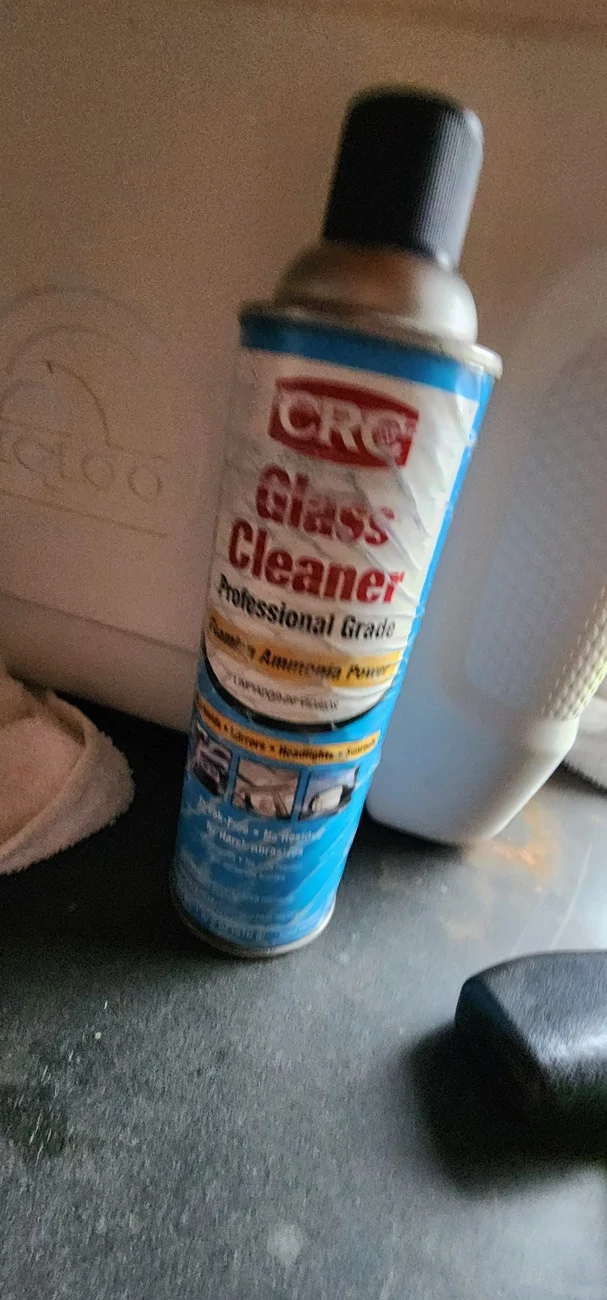
Now as you see i put bolts back in for this step because we want the bolts same color as ring. I did consider though painting bolts black, but didn't. Side note... if you wanna do bolts a different color just drill holes in a box and stick bolts in holes so they stand up. Now it's time to prep for paint. Now you can get wax and grease remover for this step, or you can be redneck diy guy and go old school....
Wipe this clean with lint free rag(microfiber) and let dry. Now you're ready for paint....
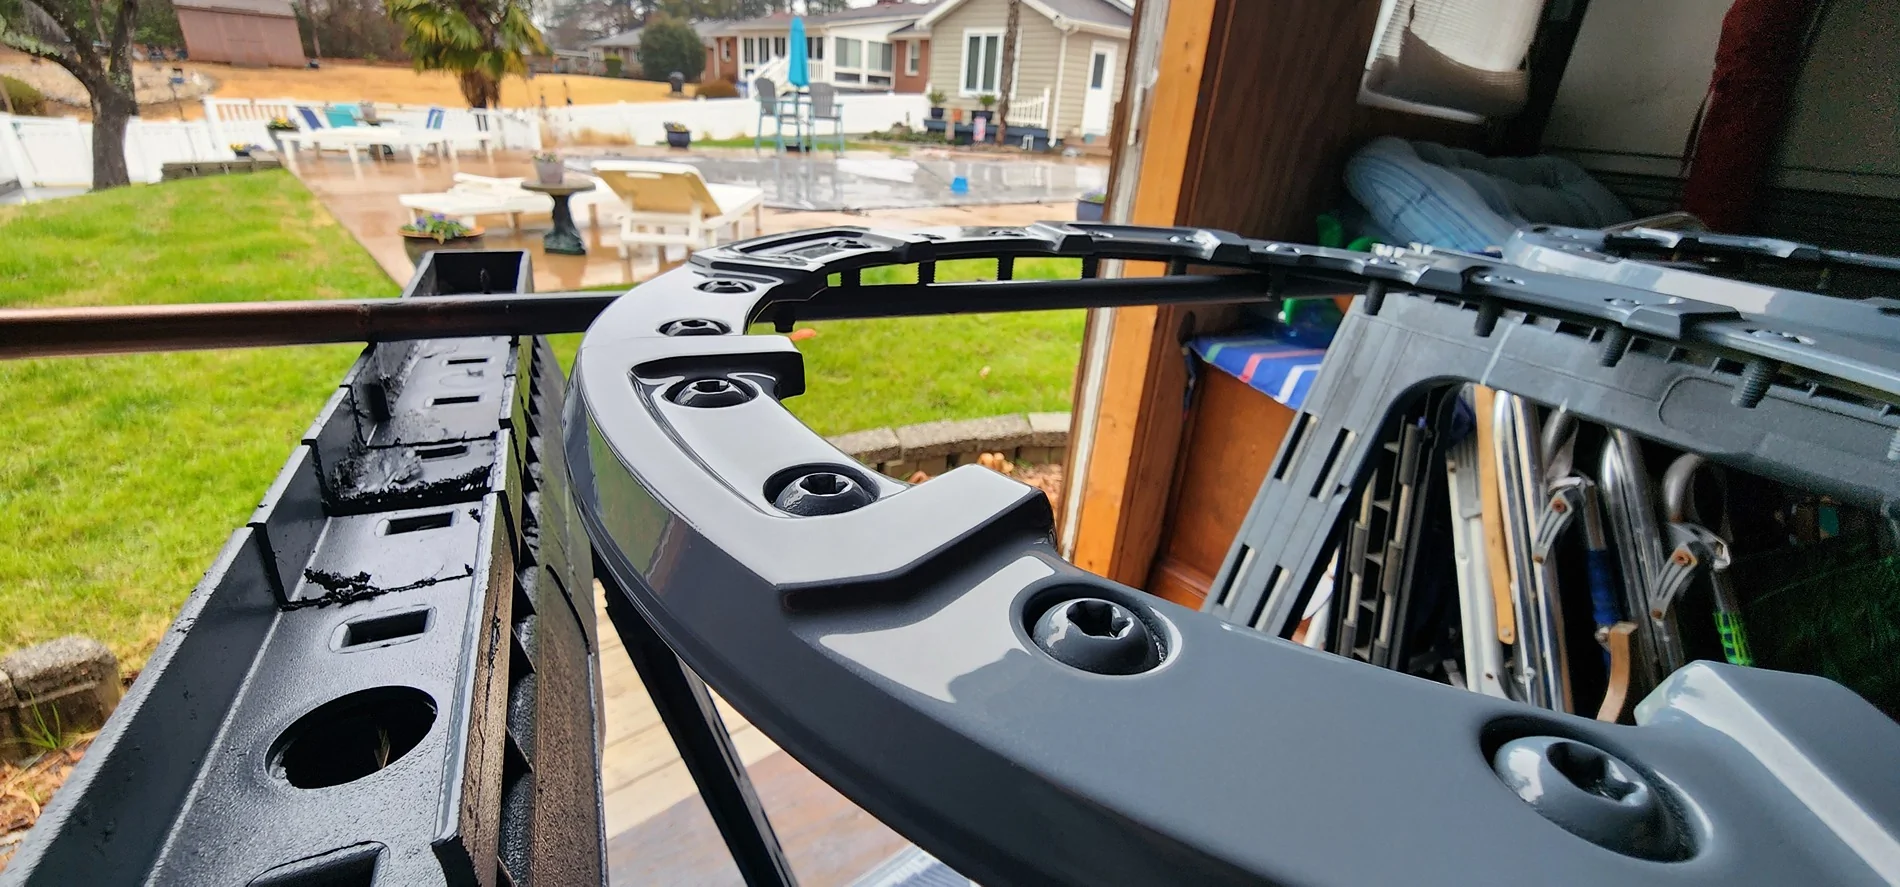
The key to paint is steady hands. Don't spray too much, but at the same time not too light. You want even wet coverage. Those pics are right after color coat. See how they are wet looking and glossy..... that's what you want. If it's too dry it'll look like bumpy or line x finish. Now I let that dry. You'll know it's dry when it gets a matte finish. Repeat this process with the clear coat. Keep in mind clear coat is usually a thinner paint. So it sprays out alot faster...
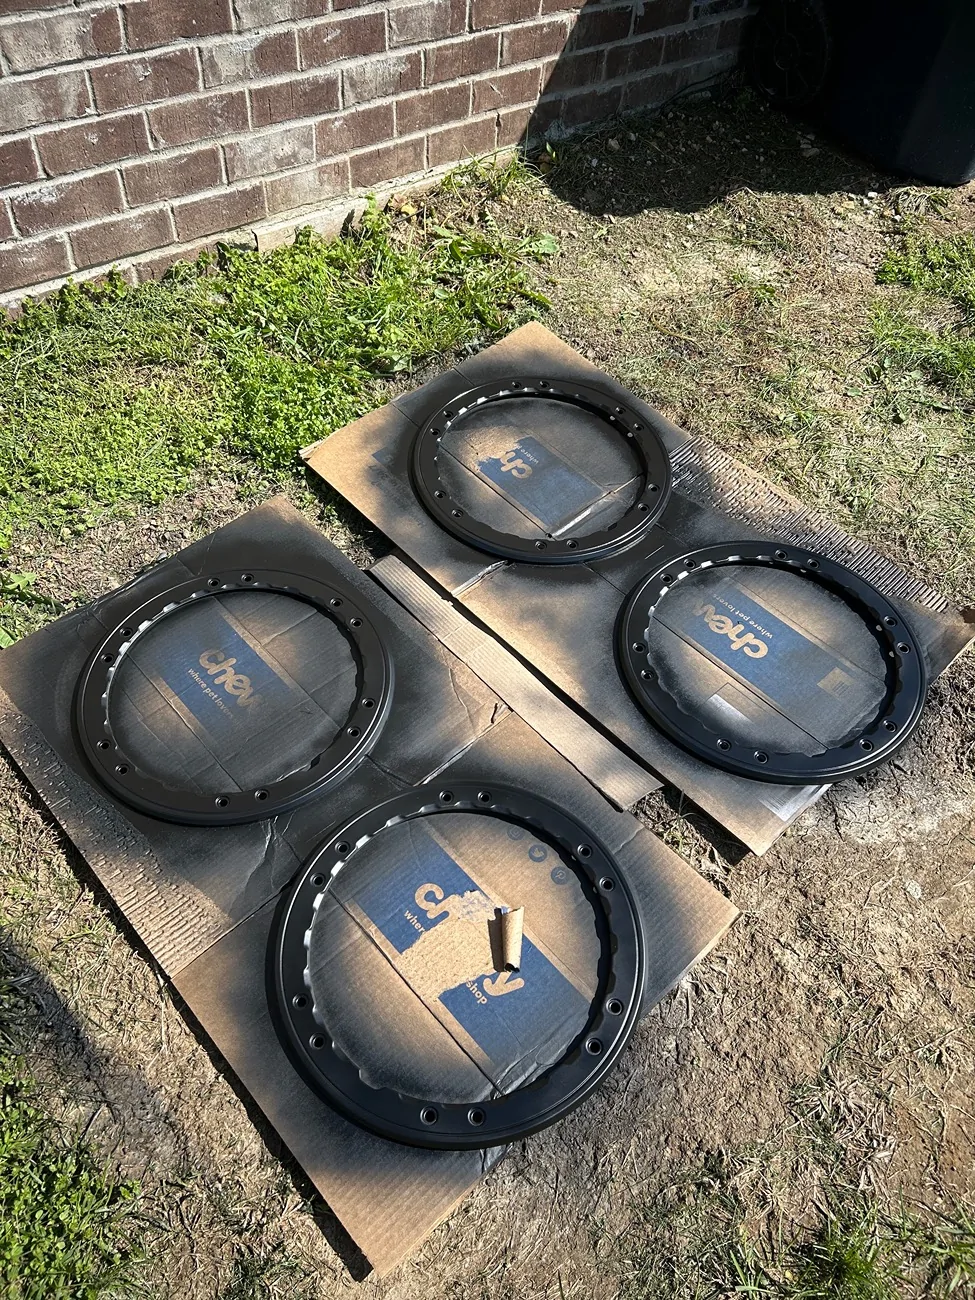
Now same process of letting it dry. Don't rush this step. Patience is key. Don't touch them until they are dry. I did 24 hours because I had plenty of time. Here they are back in garage awaiting reinstall....
Dry, but look super wet.....
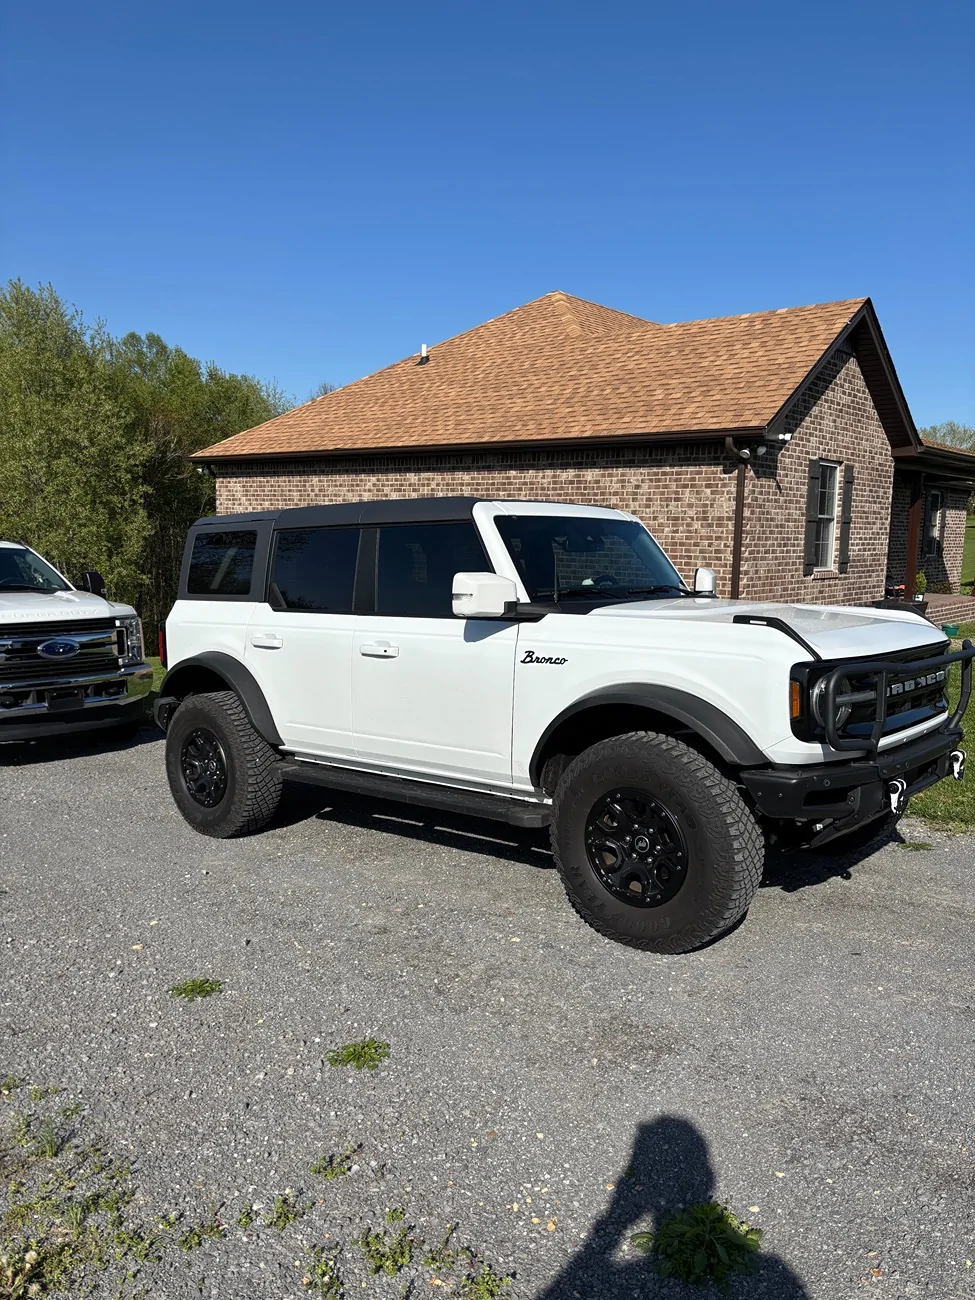
Now reinstall is simple. Be sure notch for valve stem is in right place first. Then put top bolt in first to hold it up. Then right and left side. Then bottom. Now it's lined up and tight install the rest. I used impact here again, but be careful. It's fresh paint. Now you've successfully paint matched your beauty rings at the house for about $175 and a days work. Here's all the installed pics...

Hope this helps some of yall....
So to start this project first get yourself some paint. I ordered from touch up direct. Did 2 cans color, 2 cans clear, and their can trigger sprayer. $150 shipped to the house...
Next obviously you'll need to remove rings from wheels. Don't worry you can still drive without them (although your wife will talk smack about her wheels being ugly now)....
You'll need a T45 torx bit, and a ratchet with extension(if you don't know what these are, or how to use them... you should probably go to pro to get this whole job done). An impact can also be used(im lazy). Just remove all bolts saving top one for last so the ring doesn't fall on ground. Now that you have them off find yourself a flat work surface. Here's your stock rings......

Now for the super fun part that your hands will hate you for later, but it's worth it. Get yourself some red scotch bright pads. I used 4. Available at your local hardware store....
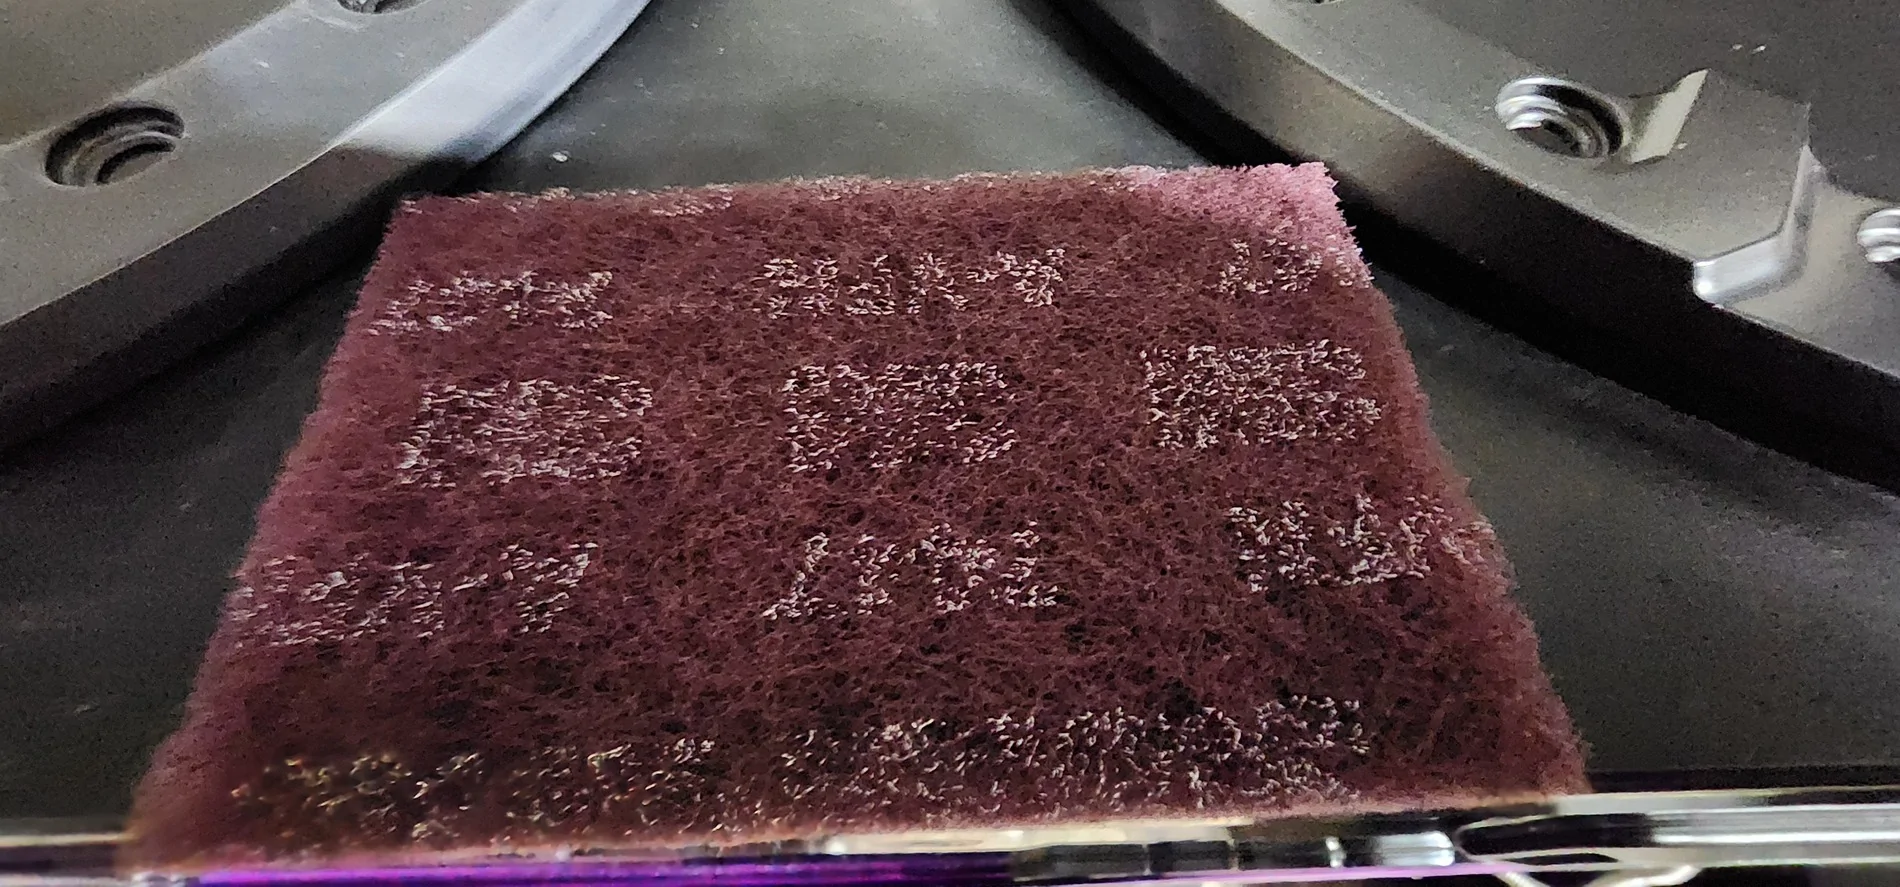
Start sanding. Don't forget the nooks they are important. Once your done it should look like this....

Now get yourself a wet rag and clean up your dust on rings and flat surface. Again don't forget the nooks they are important. Then dry them. On to the next step.... find yourself a place to paint. I made a make shift stand with copper pipe ($20 at home depot), and some saw horses.

Now as you see i put bolts back in for this step because we want the bolts same color as ring. I did consider though painting bolts black, but didn't. Side note... if you wanna do bolts a different color just drill holes in a box and stick bolts in holes so they stand up. Now it's time to prep for paint. Now you can get wax and grease remover for this step, or you can be redneck diy guy and go old school....
Wipe this clean with lint free rag(microfiber) and let dry. Now you're ready for paint....

The key to paint is steady hands. Don't spray too much, but at the same time not too light. You want even wet coverage. Those pics are right after color coat. See how they are wet looking and glossy..... that's what you want. If it's too dry it'll look like bumpy or line x finish. Now I let that dry. You'll know it's dry when it gets a matte finish. Repeat this process with the clear coat. Keep in mind clear coat is usually a thinner paint. So it sprays out alot faster...
Now same process of letting it dry. Don't rush this step. Patience is key. Don't touch them until they are dry. I did 24 hours because I had plenty of time. Here they are back in garage awaiting reinstall....
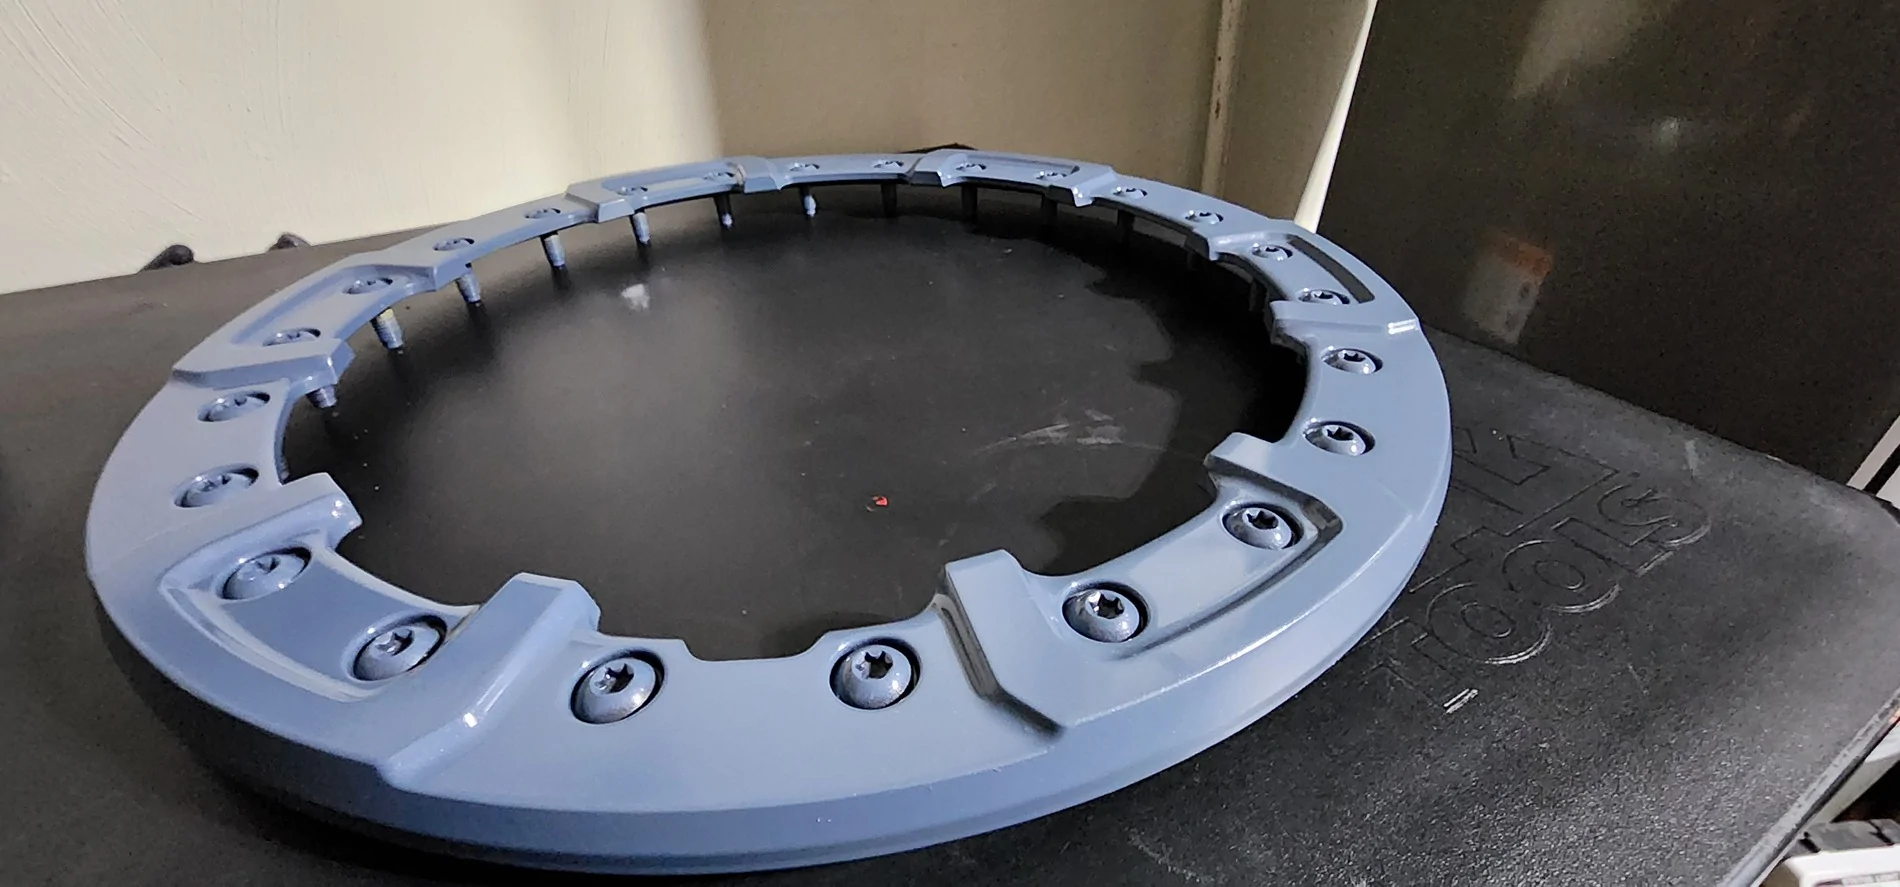
Dry, but look super wet.....
Now reinstall is simple. Be sure notch for valve stem is in right place first. Then put top bolt in first to hold it up. Then right and left side. Then bottom. Now it's lined up and tight install the rest. I used impact here again, but be careful. It's fresh paint. Now you've successfully paint matched your beauty rings at the house for about $175 and a days work. Here's all the installed pics...

Hope this helps some of yall....
Sponsored


 .
.