- Joined
- Jul 14, 2020
- Threads
- 125
- Messages
- 6,173
- Reaction score
- 7,132
- Location
- California
- Vehicle(s)
- Jeep Wrangler JKUR
- Your Bronco Model
- Wildtrak
Just got done installing both driver and passenger side RC bushings. I was a little nervous at first but once I started digging in I realized how simple it was going to be.
Couple things I may have done different than others...
1) I have kid chaos braces on. Didn't even bother taking those off or releasing the outside of the rubber boot from the clamp. I just push the rubber boot outwards out of the way to get to the big nut.
2) harbor freight sells picks (they're actually on sale for $0.99 right now). The factory black spacer has three little tabs that snap into the groove. Using a long flat head you just collapse those in (basically distort them so the tabs don't want to pop out into the groove) And then a couple picks and it basically comes right out..
3) to get the bushings in, I happen to have a 36 mm socket. If you had one a little bit bigger it'd be even better. But the point I wanted to make was that once you get one of the factory black spacers out, you can literally cut off the little tabs and then use the spacer in between the bushing and whatever you're banging on.. kind of protects the delrin bushing.
4) for the RC kit, you're going to need snap ring pliers. Harbor freight sells a cheap set for $5... They were a bit difficult because the snap ring keeps wanting to slide off the tips. But between using the pliers and the flathead screwdriver on the opposite side of the snap ring, you can slide it down in there pretty far. And then use the tap tool and the old bushing to pop the ring fully into place.
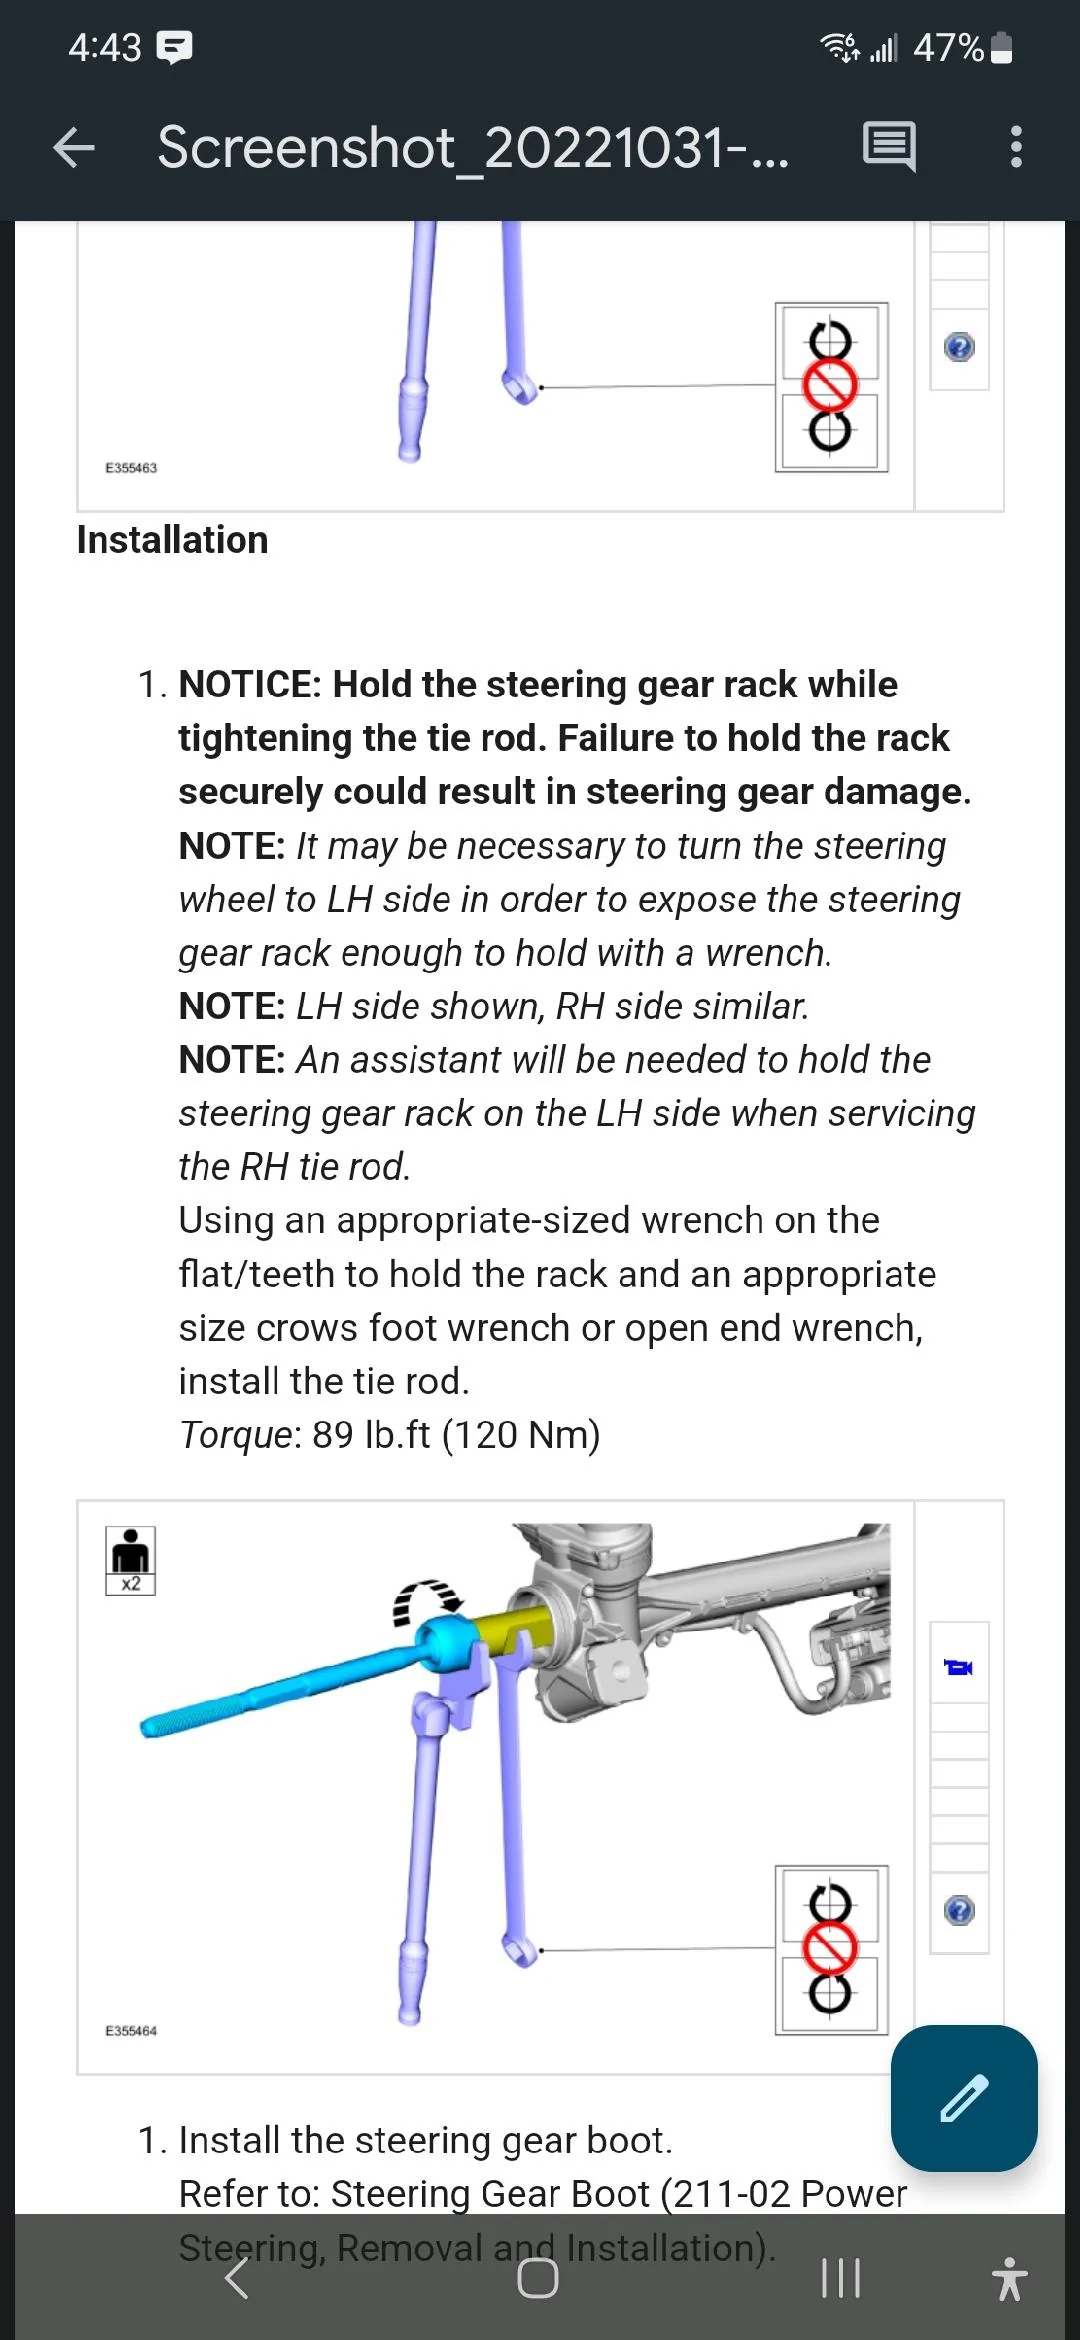
5) just because no one's mentioned it, tie rod ends are torque to 32 foot lbs
I also use loctite on both the inner tie rod, and the tie rod nuts.
Whole process took less than 2 hours for both sides.
Couple things I may have done different than others...
1) I have kid chaos braces on. Didn't even bother taking those off or releasing the outside of the rubber boot from the clamp. I just push the rubber boot outwards out of the way to get to the big nut.
2) harbor freight sells picks (they're actually on sale for $0.99 right now). The factory black spacer has three little tabs that snap into the groove. Using a long flat head you just collapse those in (basically distort them so the tabs don't want to pop out into the groove) And then a couple picks and it basically comes right out..
3) to get the bushings in, I happen to have a 36 mm socket. If you had one a little bit bigger it'd be even better. But the point I wanted to make was that once you get one of the factory black spacers out, you can literally cut off the little tabs and then use the spacer in between the bushing and whatever you're banging on.. kind of protects the delrin bushing.
4) for the RC kit, you're going to need snap ring pliers. Harbor freight sells a cheap set for $5... They were a bit difficult because the snap ring keeps wanting to slide off the tips. But between using the pliers and the flathead screwdriver on the opposite side of the snap ring, you can slide it down in there pretty far. And then use the tap tool and the old bushing to pop the ring fully into place.
5) just because no one's mentioned it, tie rod ends are torque to 32 foot lbs
I also use loctite on both the inner tie rod, and the tie rod nuts.
Whole process took less than 2 hours for both sides.
Sponsored